Be careful with remanufactured flexible couplings. Maybe they're OK now, but two I've had over the years from reputable suppliers have been worse than the worn originals. There should be practically no axial movement between one end and the other. If there is any springiness in that plane, it will be greatly amplified at the gear lever. An Imp gearchange should be very positive and precise, more so than in practically any other rear-engined car except post-1989 Porsche 911s, and even they have longer throws. It's one of the great things about the way the car feels to drive.
I managed to get an incredibly rare NOS item for my Stiletto a few years ago but I paid a ludicrous amount for it. It hurts to remember but I think it was just over £200. Supply and demand at work.
Dave Lane has fitted a different design using UJs, I think. The worry is that it might transmit noise and vibration but I think he said it was OK. You could talk to Mike Dent (Moose), too.
John
EHK 744G - 1969 Super - Interior coming along nicely
-
John Simister

- Posts: 136
- Joined: Sun Apr 09, 2006 9:16 am
- Club Member: Yes
- Car Model: Sunbeam Stiletto 1968
- Location: Berkhamsted, Herts
Re: EHK 744G - 1969 Super - BACK ON ITS WHEELS!
Member number 6. First Imp bought in 1972, 10 more between then and 2019. Currently Impless.
-
The Nun
- Posts: 2918
- Joined: Tue Jan 23, 2007 7:02 pm
- Club Member: Yes
- Car Model: Imp
- Location: South
- Has thanked: 74 times
- Been thanked: 104 times
Re: EHK 744G - 1969 Super - BACK ON ITS WHEELS!
I've got a new one, never realised they were worth over 200 quidJohn Simister wrote: ↑Wed Nov 11, 2020 10:50 am
I managed to get an incredibly rare NOS item for my Stiletto a few years ago but I paid a ludicrous amount for it. It hurts to remember but I think it was just over £200. Supply and demand
John

Peter Nunn...ey im member 00033
-
moose
- Posts: 1108
- Joined: Wed Jan 28, 2004 11:41 am
- Club Member: Yes
- Car Model: rally imp
- Location: forton lancashire north england
- Has thanked: 4 times
- Been thanked: 207 times
Re: EHK 744G - 1969 Super - BACK ON ITS WHEELS!
Job satisfaction there with the car on its wheels.
UJ flexi exchange £75 (Dave lane tried one of mine and was super fussy, His words, there was a slight vibration at a certain speed) You are more than welcome to have one, fit it, try it and if happy pay and send me old flexi in exchange. If not happy post it back and re-fit your flexi.
Fully overhauled gear system from know to box £225 exchange all components powder coated and stainless steel where possible. Baseplate slots either tig welded and repaired or new condition as found, nylon ball fitted, lever checked for being straight and strengthening sleeve on base of lever Tig welded on, stainless steel UJ, new pinch bolt with Schnorr locking washers and new nuts bolts and washers for fitting to shell. New nylon bush. Add another £25 if you want a threaded on motorsport gear knob.
Both above prices include UK mainland postage.
If you want some pictures of what to look for on the baseplate that makes fitting a new nylon ball pointless and other tips of how to re-furbish one properly email me so i can add pictures easily. mikedent87@gmail.com All the parts for doing this job yourself are available from Malcom and the club.
Regards Moose imp competition secretary
-
Pog
- Posts: 142
- Joined: Sat Aug 24, 2013 4:55 pm
- Club Member: Yes
- Car Model: 1969 Super 'Betty'
- Location: Northampton, UK
- Has thanked: 10 times
- Been thanked: 37 times
Re: EHK 744G - 1969 Super - BACK ON ITS WHEELS!
Thanks all - need some help again I’m afraid...
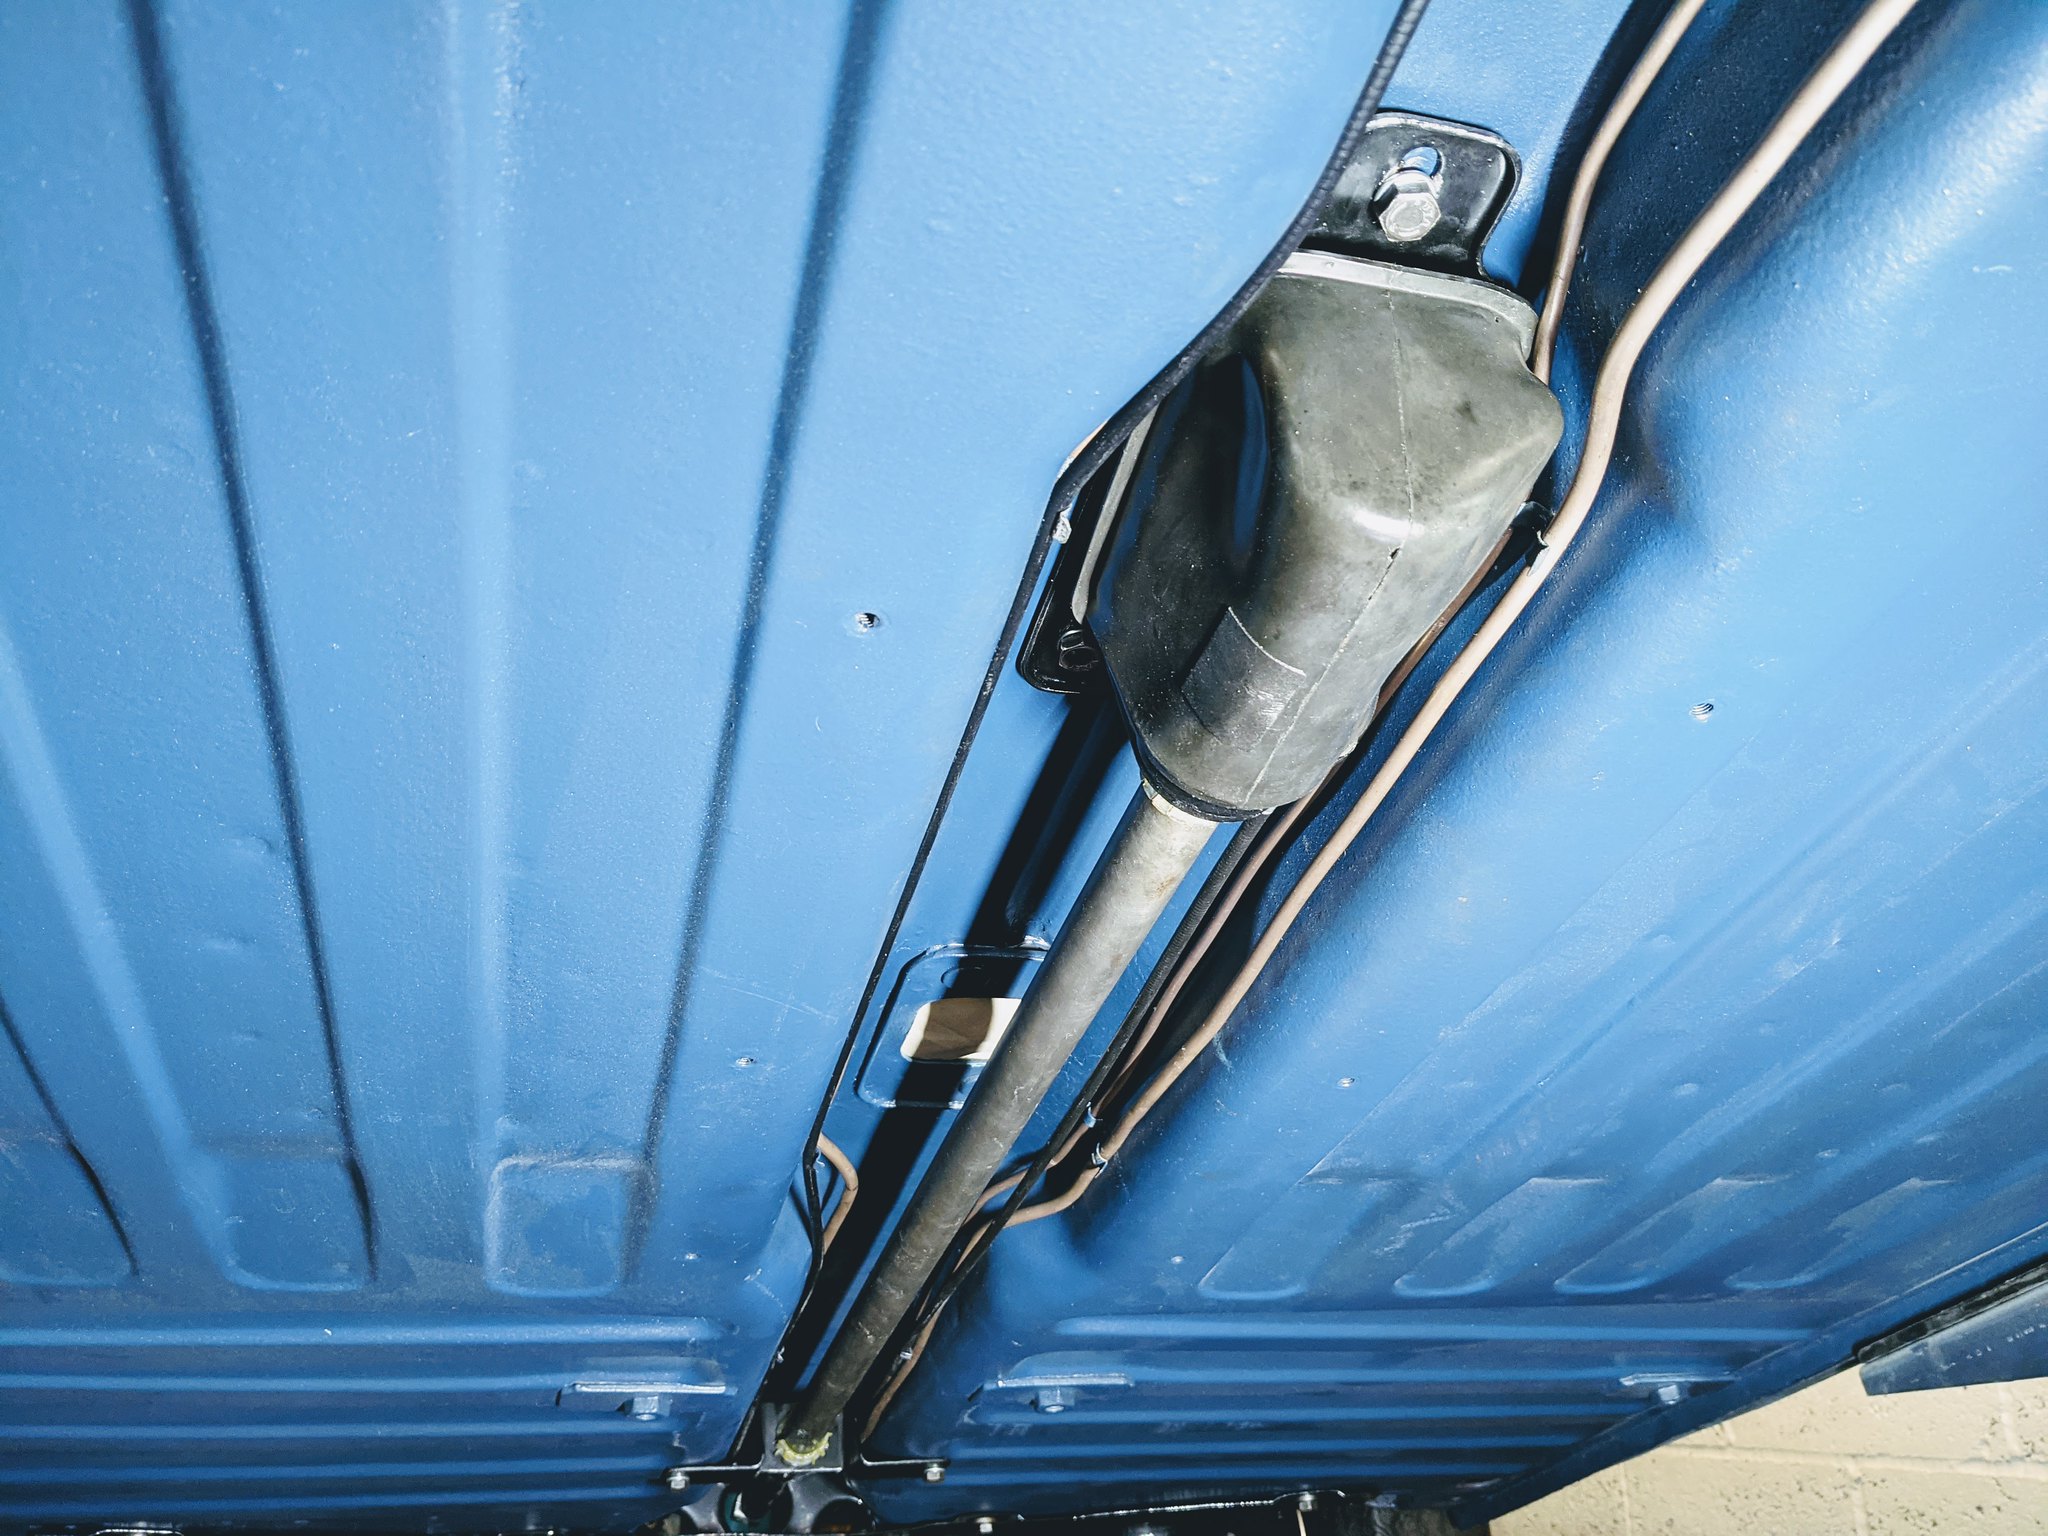
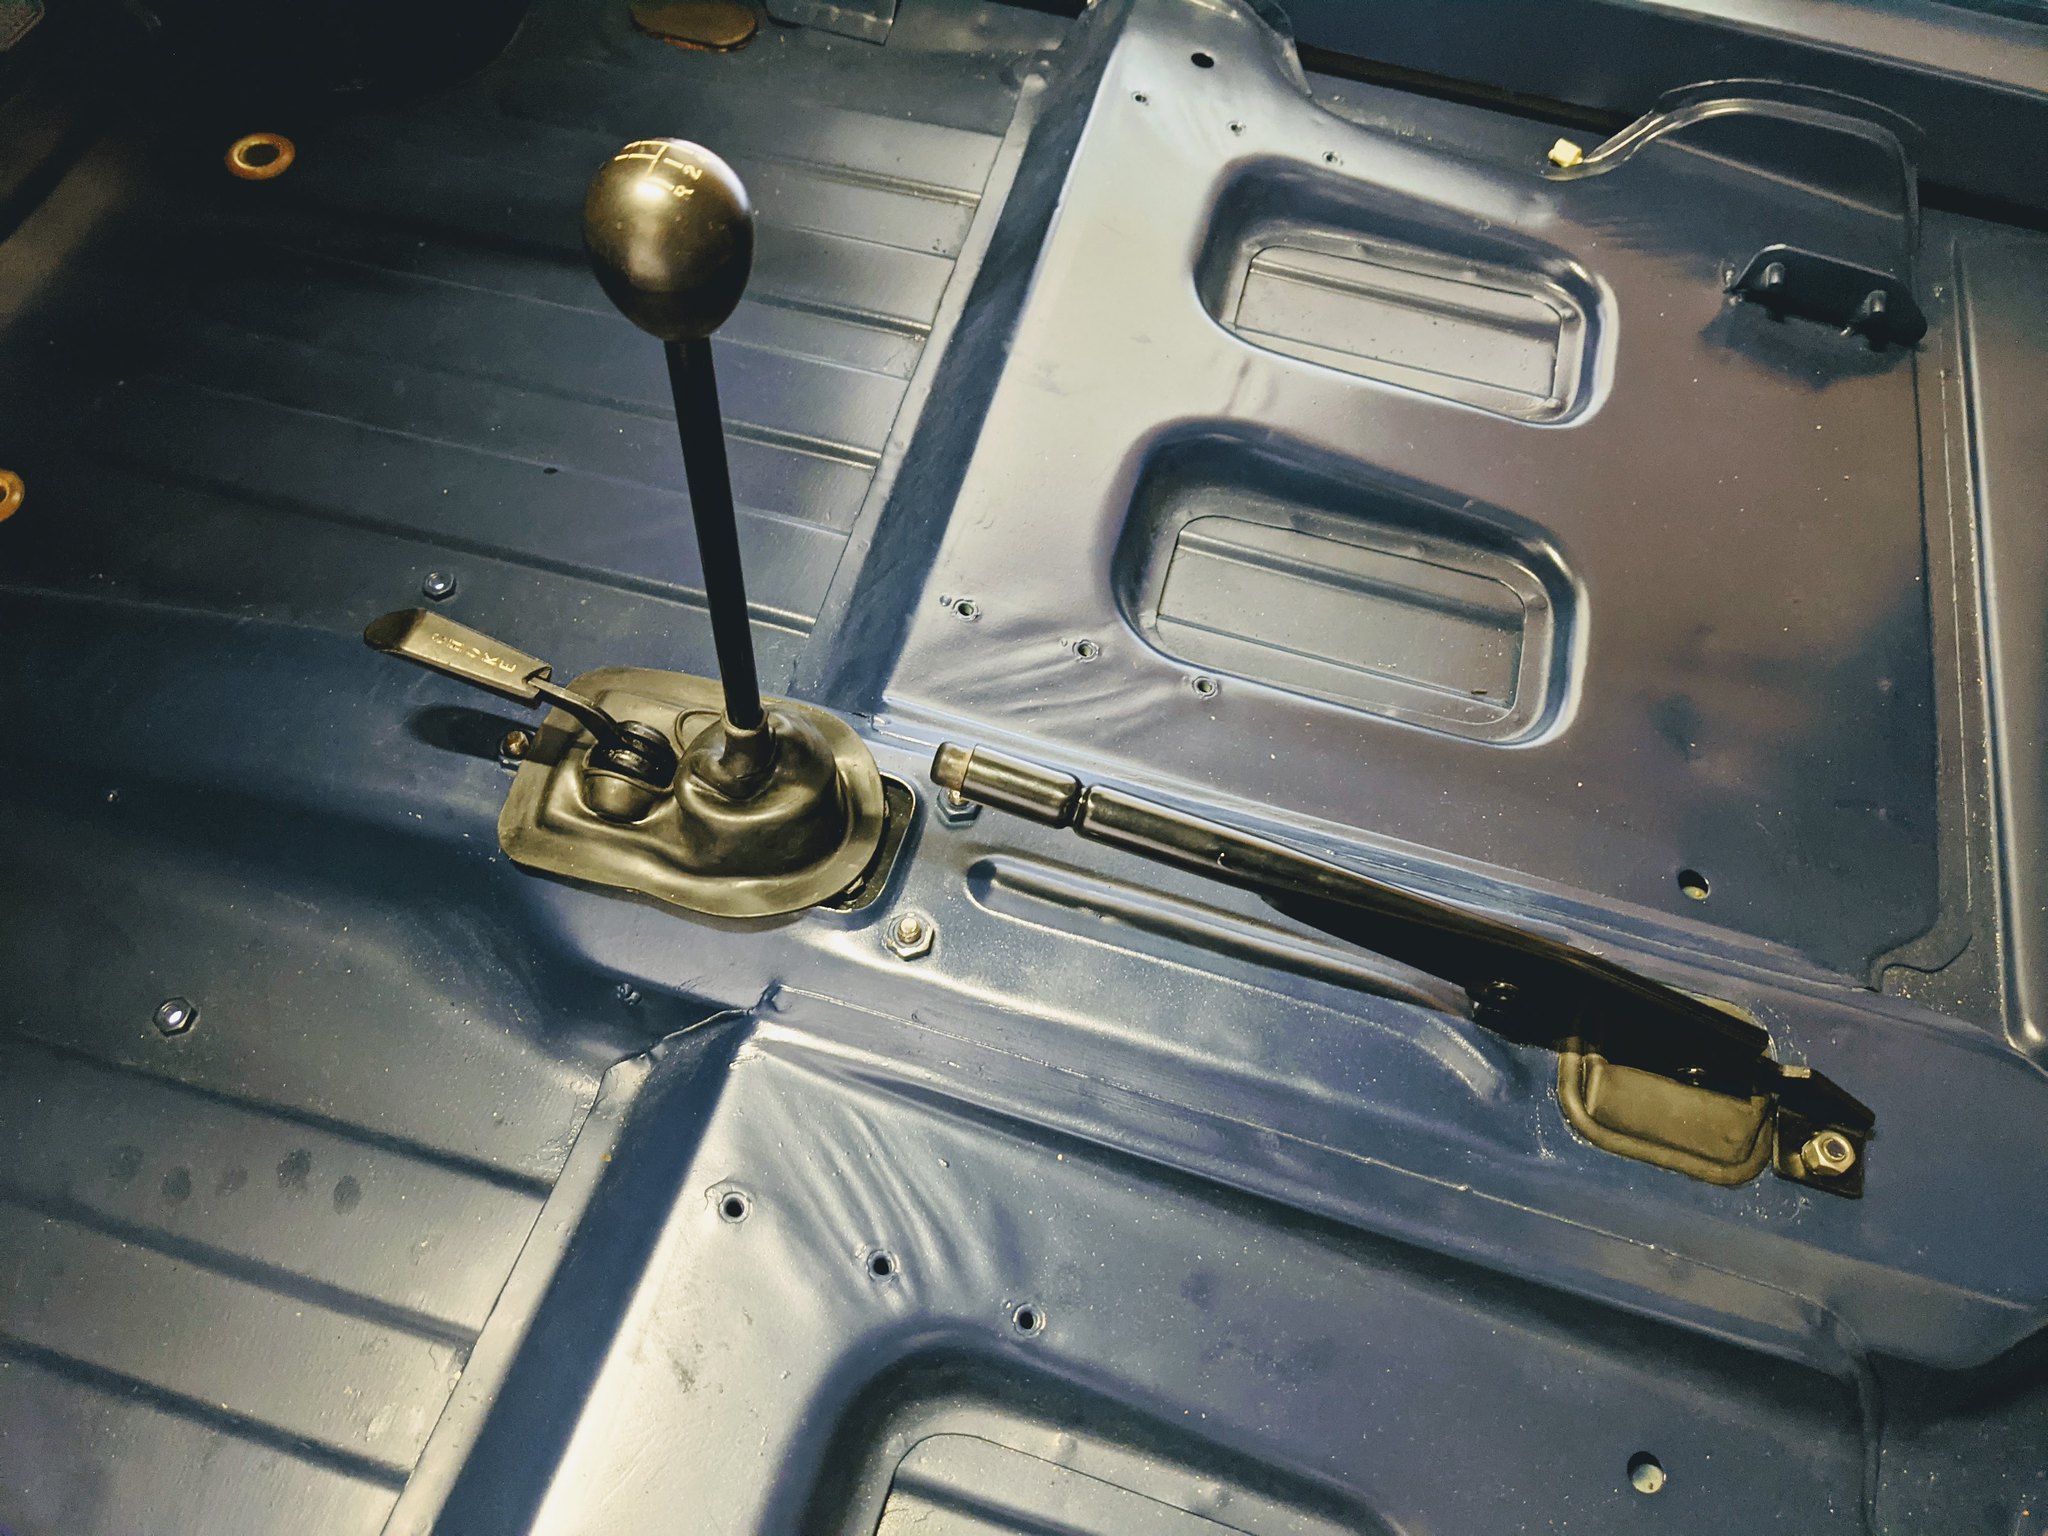
I want to get the throttle cable in place before the gear lever linkage goes in and takes up all the room in the tunnel, but it’s not going on how I thought it would.
 PXL_20201116_152509031 by Godfrey Hatton, on Flickr
Am I right that the clevis joint end attaches to the throttle pedal arm? (ignore the light blue patch, I masked up the opening before painting the interior) I thought then that the whole cable could just be fed through the floor but it’s too big. What’s the trick? The only other way I can see is if you completely remove the inner cable, feed that through the floor and then back into the outer cable on the underside?
Pog
I want to get the throttle cable in place before the gear lever linkage goes in and takes up all the room in the tunnel, but it’s not going on how I thought it would.
PXL_20201116_152509031 by Godfrey Hatton, on FlickrAm I right that the clevis joint end attaches to the throttle pedal arm? (ignore the light blue patch, I masked up the opening before painting the interior) I thought then that the whole cable could just be fed through the floor but it’s too big. What’s the trick? The only other way I can see is if you completely remove the inner cable, feed that through the floor and then back into the outer cable on the underside?
Pog
Young Imp Members Registrar
-
bks974c
- Posts: 1401
- Joined: Thu Aug 19, 2004 5:26 pm
- Club Member: Yes
- Car Model: all the above
- Location: Edinburgh, Scotland
- Has thanked: 152 times
- Been thanked: 243 times
Re: EHK 744G - 1969 Super - BACK ON ITS WHEELS!
As you have stated the outer cable is fitted into the Alloy triangular plate under the floor and the inner fed through.
Scott
Scott
-
moose
- Posts: 1108
- Joined: Wed Jan 28, 2004 11:41 am
- Club Member: Yes
- Car Model: rally imp
- Location: forton lancashire north england
- Has thanked: 4 times
- Been thanked: 207 times
Re: EHK 744G - 1969 Super - BACK ON ITS WHEELS!
I would bend that arm so it is dead center with the slot so there is no side load on the cable and as Scot and you have said feed the inner from inside the car to its full length fit clevis pin, then feed the outer over it from under the car till it locates snuggly into the ally bracket and fit the P clip that holds the outer in place just back from the ally bracket.
Regards Moose imp competition secretary
-
John Simister
- Posts: 136
- Joined: Sun Apr 09, 2006 9:16 am
- Club Member: Yes
- Car Model: Sunbeam Stiletto 1968
- Location: Berkhamsted, Herts
Re: EHK 744G - 1969 Super - BACK ON ITS WHEELS!
Or fit the outer first, locating its front end in the triangular guide bracket then clipping it and clamping the cable to the car with the original P-clamp and built-in clips, then feed the inner cable through from inside the car, greasing it as you go. Moose makes a very good point about making sure the cable arm on the pedal shaft is aligned exactly with the cable hole.
Member number 6. First Imp bought in 1972, 10 more between then and 2019. Currently Impless.
-
oli
- Posts: 327
- Joined: Tue Jul 03, 2007 10:48 am
- Club Member: Yes
- Car Model: Hillman Imp Super Safari Beige 1972
- Location: Norwich
- Has thanked: 15 times
- Been thanked: 28 times
Re: EHK 744G - 1969 Super - BACK ON ITS WHEELS!
Should have fitted the outer sleeve into the alloy triangular bracket before fitting the front suspension mounting plate... 
-
Pog
- Posts: 142
- Joined: Sat Aug 24, 2013 4:55 pm
- Club Member: Yes
- Car Model: 1969 Super 'Betty'
- Location: Northampton, UK
- Has thanked: 10 times
- Been thanked: 37 times
Re: EHK 744G - 1969 Super - BACK ON ITS WHEELS!
Hindsight's a delight isn't it! It's almost like I've never done this before... Ah well, this is how I learn.
Pog
Young Imp Members Registrar
-
The Nun
- Posts: 2918
- Joined: Tue Jan 23, 2007 7:02 pm
- Club Member: Yes
- Car Model: Imp
- Location: South
- Has thanked: 74 times
- Been thanked: 104 times
Re: EHK 744G - 1969 Super - BACK ON ITS WHEELS!
You can fit the outer after everything else has been fitted, I have without any trouble, if you have to renew the whole cable at any time you can't be expected to have to remove the front suspension to do it?
Peter Nunn...ey im member 00033
-
Pog
- Posts: 142
- Joined: Sat Aug 24, 2013 4:55 pm
- Club Member: Yes
- Car Model: 1969 Super 'Betty'
- Location: Northampton, UK
- Has thanked: 10 times
- Been thanked: 37 times
Re: EHK 744G - 1969 Super - BACK ON ITS WHEELS!
Hi all,
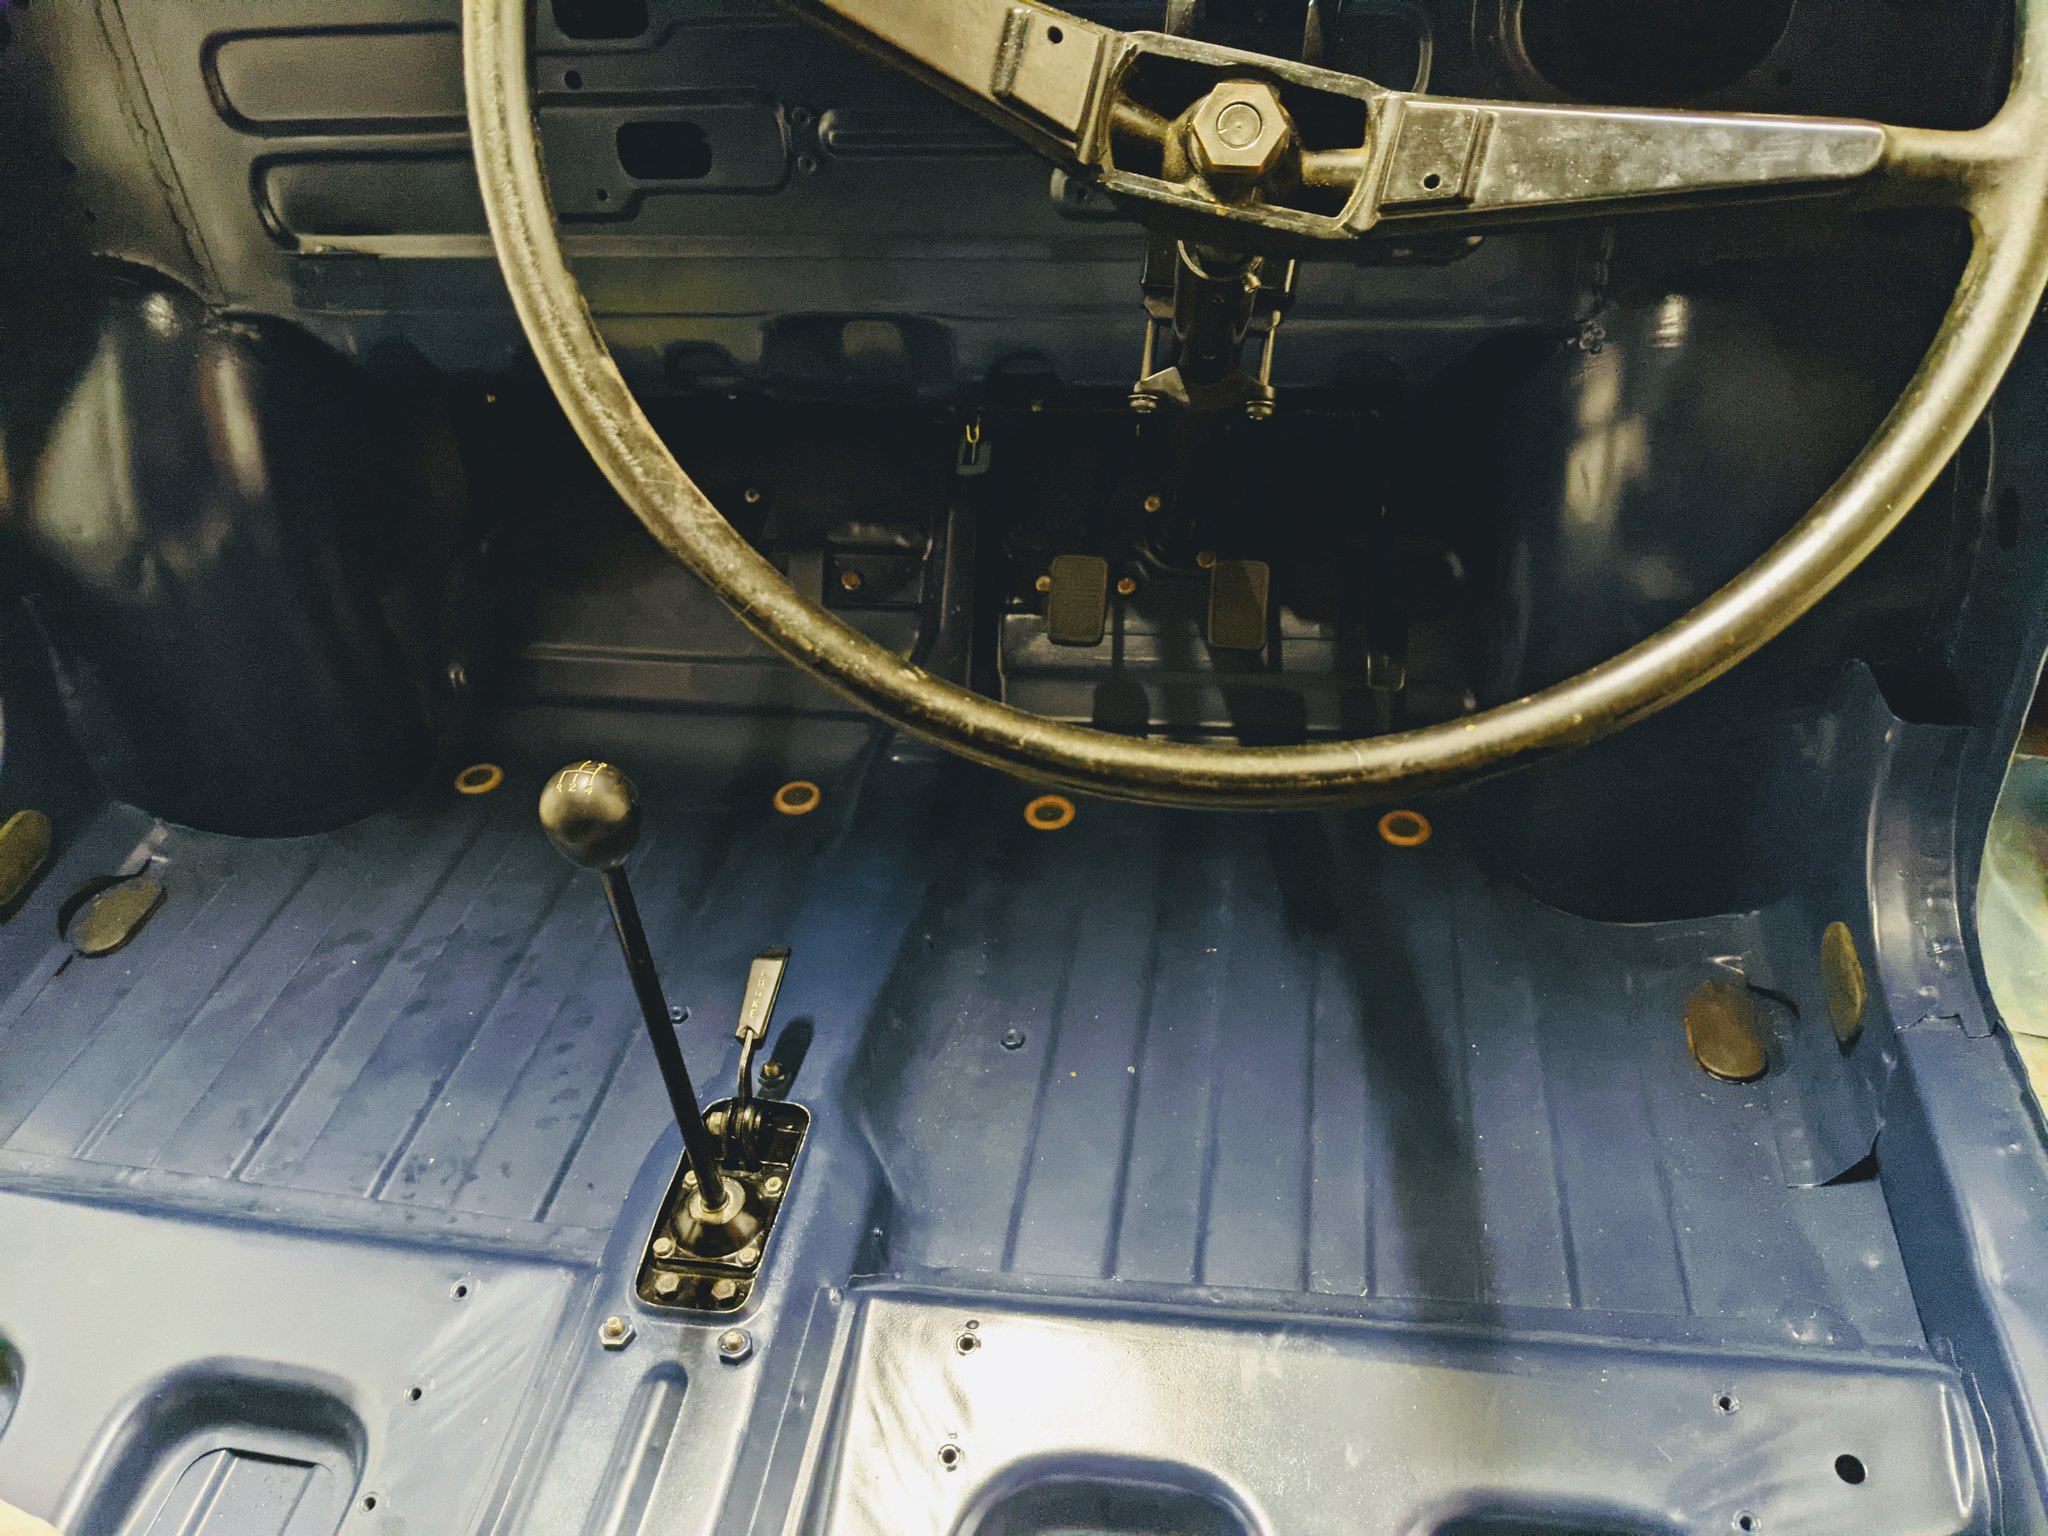
Made some more progress on the Imp today - got the gear lever/linkage assembly bolted on. Now, looking back I can see how simple the entire assembly is, but I won’t lie, I know I made a pigs ear of it! I just couldn’t picture how it went together, took me hours!
But the whole lot is as good as new. I’ve used heat shrink on the flexi so that should be nice and tight now as well as keeping the muck out.
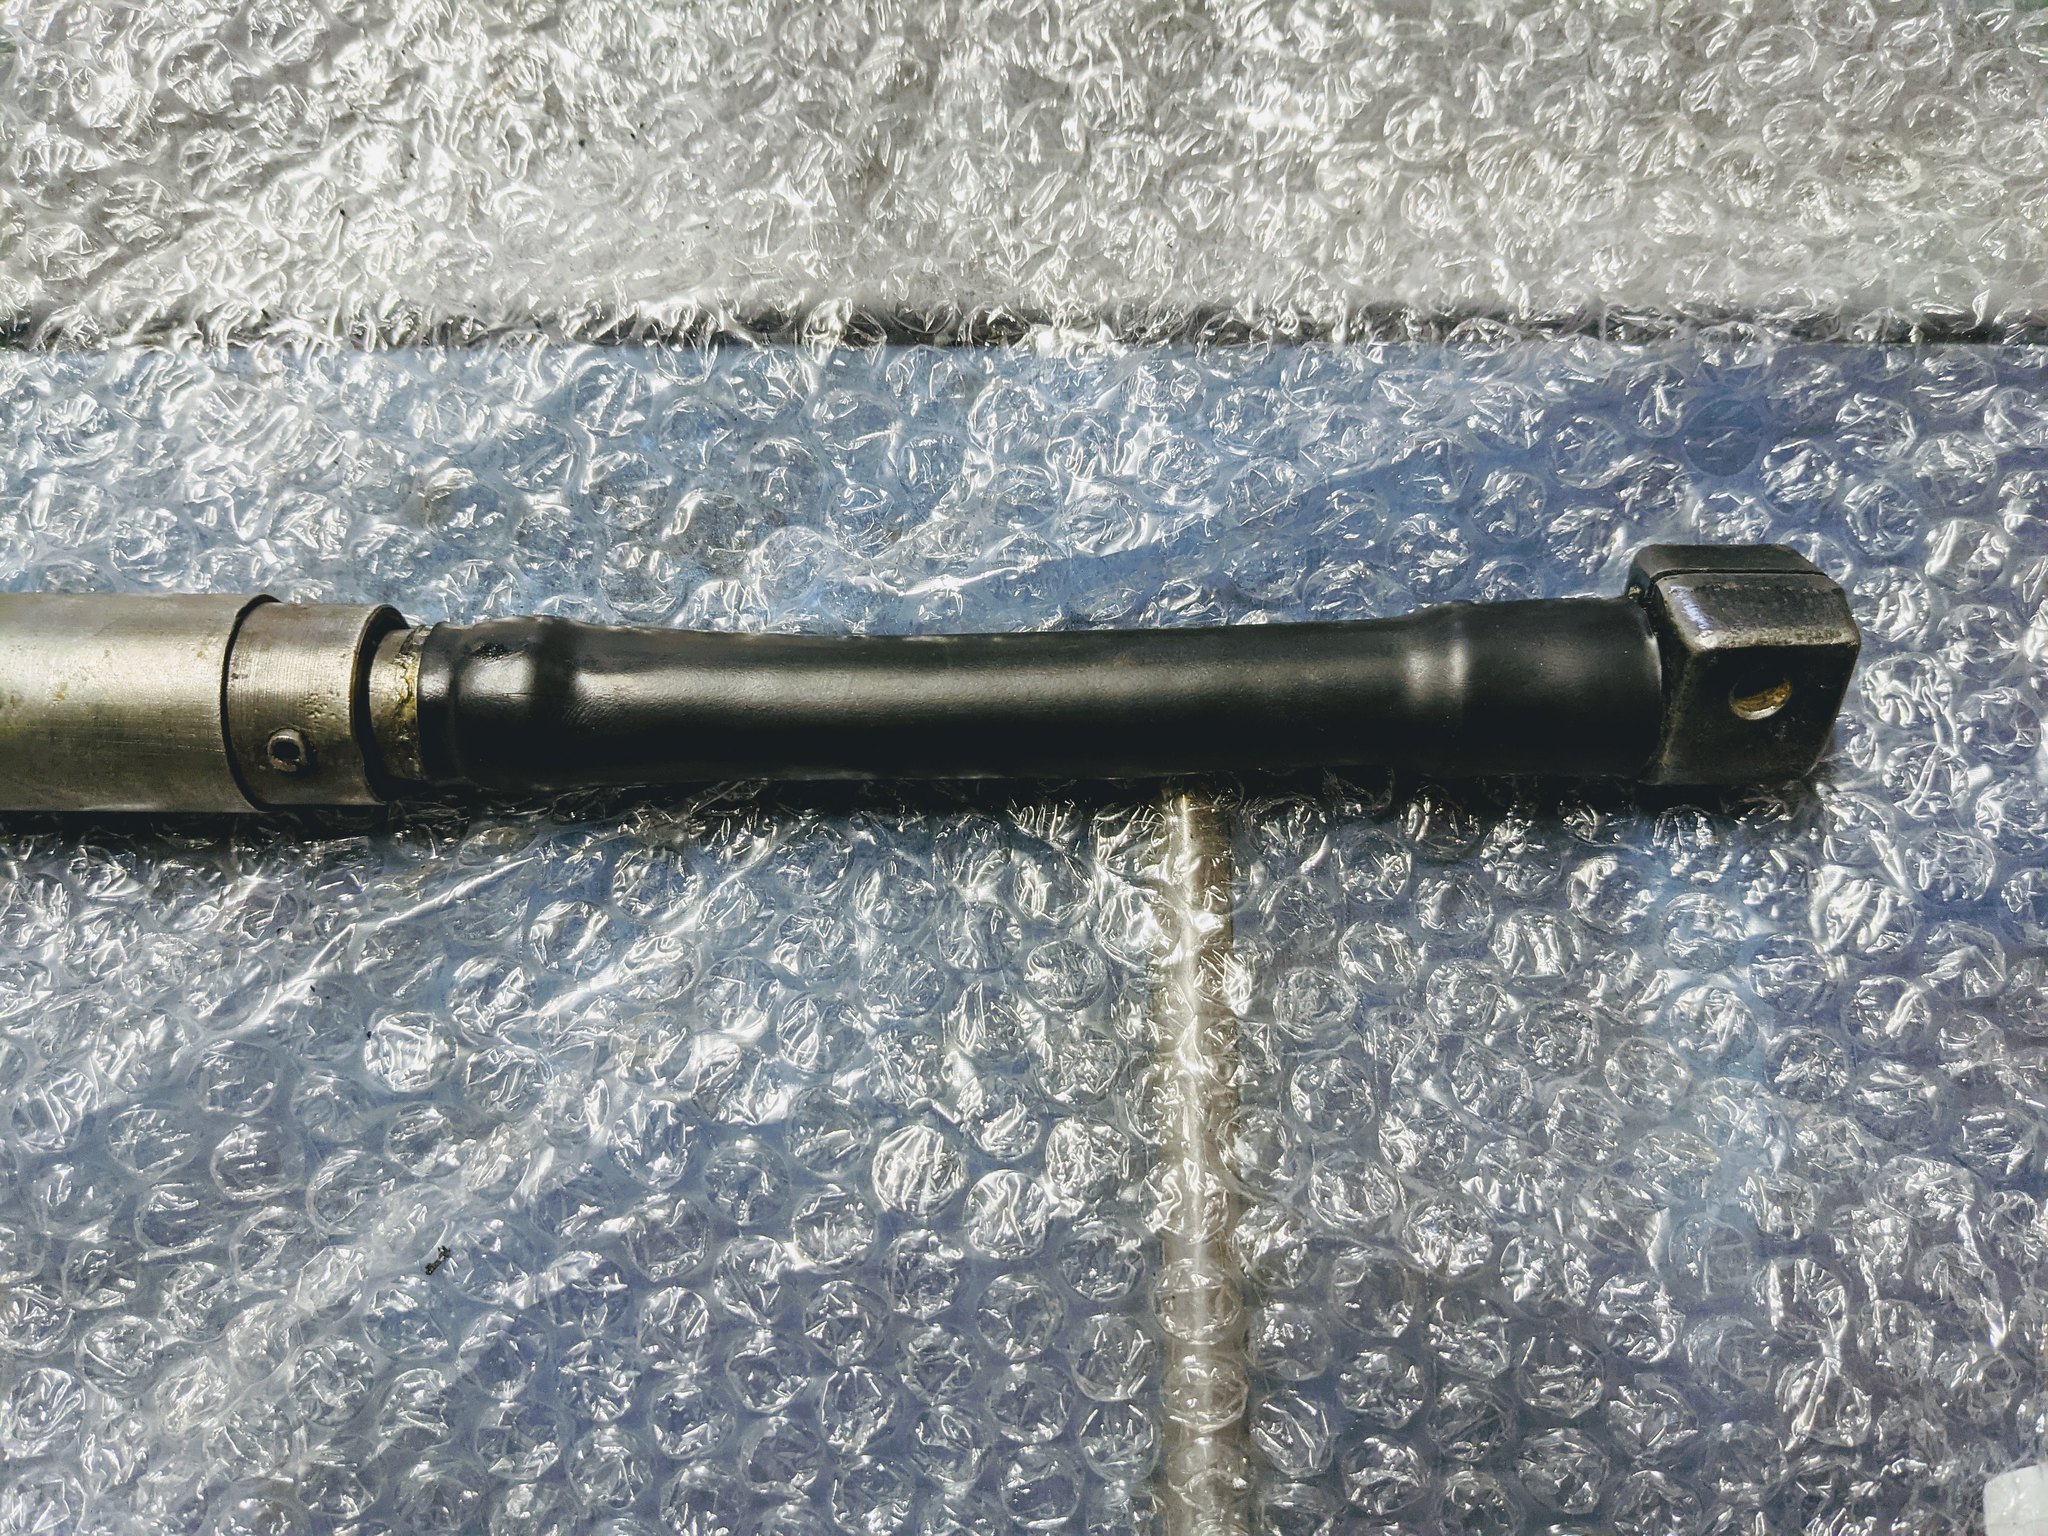 original_213d7e07-8254-4e98-8f80-6d454fd866d0_PXL_20201128_120443412 by Godfrey Hatton, on Flickr
All the brackets and gear lever got the usual treatment, back to bare metal then primed and painted. It’s a tad cold at the moment so I fashioned a stand at work and made the most of the warm workshop during my lunch break
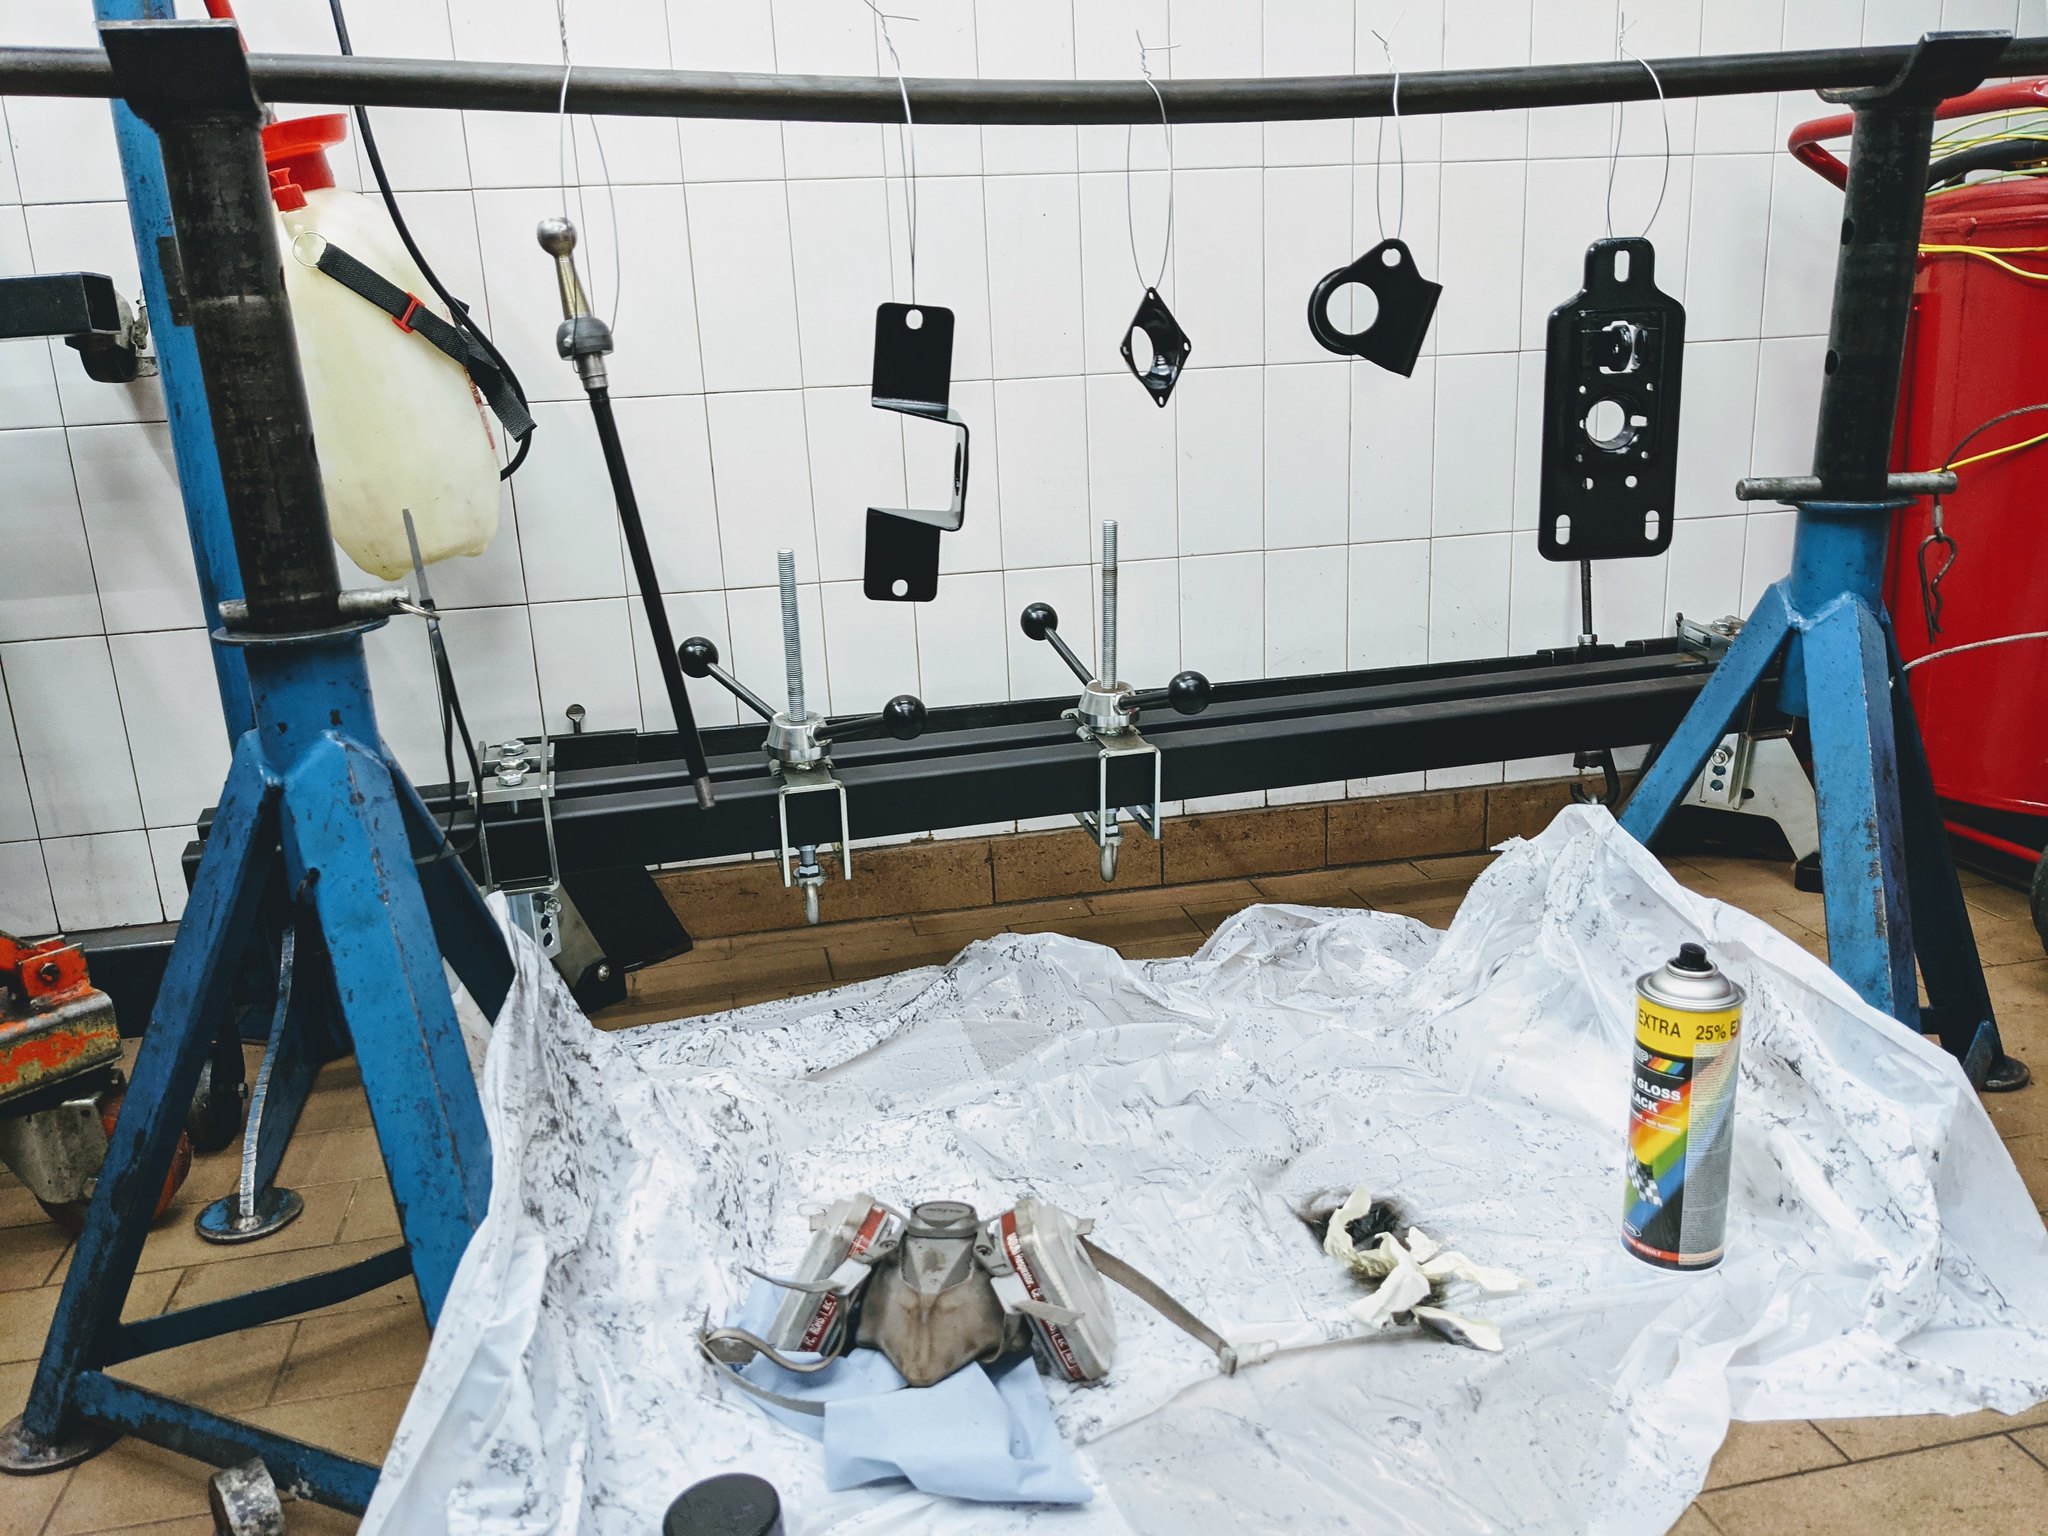 original_c7b1963b-6586-45e6-9172-84ebb7fd0d8d_PXL_20201127_144039821 by Godfrey Hatton, on Flickr
New nylotron ball and both plastic bushes replaced on the control shaft should mean zero play and a nice positive gear change choke cable got fitted at the same time too. I made sure to bend the right angle just a tad when pressed into its clip to prevent it from falling out. Repaired the tear in the gaiter with a puncture patch, looks tidy enough.
 original_f63e4ae0-dd16-4f2f-bc15-ecb513c189f7_PXL_20201128_163449712 by Godfrey Hatton, on Flickr
 original_d0b27dd9-8870-475a-8a2e-7e7e31af2ae1_PXL_20201128_162951309 by Godfrey Hatton, on Flickr
I guess handbrake and cables are next, just got to find them first... I didn’t remove them so I didn’t bag the parts, will have to trawl through the many boxes that came with the car
Pog
Made some more progress on the Imp today - got the gear lever/linkage assembly bolted on. Now, looking back I can see how simple the entire assembly is, but I won’t lie, I know I made a pigs ear of it! I just couldn’t picture how it went together, took me hours!
But the whole lot is as good as new. I’ve used heat shrink on the flexi so that should be nice and tight now as well as keeping the muck out.
original_213d7e07-8254-4e98-8f80-6d454fd866d0_PXL_20201128_120443412 by Godfrey Hatton, on FlickrAll the brackets and gear lever got the usual treatment, back to bare metal then primed and painted. It’s a tad cold at the moment so I fashioned a stand at work and made the most of the warm workshop during my lunch break
original_c7b1963b-6586-45e6-9172-84ebb7fd0d8d_PXL_20201127_144039821 by Godfrey Hatton, on FlickrNew nylotron ball and both plastic bushes replaced on the control shaft should mean zero play and a nice positive gear change
original_f63e4ae0-dd16-4f2f-bc15-ecb513c189f7_PXL_20201128_163449712 by Godfrey Hatton, on Flickroriginal_d0b27dd9-8870-475a-8a2e-7e7e31af2ae1_PXL_20201128_162951309 by Godfrey Hatton, on FlickrI guess handbrake and cables are next, just got to find them first... I didn’t remove them so I didn’t bag the parts, will have to trawl through the many boxes that came with the car
Pog
Young Imp Members Registrar
-
bks974c
- Posts: 1401
- Joined: Thu Aug 19, 2004 5:26 pm
- Club Member: Yes
- Car Model: all the above
- Location: Edinburgh, Scotland
- Has thanked: 152 times
- Been thanked: 243 times
Re: EHK 744G - 1969 Super - Gear lever assembly done
As you say hindsight is a wonderful thing, so is fitting the cables before the gear linkage  Adjusting the cables is awkward with the linkage fitted but it can be done just slow.
Looking great.
Scott
Looking great.
Scott
-
Pog
- Posts: 142
- Joined: Sat Aug 24, 2013 4:55 pm
- Club Member: Yes
- Car Model: 1969 Super 'Betty'
- Location: Northampton, UK
- Has thanked: 10 times
- Been thanked: 37 times
Re: EHK 744G - 1969 Super - Gear lever assembly done
Hi all,
I hope 2021 is going well so far. Haven't really touched the car since before Christmas - I did find the handbrake and a couple other bits next to go back on, but it's too cold at the moment to strip and paint them.
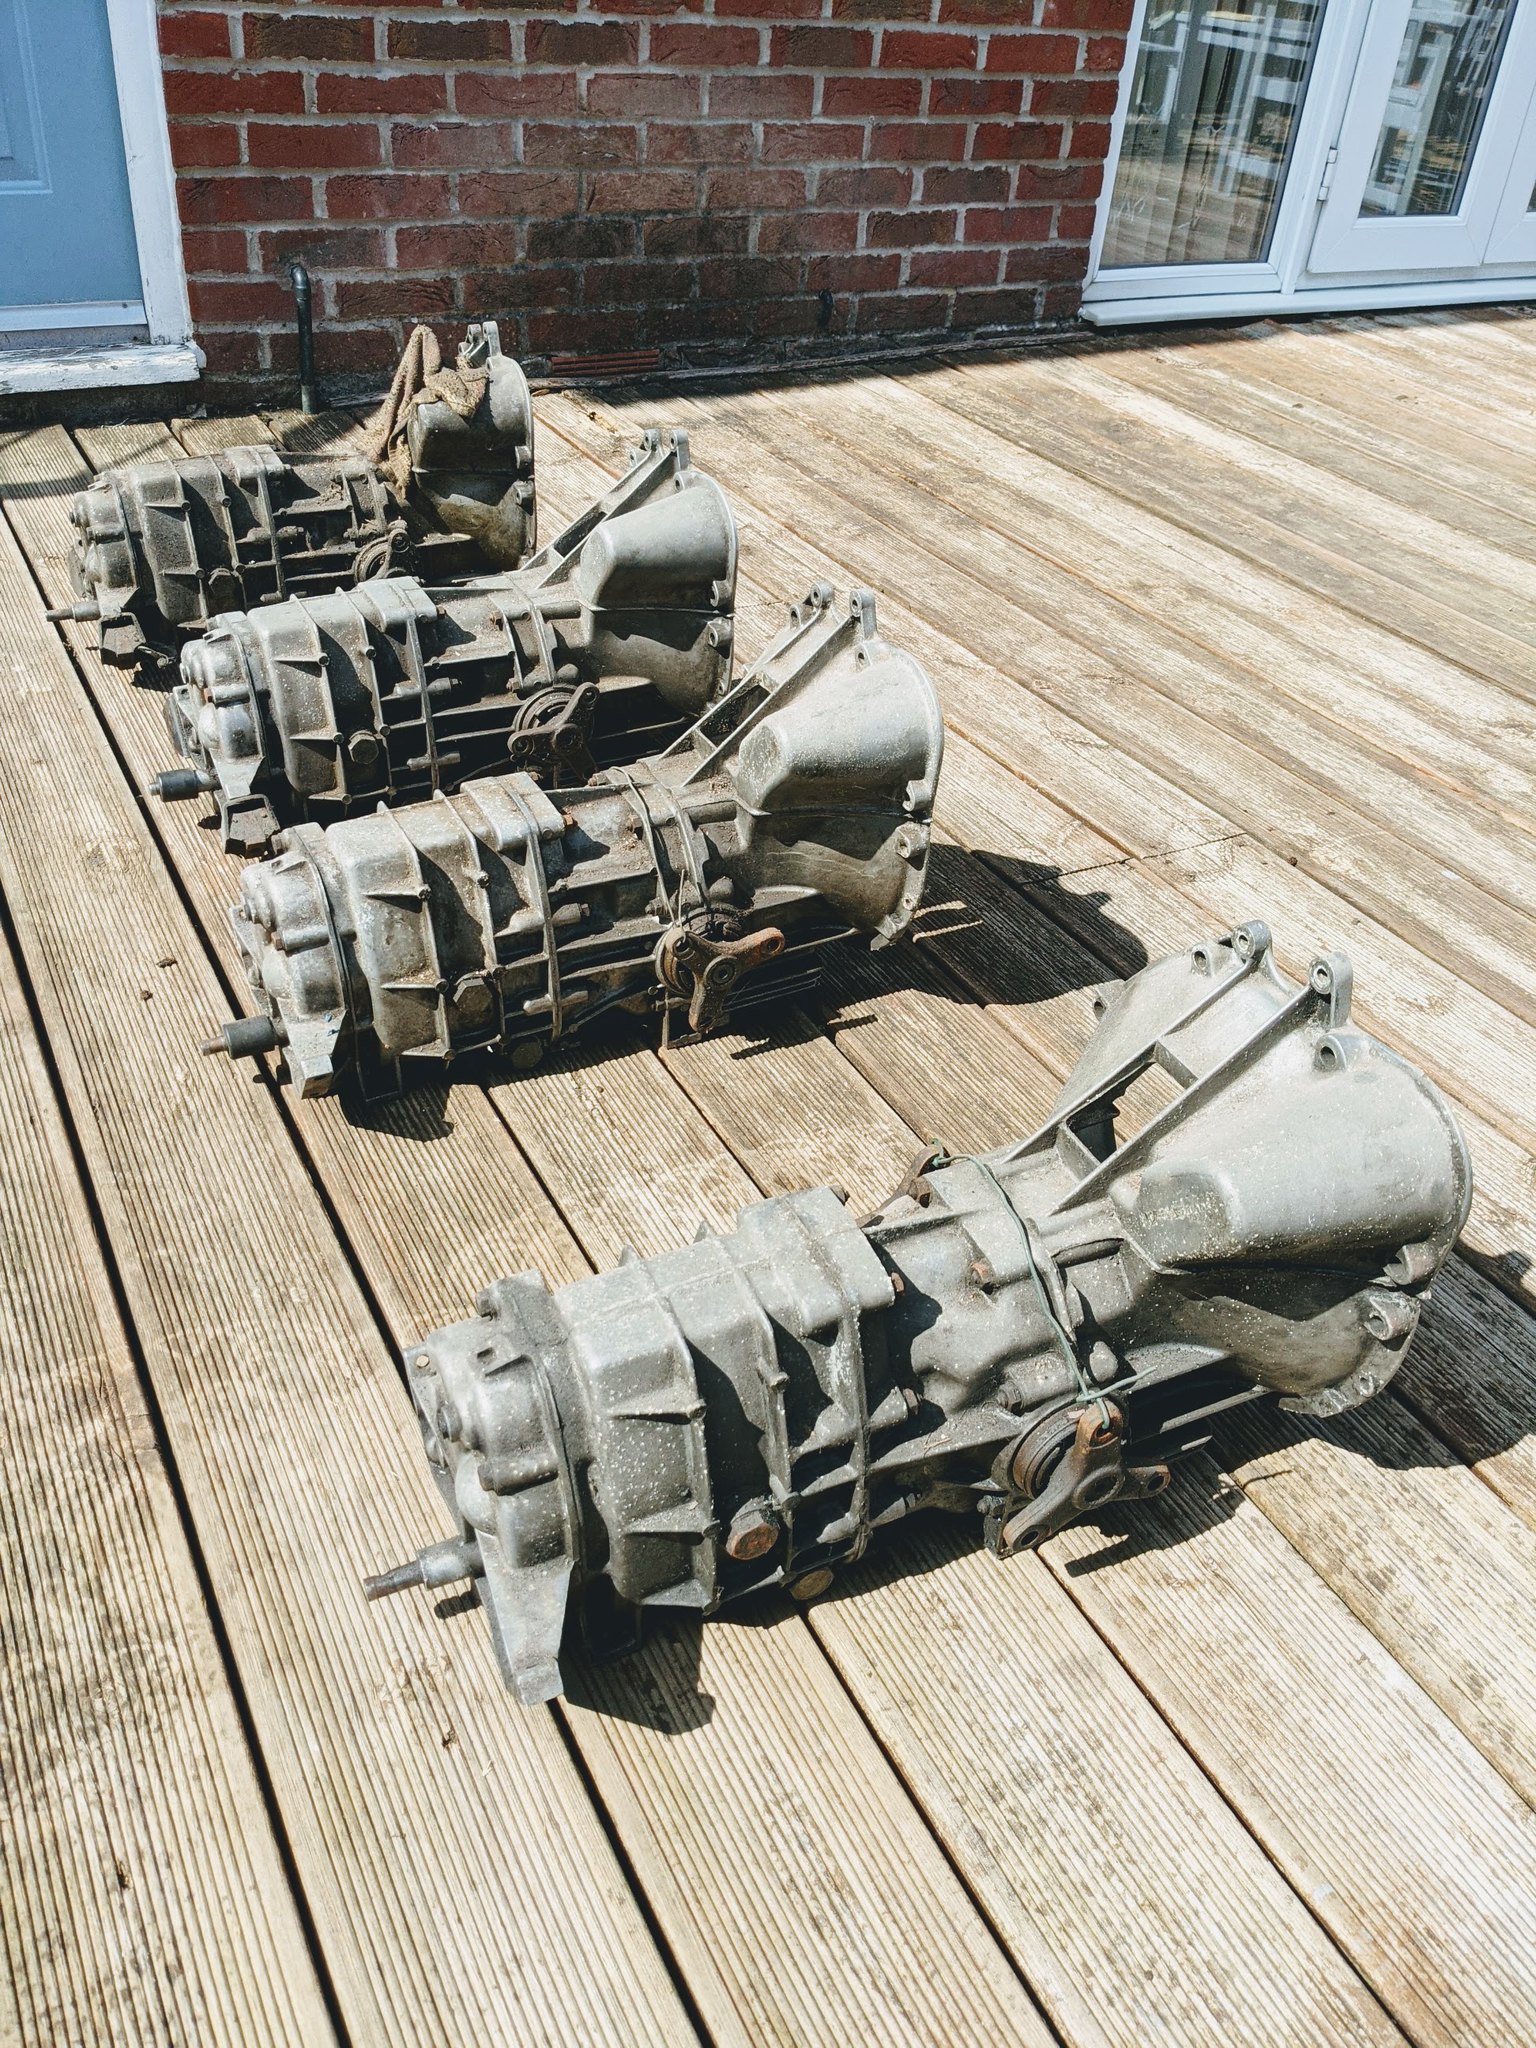
Gearbox question. A have a few boxes that were supplied in various exterior condition that came with the car. Now while I'd love to get one fully rebuilt, like I'm doing with the rest of the car, I know how expensive that can be and at this stage I'd rather focus on other things to get the car driveable again and take a chance with one of the boxes I have on the shelf. One of the spares can then get a rebuild down the line when funds allow.
What checks can I make to determine which is in the best condition? And are there any minor wear/tear items that should be changed before going back in, just as a quick freshen up? I know I'll be getting new mounts and I have one of Robin Human's strengthened clutch forks with roller release bearing with my name on it.
Pog
I hope 2021 is going well so far. Haven't really touched the car since before Christmas - I did find the handbrake and a couple other bits next to go back on, but it's too cold at the moment to strip and paint them.
Gearbox question. A have a few boxes that were supplied in various exterior condition that came with the car. Now while I'd love to get one fully rebuilt, like I'm doing with the rest of the car, I know how expensive that can be and at this stage I'd rather focus on other things to get the car driveable again and take a chance with one of the boxes I have on the shelf. One of the spares can then get a rebuild down the line when funds allow.
What checks can I make to determine which is in the best condition? And are there any minor wear/tear items that should be changed before going back in, just as a quick freshen up? I know I'll be getting new mounts and I have one of Robin Human's strengthened clutch forks with roller release bearing with my name on it.
Pog
Young Imp Members Registrar
-
John Simister
- Posts: 136
- Joined: Sun Apr 09, 2006 9:16 am
- Club Member: Yes
- Car Model: Sunbeam Stiletto 1968
- Location: Berkhamsted, Herts
Re: EHK 744G - 1969 Super - next steps...
I would choose the cleanest, nicest-looking gearbox that looks like it has leaked the least, then check that all the gears engage and that they all transmit drive. With each gear selected in turn, achieved with a mole wrench on the selector shaft (cardboard or similar between the wrench's jaws and the shaft, to avoid damage), turn the input shaft and check that the driveshaft spiders are turning. Also turn one spider and check the other one rotates in the opposite direction when a gear is selected and the input shaft is held stationary. That will prove that the differential works.
If all good, I would replace the input shaft seal and the two driveshaft spider seals. The former can be done with the input shaft still in situ, using a hooked tool of some sort to pull out the old seal.
Once fitted, if luck is on your side the gearbox will prove to be quiet with good synchromesh. That's the chance you take. If it's noisy, most likely a whirring noise when idling in neutral which becomes more obvious as you drive, the most likely culprit – and fortunately the easiest to fix – is the input shaft tail bearing. It's usually the first to fail, especially if starved of oil because the level has run low. Replacing that bearing is a fairly easy DIY job, especially for someone who has got as deeply into your car's innards as you have.
Good luck
John
Member number 6. First Imp bought in 1972, 10 more between then and 2019. Currently Impless.
-
The Nun
- Posts: 2918
- Joined: Tue Jan 23, 2007 7:02 pm
- Club Member: Yes
- Car Model: Imp
- Location: South
- Has thanked: 74 times
- Been thanked: 104 times
Re: EHK 744G - 1969 Super - Gear lever assembly done
Interesting I never knew Robin could put your name on the things he supplies, is it stamped or engraved?
Peter Nunn...ey im member 00033
-
617sqn

- Posts: 1146
- Joined: Fri Dec 05, 2003 11:17 pm
- Club Member: Yes
- Car Model: Hillman Imp 1972
- Location: Sussex, England.
Re: EHK 744G - 1969 Super - next steps...
Stupid boy.....
Andy G
Andy G
Member No. 7500, and Stan's best mate.
-
Pog
- Posts: 142
- Joined: Sat Aug 24, 2013 4:55 pm
- Club Member: Yes
- Car Model: 1969 Super 'Betty'
- Location: Northampton, UK
- Has thanked: 10 times
- Been thanked: 37 times
Re: EHK 744G - 1969 Super - Gear lever assembly done
[/quote]
Interesting I never knew Robin could put your name on the things he supplies, is it stamped or engraved?
[/quote]
*FACEPALM...* haha
Interesting I never knew Robin could put your name on the things he supplies, is it stamped or engraved?
[/quote]
*FACEPALM...*
Young Imp Members Registrar
-
impmann

- Posts: 543
- Joined: Tue Sep 09, 2003 11:27 am
- Club Member: Yes
- Car Model: ...er, one or two
- Location: Midlands
- Has thanked: 18 times
- Been thanked: 69 times
Re: EHK 744G - 1969 Super - next steps...
This is good advice.John Simister wrote: ↑Tue Jan 19, 2021 7:28 pm I would choose the cleanest, nicest-looking gearbox that looks like it has leaked the least, then check that all the gears engage and that they all transmit drive. With each gear selected in turn, achieved with a mole wrench on the selector shaft (cardboard or similar between the wrench's jaws and the shaft, to avoid damage), turn the input shaft and check that the driveshaft spiders are turning. Also turn one spider and check the other one rotates in the opposite direction when a gear is selected and the input shaft is held stationary. That will prove that the differential works.
If all good, I would replace the input shaft seal and the two driveshaft spider seals. The former can be done with the input shaft still in situ, using a hooked tool of some sort to pull out the old seal.
Once fitted, if luck is on your side the gearbox will prove to be quiet with good synchromesh. That's the chance you take. If it's noisy, most likely a whirring noise when idling in neutral which becomes more obvious as you drive, the most likely culprit – and fortunately the easiest to fix – is the input shaft tail bearing. It's usually the first to fail, especially if starved of oil because the level has run low. Replacing that bearing is a fairly easy DIY job, especially for someone who has got as deeply into your car's innards as you have.
Good luck
John
I'd add that I'd drop the oil to check the condition/colour before doing anything. An oil change is good practice anyway. Look for discolouration/swarf etc. If it looks clear, the chances are its a good box - then follow John's advice above.
Tim Morgan
Imps since 1987... one or two of them. ;-)
Imps since 1987... one or two of them. ;-)
-
Pog
- Posts: 142
- Joined: Sat Aug 24, 2013 4:55 pm
- Club Member: Yes
- Car Model: 1969 Super 'Betty'
- Location: Northampton, UK
- Has thanked: 10 times
- Been thanked: 37 times
Re: EHK 744G - 1969 Super - gearbox in!
Hey all,
Apologies for the lack of updates, just haven’t got around to uploading everything. Certainly haven’t been idle though, so hope you guys don’t mind this being a long post so I can bring you all up to speed!
I’ll start with the handbrake. I see what you meant that this would have been easier before the gear linkage! But it was only a little bit fiddly, everything went together okay and now I have a working handbrake
 PXL_20210403_171000927 by Godfrey Hatton, on Flickr
 PXL_20210403_170843016 by Godfrey Hatton, on Flickr
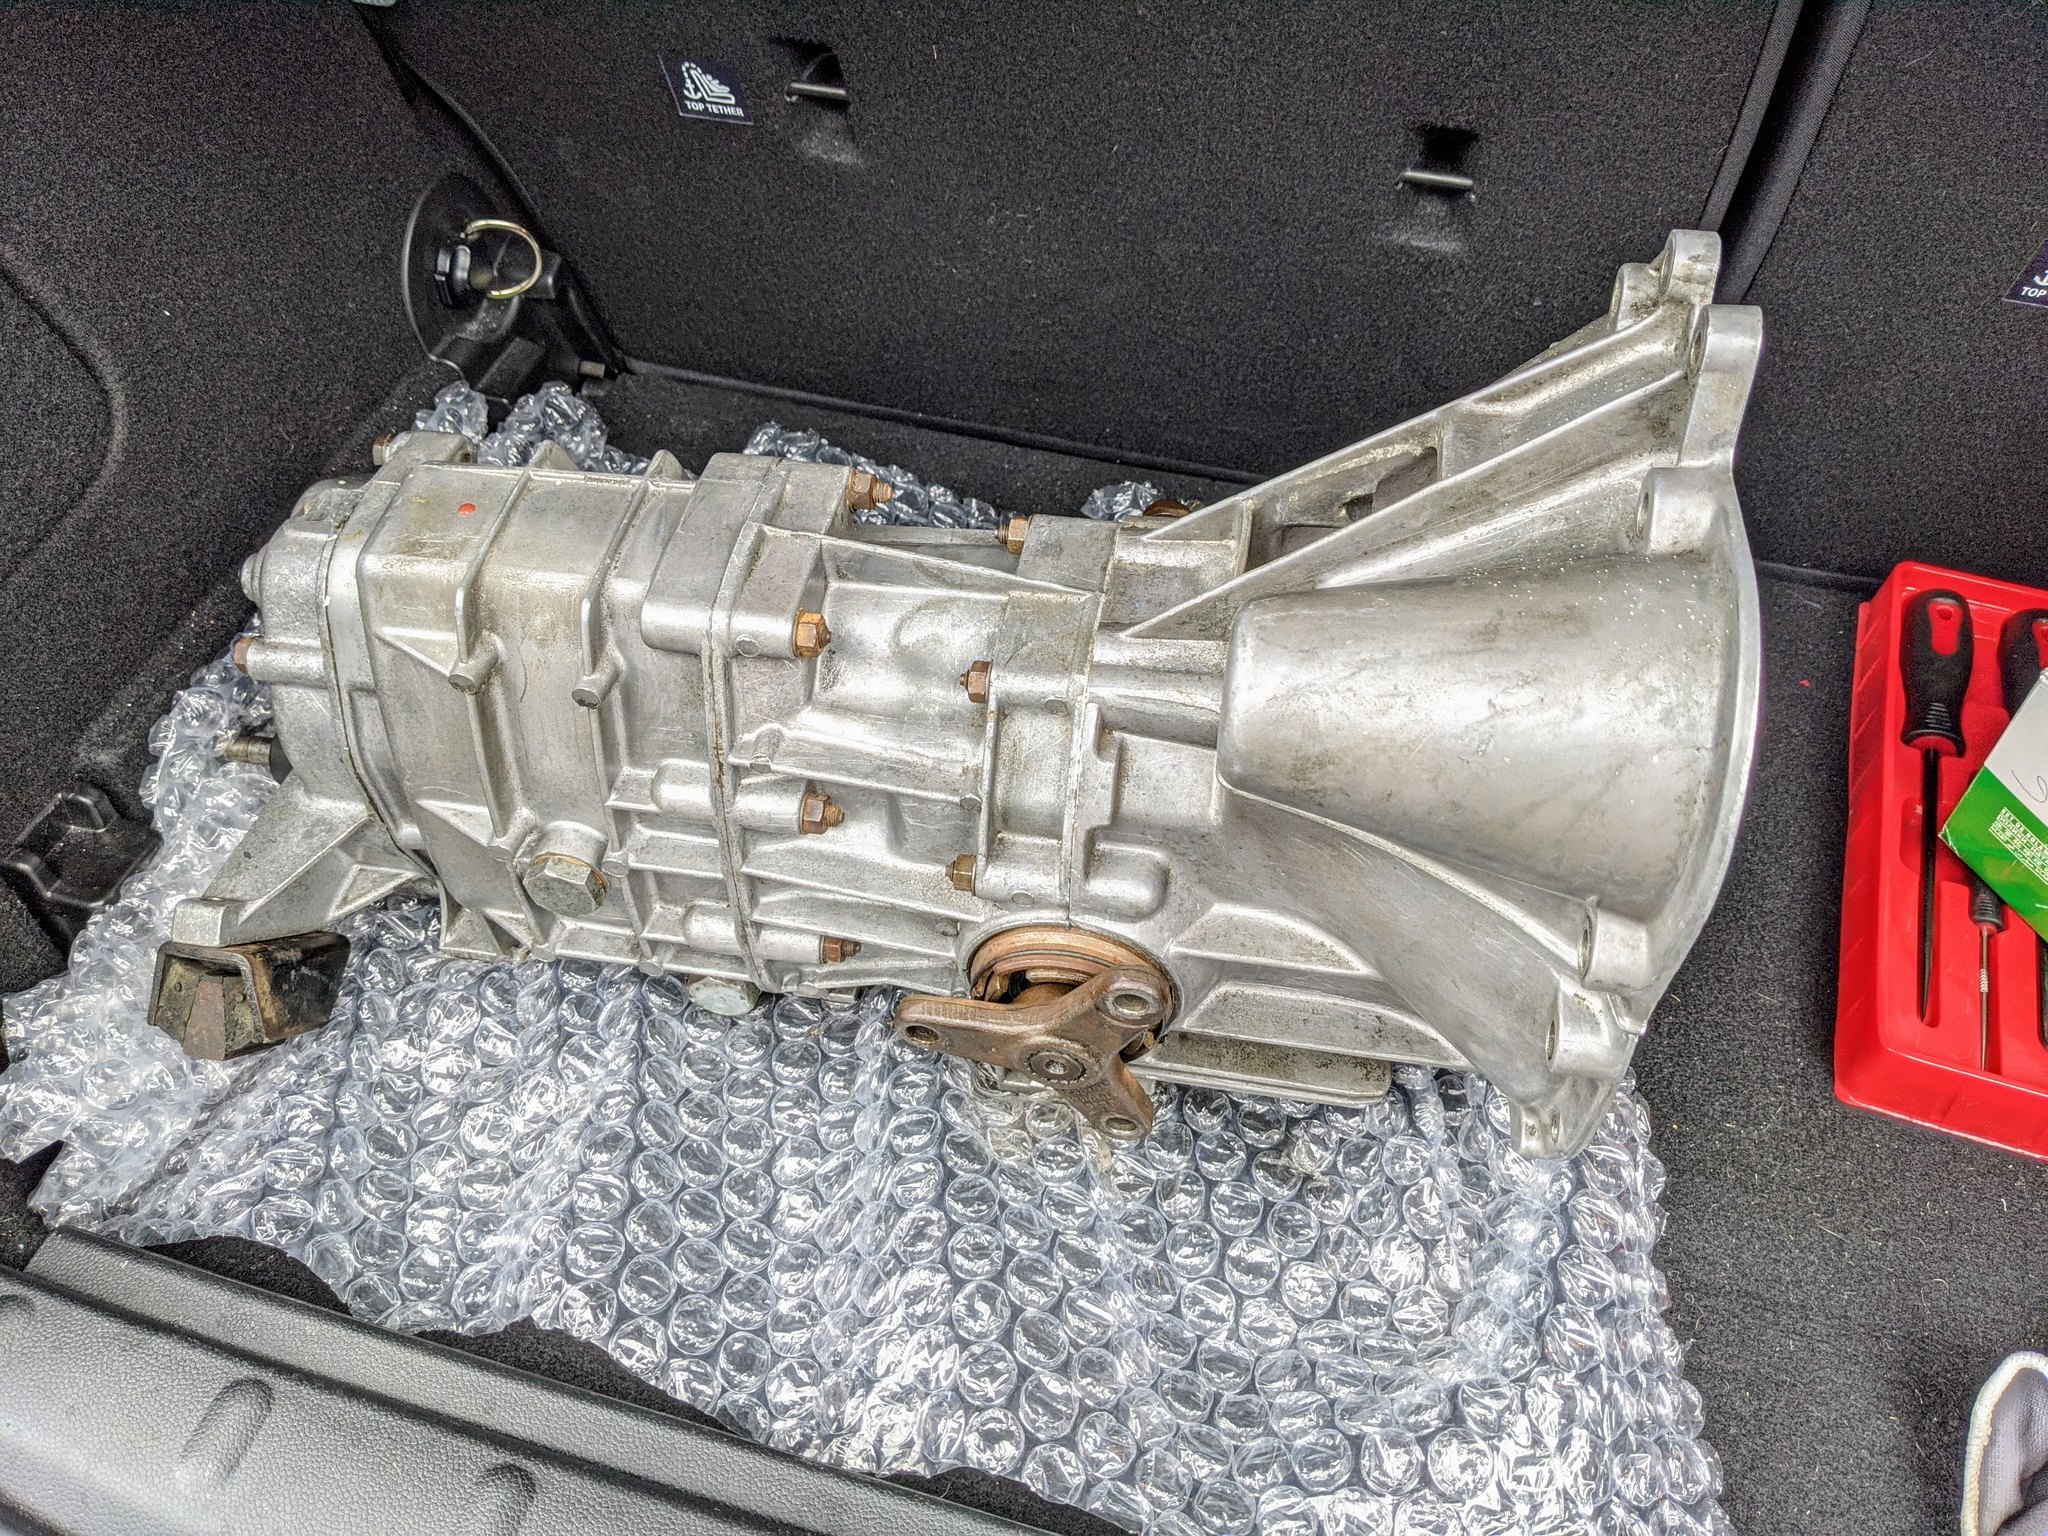
I then looked to the gearbox. I have a handful of boxes that came with the car as spares and figured at least one of them might be in decent enough condition just to get the car on the road...
 PXL_20210425_133325688 by Godfrey Hatton, on Flickr
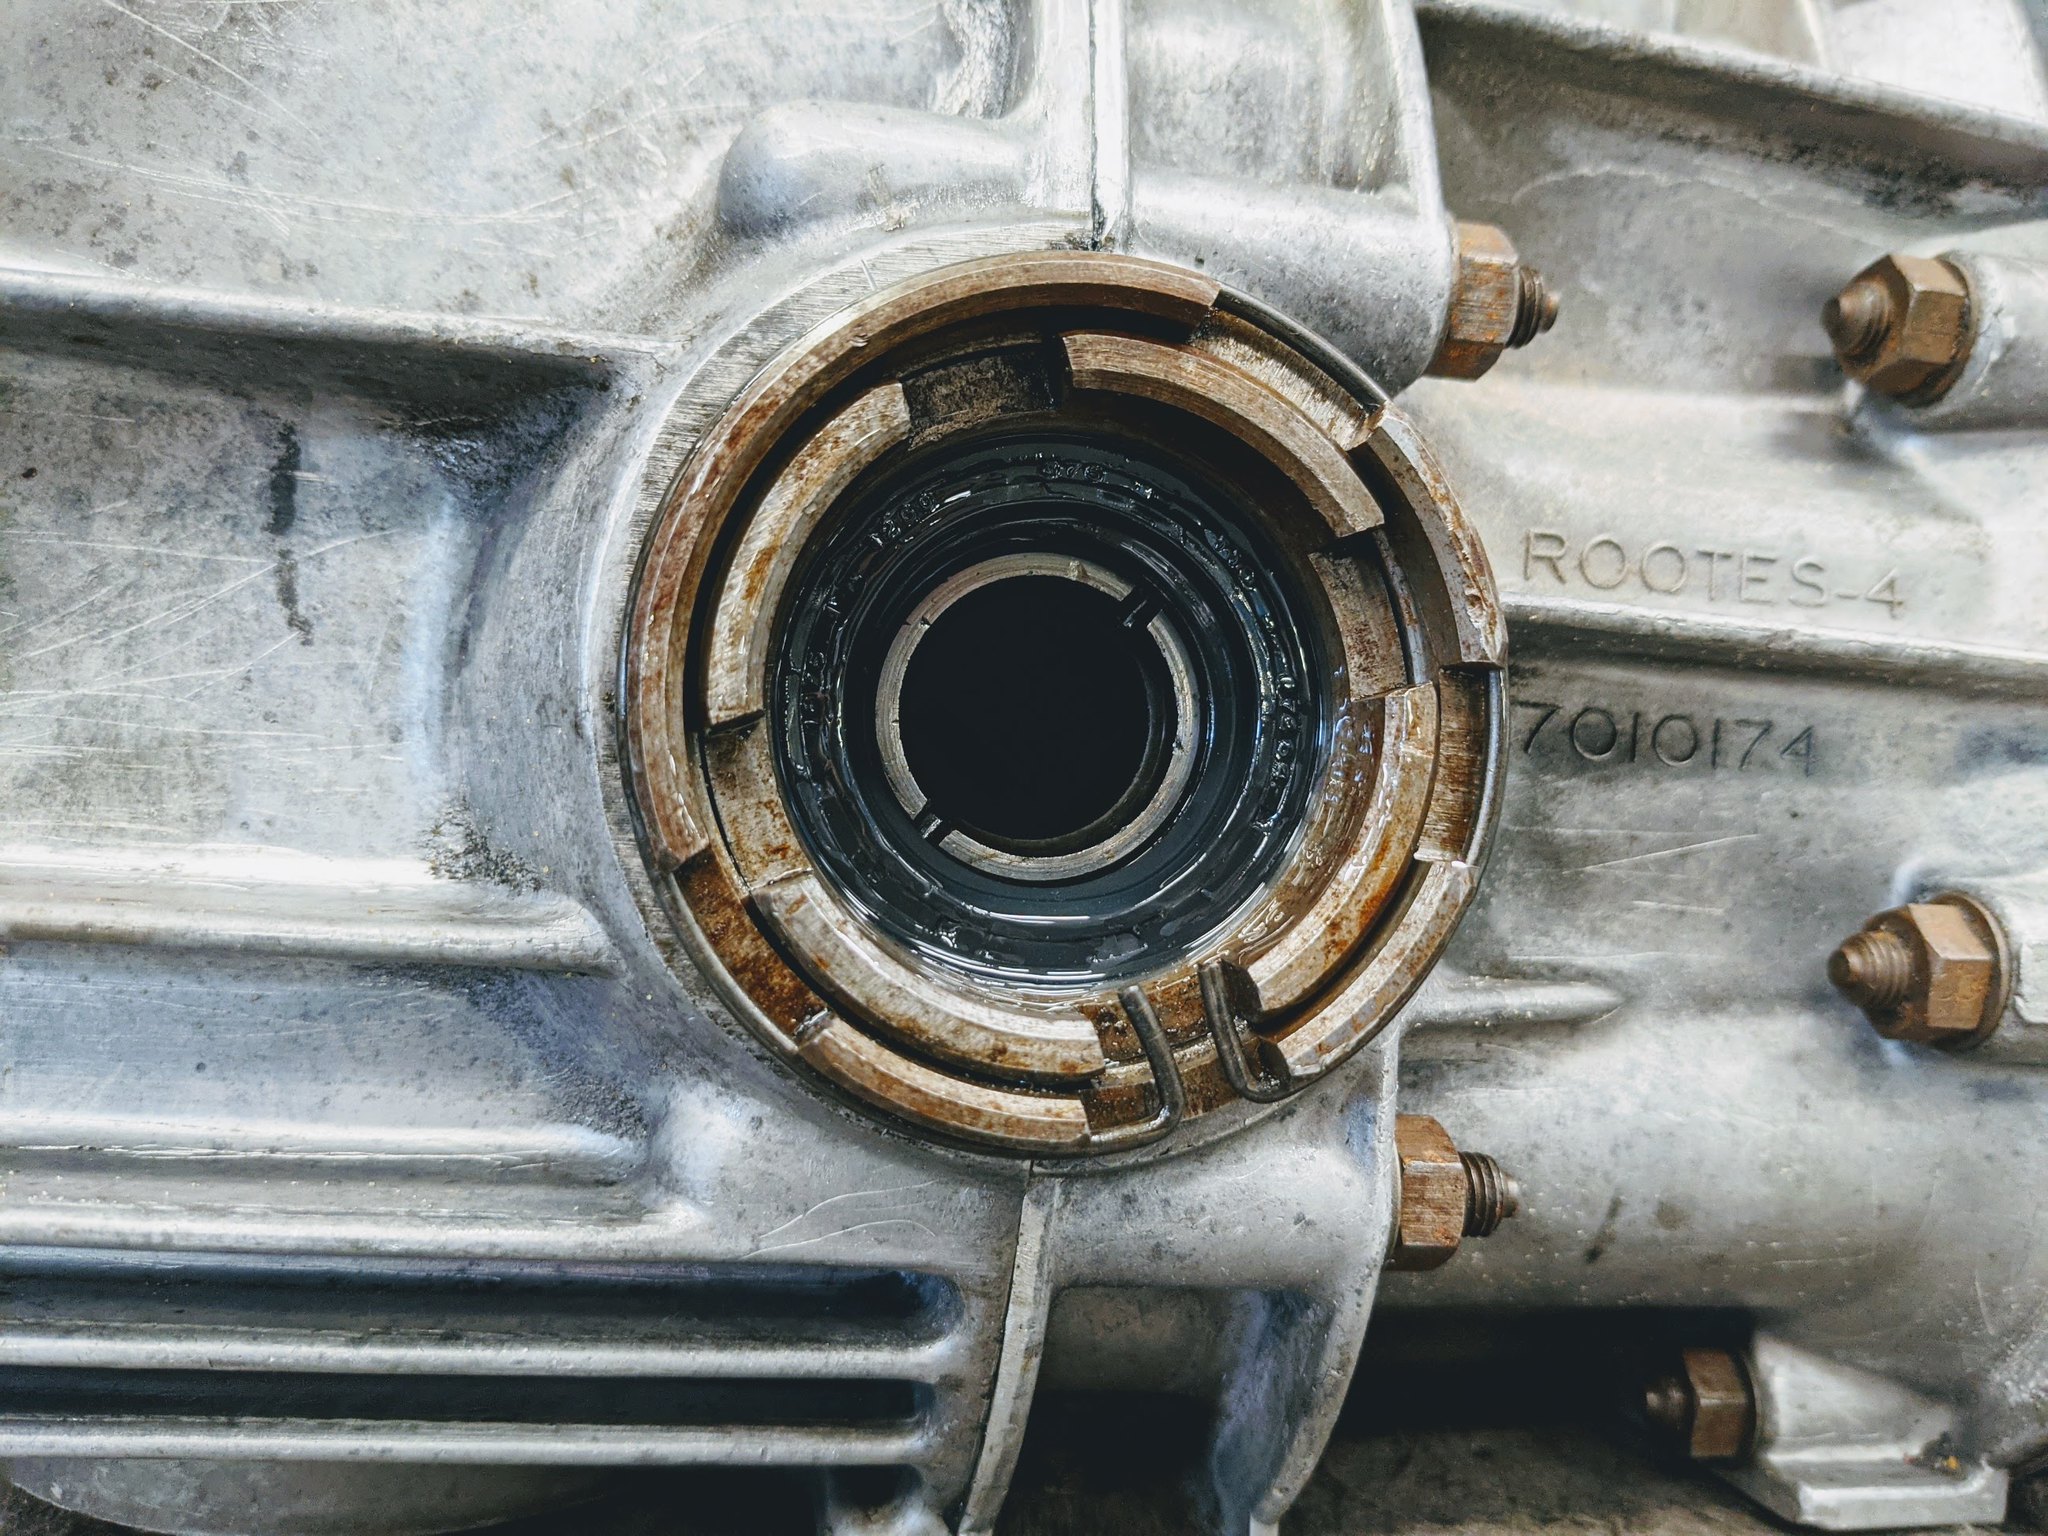
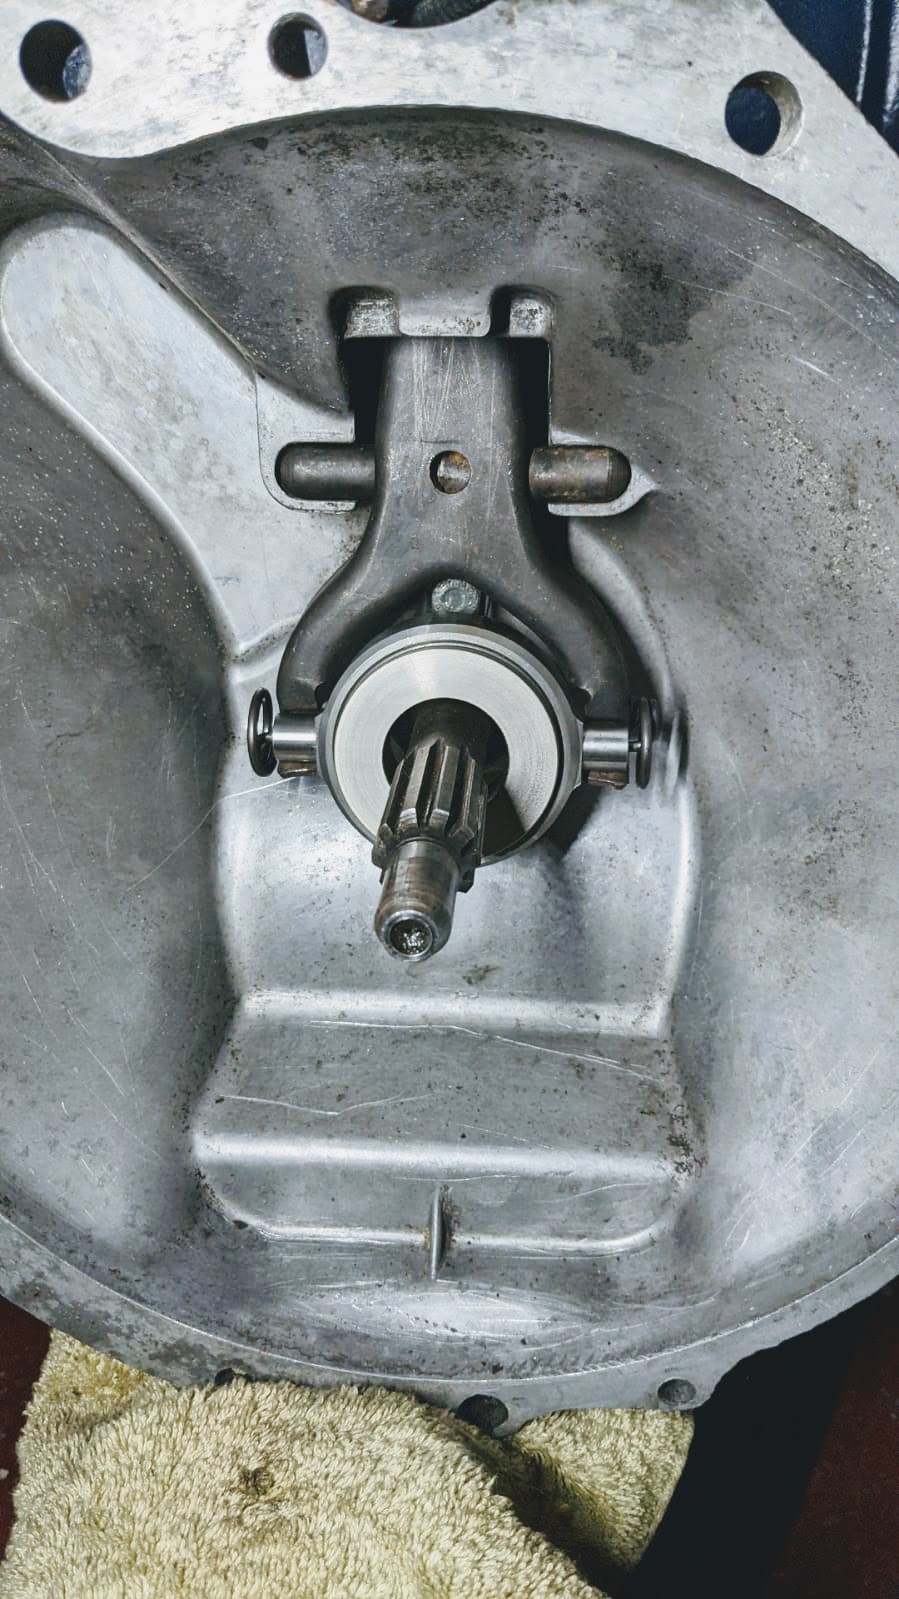
One was an early casing box with no breather, so I ruled that out just because. And following your advice, picked the cleanest one and made sure I could select all gears using some mole grips on the selector shaft and that the diff worked. From there I did the following:
Gave it a good clean using the parts washer at work - it came up lovely!
PXL_20210516_155913737 by Godfrey Hatton, on Flickr
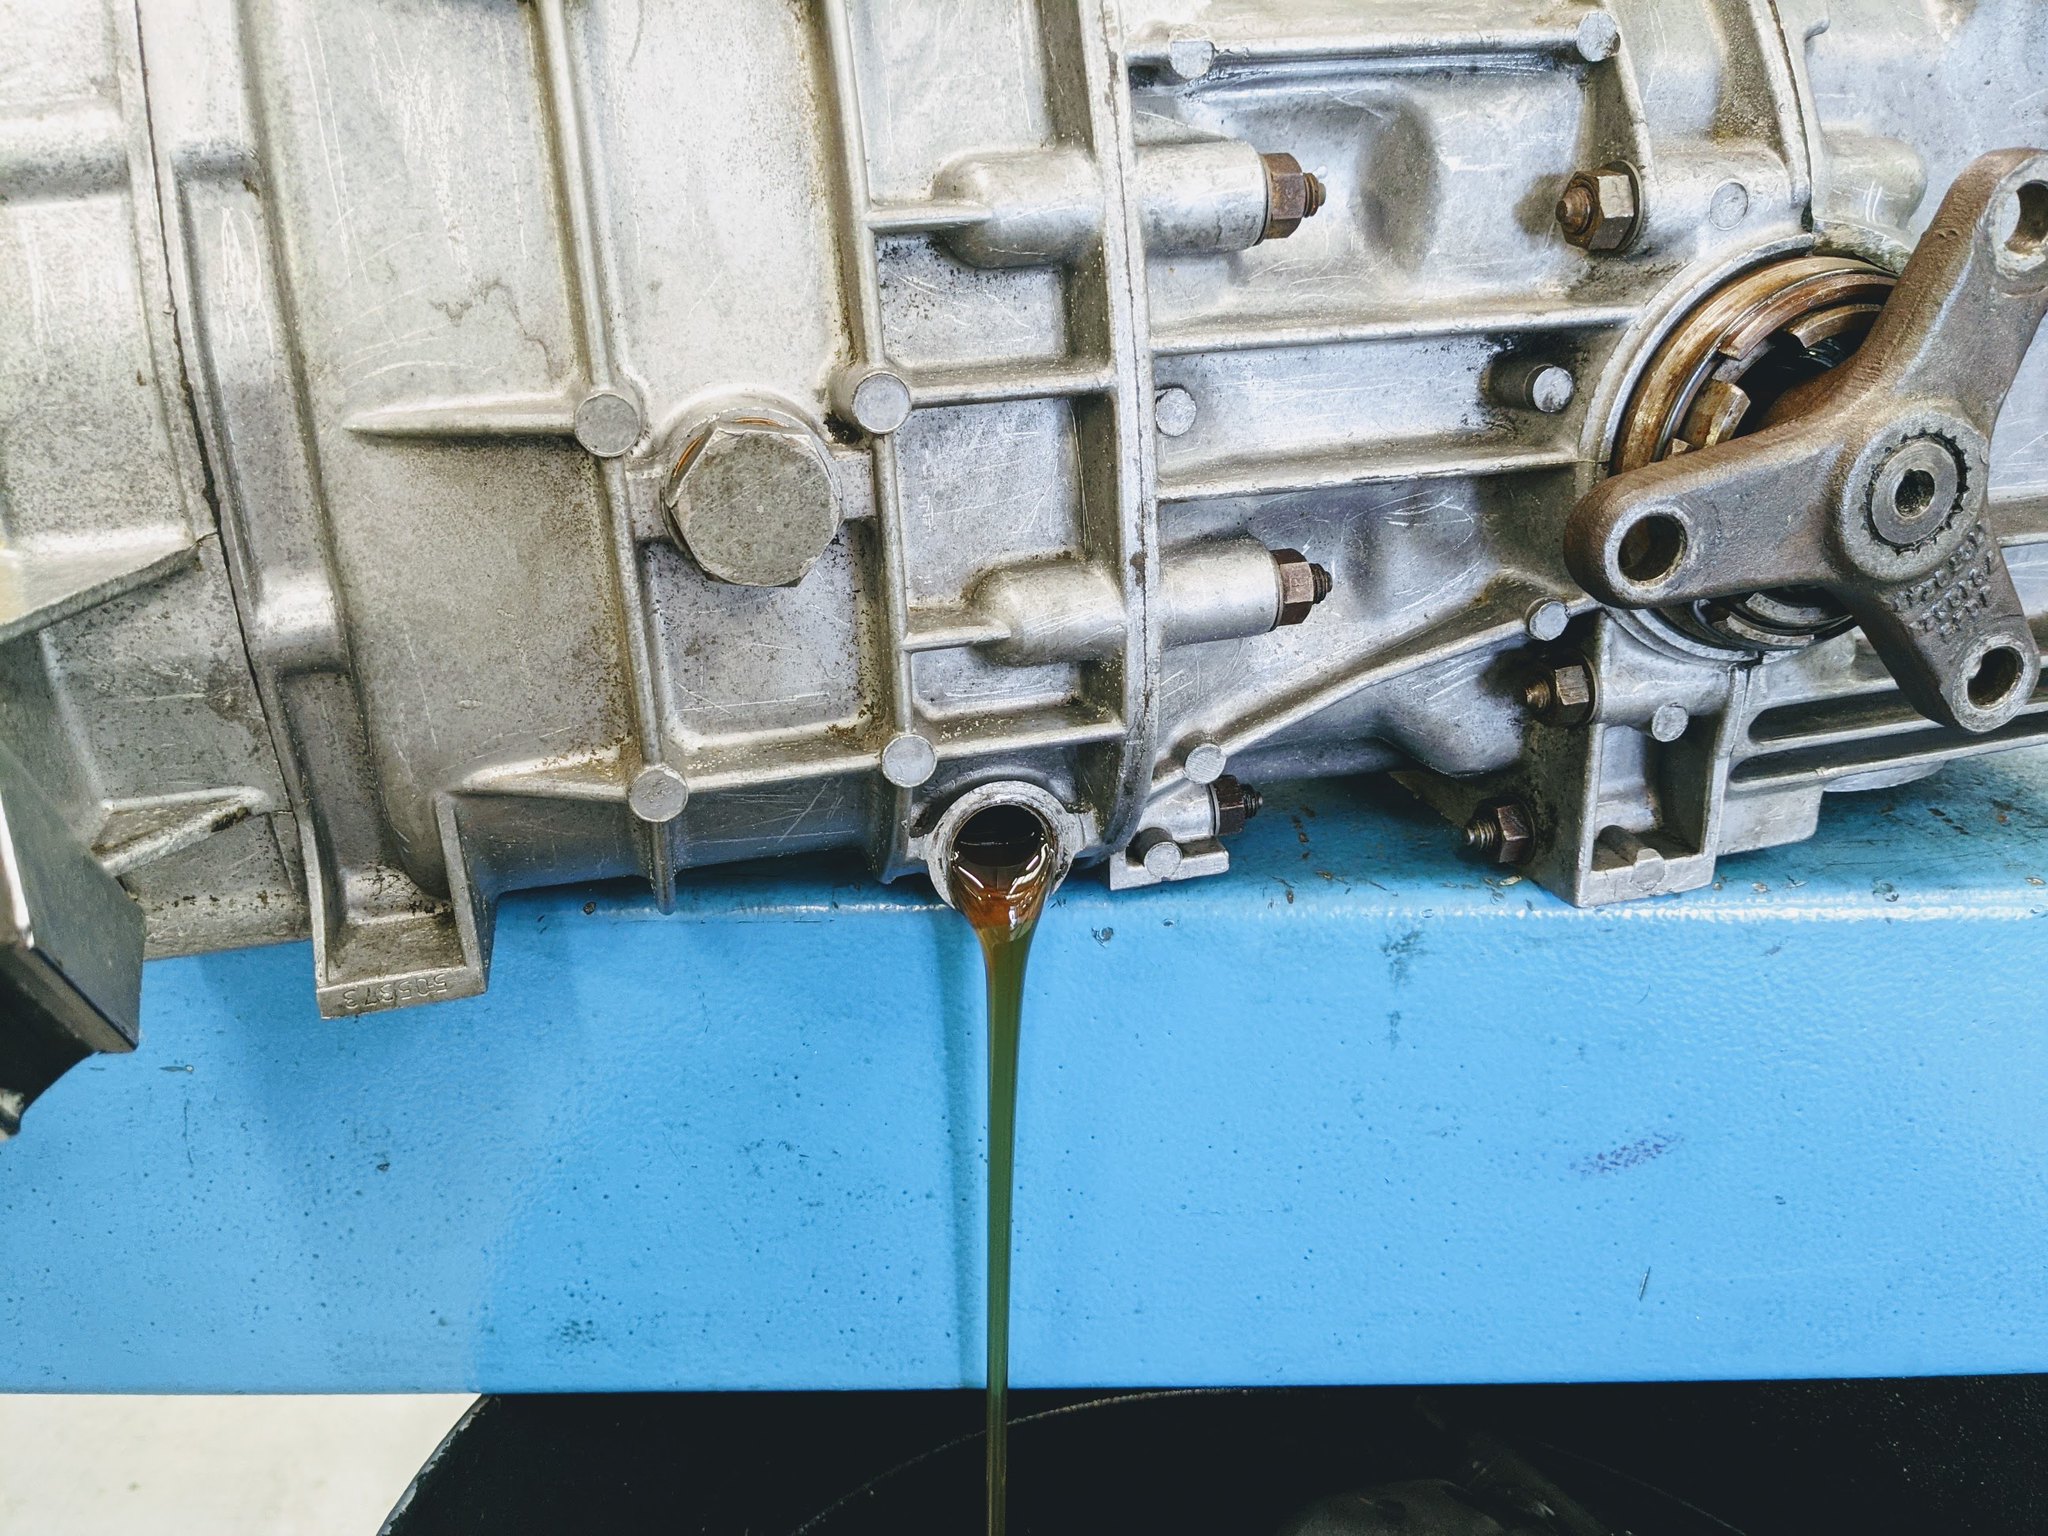
Drained the oil - very pleased to see that although a little dark/dirty, there was absolutely no metal swarf, so I’m confident this should prove to be a healthy gearbox. I then flushed some oil through a couple times just to ensure it was nice and clean inside.
 PXL_20210522_111609328 by Godfrey Hatton, on Flickr
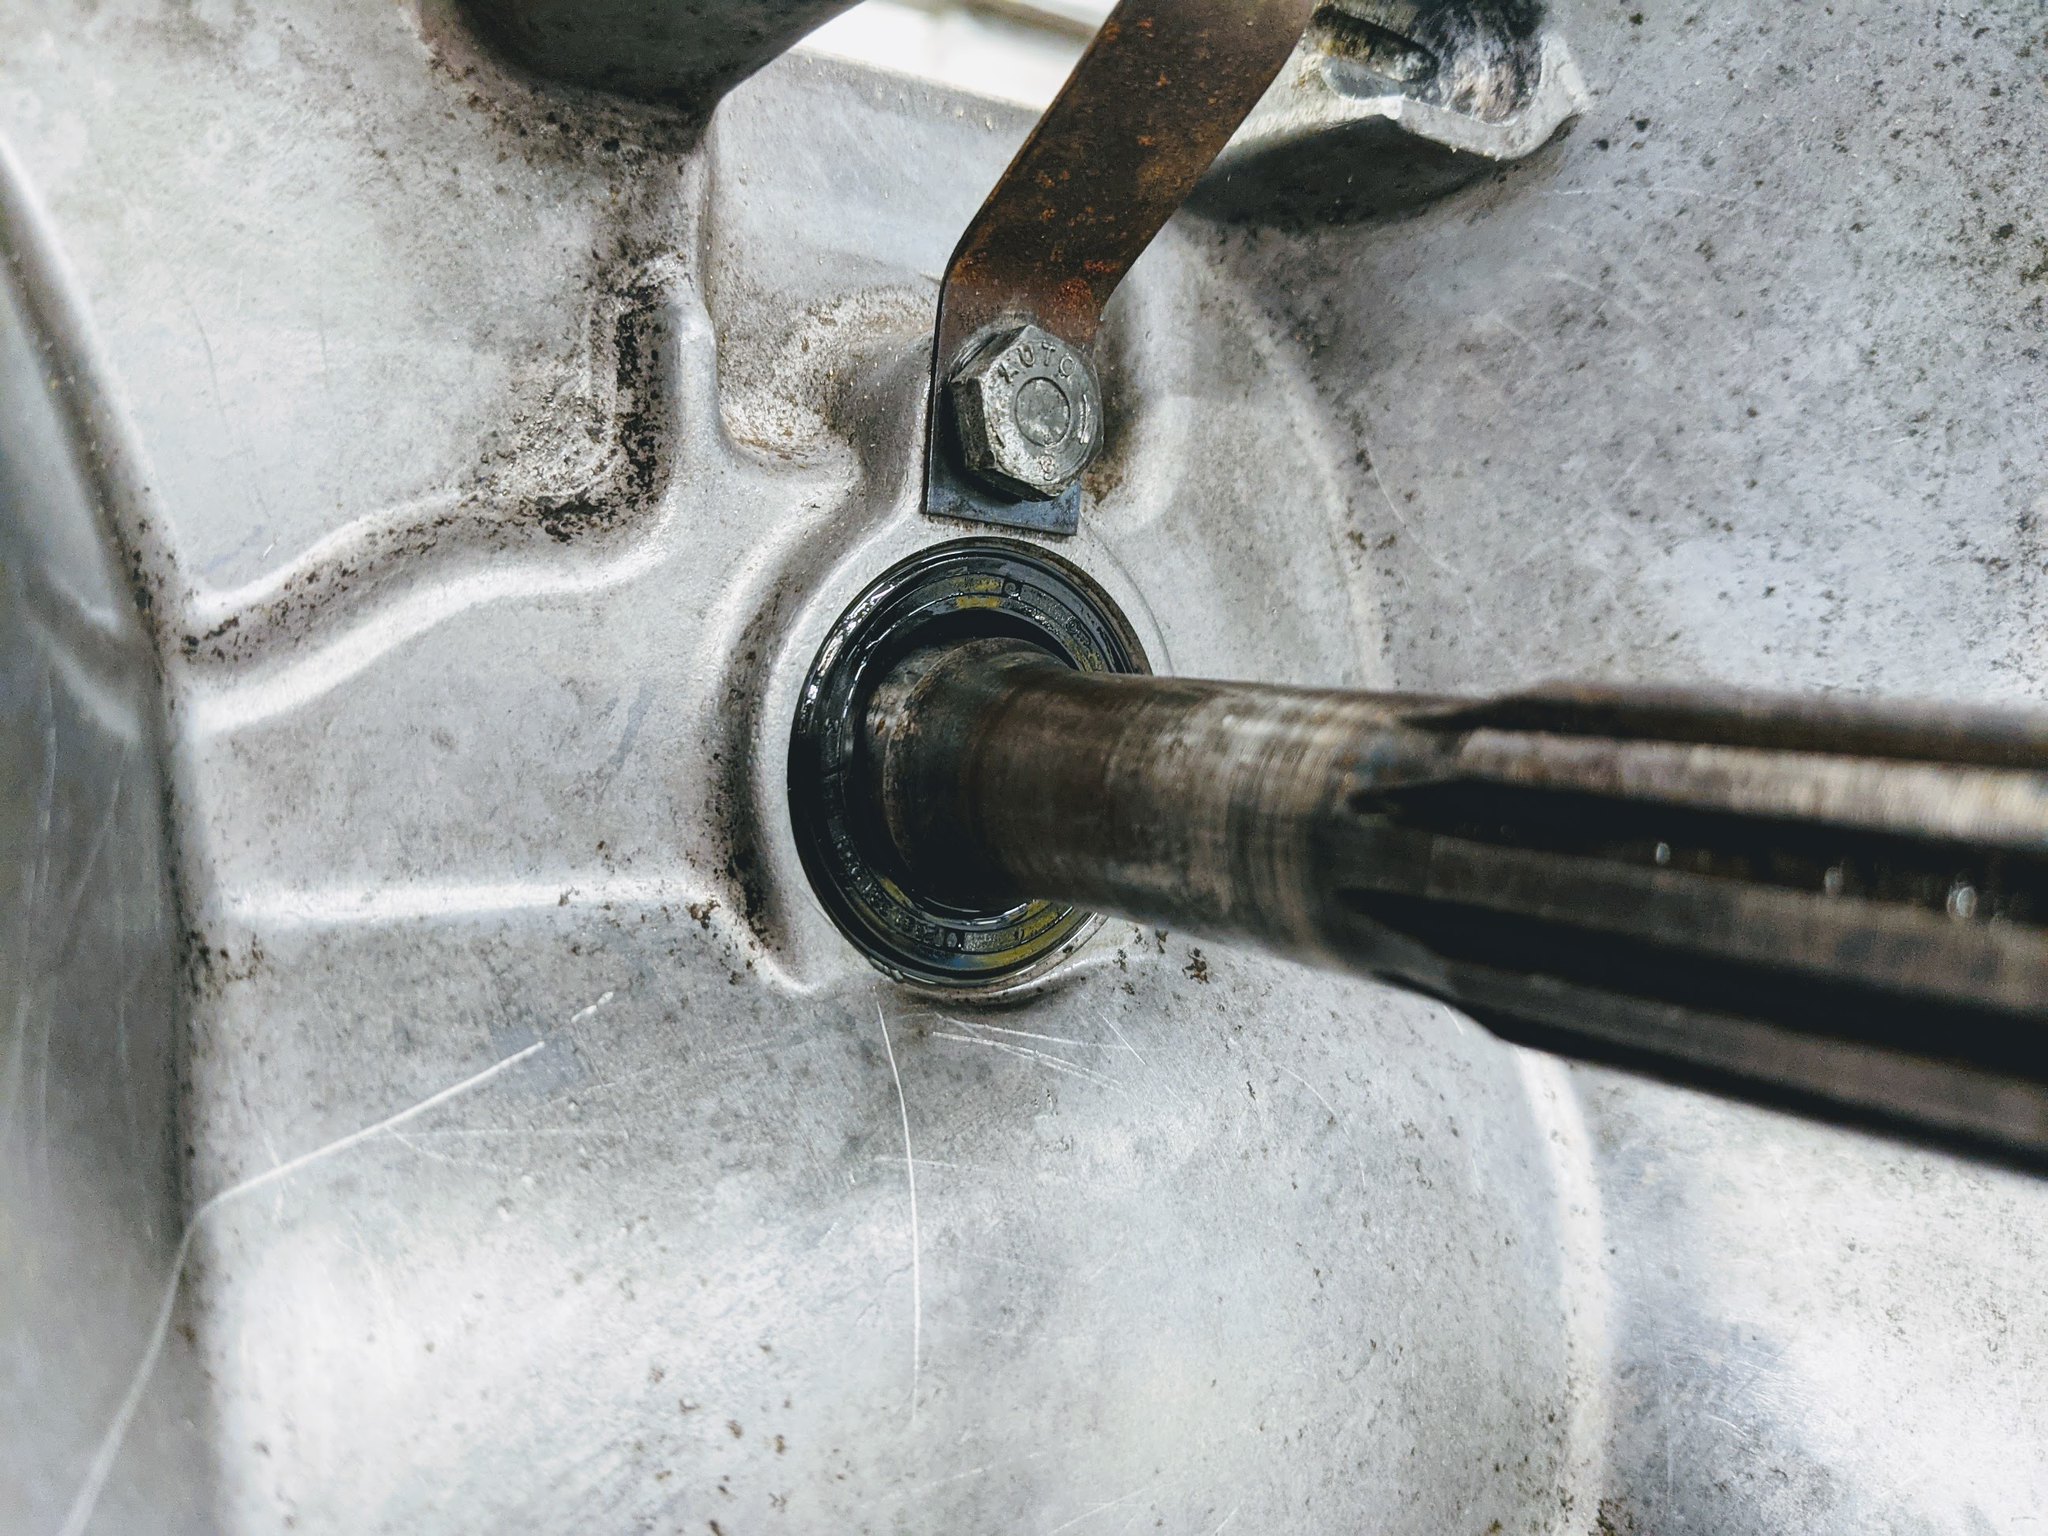
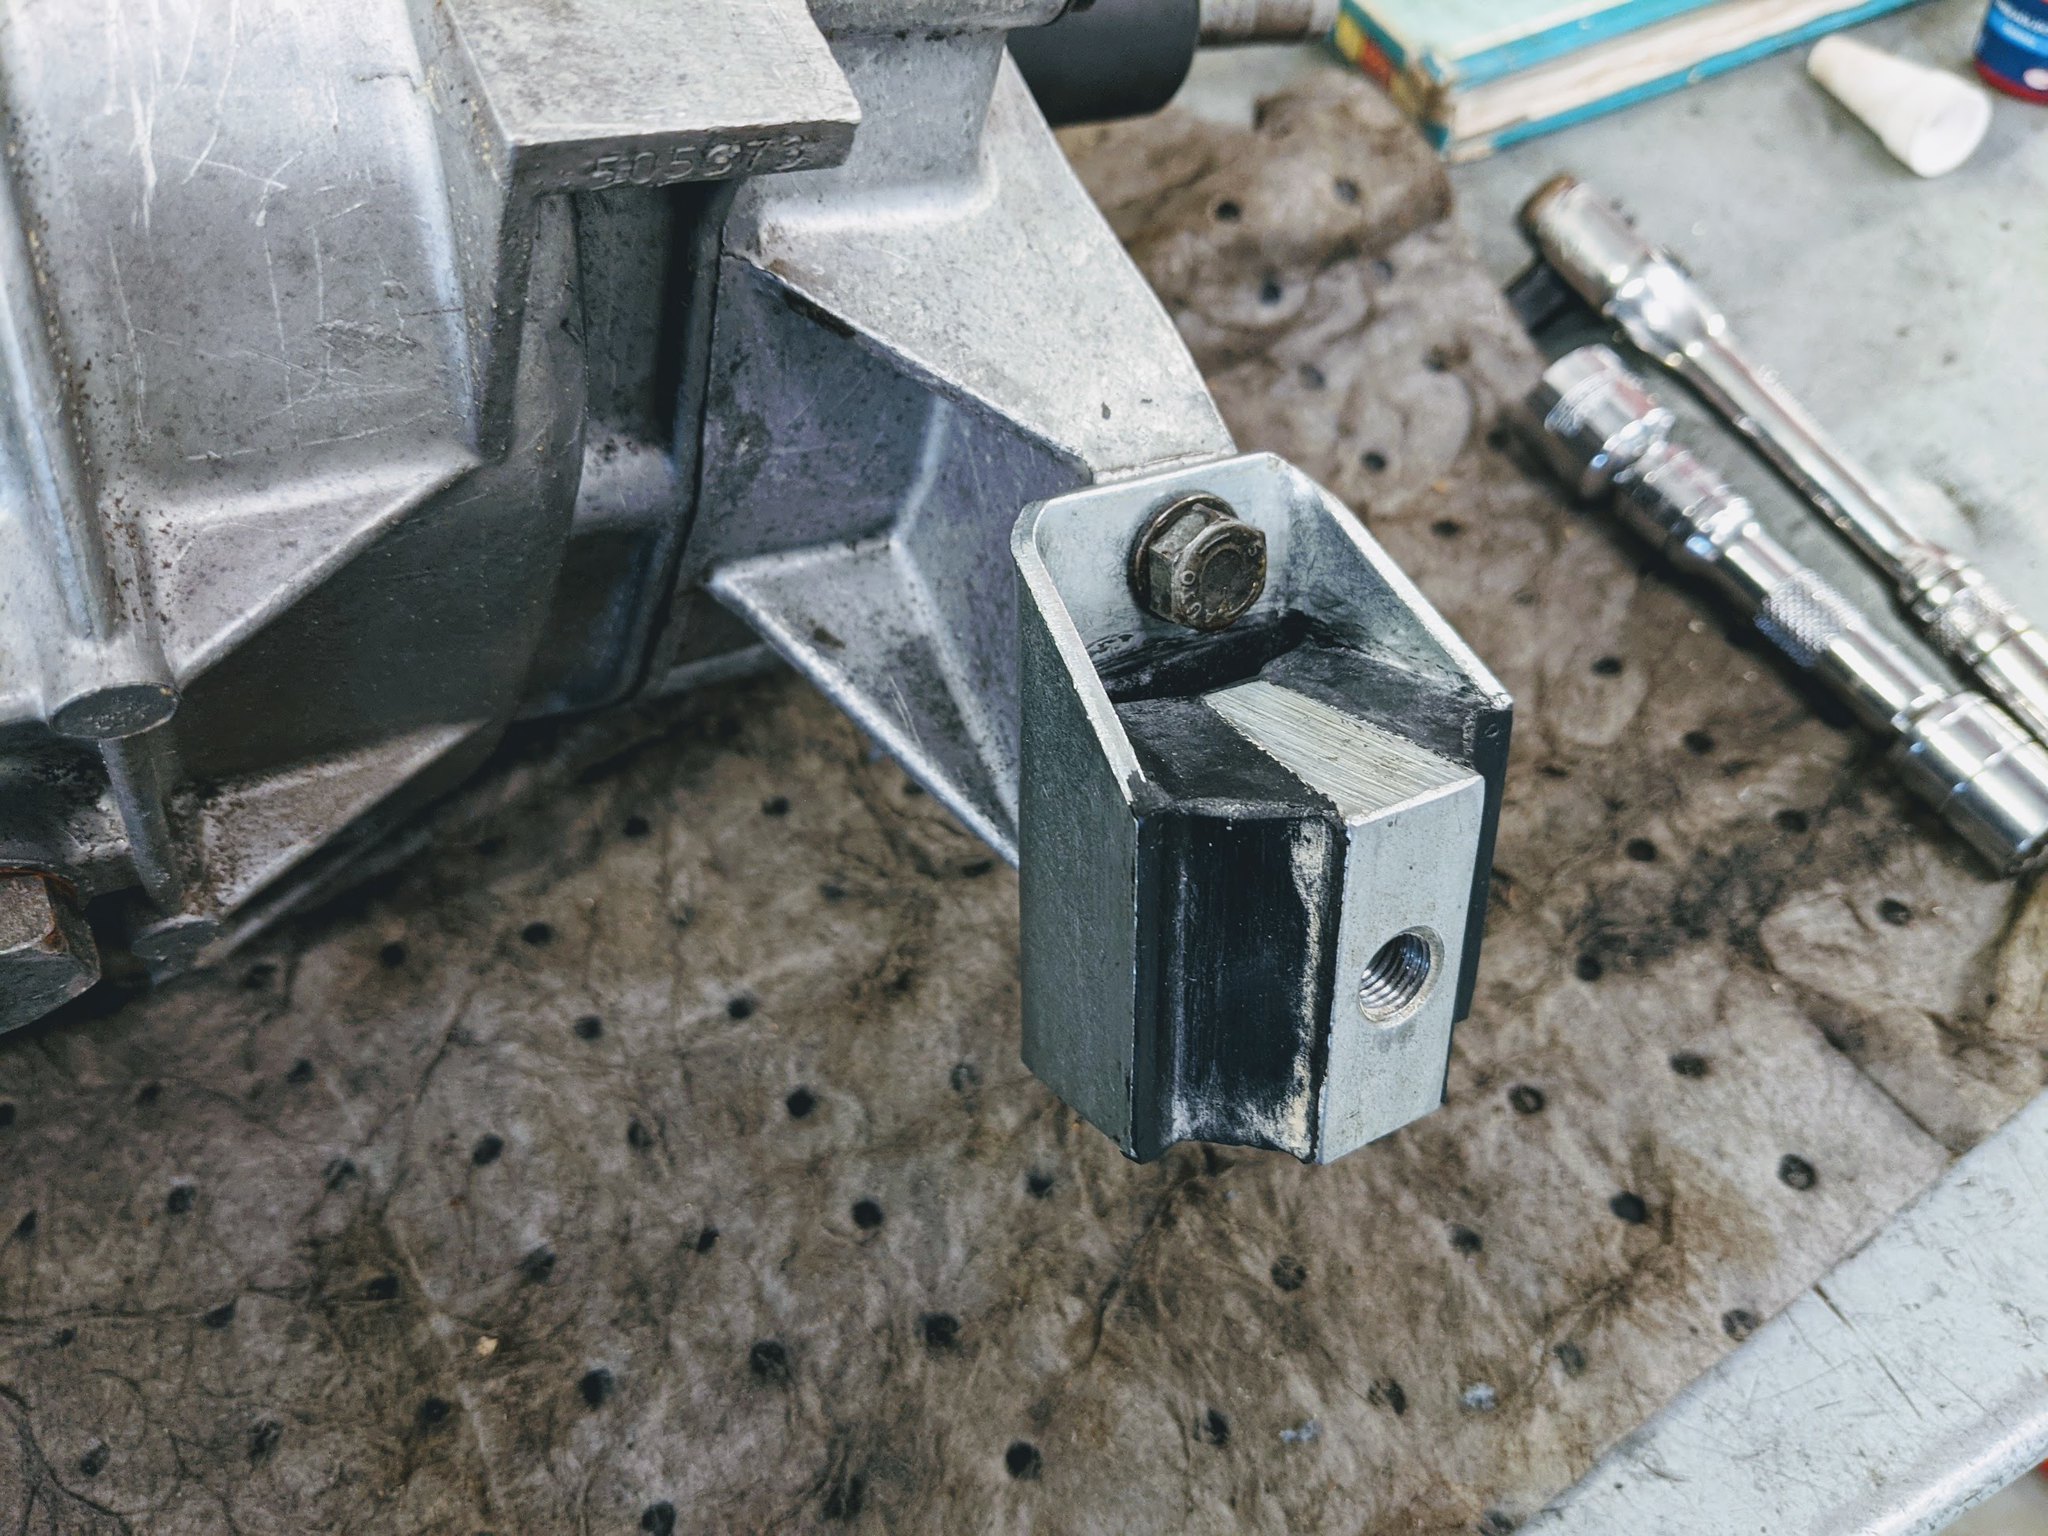
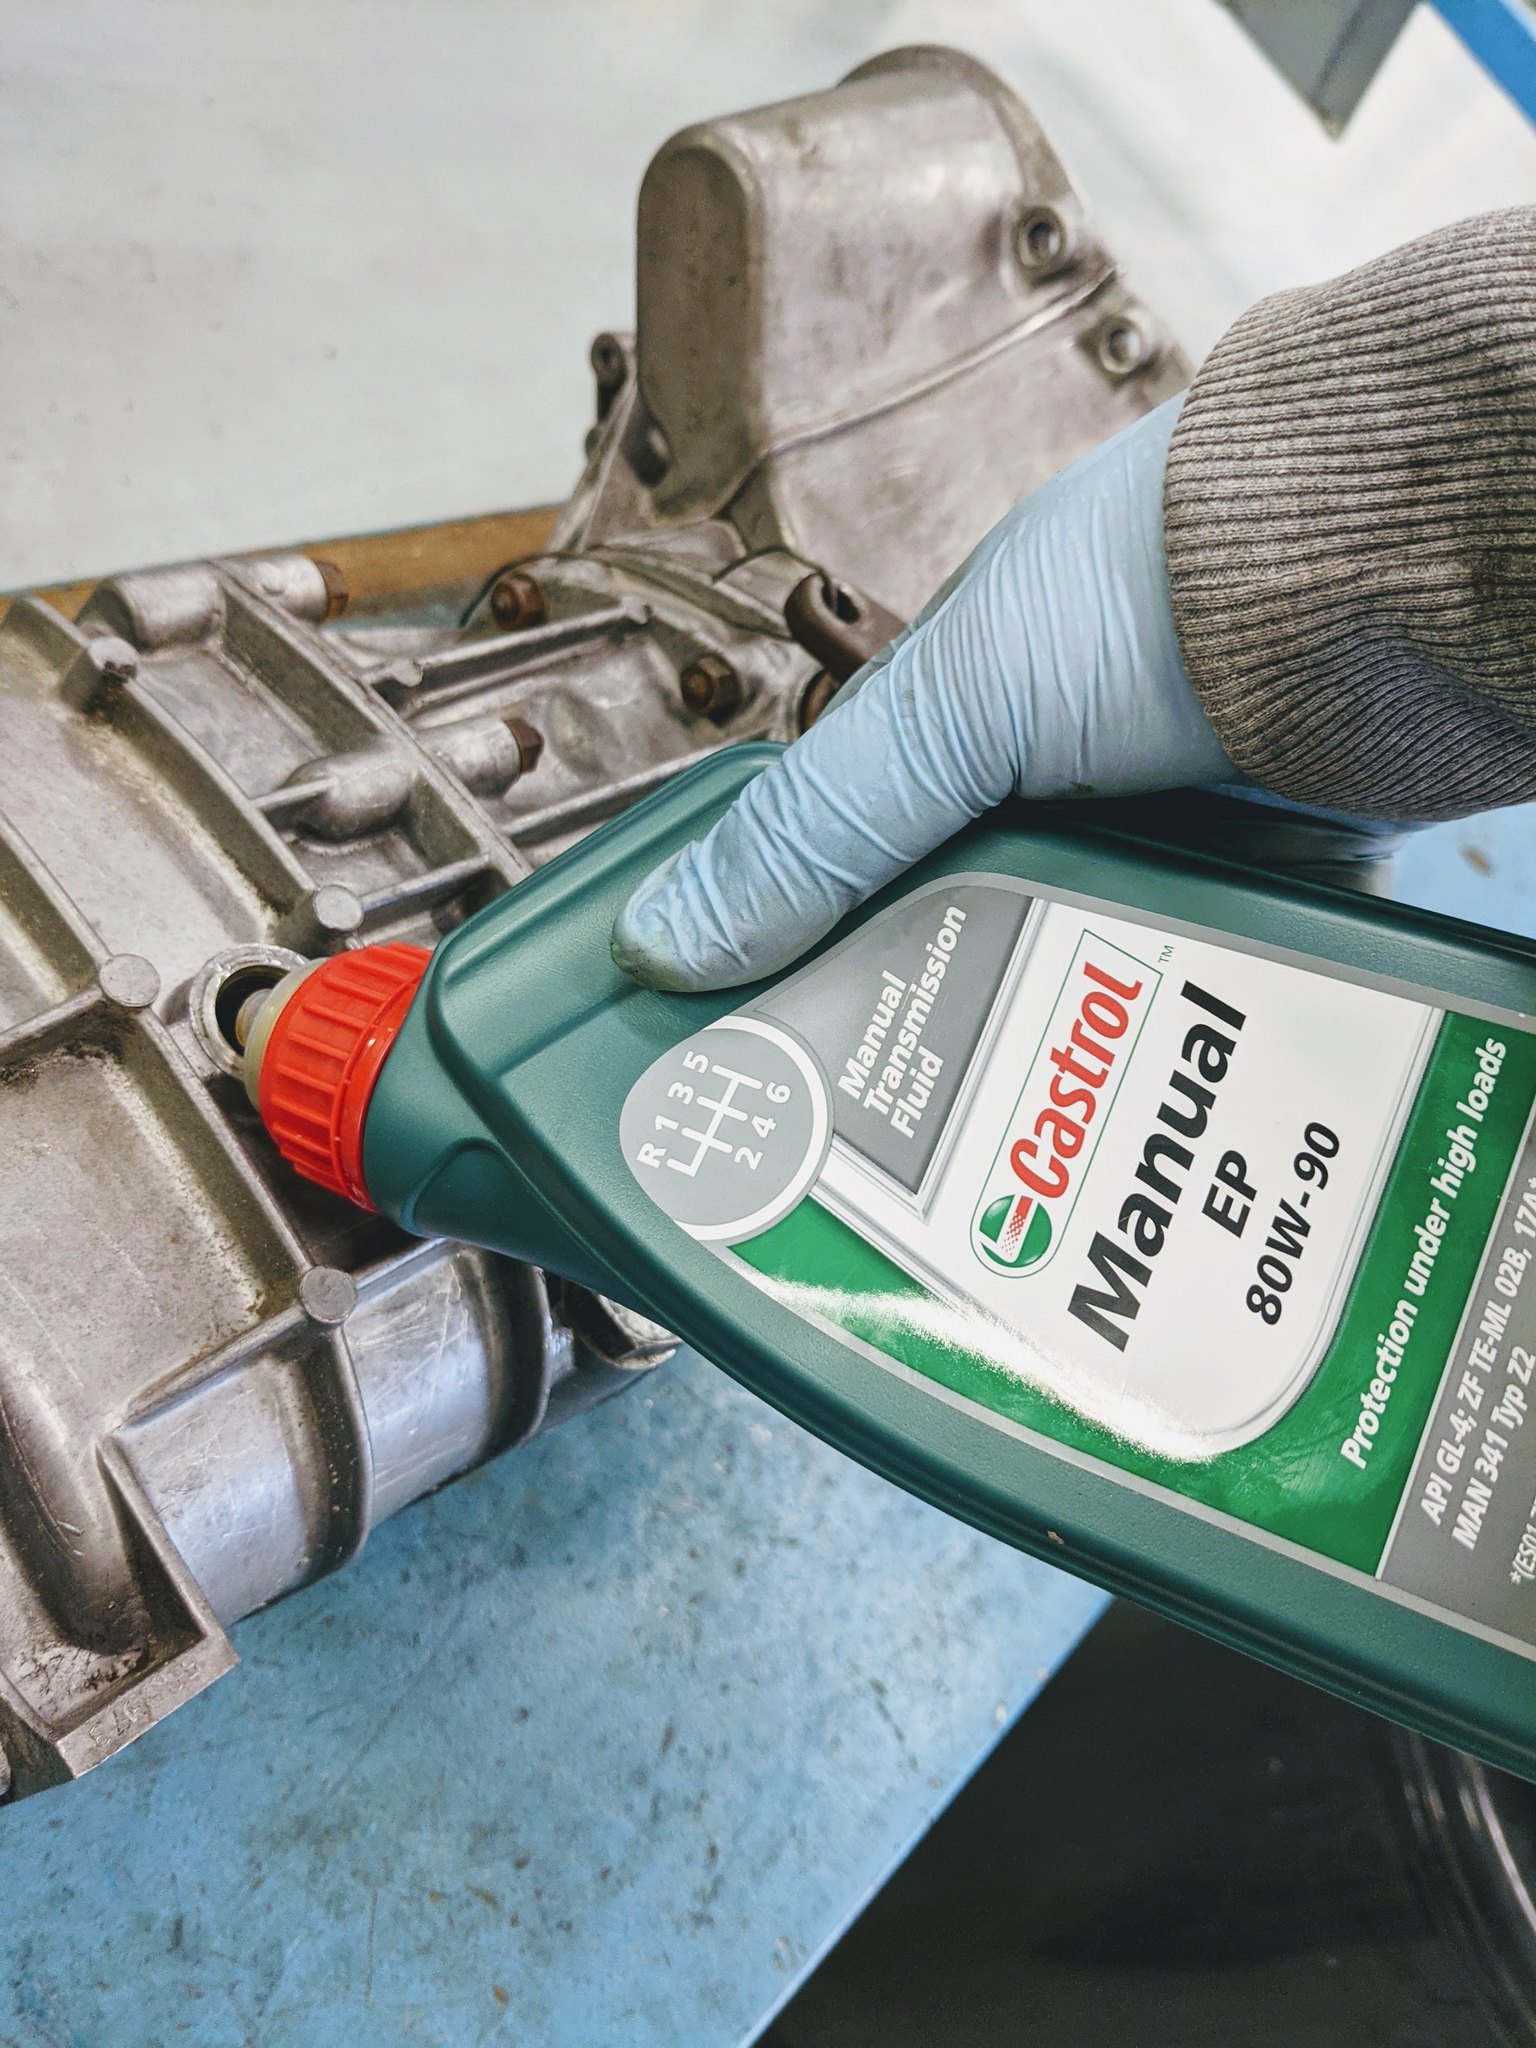
I then replaced the input and both output seals, as well as changing the transmission mounts with new ones, before refilling it with the good stuff:
 PXL_20210522_100721039 by Godfrey Hatton, on Flickr
 PXL_20210522_101441294 by Godfrey Hatton, on Flickr
 PXL_20210522_093756732 by Godfrey Hatton, on Flickr
 original_dd94b55c-1829-4f96-8aa8-b29795208043_PXL_20210522_115910684 by Godfrey Hatton, on Flickr
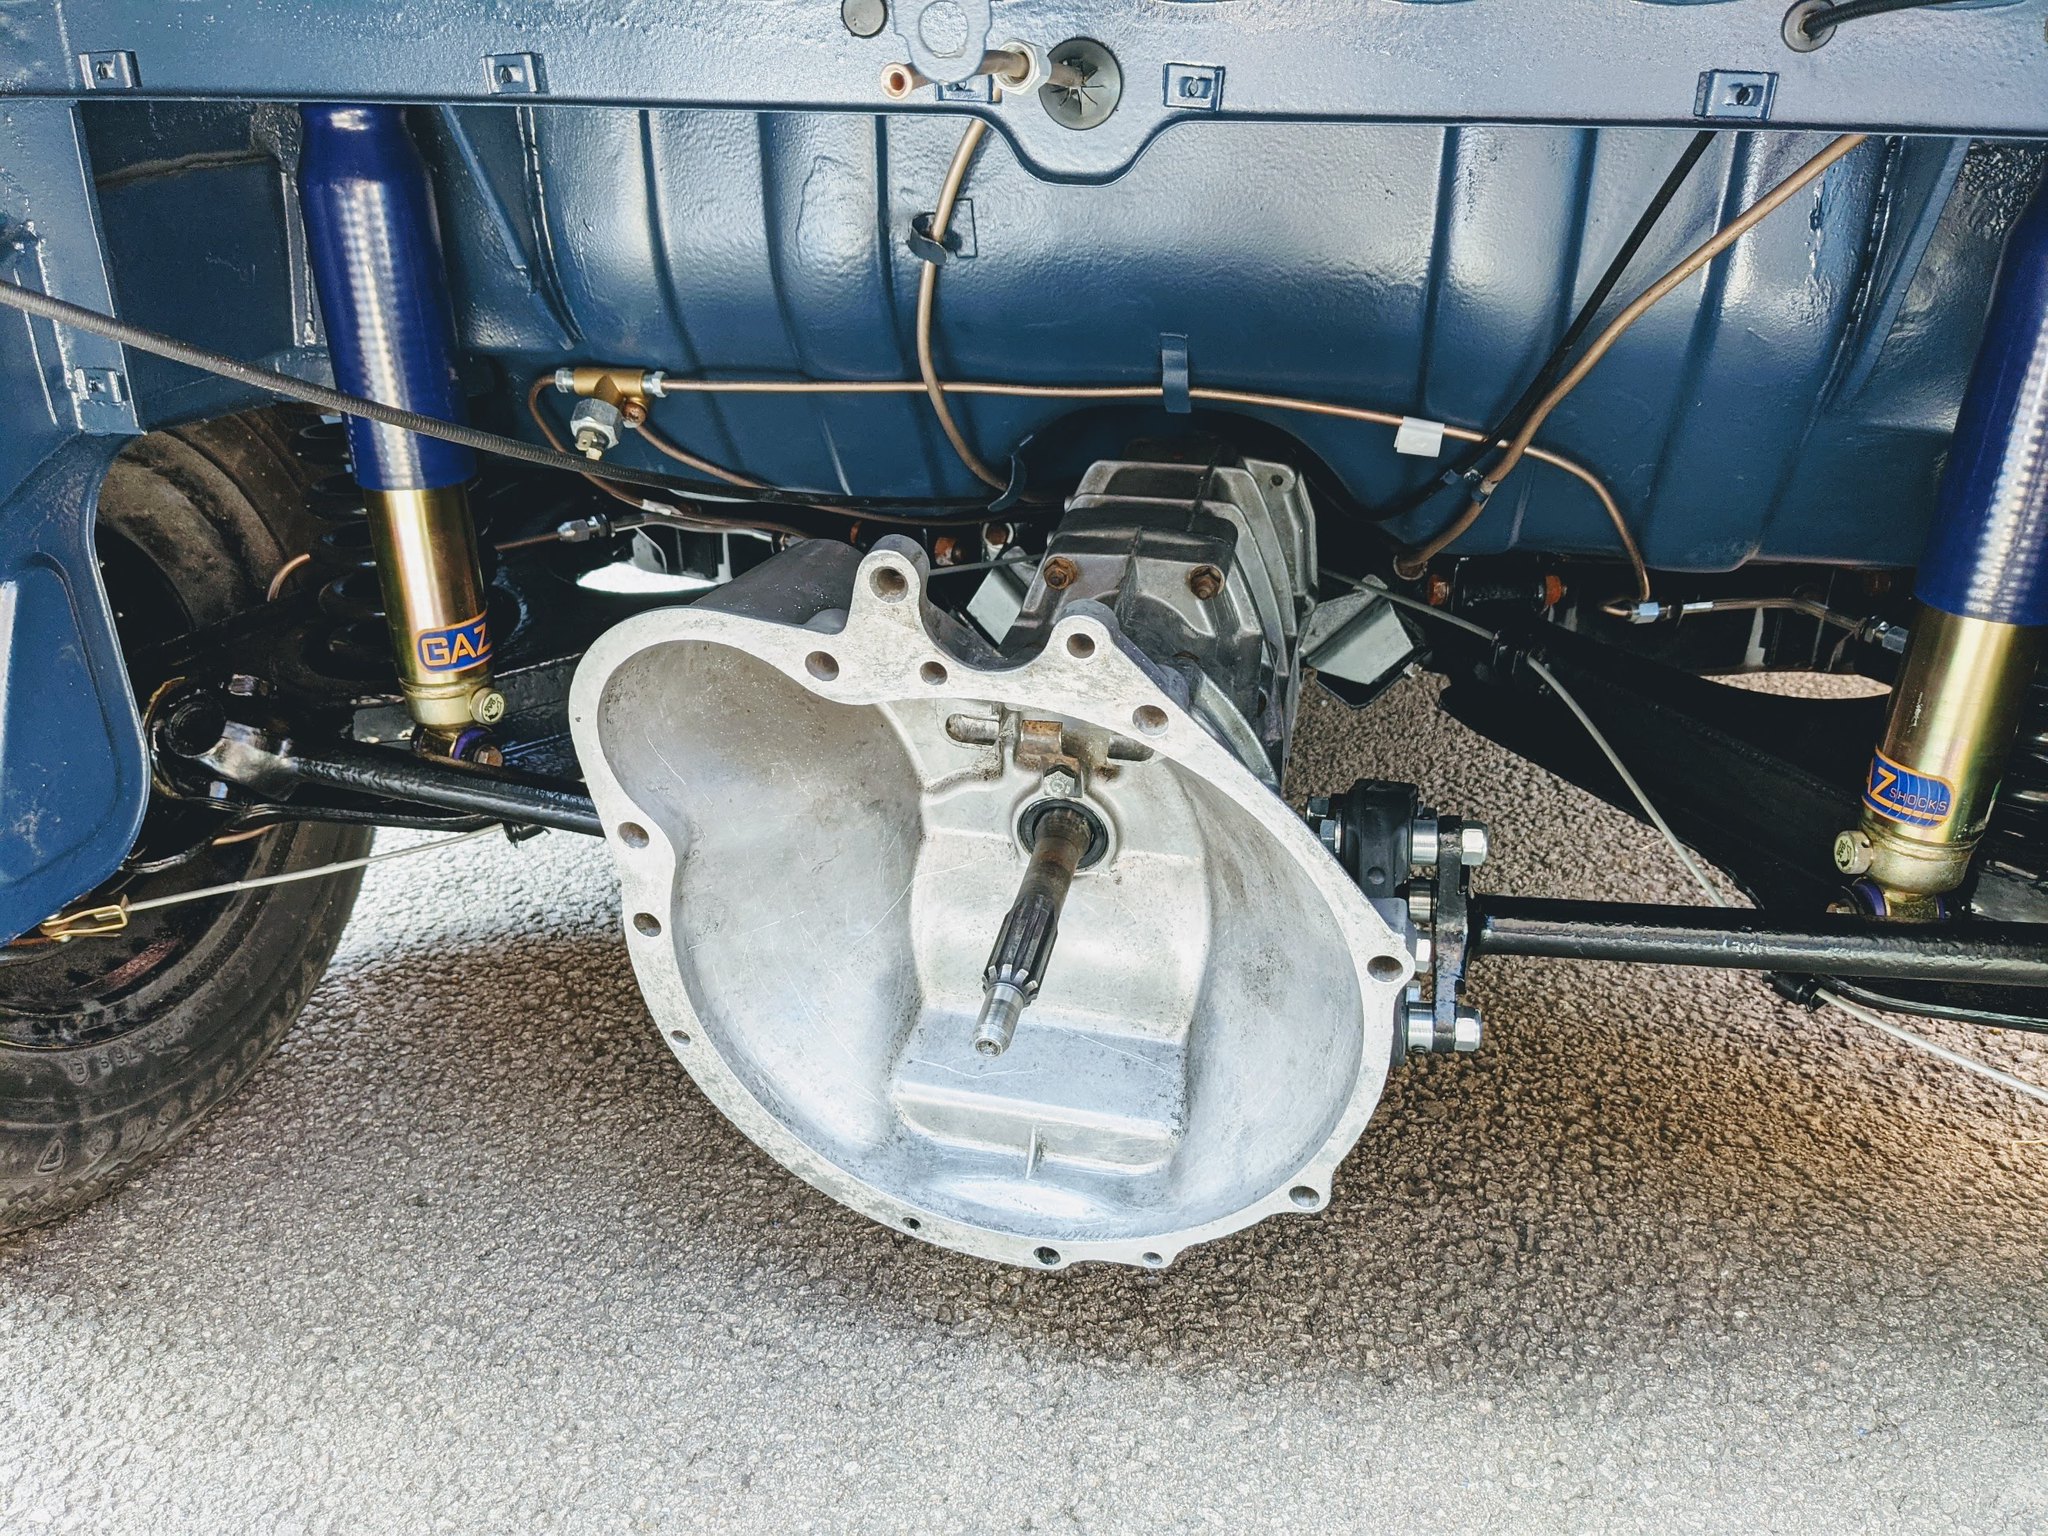
With my gearbox refresh complete, with a bit of luck I can get some healthy miles out of it... And now this brings me to this bank holiday weekend, where I managed to mount and connect up the gearbox. Getting the flexi coupling onto the selector shaft whilst keeping it in neutral was an absolute nightmare! It kept pushing it in too far and then I couldn’t line up the slot for the pinch bolt... got there in the end though! I don’t suppose there’s a knack to it is there? (Don’t worry, I am keeping the box supported so I don’t strain the mounts)
 PXL_20210529_141845571 by Godfrey Hatton, on Flickr
Here’s a video of it all working that I posted on my Instagram, man it felt good to get to this stage, it’s really starting to feel like a car!
 PXL_20210529_171403283 by Godfrey Hatton, on Flickr
I’m now a little bit confused as to what to do next, part of me thinks I should tackle the heater hoses/wiring loom (both of which I need to order), but I’m starting to think I should start with the most daunting of tasks, the exterior bodywork. That’ll be the biggest job I do and so I should start now the weather is getting better, what do you guys think?
Thanks if you’ve stuck with this entire post!
Pog
Apologies for the lack of updates, just haven’t got around to uploading everything. Certainly haven’t been idle though, so hope you guys don’t mind this being a long post so I can bring you all up to speed!
I’ll start with the handbrake. I see what you meant that this would have been easier before the gear linkage! But it was only a little bit fiddly, everything went together okay and now I have a working handbrake
PXL_20210403_171000927 by Godfrey Hatton, on FlickrPXL_20210403_170843016 by Godfrey Hatton, on FlickrI then looked to the gearbox. I have a handful of boxes that came with the car as spares and figured at least one of them might be in decent enough condition just to get the car on the road...
PXL_20210425_133325688 by Godfrey Hatton, on FlickrOne was an early casing box with no breather, so I ruled that out just because. And following your advice, picked the cleanest one and made sure I could select all gears using some mole grips on the selector shaft and that the diff worked. From there I did the following:
Gave it a good clean using the parts washer at work - it came up lovely!
PXL_20210516_155913737 by Godfrey Hatton, on Flickr
Drained the oil - very pleased to see that although a little dark/dirty, there was absolutely no metal swarf, so I’m confident this should prove to be a healthy gearbox. I then flushed some oil through a couple times just to ensure it was nice and clean inside.
PXL_20210522_111609328 by Godfrey Hatton, on FlickrI then replaced the input and both output seals, as well as changing the transmission mounts with new ones, before refilling it with the good stuff:
PXL_20210522_100721039 by Godfrey Hatton, on FlickrPXL_20210522_101441294 by Godfrey Hatton, on FlickrPXL_20210522_093756732 by Godfrey Hatton, on Flickroriginal_dd94b55c-1829-4f96-8aa8-b29795208043_PXL_20210522_115910684 by Godfrey Hatton, on FlickrWith my gearbox refresh complete, with a bit of luck I can get some healthy miles out of it... And now this brings me to this bank holiday weekend, where I managed to mount and connect up the gearbox. Getting the flexi coupling onto the selector shaft whilst keeping it in neutral was an absolute nightmare! It kept pushing it in too far and then I couldn’t line up the slot for the pinch bolt... got there in the end though! I don’t suppose there’s a knack to it is there? (Don’t worry, I am keeping the box supported so I don’t strain the mounts)
PXL_20210529_141845571 by Godfrey Hatton, on FlickrHere’s a video of it all working that I posted on my Instagram, man it felt good to get to this stage, it’s really starting to feel like a car!
PXL_20210529_171403283 by Godfrey Hatton, on FlickrI’m now a little bit confused as to what to do next, part of me thinks I should tackle the heater hoses/wiring loom (both of which I need to order), but I’m starting to think I should start with the most daunting of tasks, the exterior bodywork. That’ll be the biggest job I do and so I should start now the weather is getting better, what do you guys think?
Thanks if you’ve stuck with this entire post!
Pog
Young Imp Members Registrar
-
moose
- Posts: 1108
- Joined: Wed Jan 28, 2004 11:41 am
- Club Member: Yes
- Car Model: rally imp
- Location: forton lancashire north england
- Has thanked: 4 times
- Been thanked: 207 times
Re: EHK 744G - 1969 Super - gearbox in!
Good progress there pal. I would make a list of everything you think needs doing and high light everything you complete as and when you do it. Seeing the list get smaller is an inspiration. Try to list jobs you know are easy and want to get stuck into amongst jobs you feel you will find harder to do and then is one of the harder jobs is a mare leave it and move onto a simpler task for that sense of achievement at the end of the day. The wiring loom and hoses are not difficult if you have done them before and learnt a technique. For the hoses i start at the pocket by back seat feed the hose down the wheel arch towards the front of a car and guide it through the box section at bottom of the bin with the other hand. I use brake cleaner to make the pipe slippy so it slides through the shell. Slow and steady and working out what it has jammed on and back tracking is better than going in at the job with a negative attitude because people say it is a difficult job. Once it has appeared out the front end of the sill a second person care fully pulling on the pipe as you continue to guide it the two ends are then the easy bit to pass through.
Regards Moose imp competition secretary
-
impmann
- Posts: 543
- Joined: Tue Sep 09, 2003 11:27 am
- Club Member: Yes
- Car Model: ...er, one or two
- Location: Midlands
- Has thanked: 18 times
- Been thanked: 69 times
Re: EHK 744G - 1969 Super - gearbox in!
You really ought to support the gearbox at the bell housing end if there is no engine in there. It bends the flexi shaft and stretches the gearbox mounts.
The standard scissor jack is very handy for this.
The standard scissor jack is very handy for this.

Tim Morgan
Imps since 1987... one or two of them. ;-)
Imps since 1987... one or two of them. ;-)
-
Pog
- Posts: 142
- Joined: Sat Aug 24, 2013 4:55 pm
- Club Member: Yes
- Car Model: 1969 Super 'Betty'
- Location: Northampton, UK
- Has thanked: 10 times
- Been thanked: 37 times
Re: EHK 744G - 1969 Super - gearbox in!
As above, "(Don’t worry, I am keeping the box supported so I don’t strain the mounts)"
But thanks for looking out

Pog
Young Imp Members Registrar
-
colimp66

- Posts: 702
- Joined: Wed Dec 17, 2008 8:17 pm
- Club Member: Yes
- Car Model: 1970 Hillman Imp Deluxe.. "The Pest"
- Location: Dunbar, East Lothian, Scotland
- Has thanked: 60 times
- Been thanked: 53 times
Re: EHK 744G - 1969 Super - gearbox in!
Pog,
A long post is great to see if it has progress reports and photos of a restoration which is moving forward.
Good luck with the rest of the build, gets closer with every bit you can get done, brilliant stuff.
Cheers
Col.
A long post is great to see if it has progress reports and photos of a restoration which is moving forward.
Good luck with the rest of the build, gets closer with every bit you can get done, brilliant stuff.
Cheers
Col.
-
Pog
- Posts: 142
- Joined: Sat Aug 24, 2013 4:55 pm
- Club Member: Yes
- Car Model: 1969 Super 'Betty'
- Location: Northampton, UK
- Has thanked: 10 times
- Been thanked: 37 times
Re: EHK 744G - 1969 Super - gearbox in!
Thanks Mike, some good tips there.
I'm now wishing I ordered the wiring loom sooner, as the lead time from Autosparks is 14-18 weeks! Before I click order, I'd just like to confirm I am looking at the right one for my car, as they are non returnable due to being a bespoke made loom, which makes me nervous if I get it wrong!
https://www.autosparks.co.uk/hillman-im ... ness-set-5
The description states this is for the printed circuit dash, that does mean the later round dial dash doesn't it?
Pog
Young Imp Members Registrar
-
The Nun
- Posts: 2918
- Joined: Tue Jan 23, 2007 7:02 pm
- Club Member: Yes
- Car Model: Imp
- Location: South
- Has thanked: 74 times
- Been thanked: 104 times
Re: EHK 744G - 1969 Super - gearbox in!
Yes printed circuit is the Chrysler imp with the plastic dash round instruments, if you're ordering from Autosparks and aren't sure yourself which you need ring them and give them the cars chassis number
Peter Nunn...ey im member 00033
-
ImpManiac

- Posts: 1855
- Joined: Tue Feb 01, 2005 3:48 pm
- Club Member: Yes
- Car Model: Singer Chamois
- Location: Houghton Regis, Bedfordshire
- Has thanked: 184 times
- Been thanked: 13 times
Re: EHK 744G - 1969 Super - gearbox in!
You're doing a fabulous job on your Imp, Pog!  Keep up the great work.
IM
IM
Paul Harrison
imp: a small demon : FIEND : a mischievous child : URCHIN
maniac: Raging with disordered intellect: affected with mania: MAD
imp: a small demon : FIEND : a mischievous child : URCHIN
maniac: Raging with disordered intellect: affected with mania: MAD
-
Pog
- Posts: 142
- Joined: Sat Aug 24, 2013 4:55 pm
- Club Member: Yes
- Car Model: 1969 Super 'Betty'
- Location: Northampton, UK
- Has thanked: 10 times
- Been thanked: 37 times
Re: EHK 744G - 1969 Super - planning bits...
Thanks IM!
At the moment I'm organising a couple more things which I know will have a long lead time:
1. Carburettor rebuild. In one of the many boxes that came with the car were a pair of stroms, complete with the manifold and airbox, which I believe came from a stiletto the previous owner scrapped and kept some of the goodies. Now I'm very aware of their shortfalls, which is why I plan to send them off to a specialist for a complete rebuild. The place I've found caught my eye as they actually rebush the spindle housing with PTFE, so should last forever once done. The lead time for this is about 8 weeks.
In terms of carb settings, are the ones on imps4ever pretty accurate? I plan to build up a sport spec type engine - I'll be getting the block machined for over-sized pistons just to ensure completely fresh cylinders, and I have a 533 head which I'll convert to sport inlets and get some light porting done. (Essentially I just want to build what on paper should be a happy little engine for some mild spirited driving.) The Imp Site page suggests 6K needles and blue springs, does that sound like it should match my plans?
2. Fibreglass bonnet and engine lid. My front bonnet is looking pretty sorry along the usual front lip and at the back where the weatherstrip has perished. Even if it was in better nick, it's of the Chrysler cost cutting types with just one strengthening brace. So I'm keen to swap to a fibreglass panel for the obvious benefits. While I'm at it, the engine lid will benefit from the same swap. I haven't heard the greatest of things about Fibreclass, which would have been the obvious choice, but instead have stumbled across http://www.smithanddeakin.co.uk/ and they seem promising. 8 week lead time for these as well.
Any tips and advice is always welcome
Pog
Young Imp Members Registrar
-
John Simister
- Posts: 136
- Joined: Sun Apr 09, 2006 9:16 am
- Club Member: Yes
- Car Model: Sunbeam Stiletto 1968
- Location: Berkhamsted, Herts
Re: EHK 744G - 1969 Super - planning bits...
You're probably on the case with this already, but in case you're not: ideally you should use a Sport camshaft – do you have the one that went with your L4 (533) head? That's a Sport-spec camshaft despite being used in a non-Sport Imp. Also a Sport manifold and silencer, plus a Sport distributor with the right advance curve to suit the camshaft and other Sport-spec bits. Original Lucas numbers were 41132 or 41190 for the 25D distributors, or 41457 for the later 45D distributor. The Distributor Doctor can rebuild your distributor and calibrate it to one of those specs, and fit an electronic module while he's at it. Blue springs and 6K needles are orginal Sport spec and will be fine.
Member number 6. First Imp bought in 1972, 10 more between then and 2019. Currently Impless.
-
The Nun
- Posts: 2918
- Joined: Tue Jan 23, 2007 7:02 pm
- Club Member: Yes
- Car Model: Imp
- Location: South
- Has thanked: 74 times
- Been thanked: 104 times
Re: EHK 744G - 1969 Super - planning bits...
There's 2 types of a Stromberg carbs fitted to the Sport, the 125CDS with the screw driver slotted jet adjuster, early cars and the Stromberg 125CD3 with the castle nut adjuster, these were fitted to the later Sports have different needles and NO damper spring at all. Both your carbs to be a matched pair.
Peter Nunn...ey im member 00033
-
Pog
- Posts: 142
- Joined: Sat Aug 24, 2013 4:55 pm
- Club Member: Yes
- Car Model: 1969 Super 'Betty'
- Location: Northampton, UK
- Has thanked: 10 times
- Been thanked: 37 times
Re: EHK 744G - 1969 Super - planning bits...
Thanks John, yes already sourced a sport cam and carrier. Also in a box was a genuine manifold and silencer that genuinely doesn't look like it's ever been fitted, just surface corrosion, so I plan to send them off for ceramic coating to preserve them and gain the benefits of lower engine bay temperatures. As for distributor, I'm keen to go for a 123 system, as if I ever plan to upgrade the engine further it can just be reprogrammed for a different advance curve. I also love that they do one that allows you to immobilise it via Bluetooth for added security, a worthwhile feature for sure.
Good to know, Nun. Fortunately both of mine are stamped CDS so seem to be a proper matching pair.
Pog
Good to know, Nun. Fortunately both of mine are stamped CDS so seem to be a proper matching pair.
Pog
Young Imp Members Registrar
-
Pog
- Posts: 142
- Joined: Sat Aug 24, 2013 4:55 pm
- Club Member: Yes
- Car Model: 1969 Super 'Betty'
- Location: Northampton, UK
- Has thanked: 10 times
- Been thanked: 37 times
Re: EHK 744G - 1969 Super - planning bits...
Hi all,
Well the weather has been awful lately hasn’t it? Really prevented me from working on the car at the weekends like I’d hope to, so it’s just a small update today…
Fitted my strengthened clutch fork and new roller release bearing (thanks Robin Human), so that was at least a nice quick job:
 IMG-20210804-WA0003 by Godfrey Hatton, on Flickr
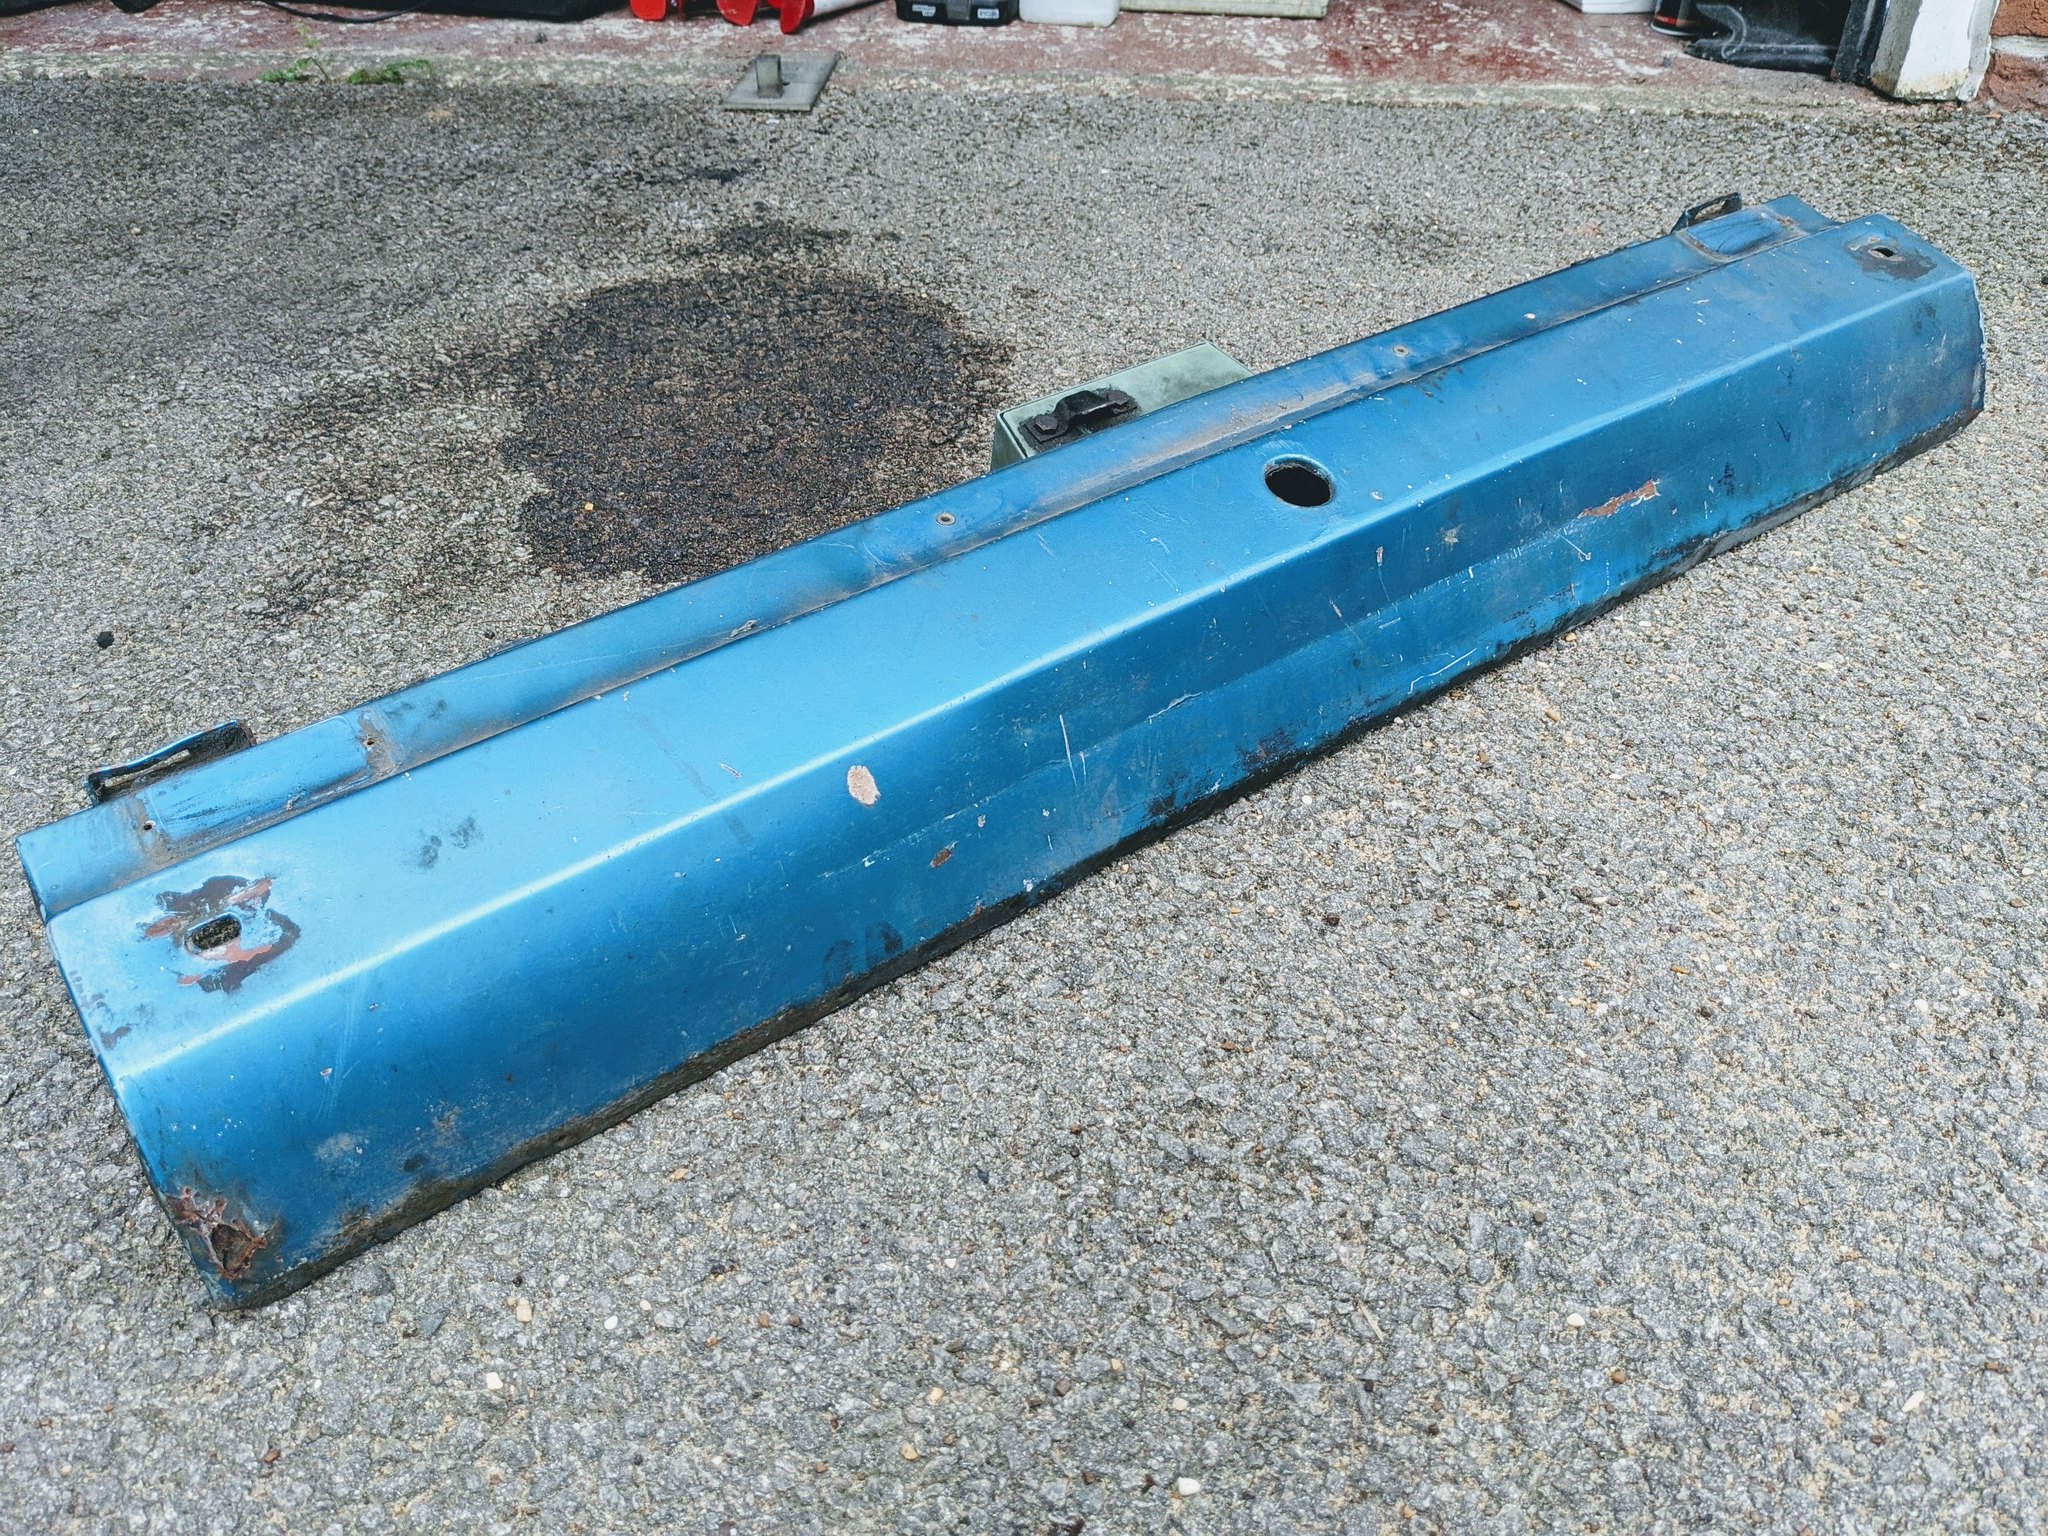
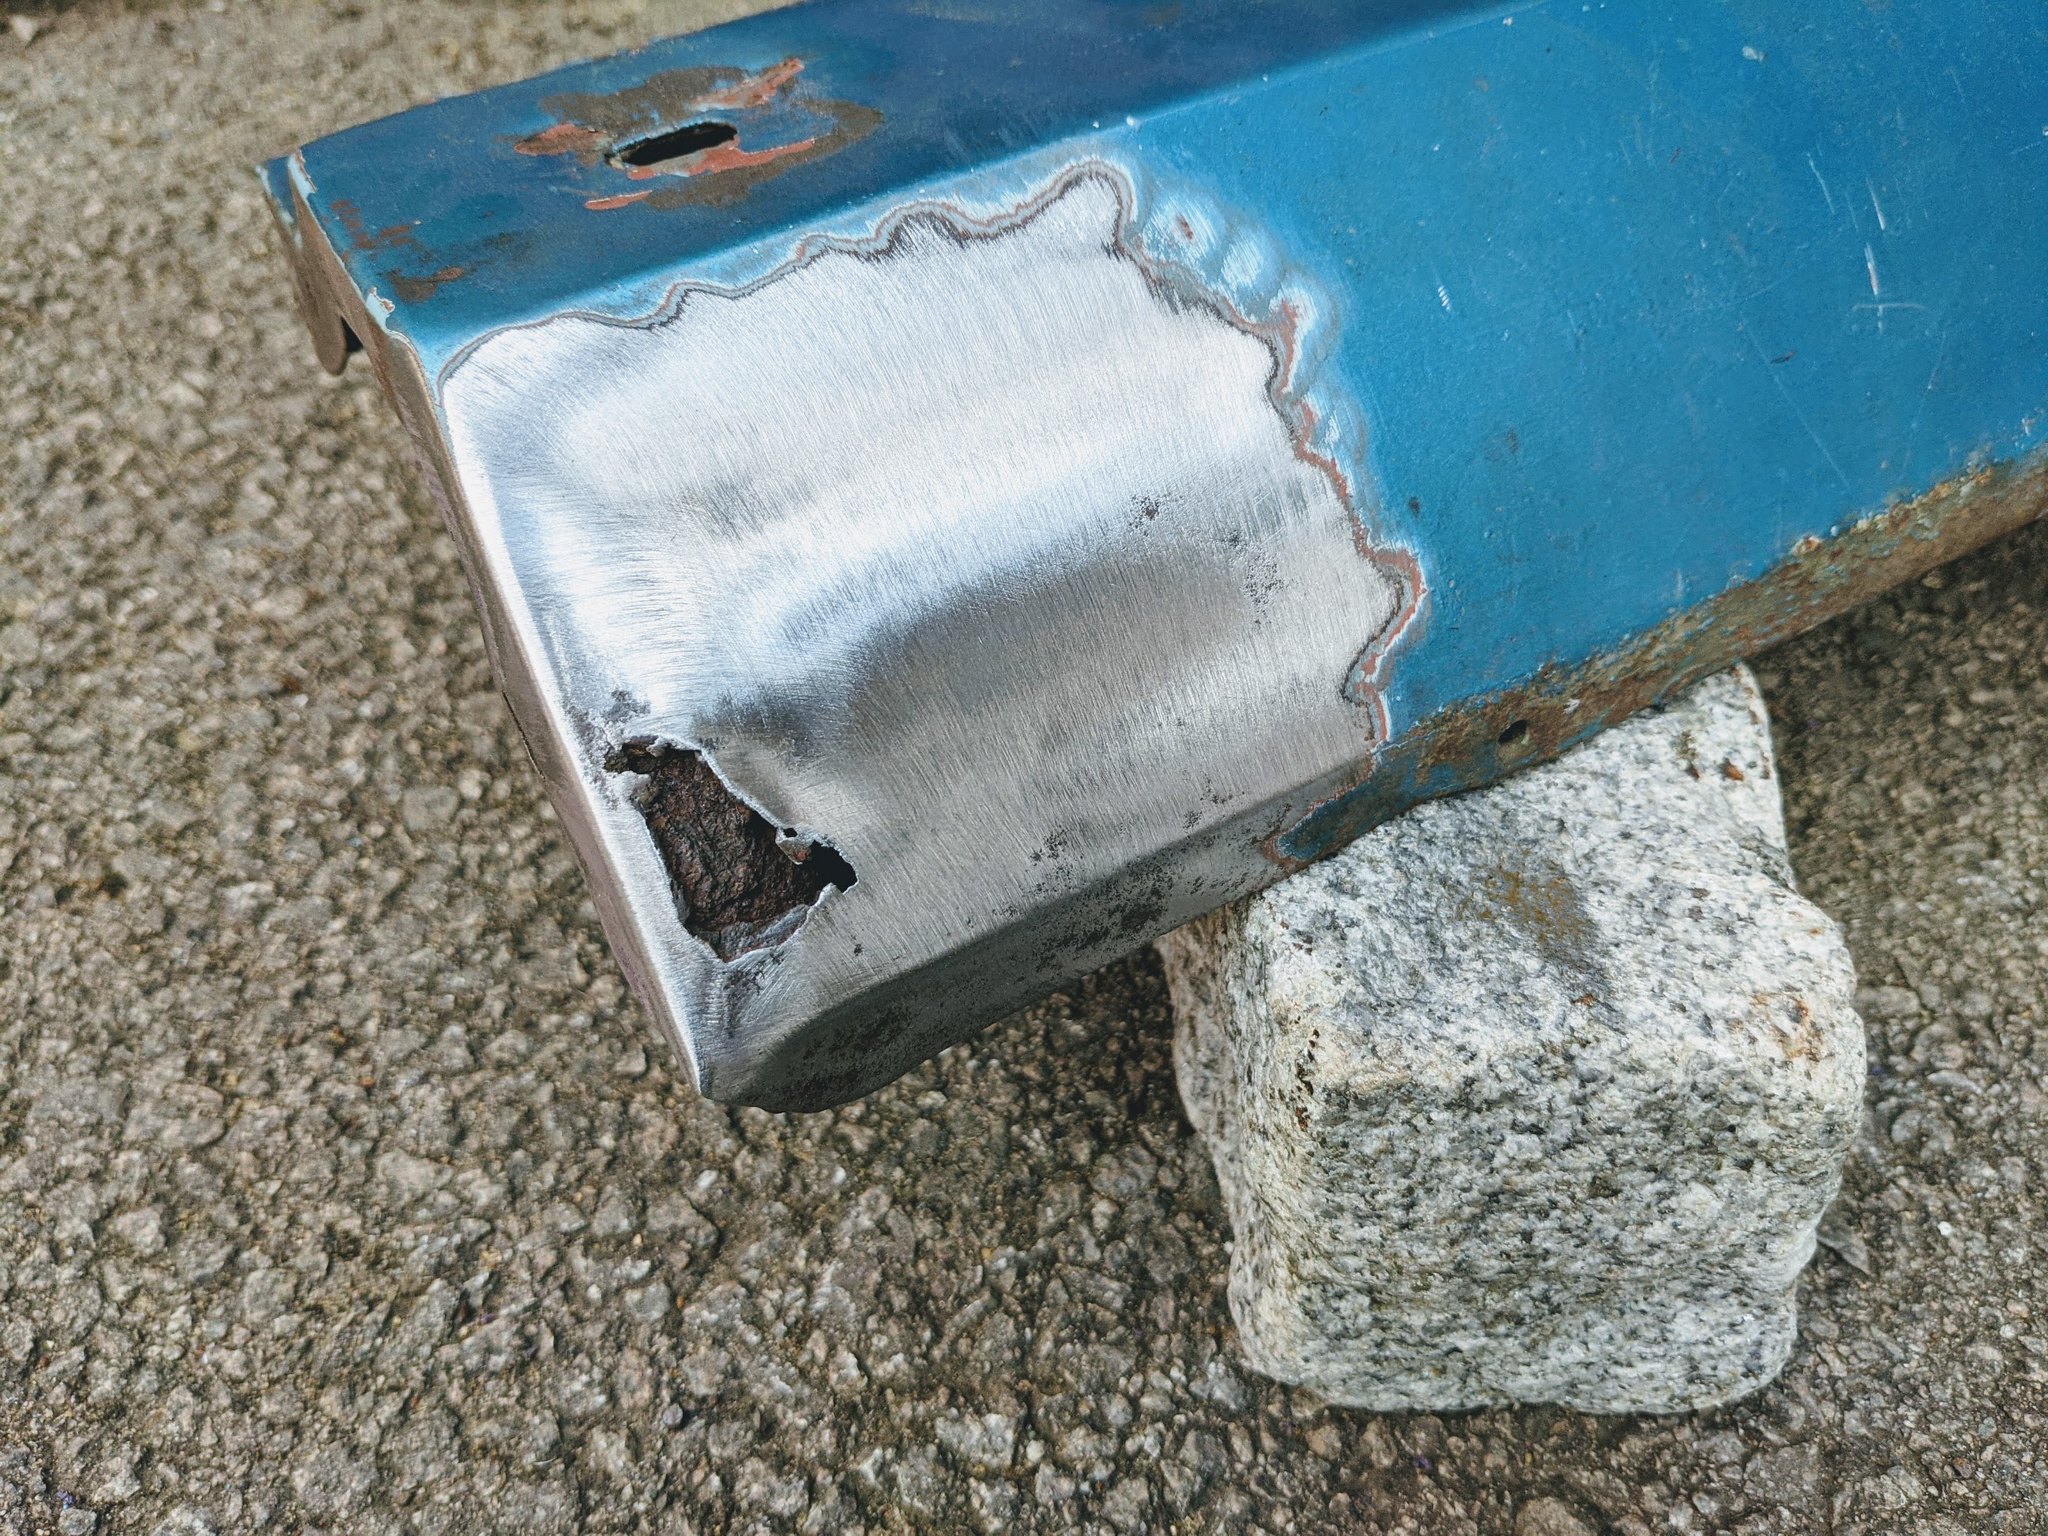
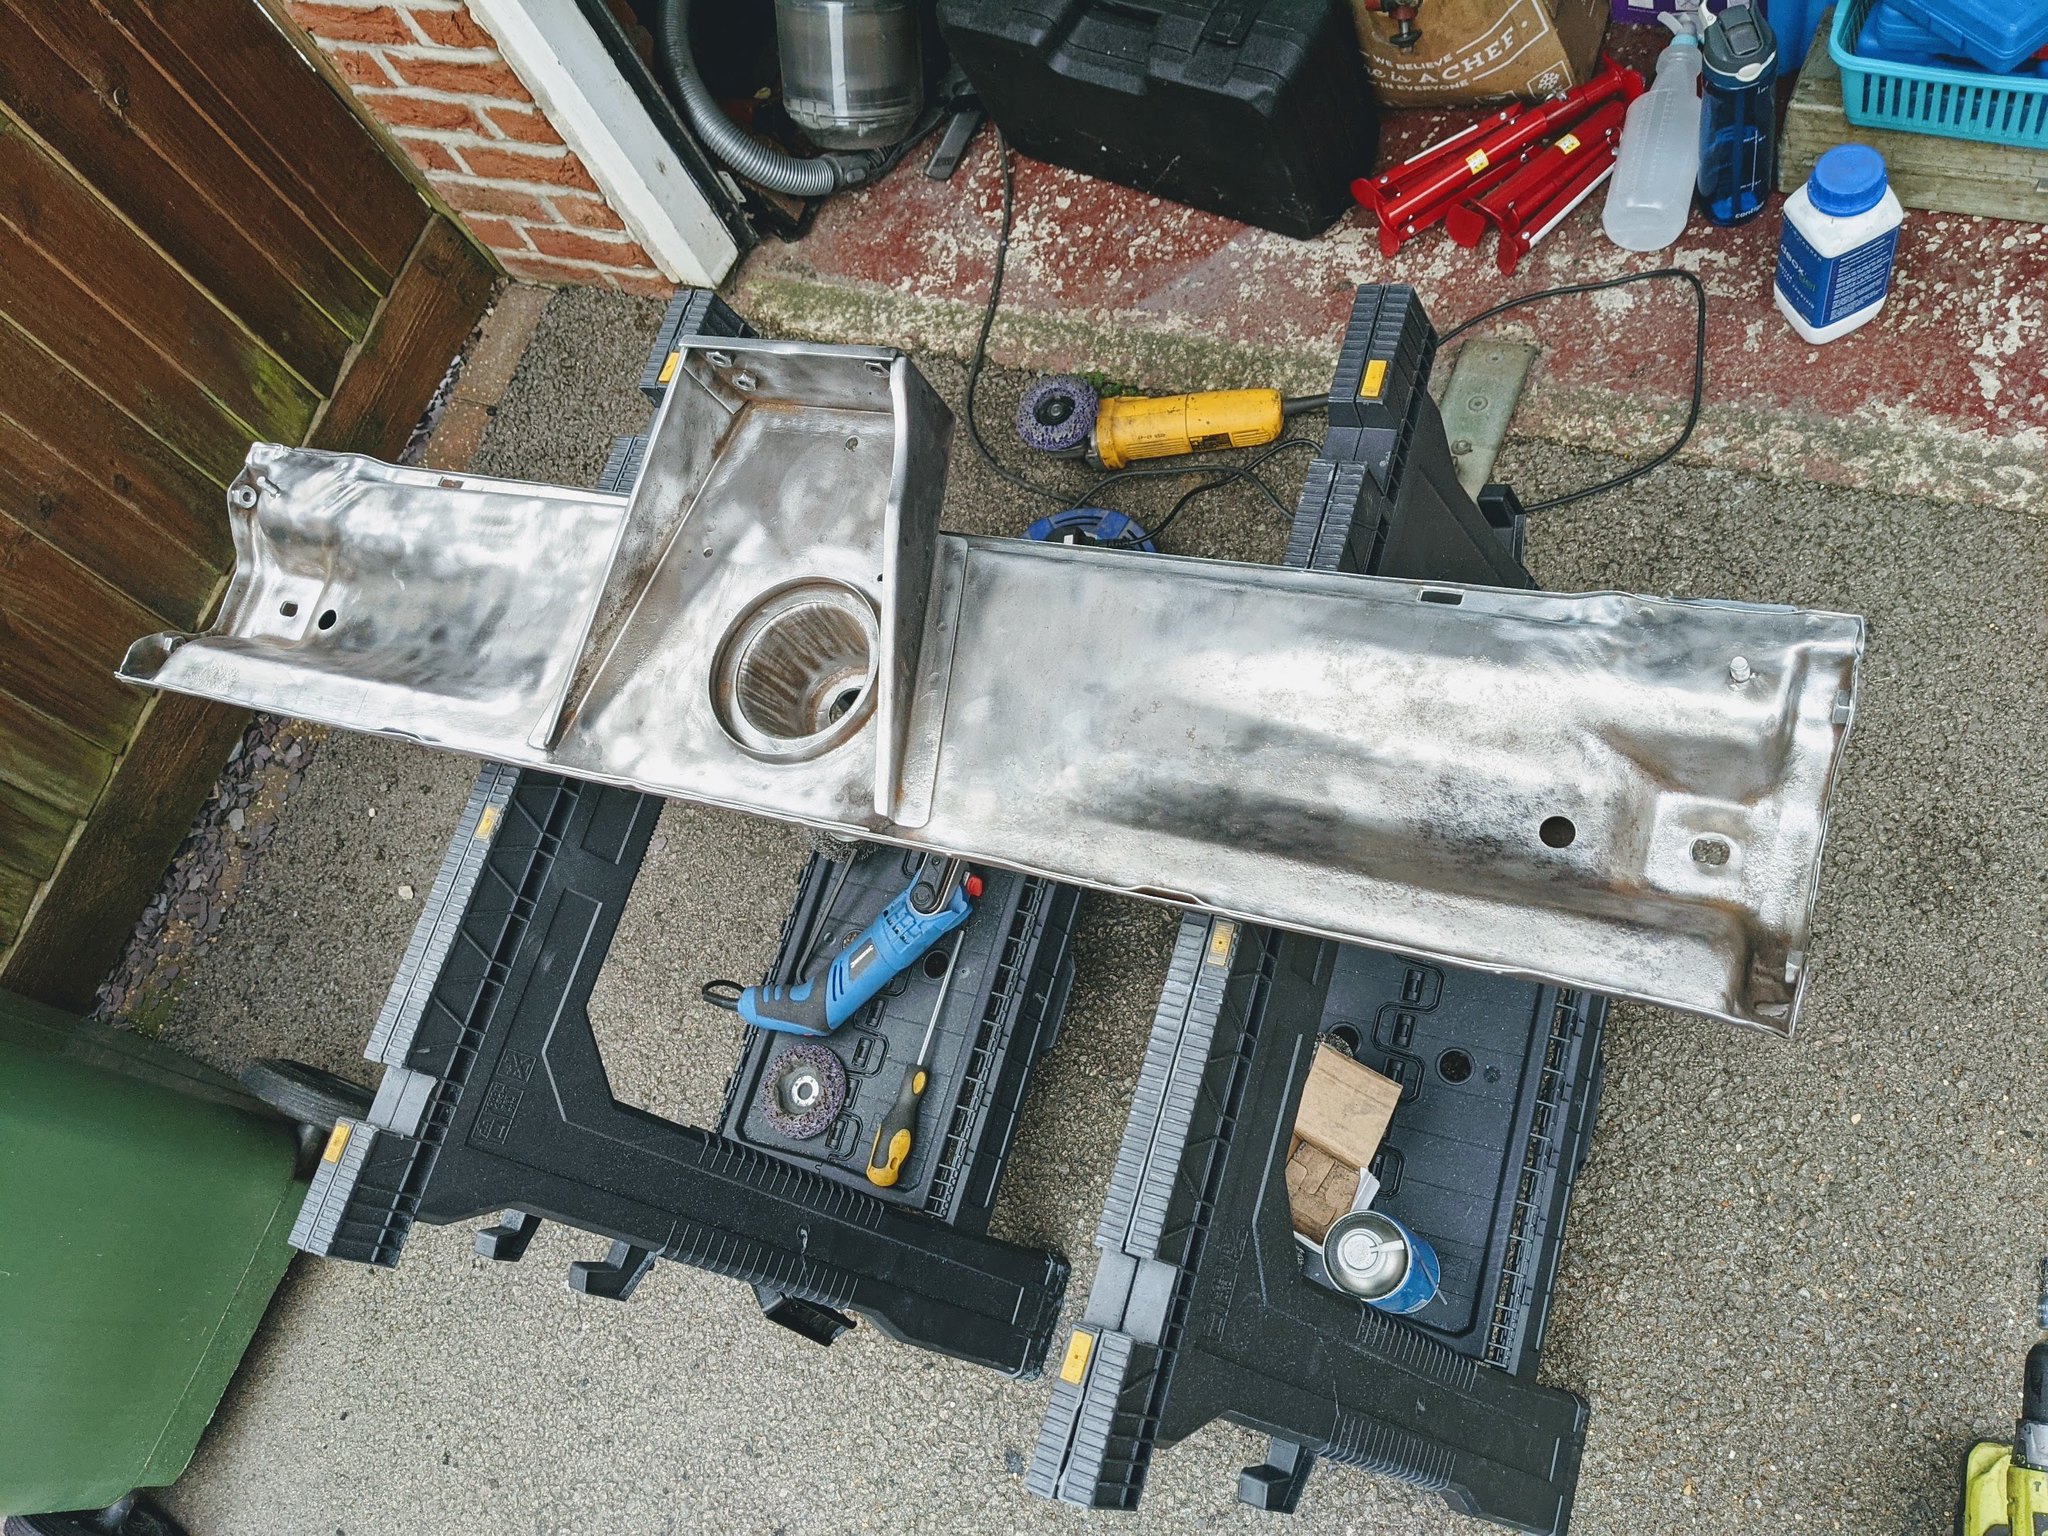
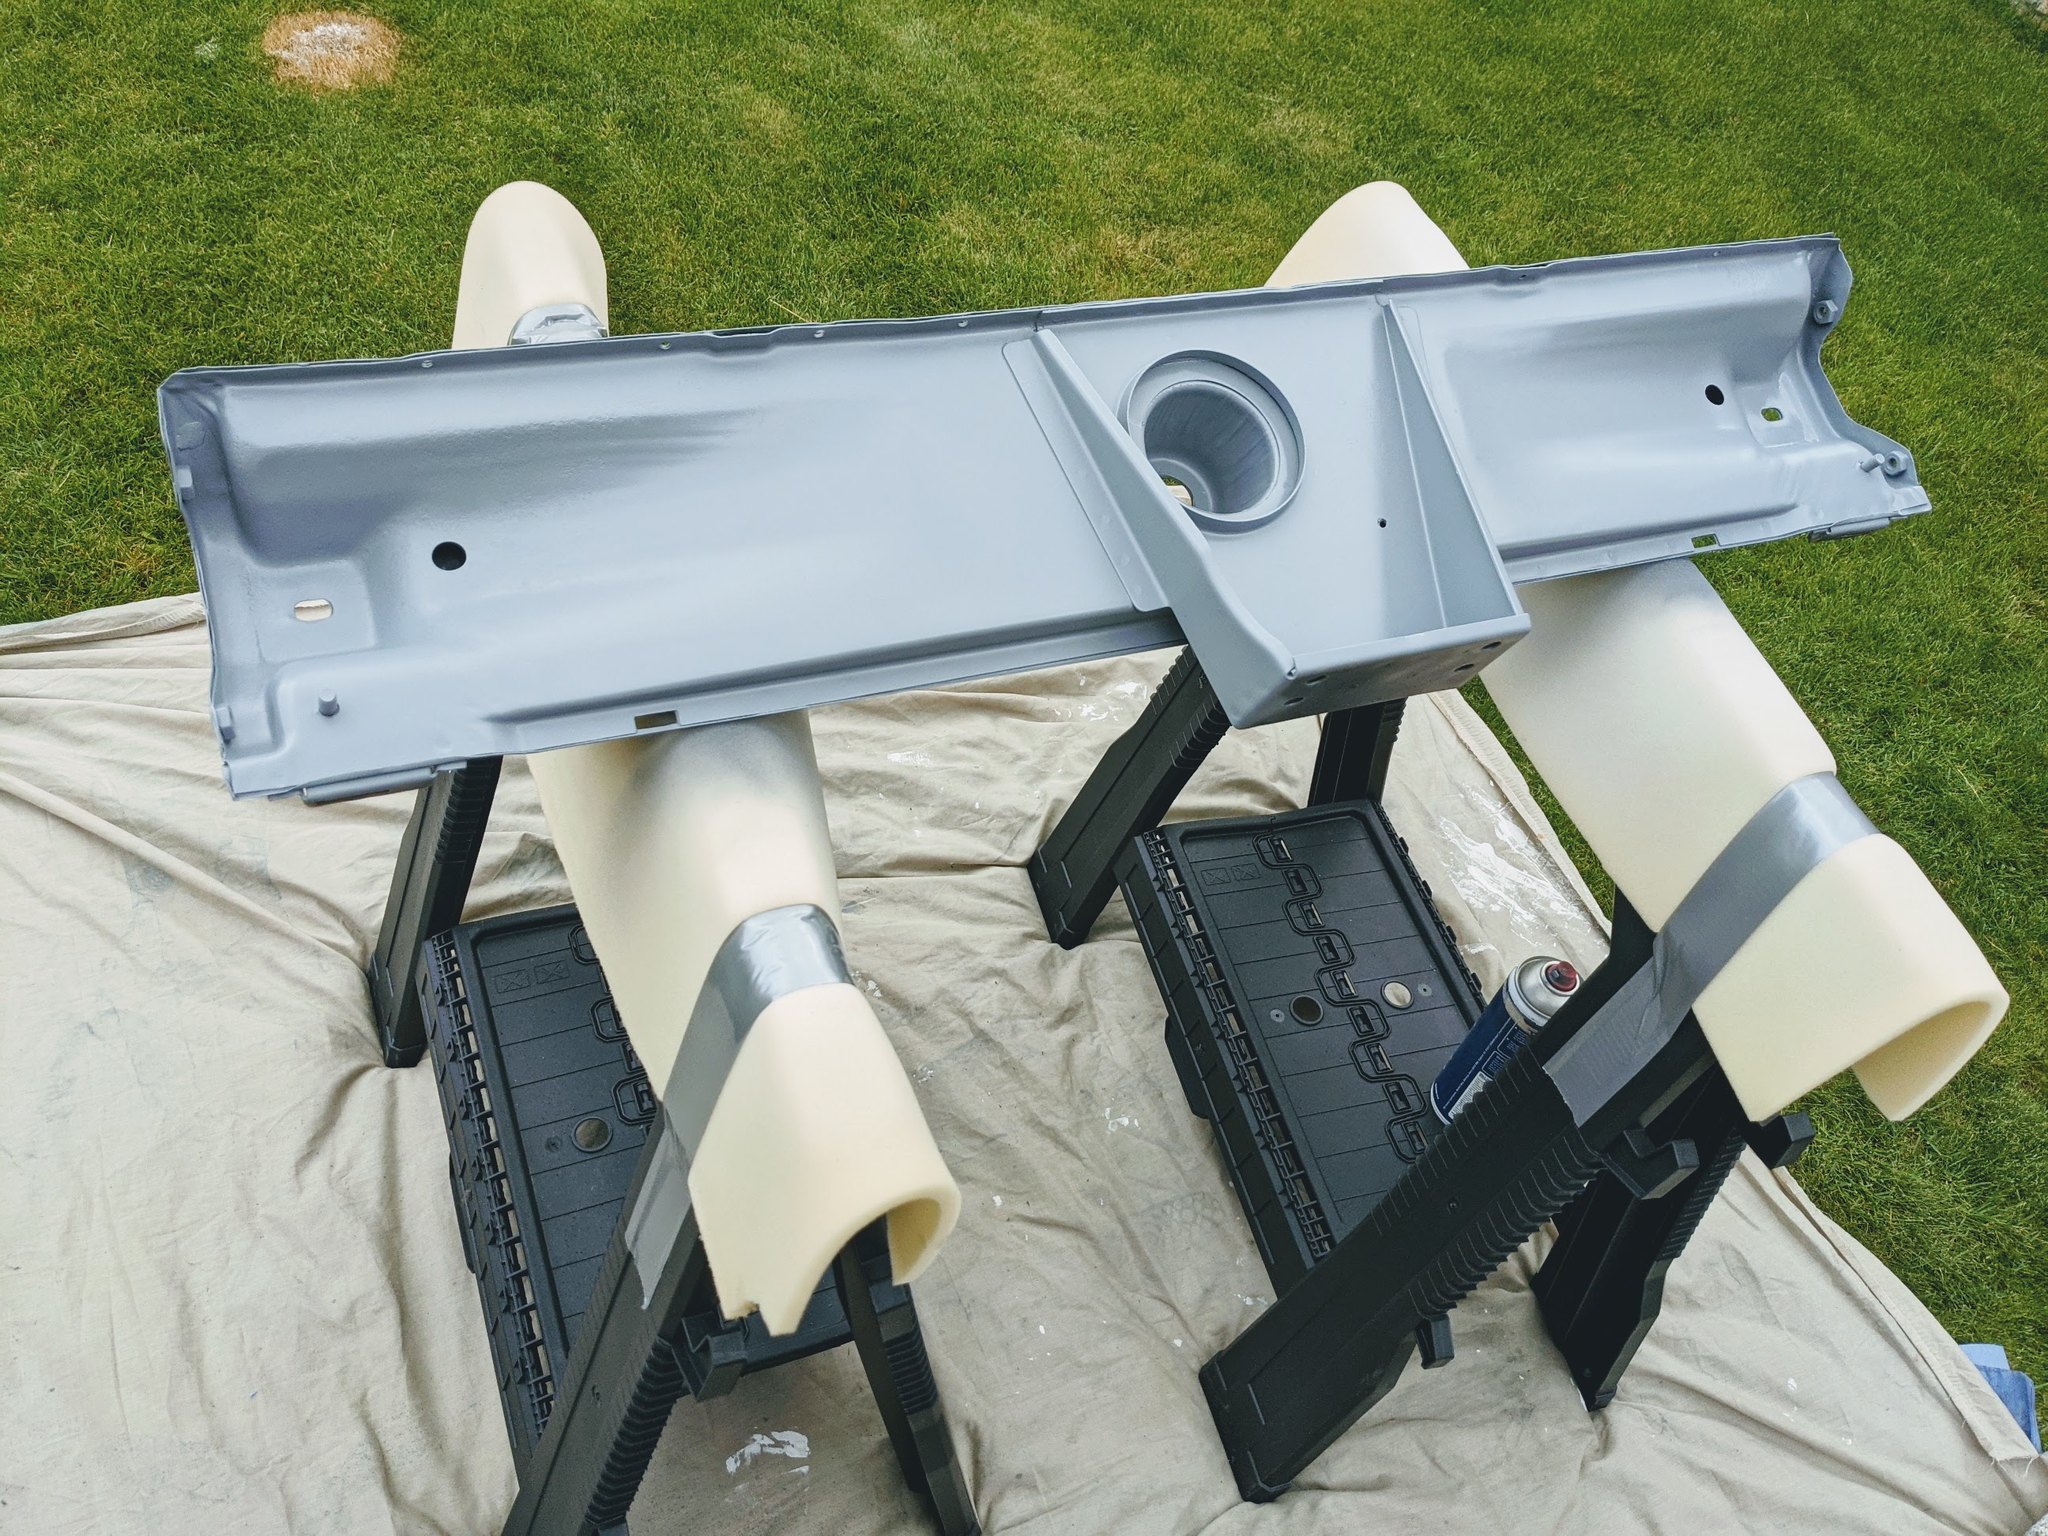
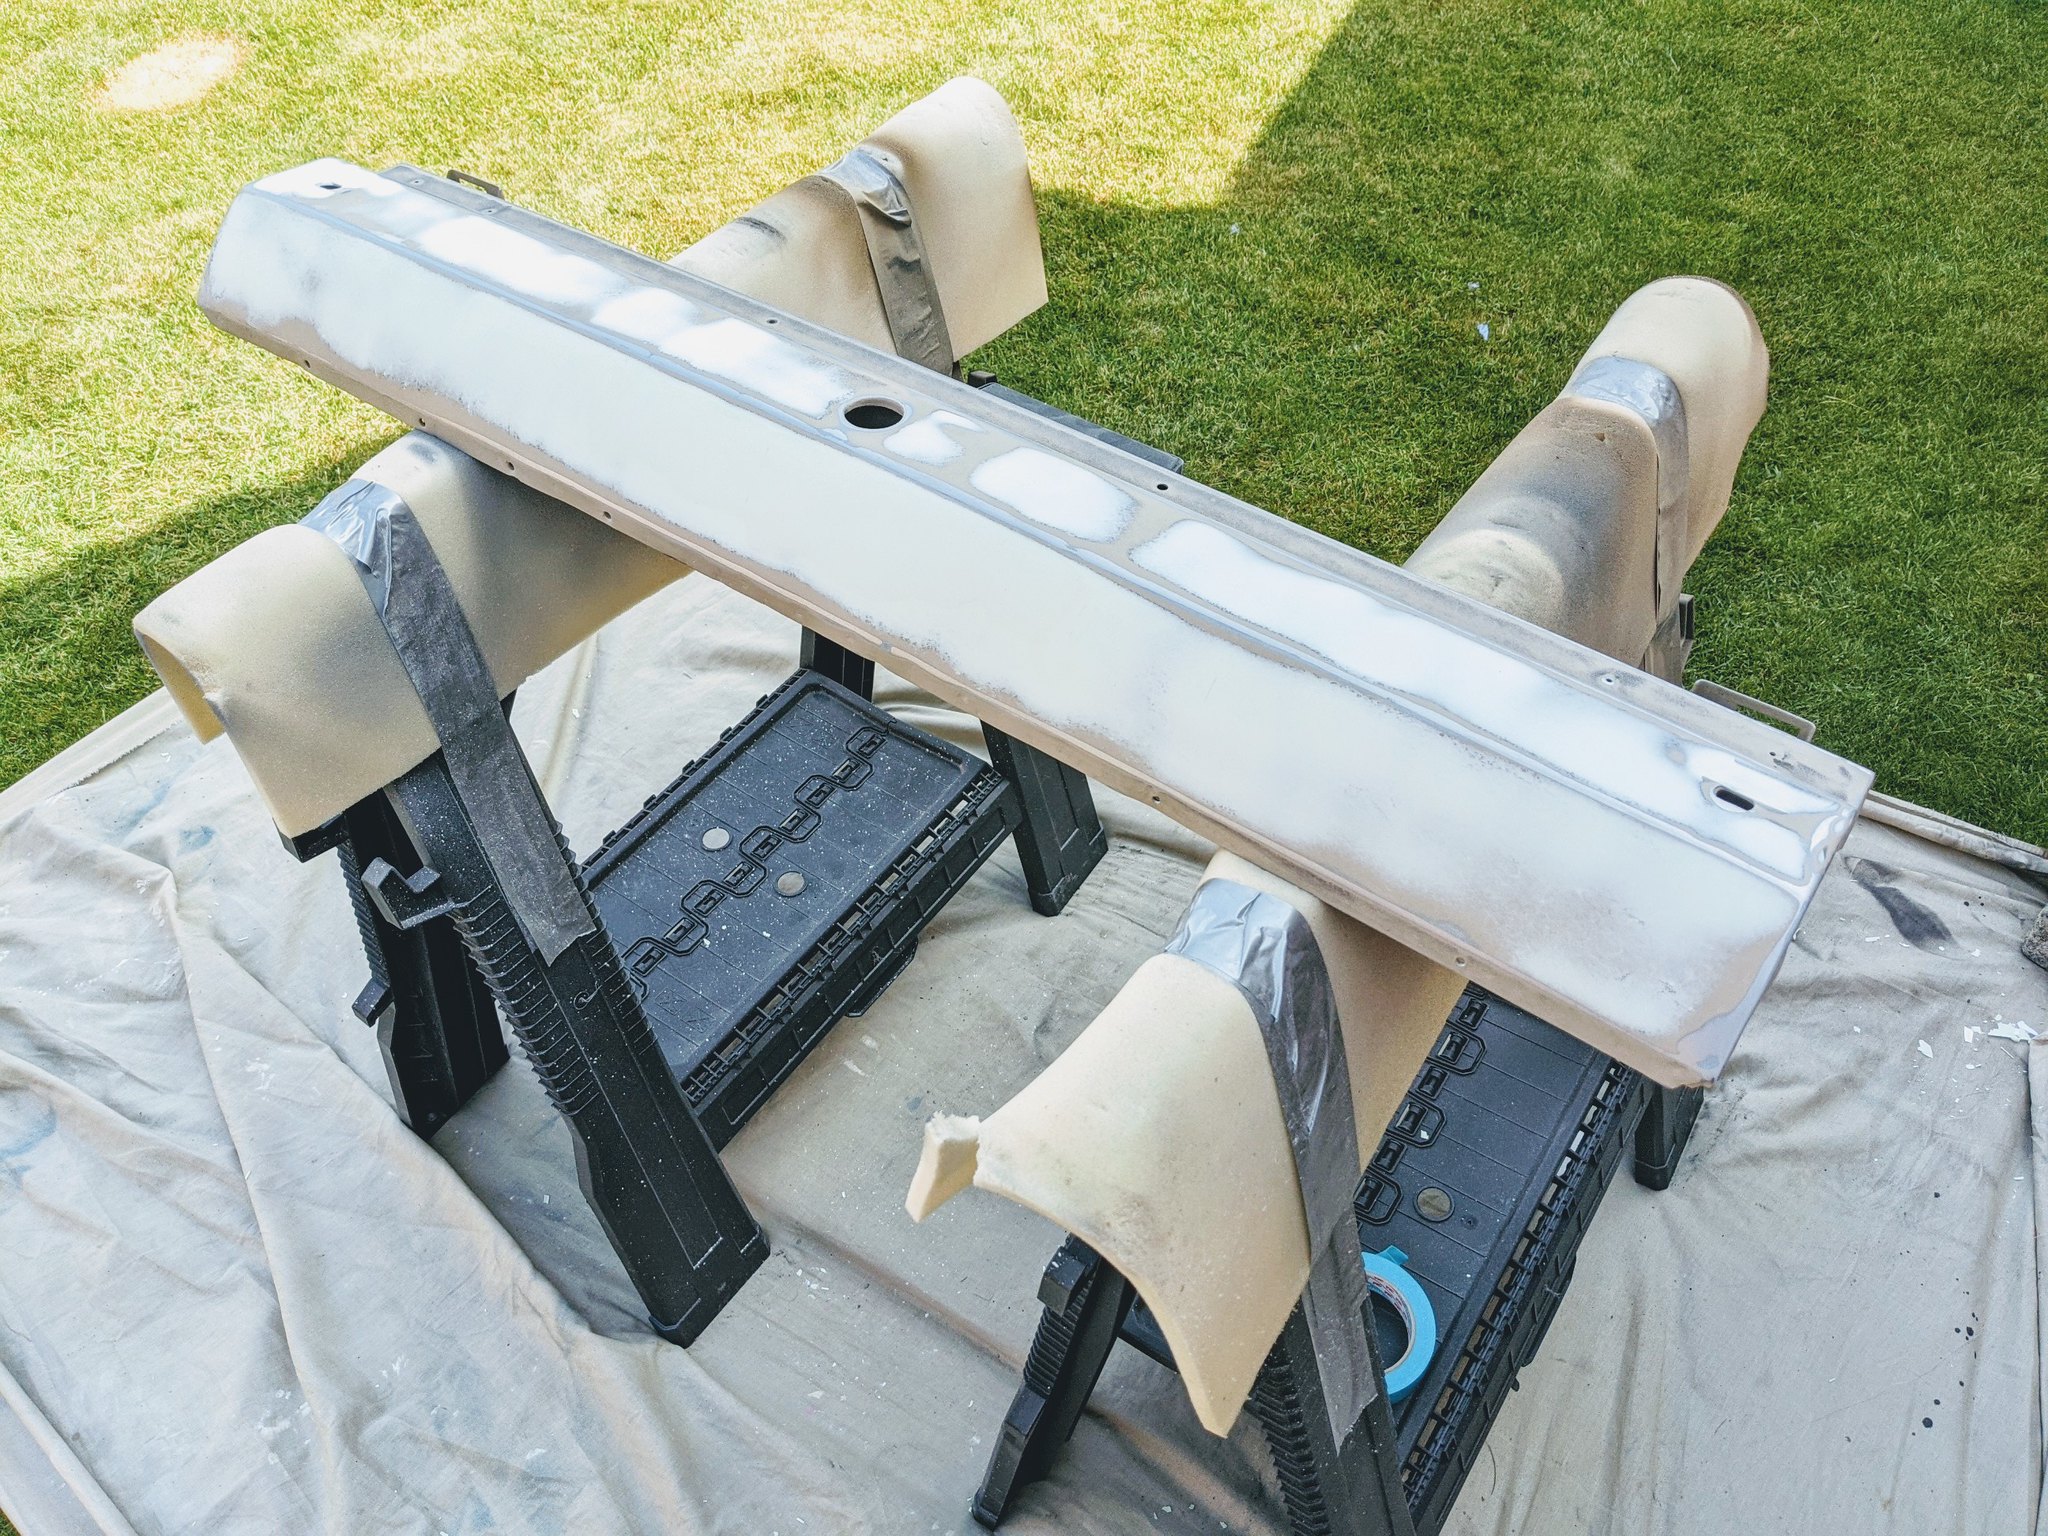
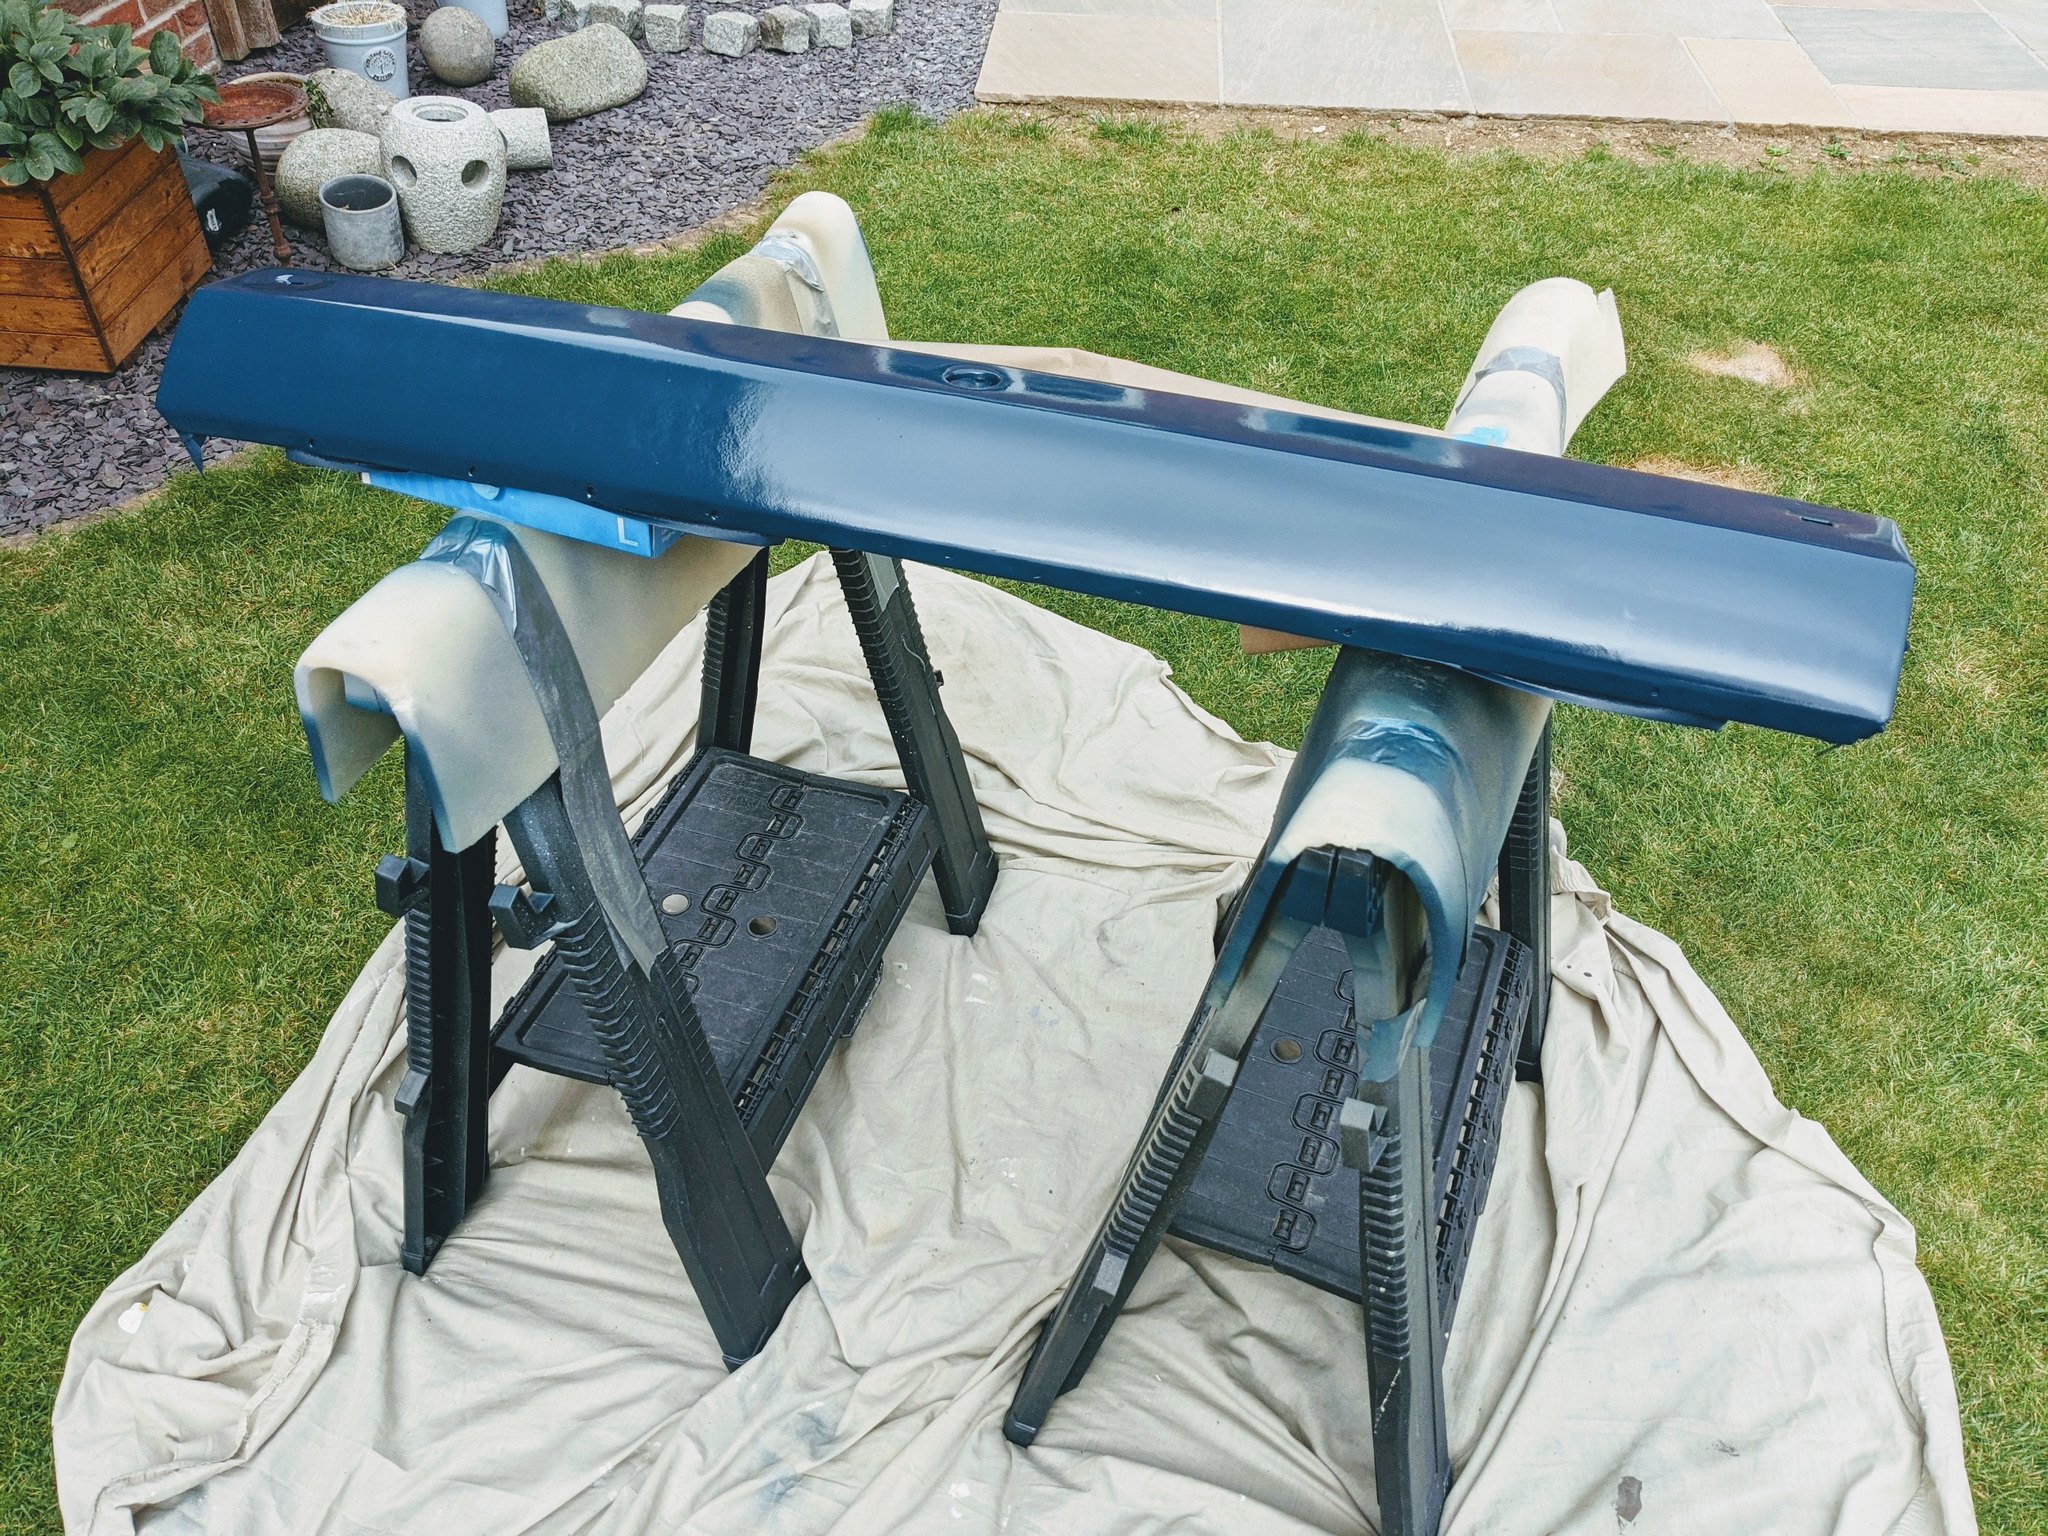
Today I dug out the rear crossmember, thinking I’ll start with this, to practice on before I tackle the doors and then the actual bodywork. But my heart sank when I saw it out in the light for the first time in 18 months, I thought I was done with the welder…
 PXL_20210807_135335389 by Godfrey Hatton, on Flickr
I’m kicking myself I didn’t clock the rot in the left corner, plus that massive dent in the middle, but I guess I couldn’t think this far ahead into the project when I was tearing it apart, but hey ho it’s all experience right! So I’m going to have to get another gas bottle as I returned the last one thinking I was done with welding, how naive I was!
Anything I need to be mindful of when cutting out the rust? How is the corner formed on these? And for the dent, has anyone had much success with a kit like this? https://www.ebay.co.uk/itm/133484943597
Pog
Well the weather has been awful lately hasn’t it? Really prevented me from working on the car at the weekends like I’d hope to, so it’s just a small update today…
Fitted my strengthened clutch fork and new roller release bearing (thanks Robin Human), so that was at least a nice quick job:
IMG-20210804-WA0003 by Godfrey Hatton, on FlickrToday I dug out the rear crossmember, thinking I’ll start with this, to practice on before I tackle the doors and then the actual bodywork. But my heart sank when I saw it out in the light for the first time in 18 months, I thought I was done with the welder…
PXL_20210807_135335389 by Godfrey Hatton, on FlickrI’m kicking myself I didn’t clock the rot in the left corner, plus that massive dent in the middle, but I guess I couldn’t think this far ahead into the project when I was tearing it apart, but hey ho it’s all experience right! So I’m going to have to get another gas bottle as I returned the last one thinking I was done with welding, how naive I was!
Anything I need to be mindful of when cutting out the rust? How is the corner formed on these? And for the dent, has anyone had much success with a kit like this? https://www.ebay.co.uk/itm/133484943597
Pog
Young Imp Members Registrar
-
Pog
- Posts: 142
- Joined: Sat Aug 24, 2013 4:55 pm
- Club Member: Yes
- Car Model: 1969 Super 'Betty'
- Location: Northampton, UK
- Has thanked: 10 times
- Been thanked: 37 times
Re: EHK 744G - 1969 Super - time to get the welder out again!
Hi all,
Been busy working away on the rear crossmember, so hope you don’t mind a photo filled update!
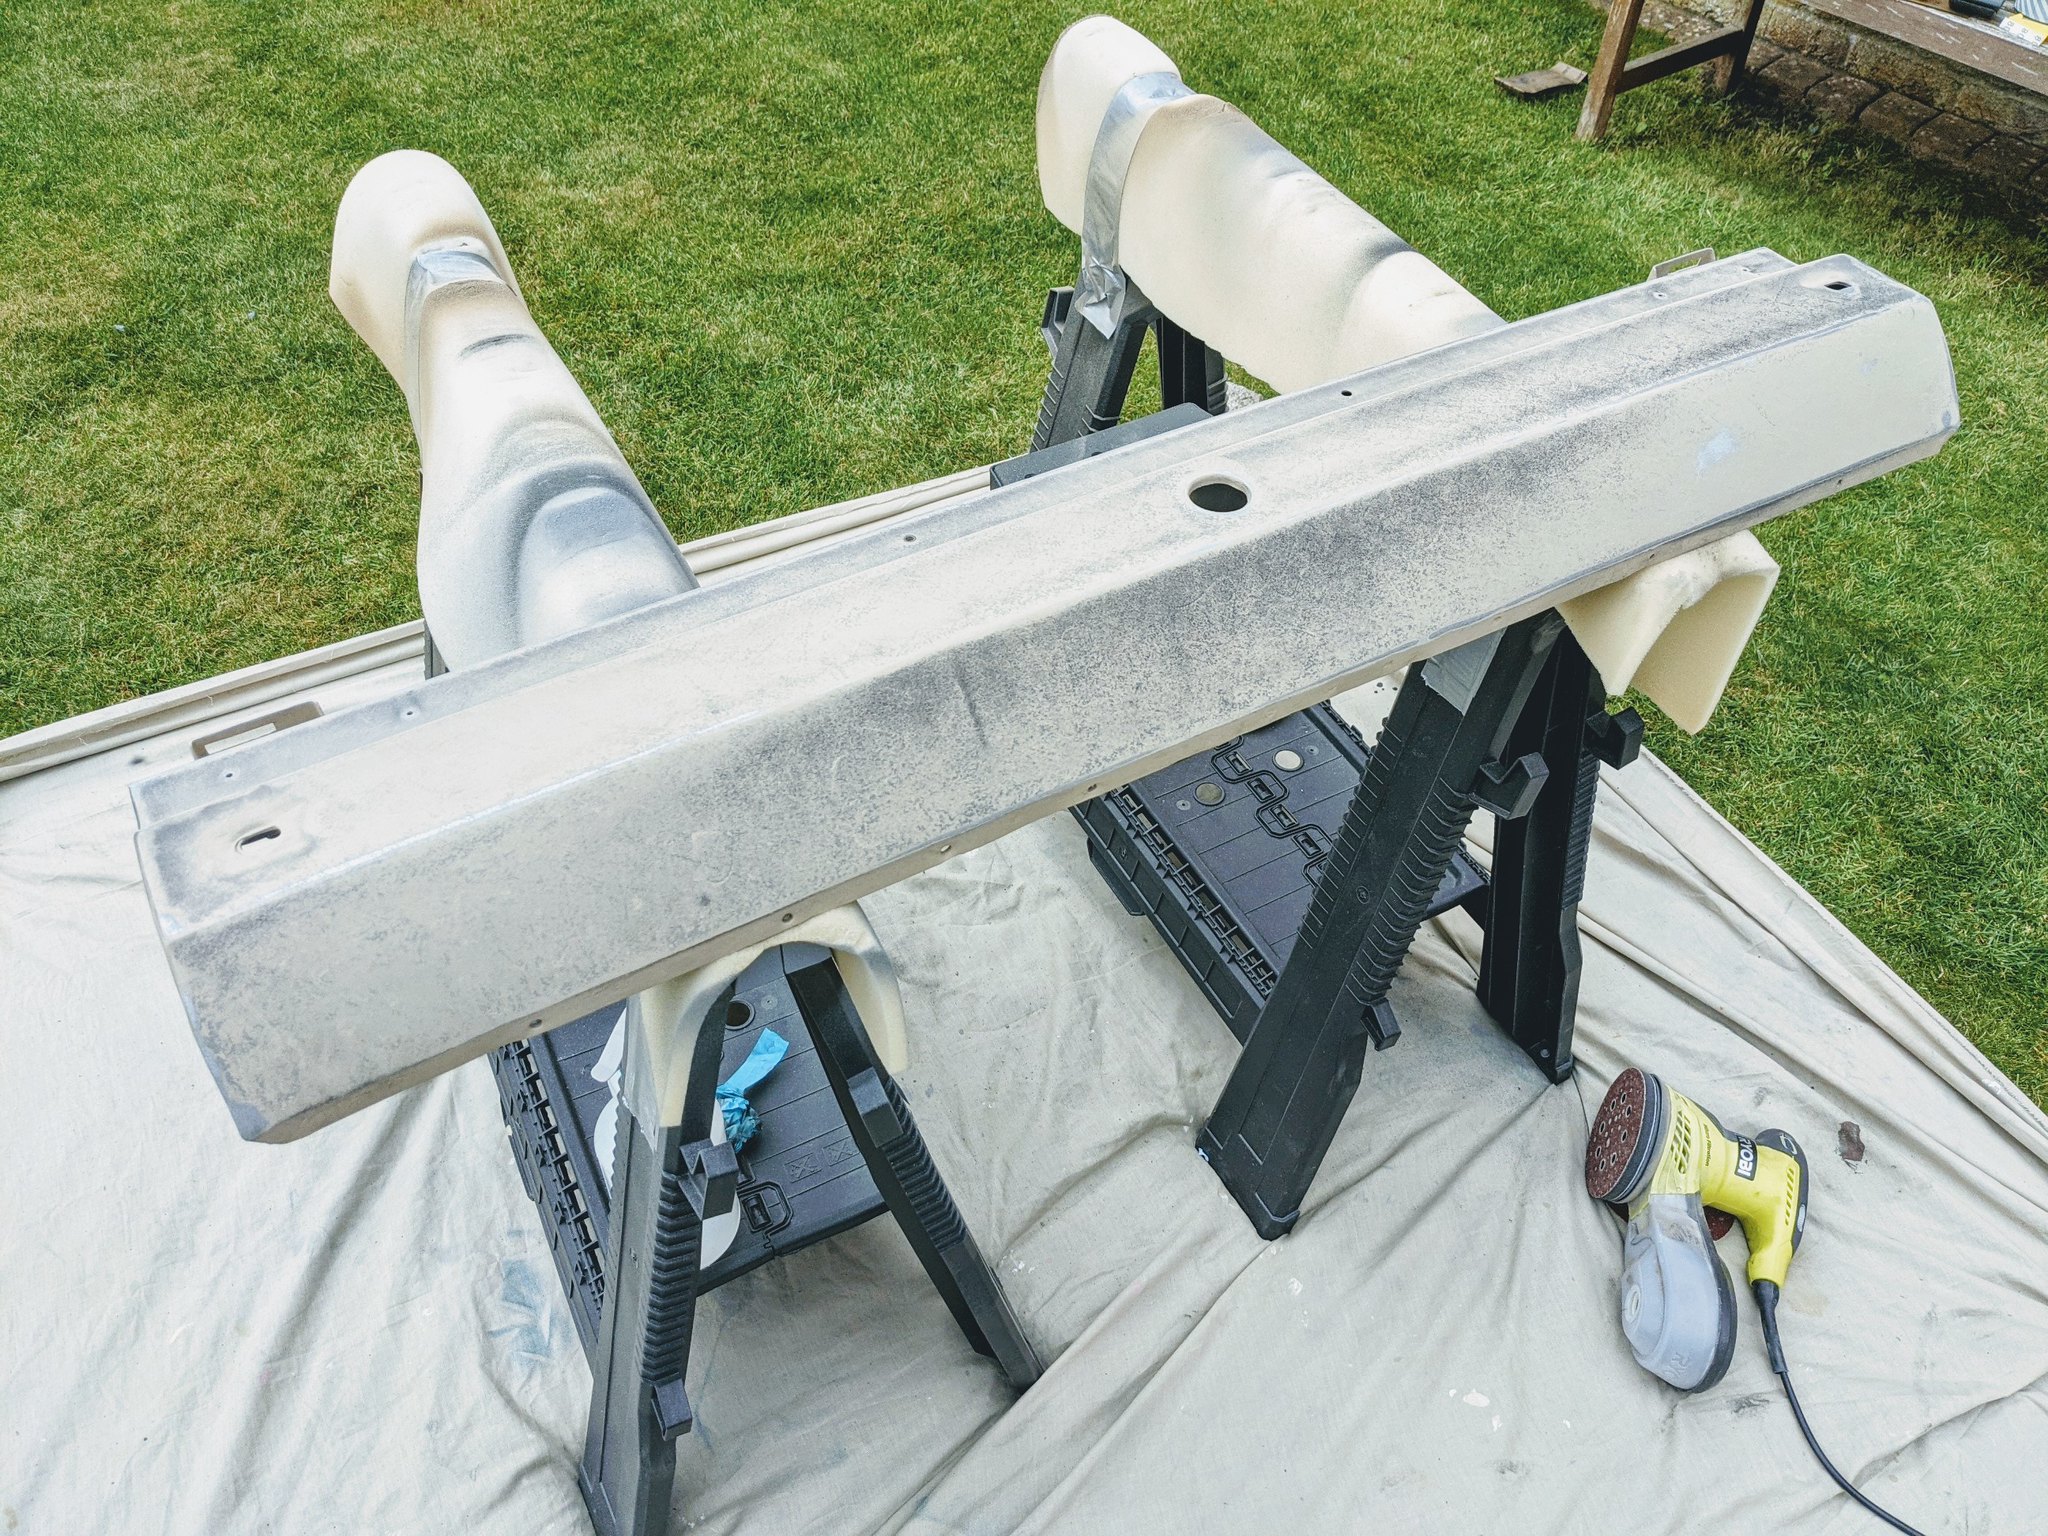
I started with the rot in the corner. Firstly, ground down to see what I was working with:
 PXL_20210815_113140311 by Godfrey Hatton, on Flickr
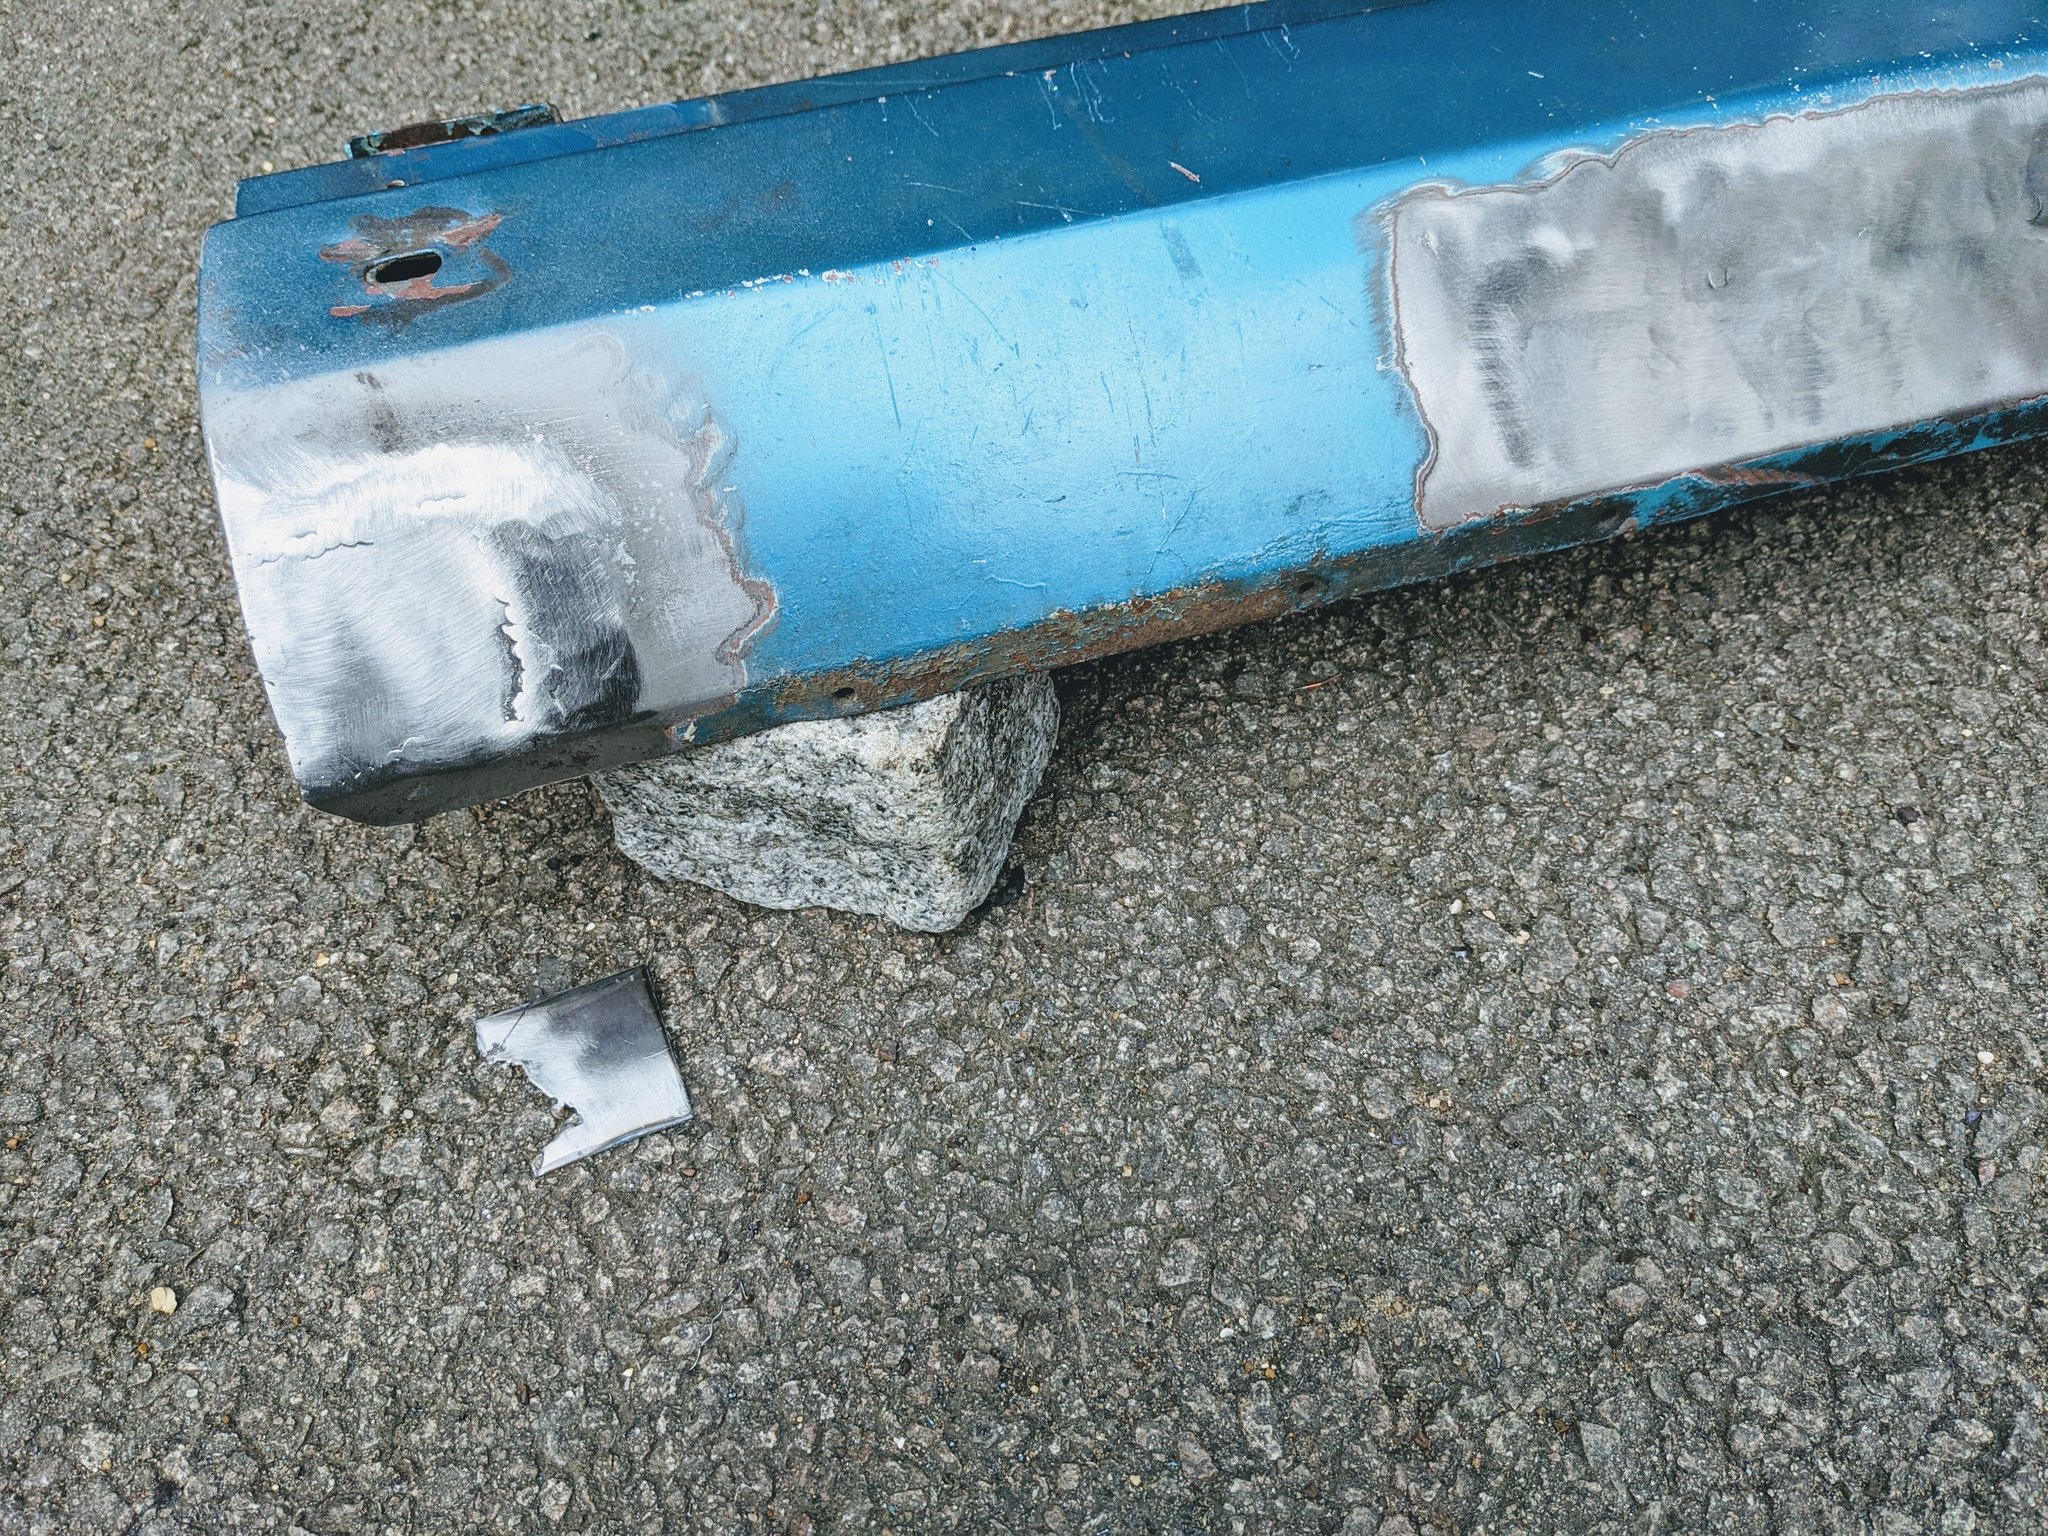
Then to cut out the rotted section on the outer skin:
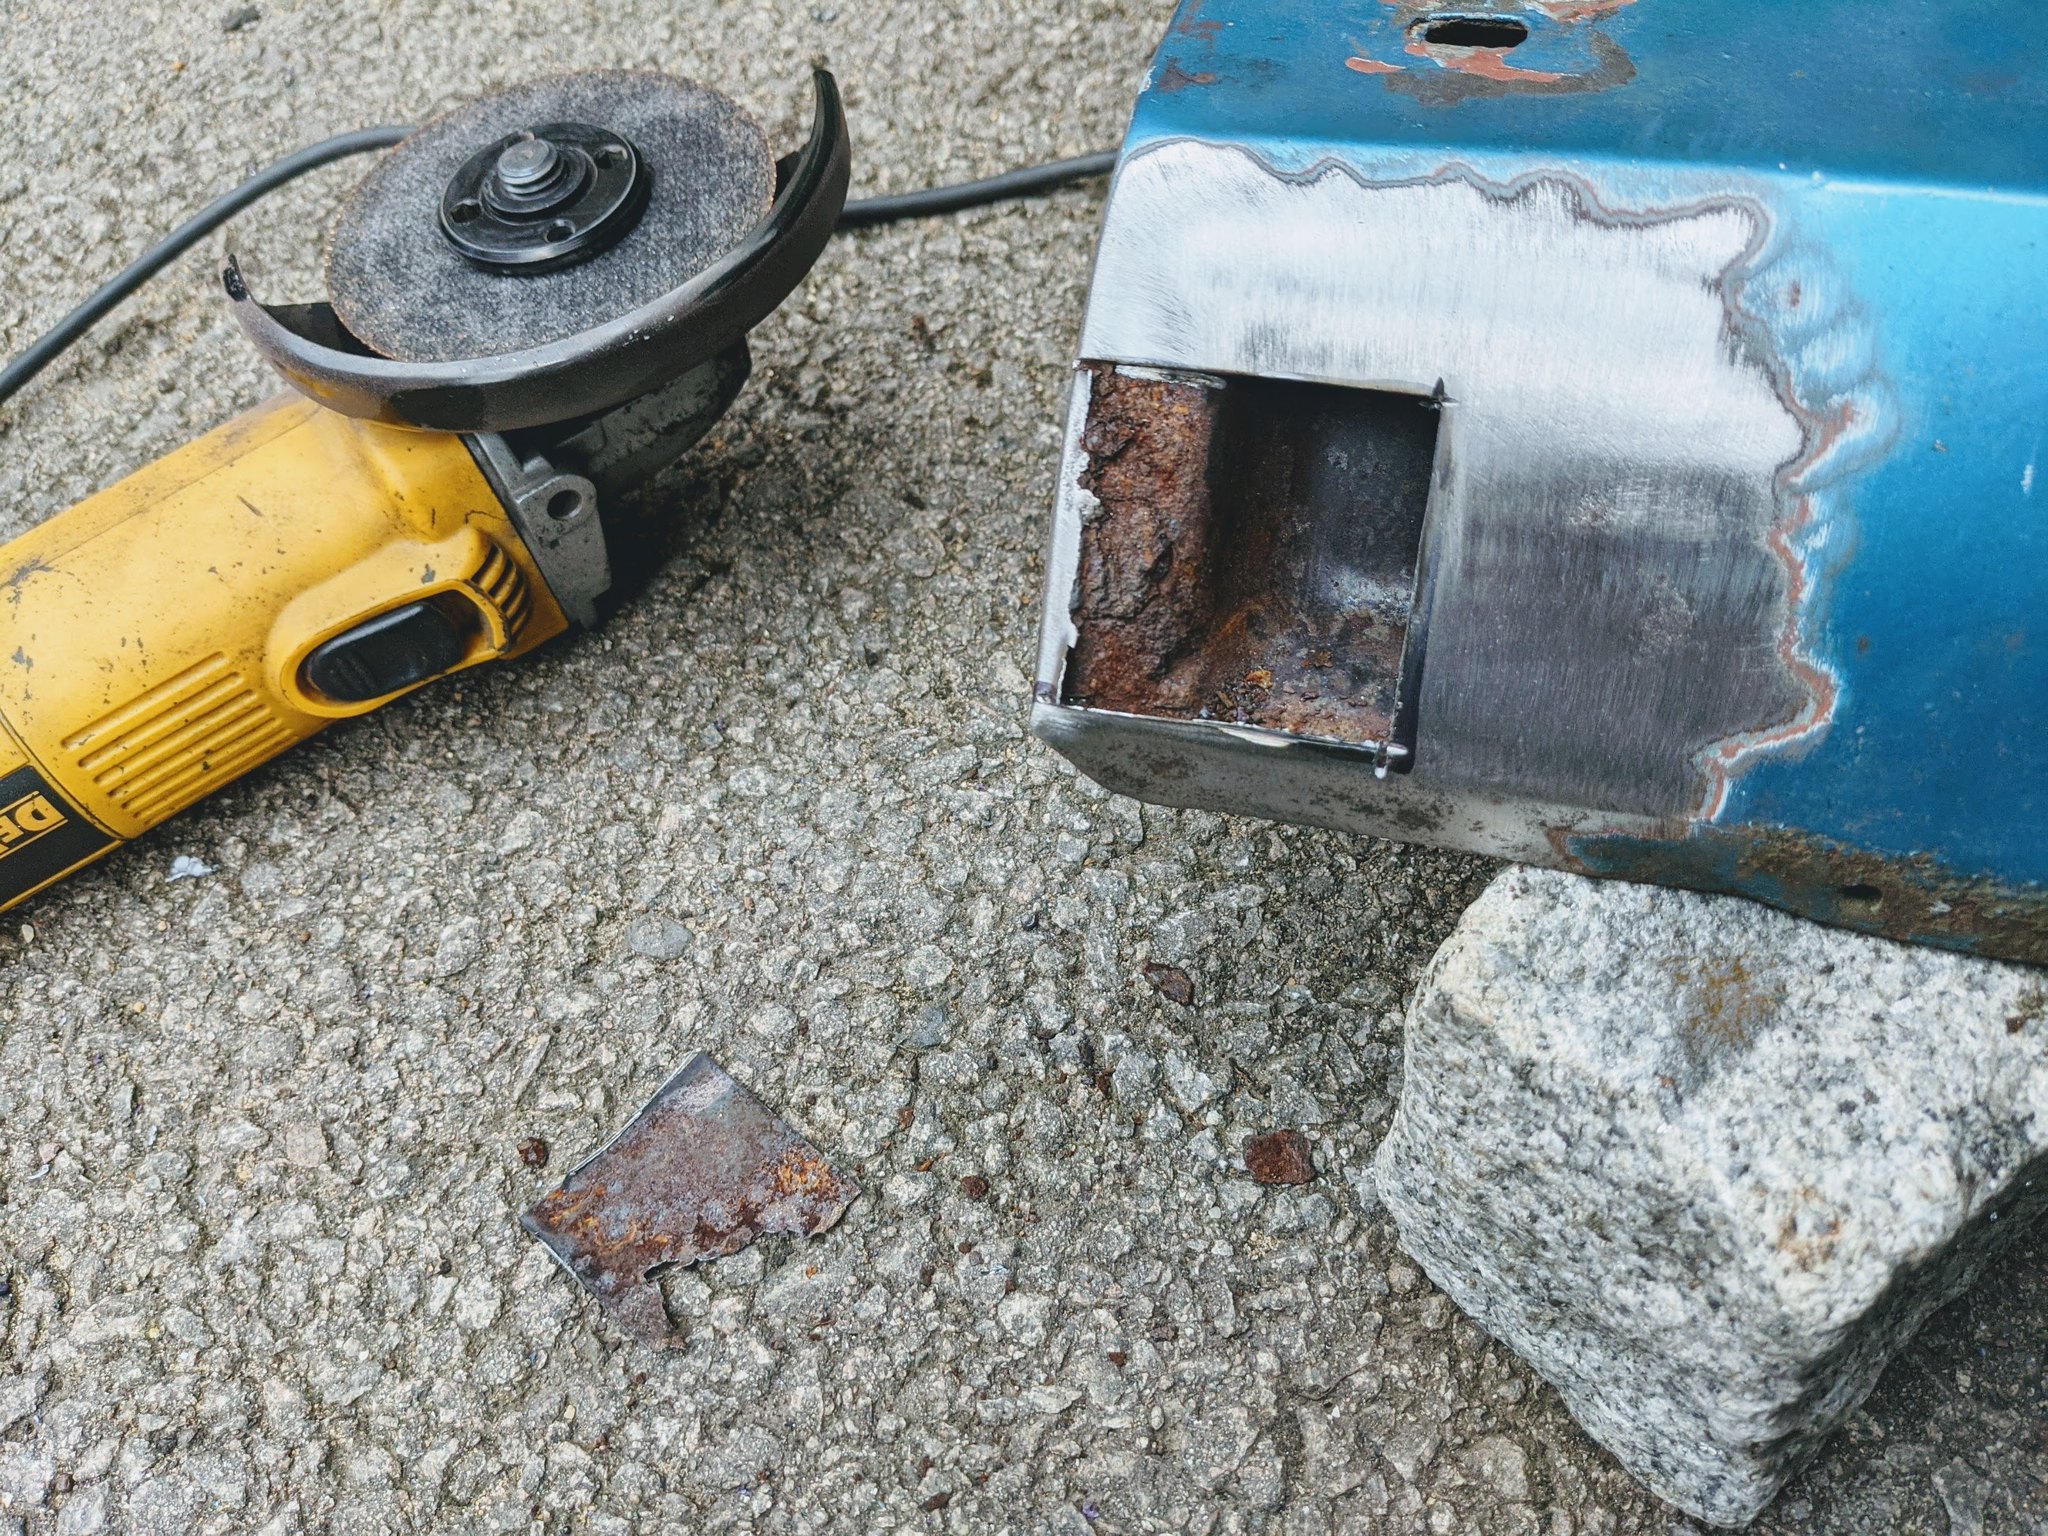 PXL_20210815_113713823 by Godfrey Hatton, on Flickr
Although clearly pitted, the inner skin cleaned up okay and I welded up a couple of pinholes from the other side. It’s definitely not perfect, and possibly even too far gone for just a patch repair like this, but I can only work to my skill level and this just makes it solid enough to get back on the road:
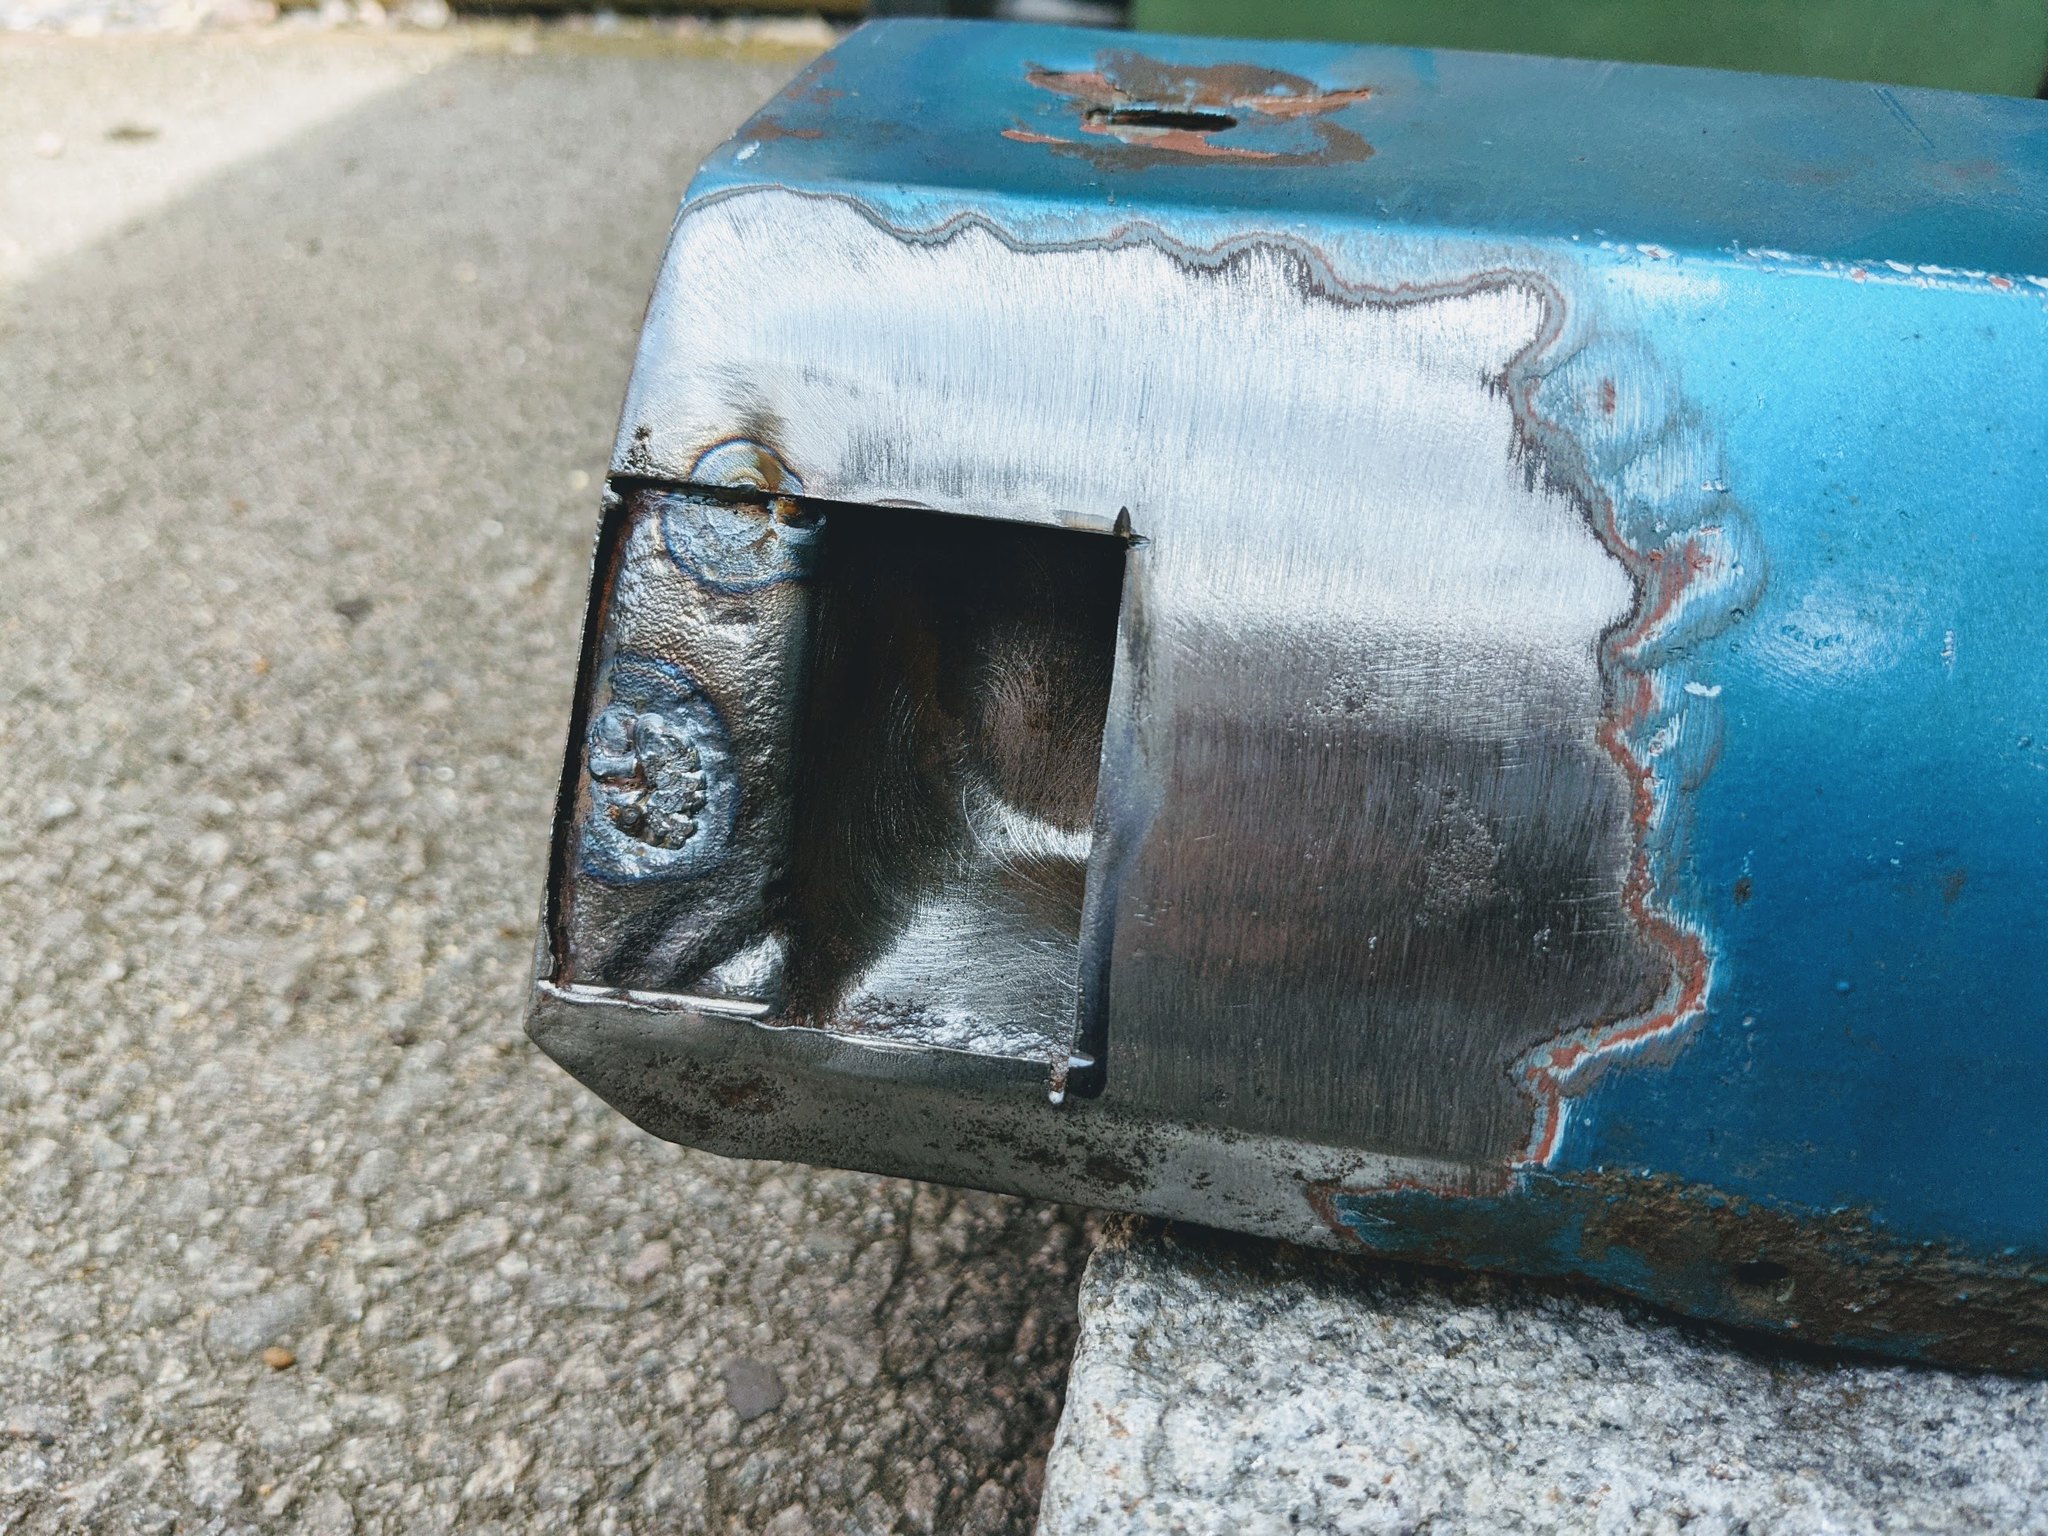 PXL_20210815_121429902 by Godfrey Hatton, on Flickr
Once cleaned up properly I primed the inside with weld through primer and welded in the new patch. I was a bit out of practice I must admit and ended up distorting it slightly. Ah well, it's better than it was, it’ll just take a bit more work in the filler and sanding stage, but it’ll do!
 PXL_20210815_165838513 by Godfrey Hatton, on Flickr
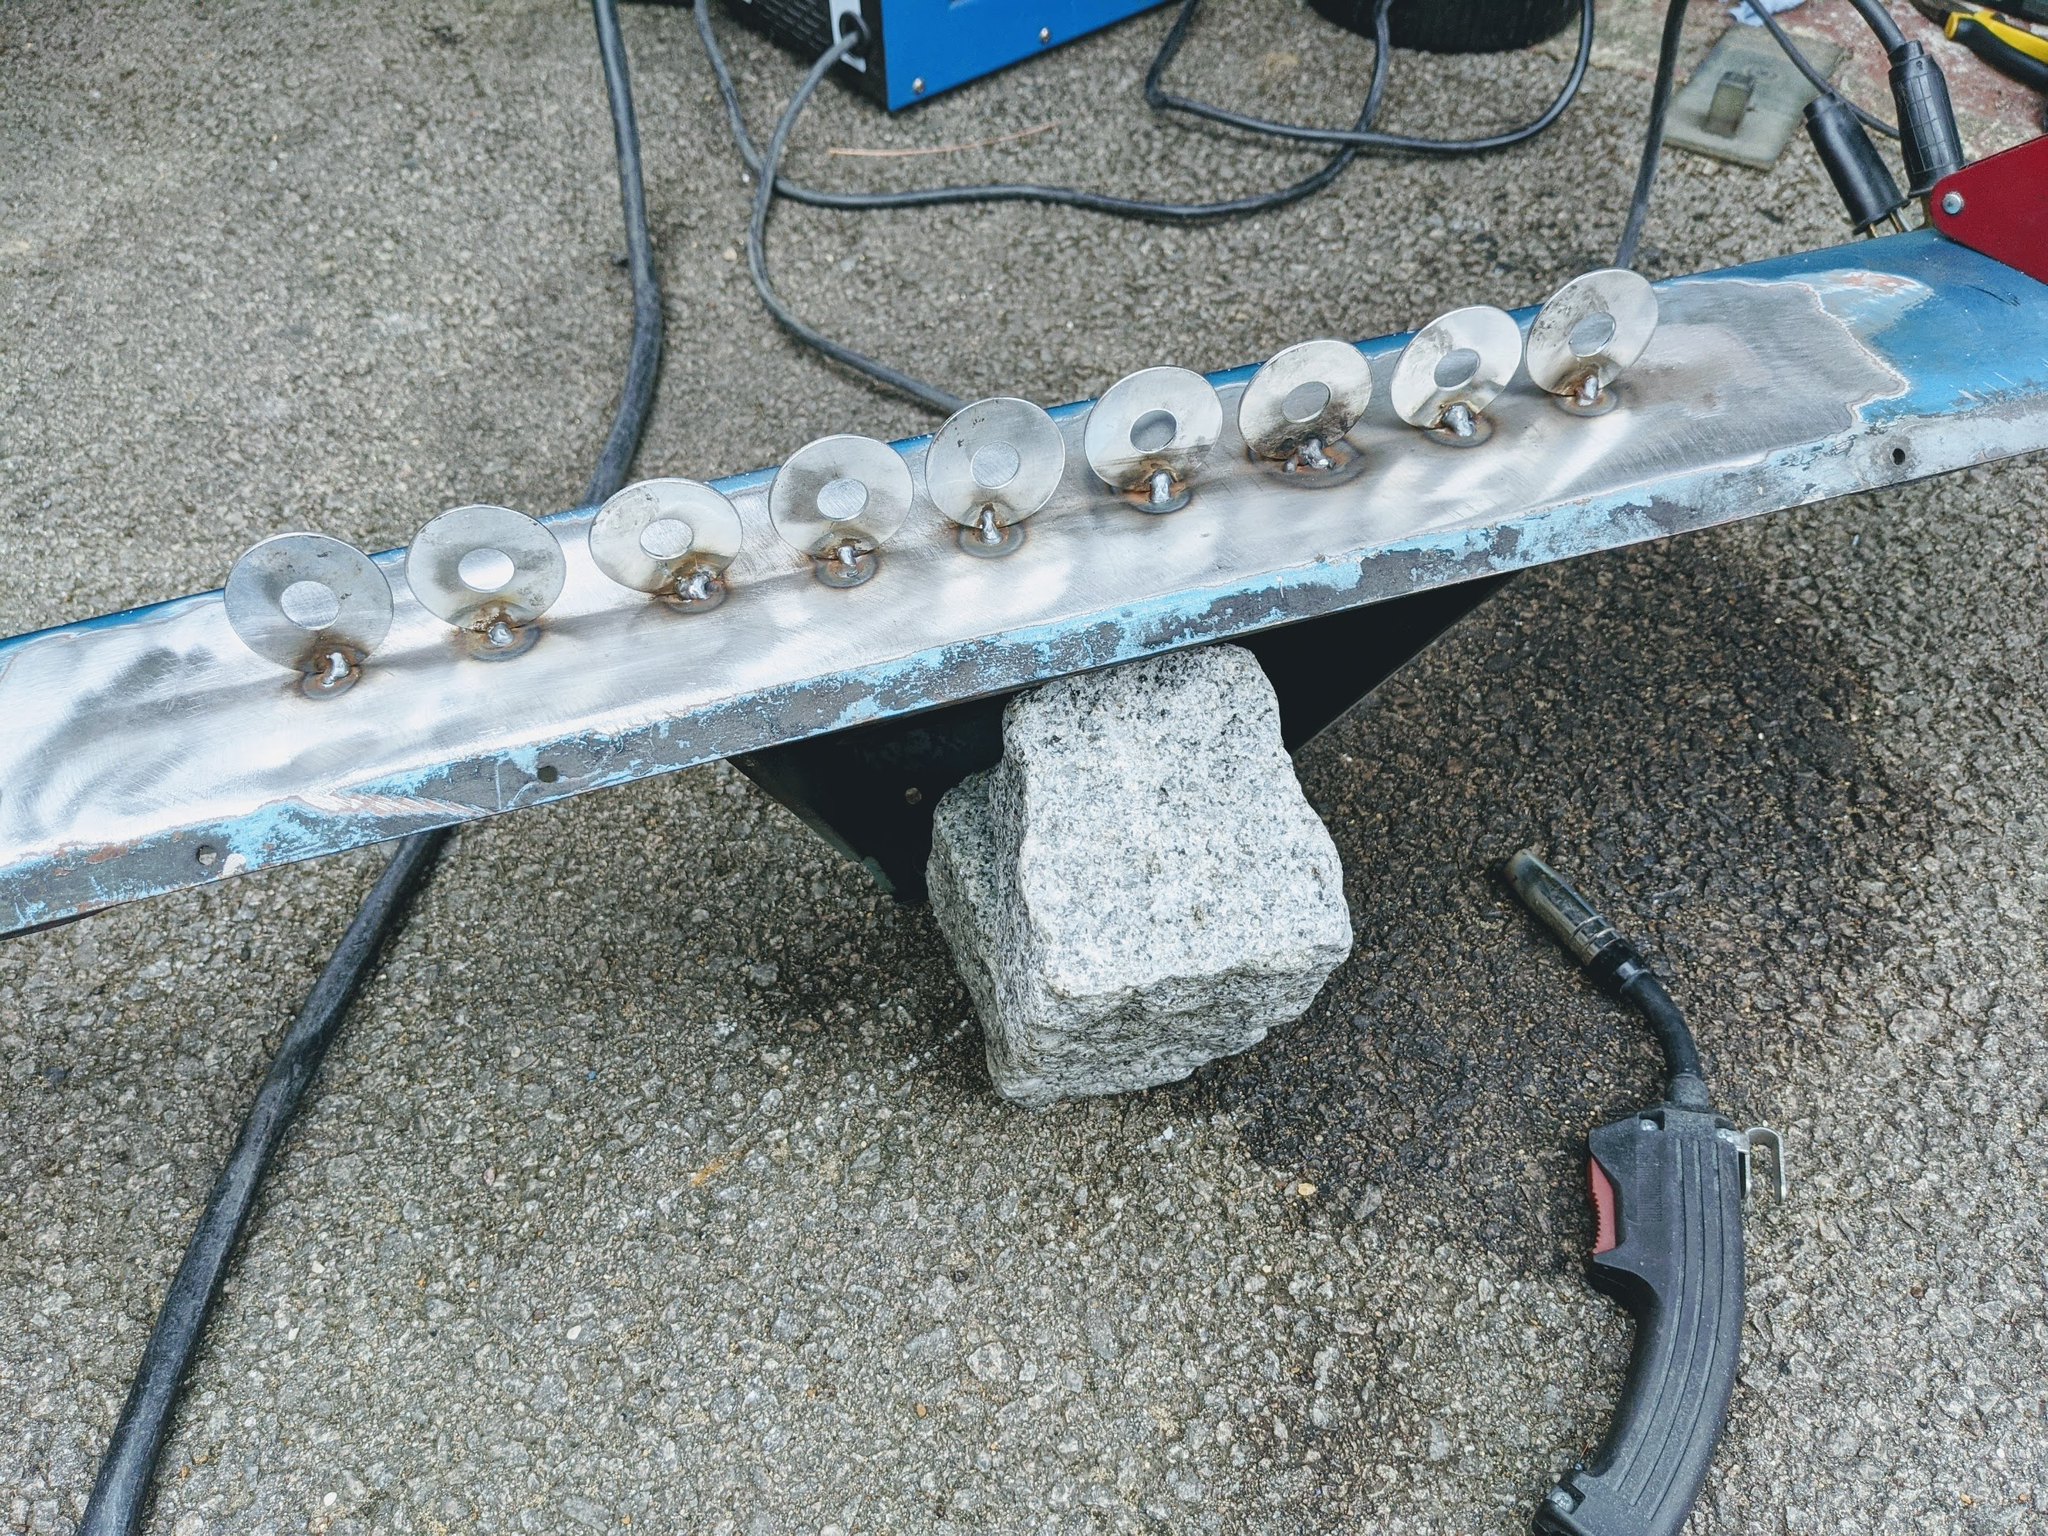
I then turned my attention to the huge dent in the middle of the panel. Now I wasn’t going to fork out for a proper stud welder, but I used the same process in a DIY fashion. Cleaning back to bare metal and tacking on a number of washers:
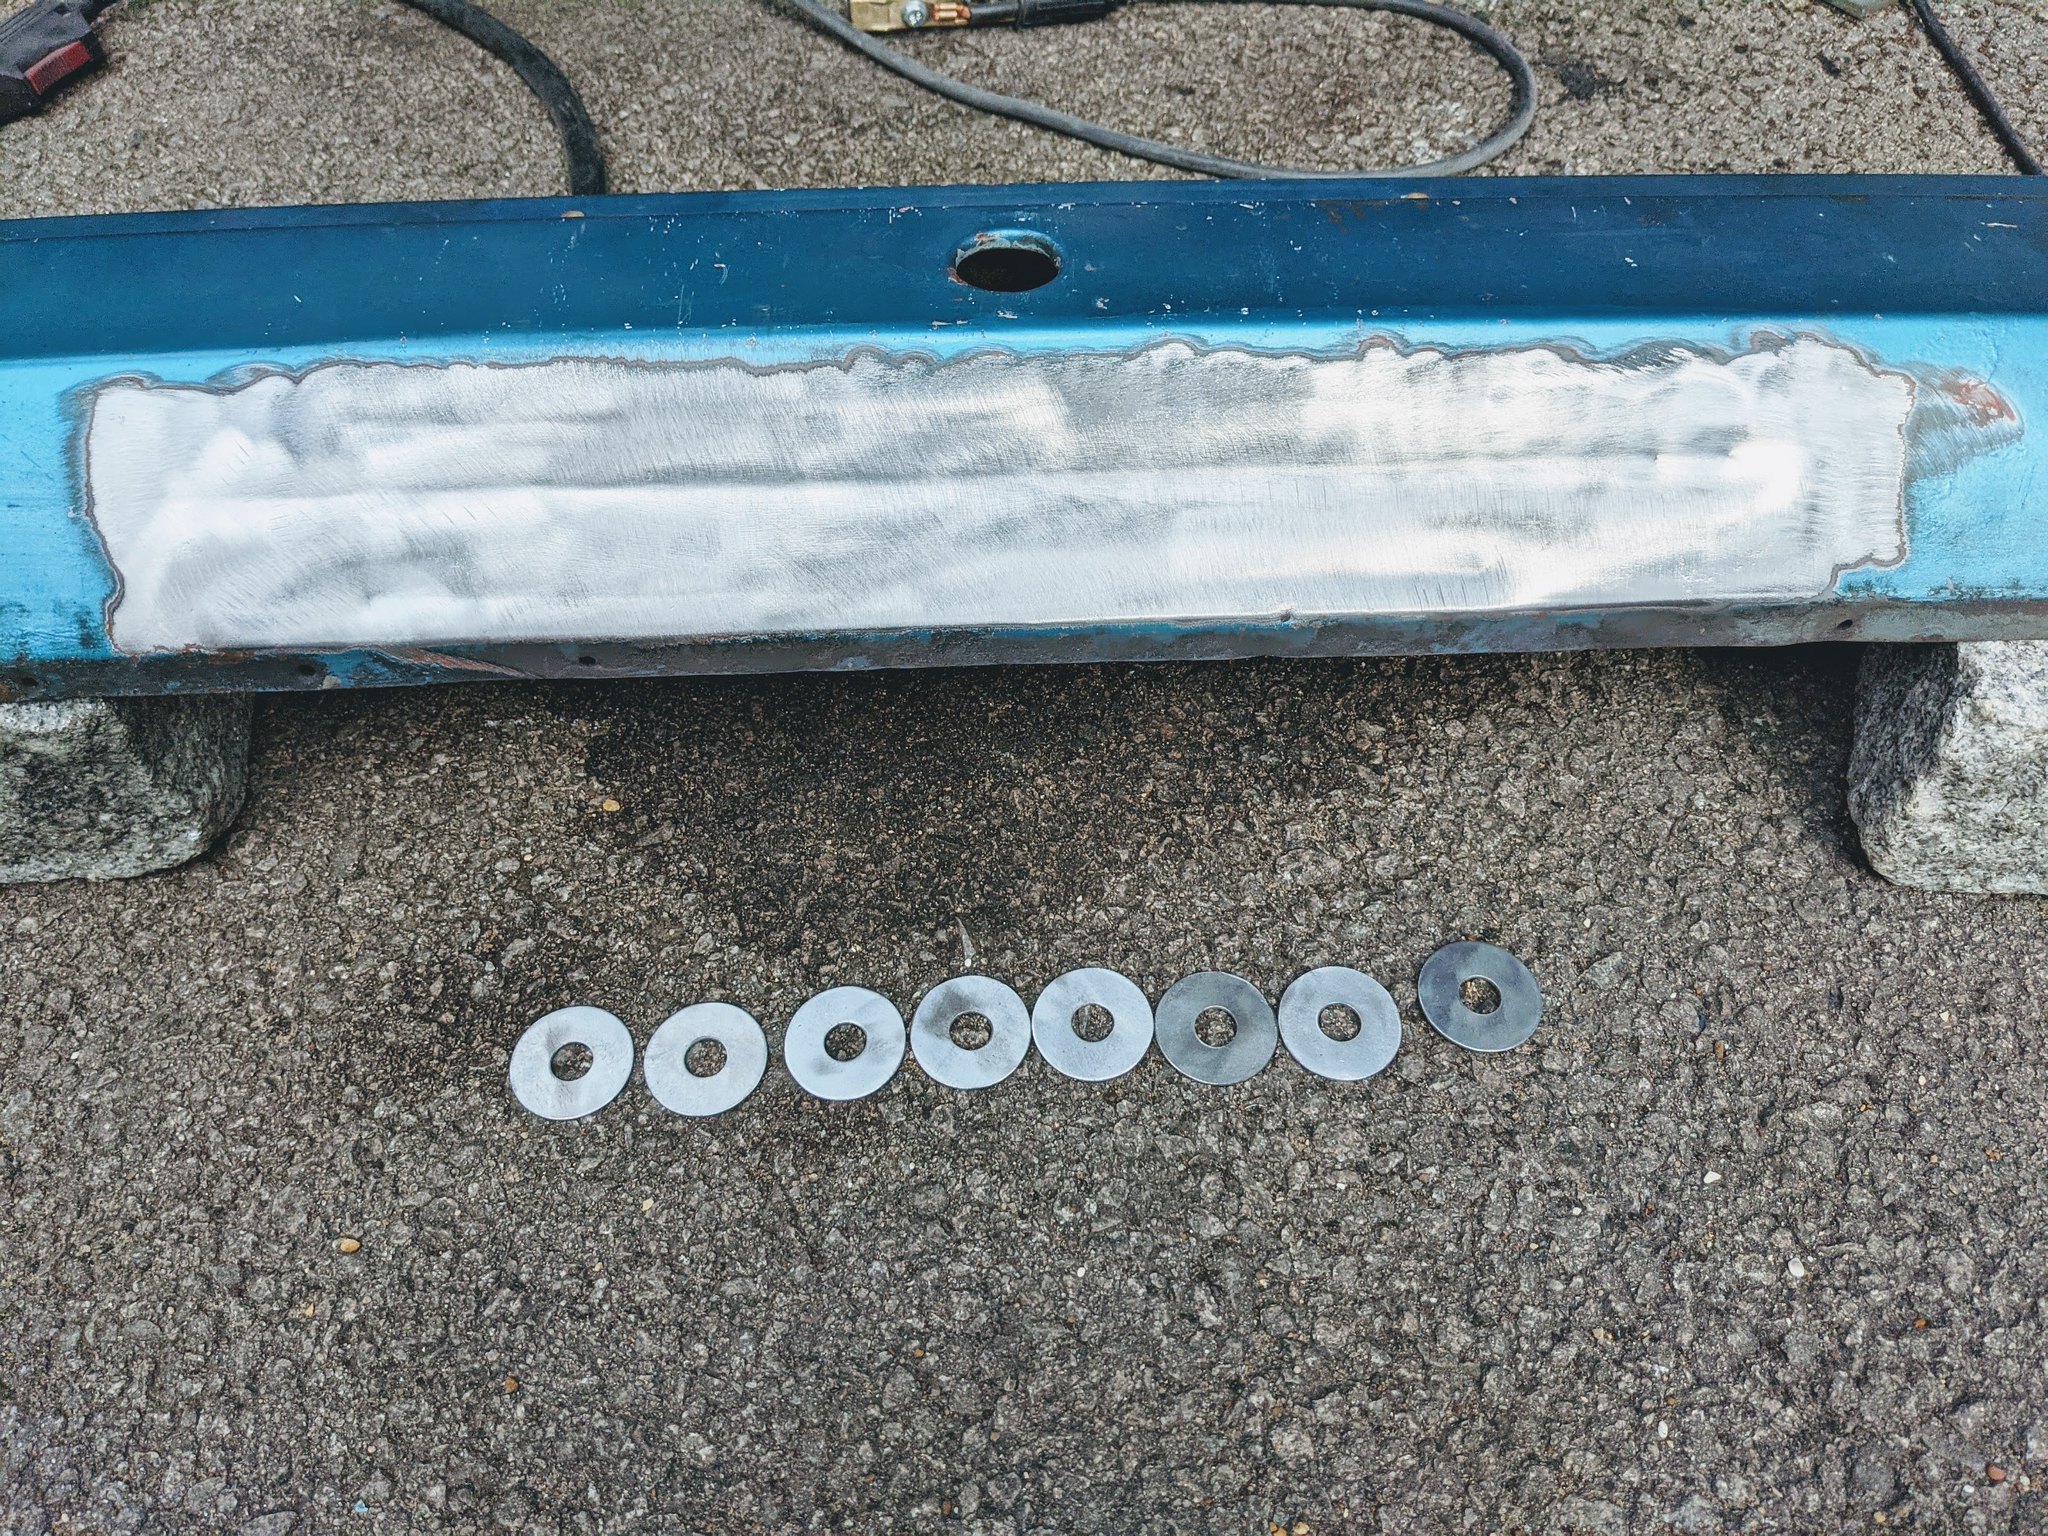 PXL_20210814_145553197 by Godfrey Hatton, on Flickr
 PXL_20210814_154050192 by Godfrey Hatton, on Flickr
And using a slide hammer pulled out the dent as best I could:
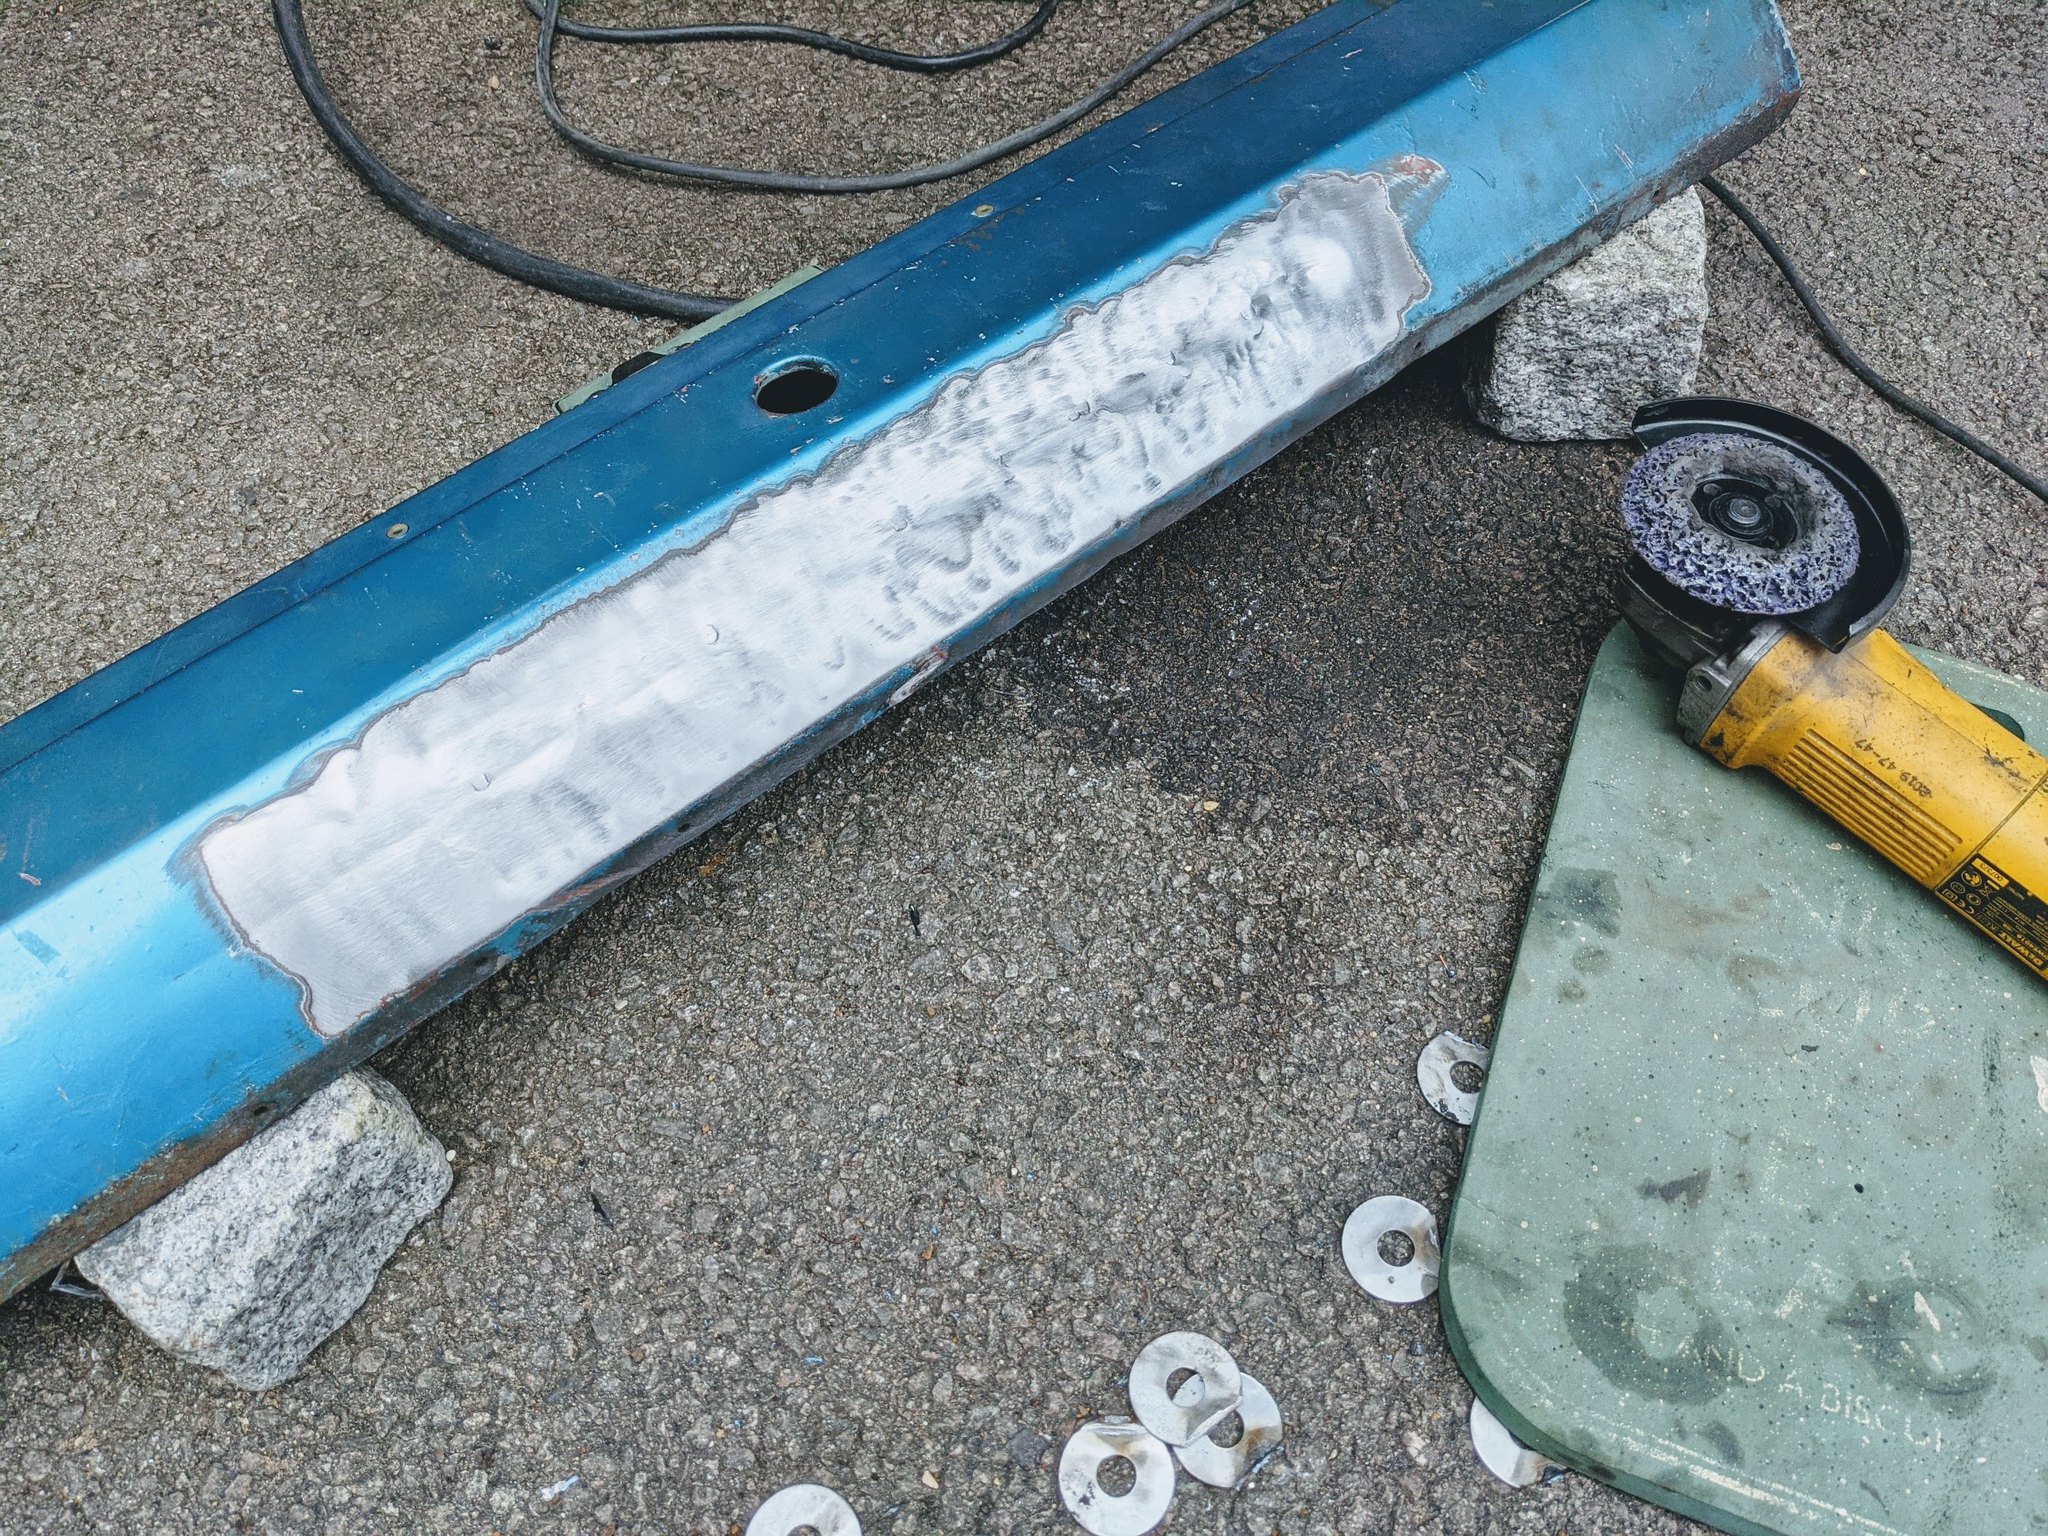 PXL_20210814_170502707 by Godfrey Hatton, on Flickr
Again, definitely not perfect, but done the job it needed to by significantly reducing the amount of filler required to get a smooth finish.
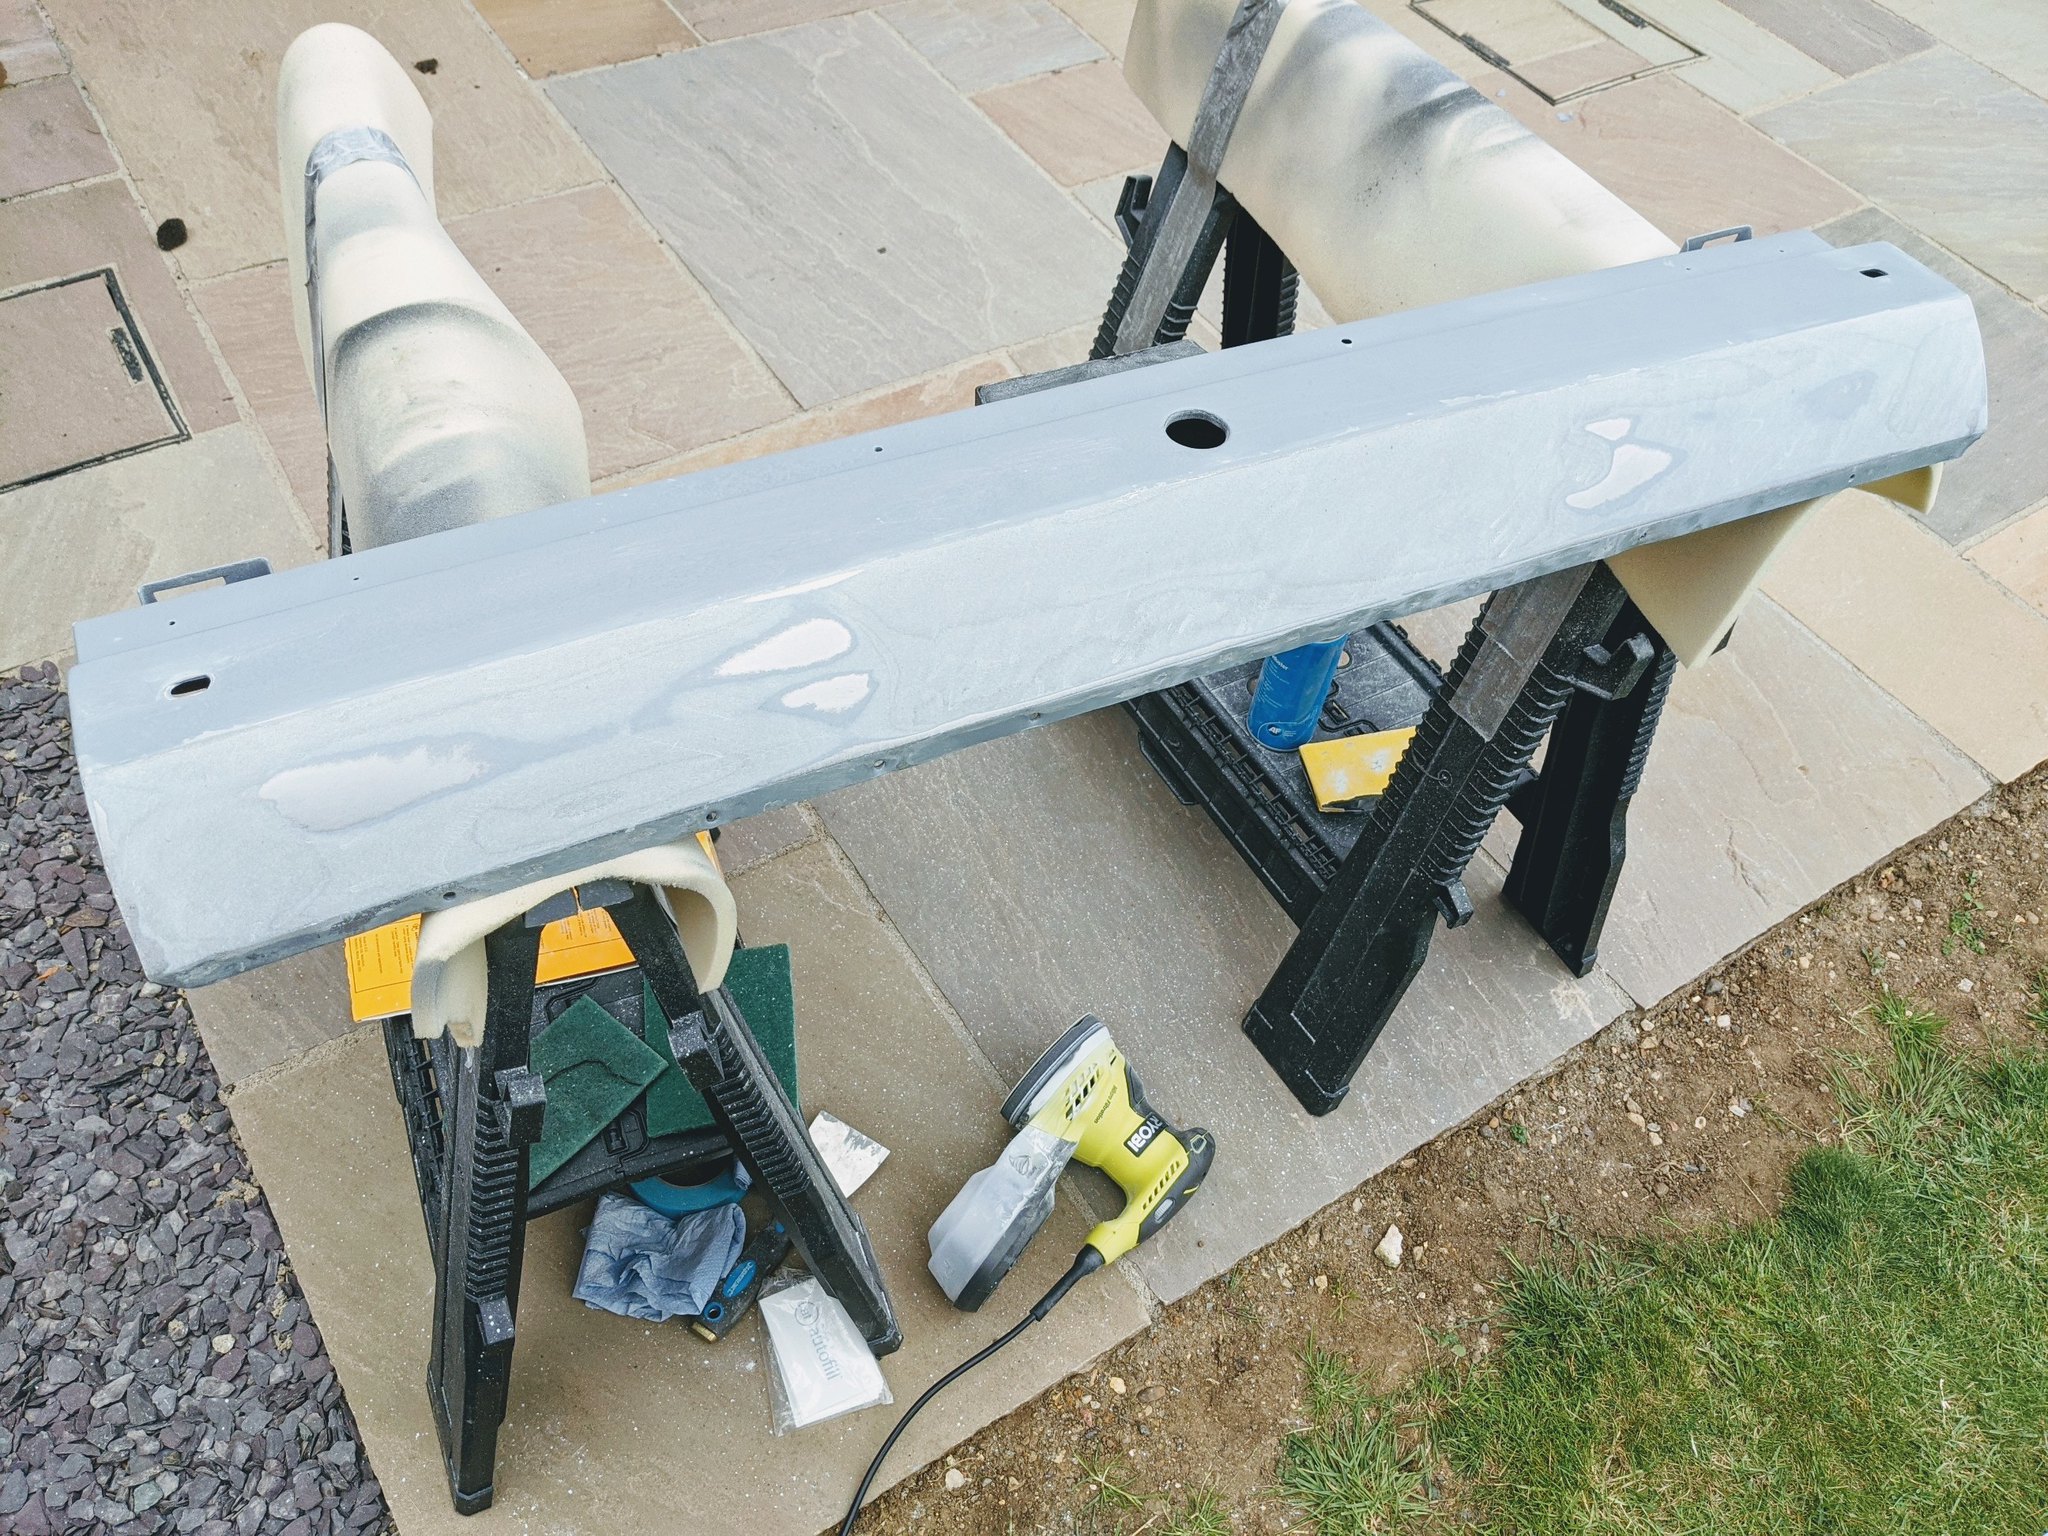
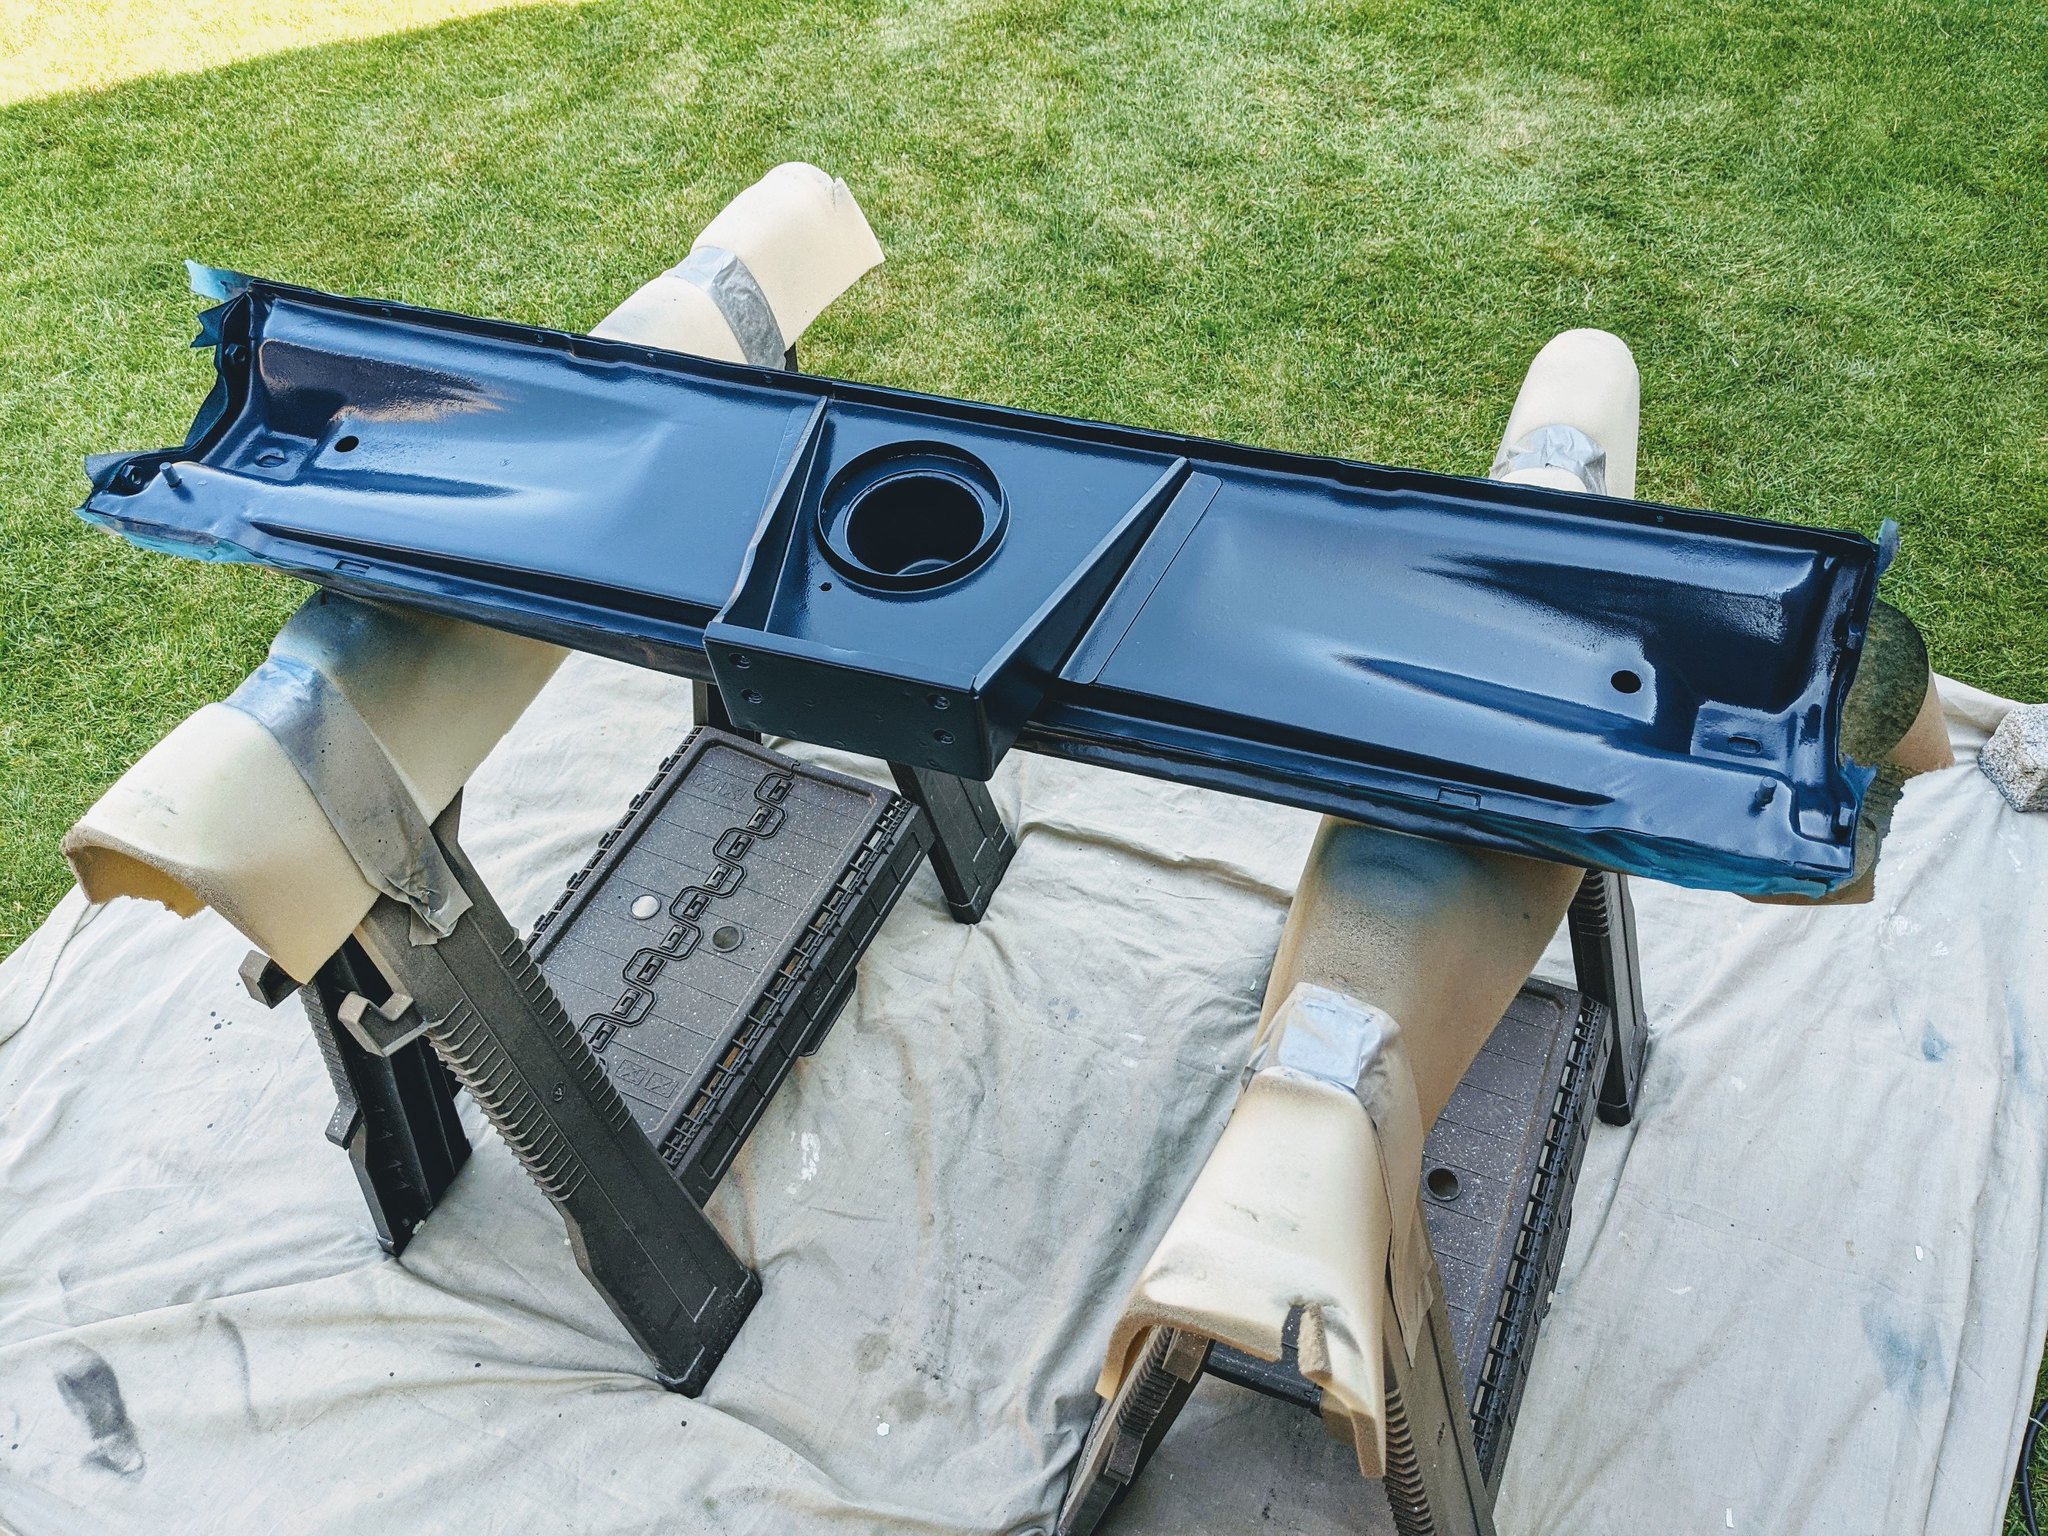
The next step is to prepare for paint. So I stripped back the entire panel to bare metal and let some deox gel neutralise any further pitting:
 PXL_20210827_154145302 by Godfrey Hatton, on Flickr
Before priming:
 PXL_20210828_105320818 by Godfrey Hatton, on Flickr
And to match the finish in the engine bay, a coat of stonechip using the fine nozzle on the inside:
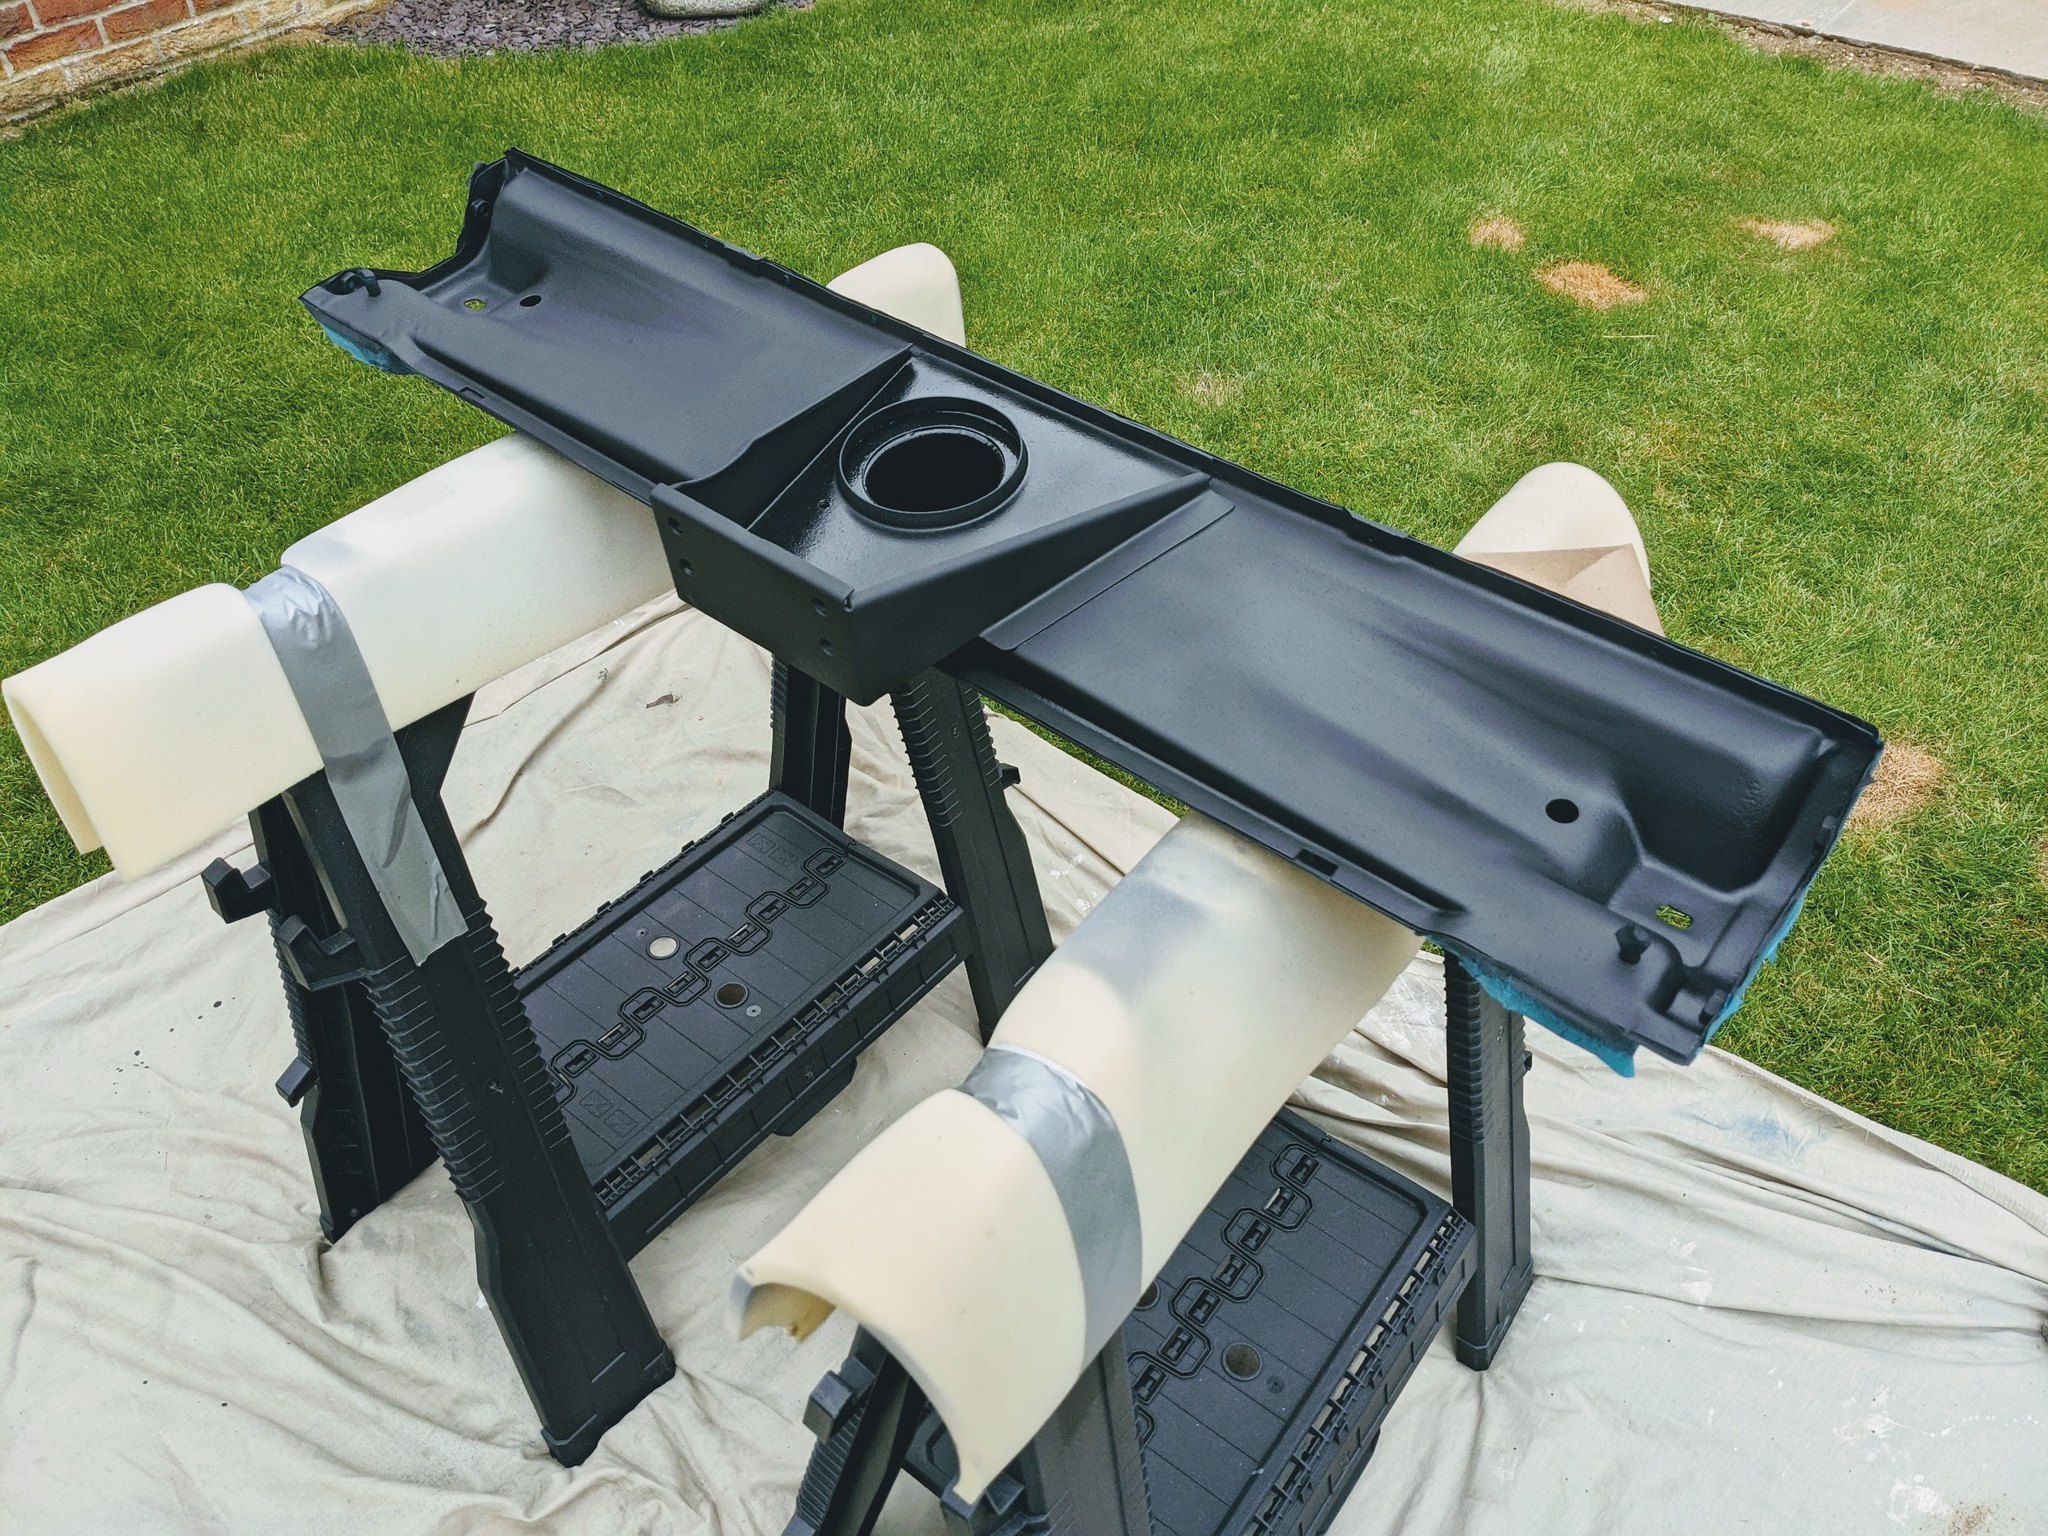 PXL_20210831_095900917 by Godfrey Hatton, on Flickr
Currently waiting for improved weather conditions so I can make a start with the filler and sanding on the exterior. Pleased with how it’s progressing so far though.
As always, any advice or comments please do let me know!
Pog
Been busy working away on the rear crossmember, so hope you don’t mind a photo filled update!
I started with the rot in the corner. Firstly, ground down to see what I was working with:
PXL_20210815_113140311 by Godfrey Hatton, on FlickrThen to cut out the rotted section on the outer skin:
PXL_20210815_113713823 by Godfrey Hatton, on FlickrAlthough clearly pitted, the inner skin cleaned up okay and I welded up a couple of pinholes from the other side. It’s definitely not perfect, and possibly even too far gone for just a patch repair like this, but I can only work to my skill level and this just makes it solid enough to get back on the road:
PXL_20210815_121429902 by Godfrey Hatton, on FlickrOnce cleaned up properly I primed the inside with weld through primer and welded in the new patch. I was a bit out of practice I must admit and ended up distorting it slightly. Ah well, it's better than it was, it’ll just take a bit more work in the filler and sanding stage, but it’ll do!
PXL_20210815_165838513 by Godfrey Hatton, on FlickrI then turned my attention to the huge dent in the middle of the panel. Now I wasn’t going to fork out for a proper stud welder, but I used the same process in a DIY fashion. Cleaning back to bare metal and tacking on a number of washers:
PXL_20210814_145553197 by Godfrey Hatton, on FlickrPXL_20210814_154050192 by Godfrey Hatton, on FlickrAnd using a slide hammer pulled out the dent as best I could:
PXL_20210814_170502707 by Godfrey Hatton, on FlickrAgain, definitely not perfect, but done the job it needed to by significantly reducing the amount of filler required to get a smooth finish.
The next step is to prepare for paint. So I stripped back the entire panel to bare metal and let some deox gel neutralise any further pitting:
PXL_20210827_154145302 by Godfrey Hatton, on FlickrBefore priming:
PXL_20210828_105320818 by Godfrey Hatton, on FlickrAnd to match the finish in the engine bay, a coat of stonechip using the fine nozzle on the inside:
PXL_20210831_095900917 by Godfrey Hatton, on FlickrCurrently waiting for improved weather conditions so I can make a start with the filler and sanding on the exterior. Pleased with how it’s progressing so far though.
As always, any advice or comments please do let me know!
Pog
Young Imp Members Registrar
-
Pog
- Posts: 142
- Joined: Sat Aug 24, 2013 4:55 pm
- Club Member: Yes
- Car Model: 1969 Super 'Betty'
- Location: Northampton, UK
- Has thanked: 10 times
- Been thanked: 37 times
Re: EHK 744G - 1969 Super - 1st panel painted
Hey everyone,
Well the last few weeks has been a serious learning curve, but the rear transom panel is now fully painted. This is my first time prepping a panel, using filler etc and I'm not going to lie it did take me several attempts before I was happy with how it was turning out - here's how I got on. I took many more photos between stages but here is the condensed version:
1st step was to predominantly fill what remained of the dent I pulled to achieve a starting level surface:
 PXL_20210901_142534725 by Godfrey Hatton, on Flickr
After a couple coats of high-build, a guide coat revealed where it was still quite low in the middle compared to the outer edges:
 PXL_20210903_110633455 by Godfrey Hatton, on Flickr
Using a finer glazing filler then allowed me to dial in the correct shape of the panel and get it smooth and flat:
 PXL_20210903_125642408 by Godfrey Hatton, on Flickr
A couple more coats of high build and I was really happy with how it was looking. Trying to get that body line completely straight and the right level of 'sharpness' took a lot of trial and error!
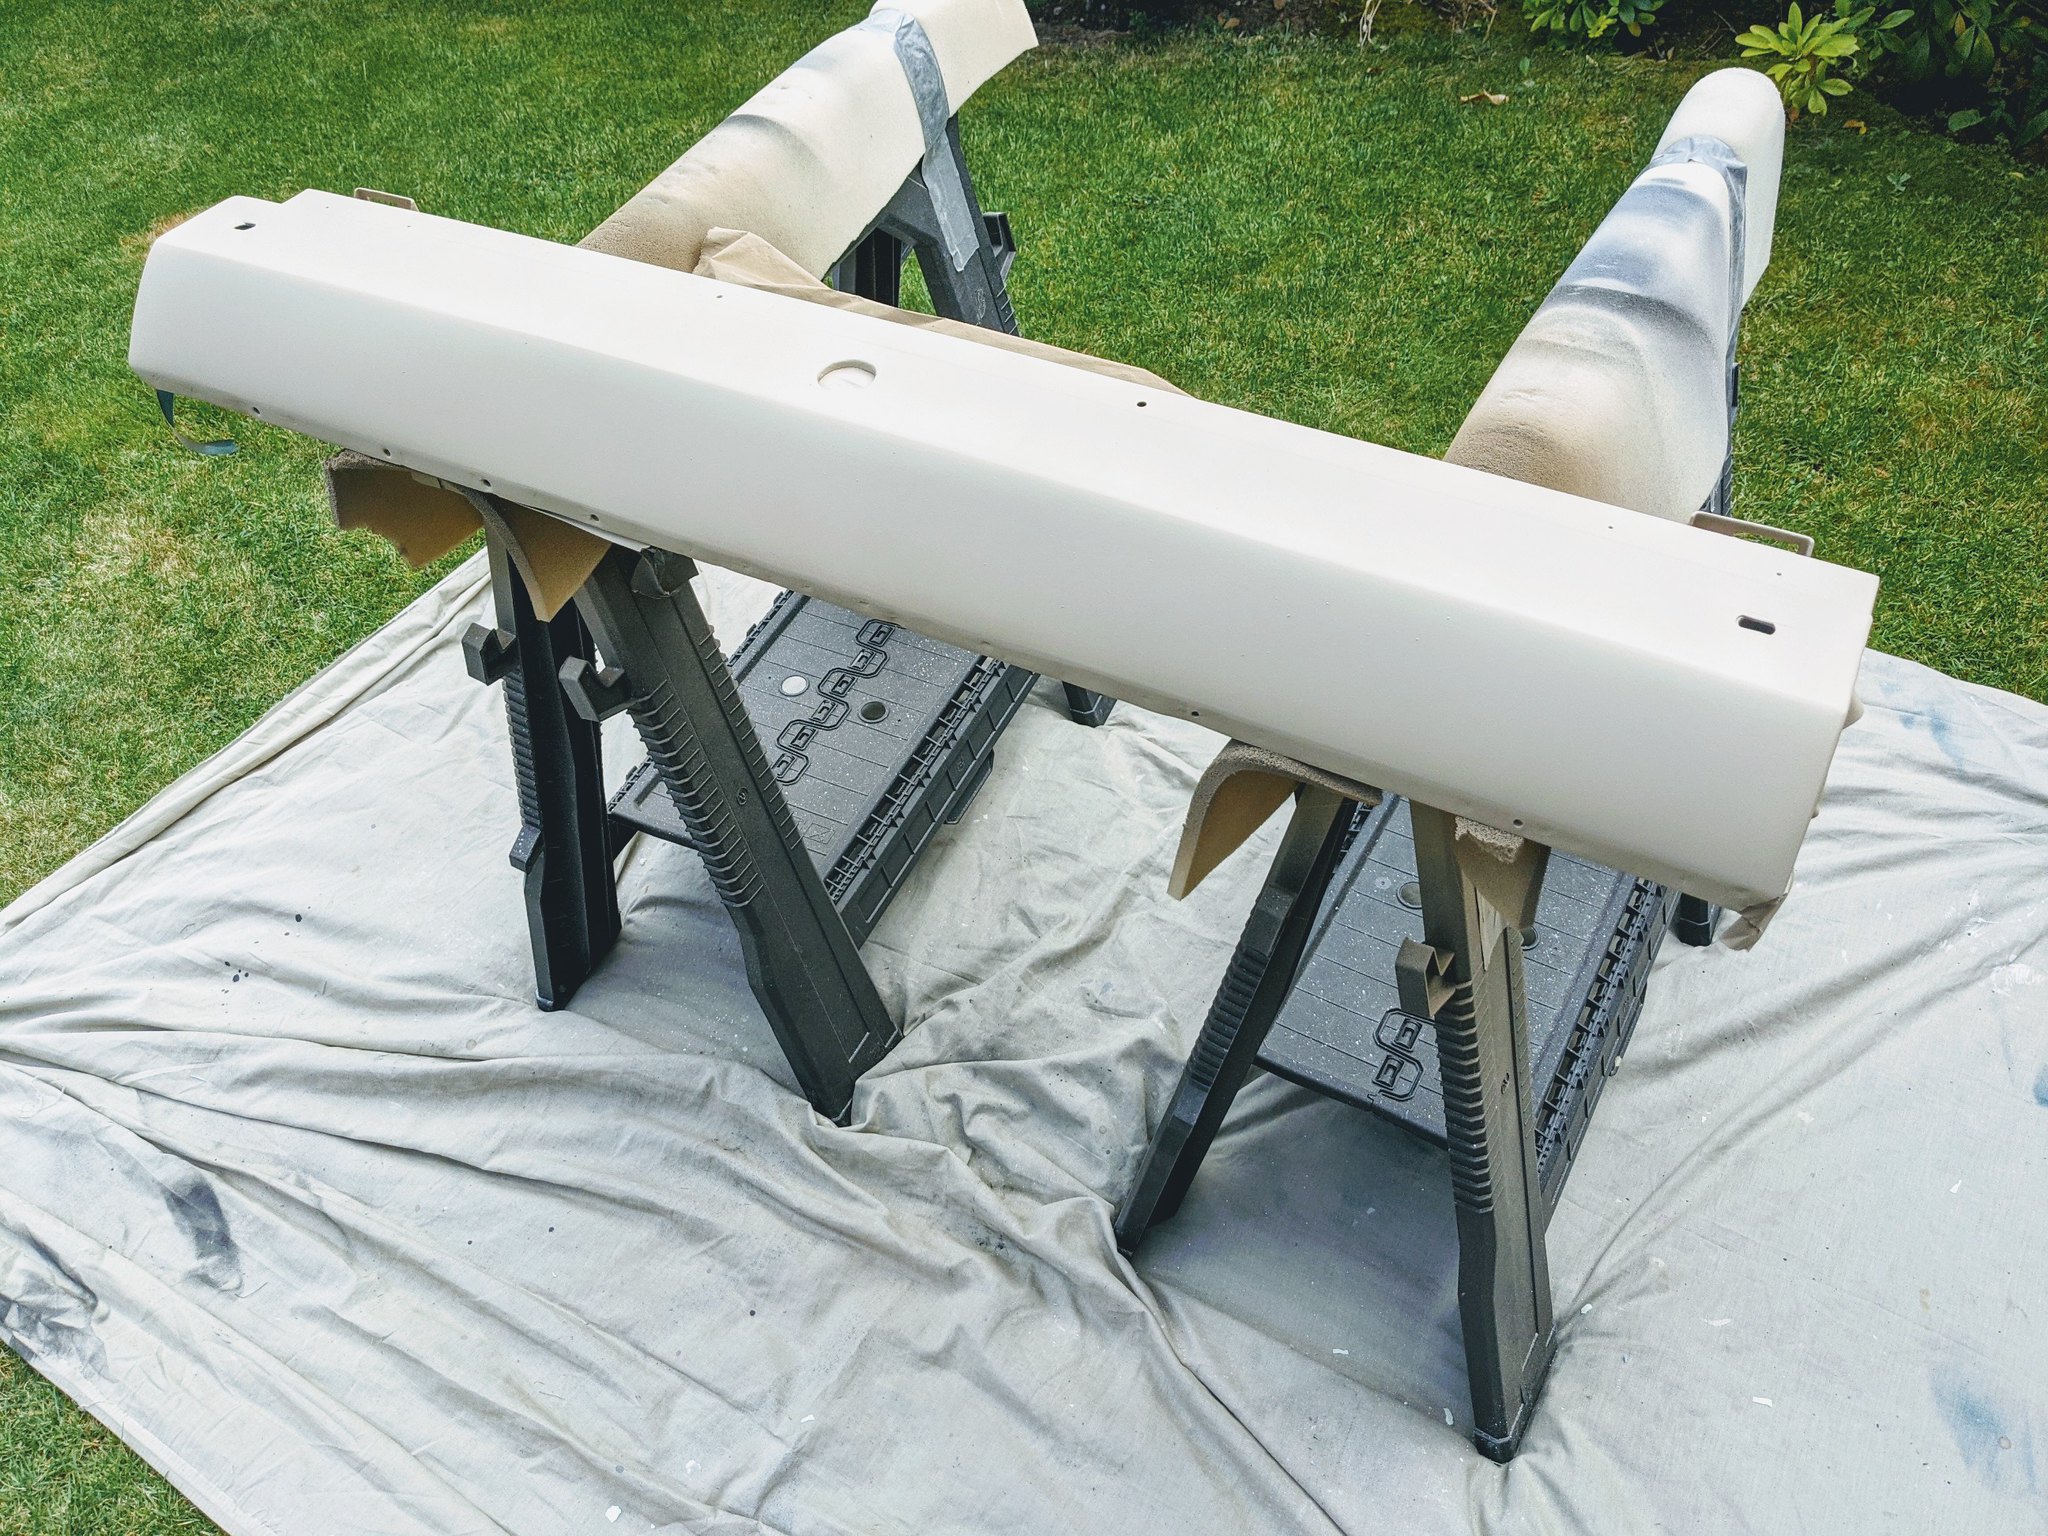 PXL_20210906_110333633 by Godfrey Hatton, on Flickr
Once happy with the final shape I then focused on getting it flat enough for final colour, wet sanding revealed I was getting somewhere, slowly but surely a reflection started to appear:
 PXL_20210907_101253934 by Godfrey Hatton, on Flickr
Then I could move on to the colour coats. 4 coats to start with, slowly building up the layers:
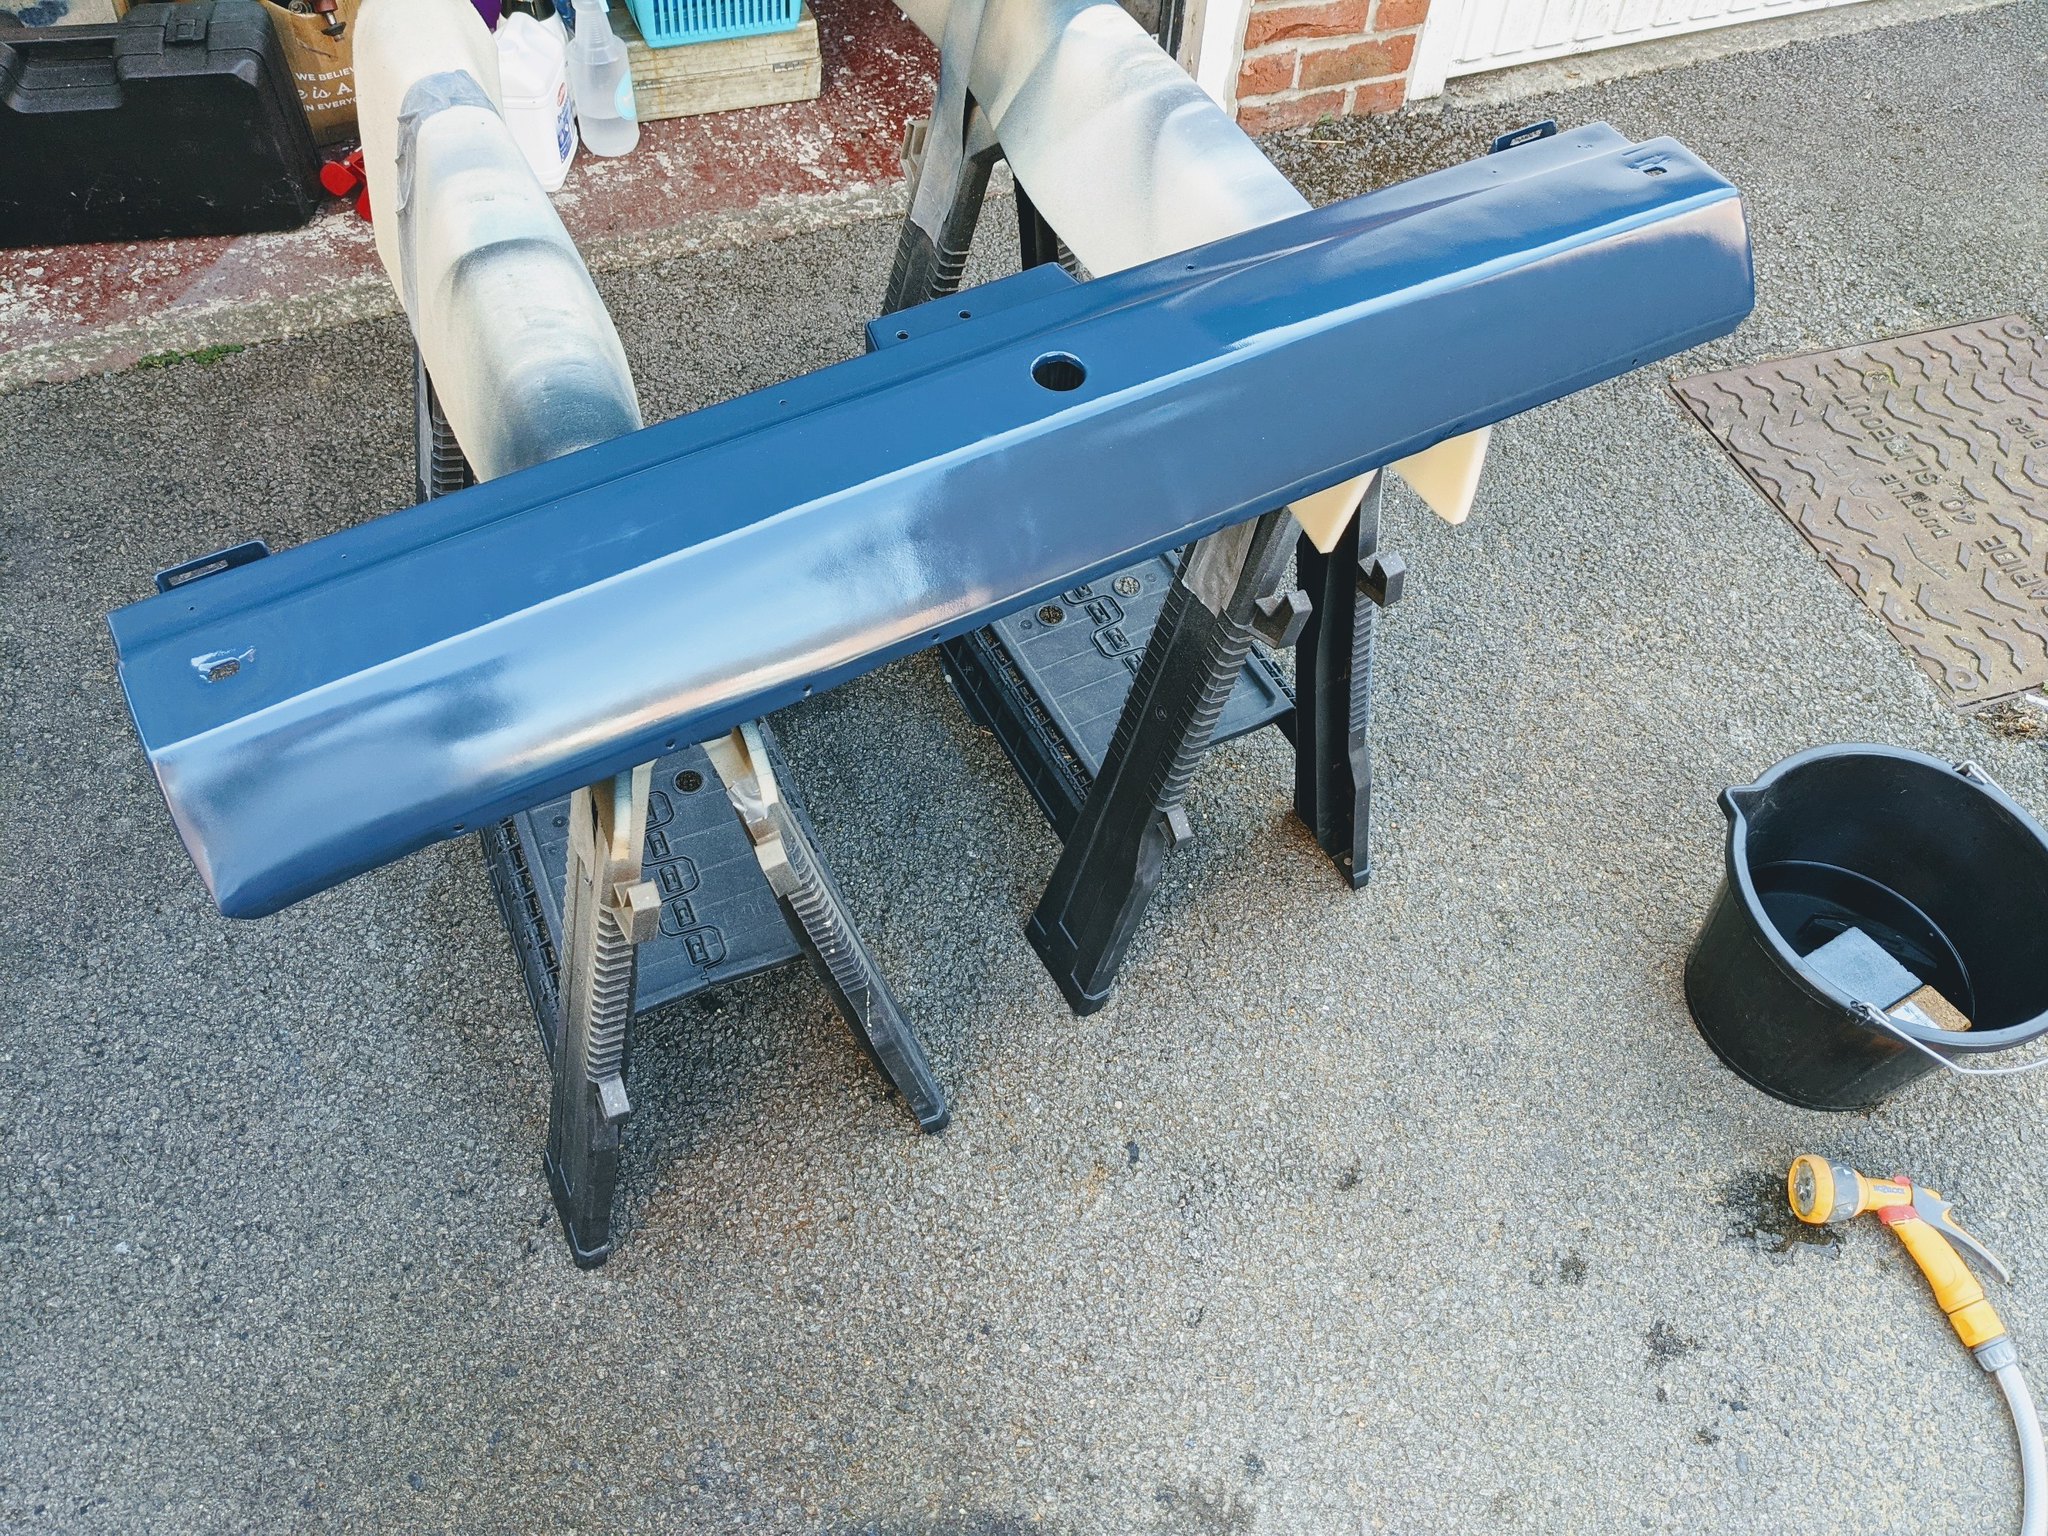 PXL_20210908_092213324 by Godfrey Hatton, on Flickr
And in a bid to help the final finish (as I'm fully aware this is a far from professional job and need all the help I can get) I went on to wet sand again between colour coats, before laying another 4 coats of final colour:
 PXL_20210908_095321690 by Godfrey Hatton, on Flickr
Which has actually resulted in something that isn't completely dreadful! It's certainly glossy enough, if not a tad (read, quite a lot) orange peely, but nothing a final cut and compound won't sort out.
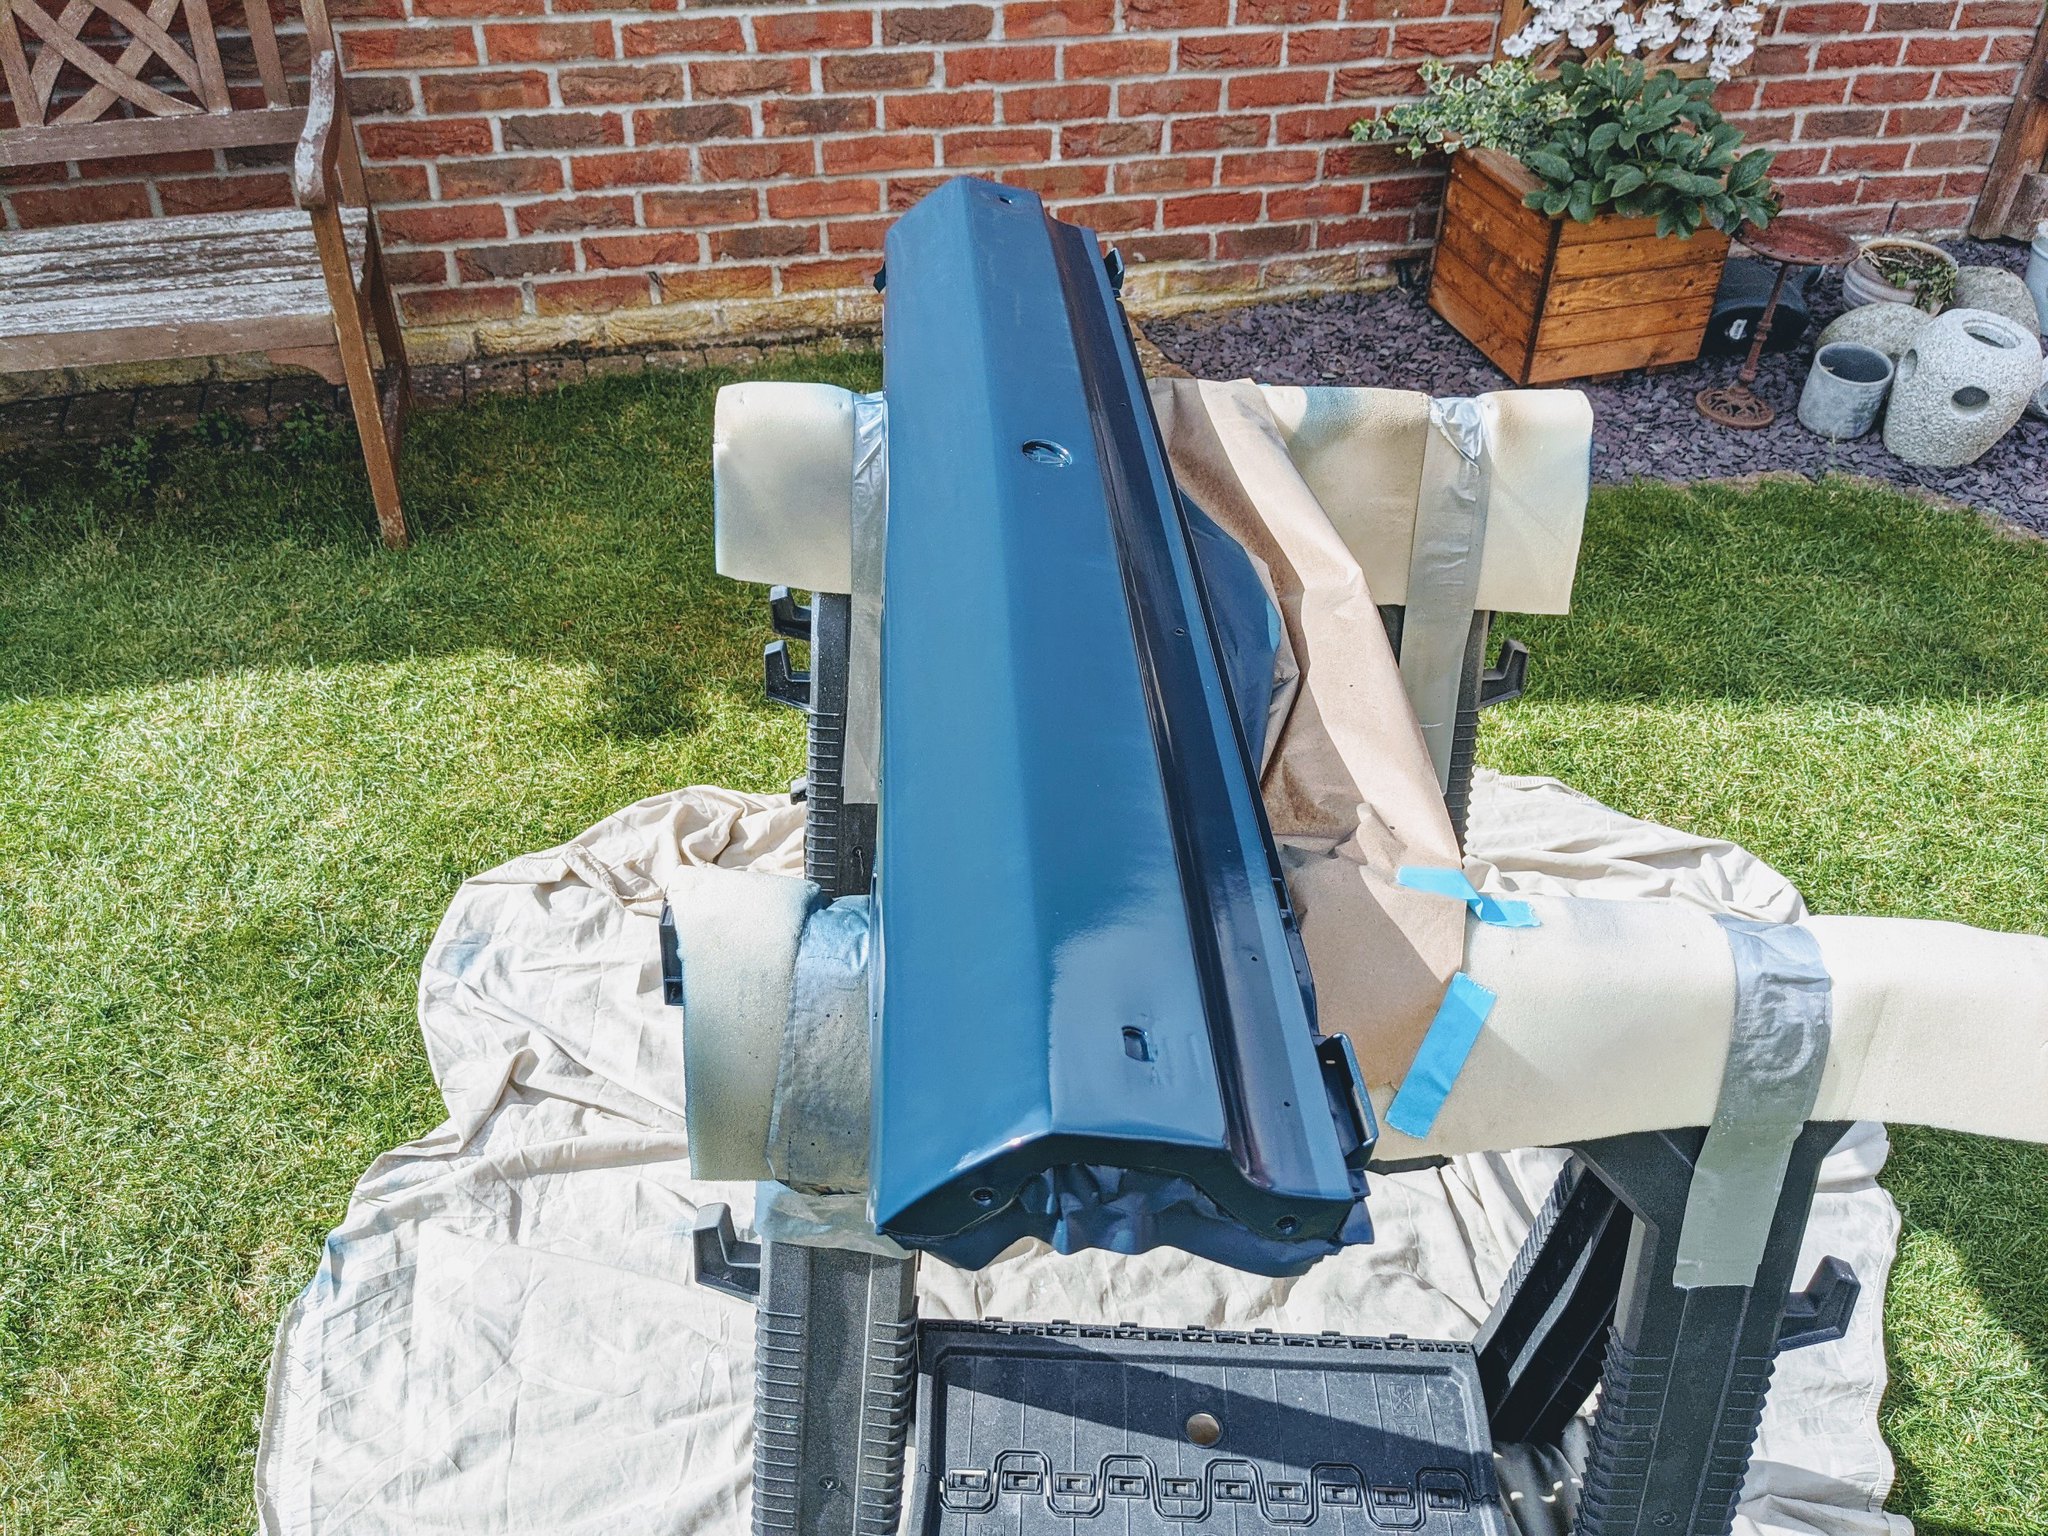 PXL_20210909_101624245 by Godfrey Hatton, on Flickr
 PXL_20210909_100309936 by Godfrey Hatton, on Flickr
 PXL_20210906_134704591 by Godfrey Hatton, on Flickr
The main reason for starting with this panel is most of it is out of sight, hid by the bumper and then curving underneath the car, so I knew that if it wasn't perfect it won't stick out like a sore thumb. I can then use all I've learned doing this panel on the rest of the car, where it will really count, eg. the importance of 'over sharpening' the body lines when shaping as they soon soften after a few coats of paint.
But by far the biggest take away for me was being humbled with what I thought I could achieve just with spray cans. As you know I've only used aerosol's for everything up til now, and I've certainly been pleased with how everything looks, but I've now realised there's a huge difference between making something look decent for the interior and getting a quality finish on the exterior... I really wanted my 'achievement' to be that I painted it with nothing but spray cans, but I see now how naïve that was! Without a doubt I'll be investing in a compressor so I can do a proper DIY job with a gun, but I'm still determined to paint it myself, I've at least proved to myself I can get a half decent finish, but it was hard enough on a small panel like this so I dread to think how I'd have got on with the rest of the car. What do you guys think?
Pog
Well the last few weeks has been a serious learning curve, but the rear transom panel is now fully painted. This is my first time prepping a panel, using filler etc and I'm not going to lie it did take me several attempts before I was happy with how it was turning out - here's how I got on. I took many more photos between stages but here is the condensed version:
1st step was to predominantly fill what remained of the dent I pulled to achieve a starting level surface:
PXL_20210901_142534725 by Godfrey Hatton, on FlickrAfter a couple coats of high-build, a guide coat revealed where it was still quite low in the middle compared to the outer edges:
PXL_20210903_110633455 by Godfrey Hatton, on Flickr Using a finer glazing filler then allowed me to dial in the correct shape of the panel and get it smooth and flat:
PXL_20210903_125642408 by Godfrey Hatton, on FlickrA couple more coats of high build and I was really happy with how it was looking. Trying to get that body line completely straight and the right level of 'sharpness' took a lot of trial and error!
PXL_20210906_110333633 by Godfrey Hatton, on Flickr Once happy with the final shape I then focused on getting it flat enough for final colour, wet sanding revealed I was getting somewhere, slowly but surely a reflection started to appear:
PXL_20210907_101253934 by Godfrey Hatton, on Flickr Then I could move on to the colour coats. 4 coats to start with, slowly building up the layers:
PXL_20210908_092213324 by Godfrey Hatton, on Flickr And in a bid to help the final finish (as I'm fully aware this is a far from professional job and need all the help I can get) I went on to wet sand again between colour coats, before laying another 4 coats of final colour:
PXL_20210908_095321690 by Godfrey Hatton, on Flickr Which has actually resulted in something that isn't completely dreadful! It's certainly glossy enough, if not a tad (read, quite a lot) orange peely, but nothing a final cut and compound won't sort out.
PXL_20210909_101624245 by Godfrey Hatton, on FlickrPXL_20210909_100309936 by Godfrey Hatton, on Flickr PXL_20210906_134704591 by Godfrey Hatton, on FlickrThe main reason for starting with this panel is most of it is out of sight, hid by the bumper and then curving underneath the car, so I knew that if it wasn't perfect it won't stick out like a sore thumb. I can then use all I've learned doing this panel on the rest of the car, where it will really count, eg. the importance of 'over sharpening' the body lines when shaping as they soon soften after a few coats of paint.
But by far the biggest take away for me was being humbled with what I thought I could achieve just with spray cans. As you know I've only used aerosol's for everything up til now, and I've certainly been pleased with how everything looks, but I've now realised there's a huge difference between making something look decent for the interior and getting a quality finish on the exterior... I really wanted my 'achievement' to be that I painted it with nothing but spray cans, but I see now how naïve that was! Without a doubt I'll be investing in a compressor so I can do a proper DIY job with a gun, but I'm still determined to paint it myself, I've at least proved to myself I can get a half decent finish, but it was hard enough on a small panel like this so I dread to think how I'd have got on with the rest of the car. What do you guys think?
Pog
Young Imp Members Registrar
-
The Nun
- Posts: 2918
- Joined: Tue Jan 23, 2007 7:02 pm
- Club Member: Yes
- Car Model: Imp
- Location: South
- Has thanked: 74 times
- Been thanked: 104 times
Re: EHK 744G - 1969 Super - 1st panel painted
Mood indigo or Midnight Blue ?
Peter Nunn...ey im member 00033
-
Pog
- Posts: 142
- Joined: Sat Aug 24, 2013 4:55 pm
- Club Member: Yes
- Car Model: 1969 Super 'Betty'
- Location: Northampton, UK
- Has thanked: 10 times
- Been thanked: 37 times
Re: EHK 744G - 1969 Super - 1st panel painted
Good eye Peter! It's midnight blue. My favourite colour on an imp is Oxford blue off of the works cars. But that's a Rootes colour and wouldn't have been right on my 69 Chrysler car, so I decided on midnight blue so it would be period correct and still be a navy car like I wanted. And seeing it in person now I absolutely love it, it's got a hint of teal that completely changes colour when the sun hits it. Can't wait til the whole car is done!
Pog
Young Imp Members Registrar
-
bks974c
- Posts: 1401
- Joined: Thu Aug 19, 2004 5:26 pm
- Club Member: Yes
- Car Model: all the above
- Location: Edinburgh, Scotland
- Has thanked: 152 times
- Been thanked: 243 times
Re: EHK 744G - 1969 Super - 1st panel painted
Pog
Making good progress,90% of the finish is in the preparation and unfortunately no shortcuts. Painting with aerosols gets expensive real quick so a compressor and spray gun is going to be cost effective, cheap sprayguns are cheap for a reason but if you are prepared to sand it back you can end up with an excellent finish.
Don't sand with too fine a paper between coats (400-600) or you may fine subsequent coats don't bond too well as it needs the mechanical key.
Scott
-
Pog
- Posts: 142
- Joined: Sat Aug 24, 2013 4:55 pm
- Club Member: Yes
- Car Model: 1969 Super 'Betty'
- Location: Northampton, UK
- Has thanked: 10 times
- Been thanked: 37 times
Re: EHK 744G - 1969 Super - How has it been a year?!
Hi all,
I can't believe its been more than a year since I posted an update, and I'm slightly embarrassed the car is barely any further to being completed, how life gets in the way!
But in January we got a new addition to the family, a dachshund puppy named Ralph, who has completely taken over our lives
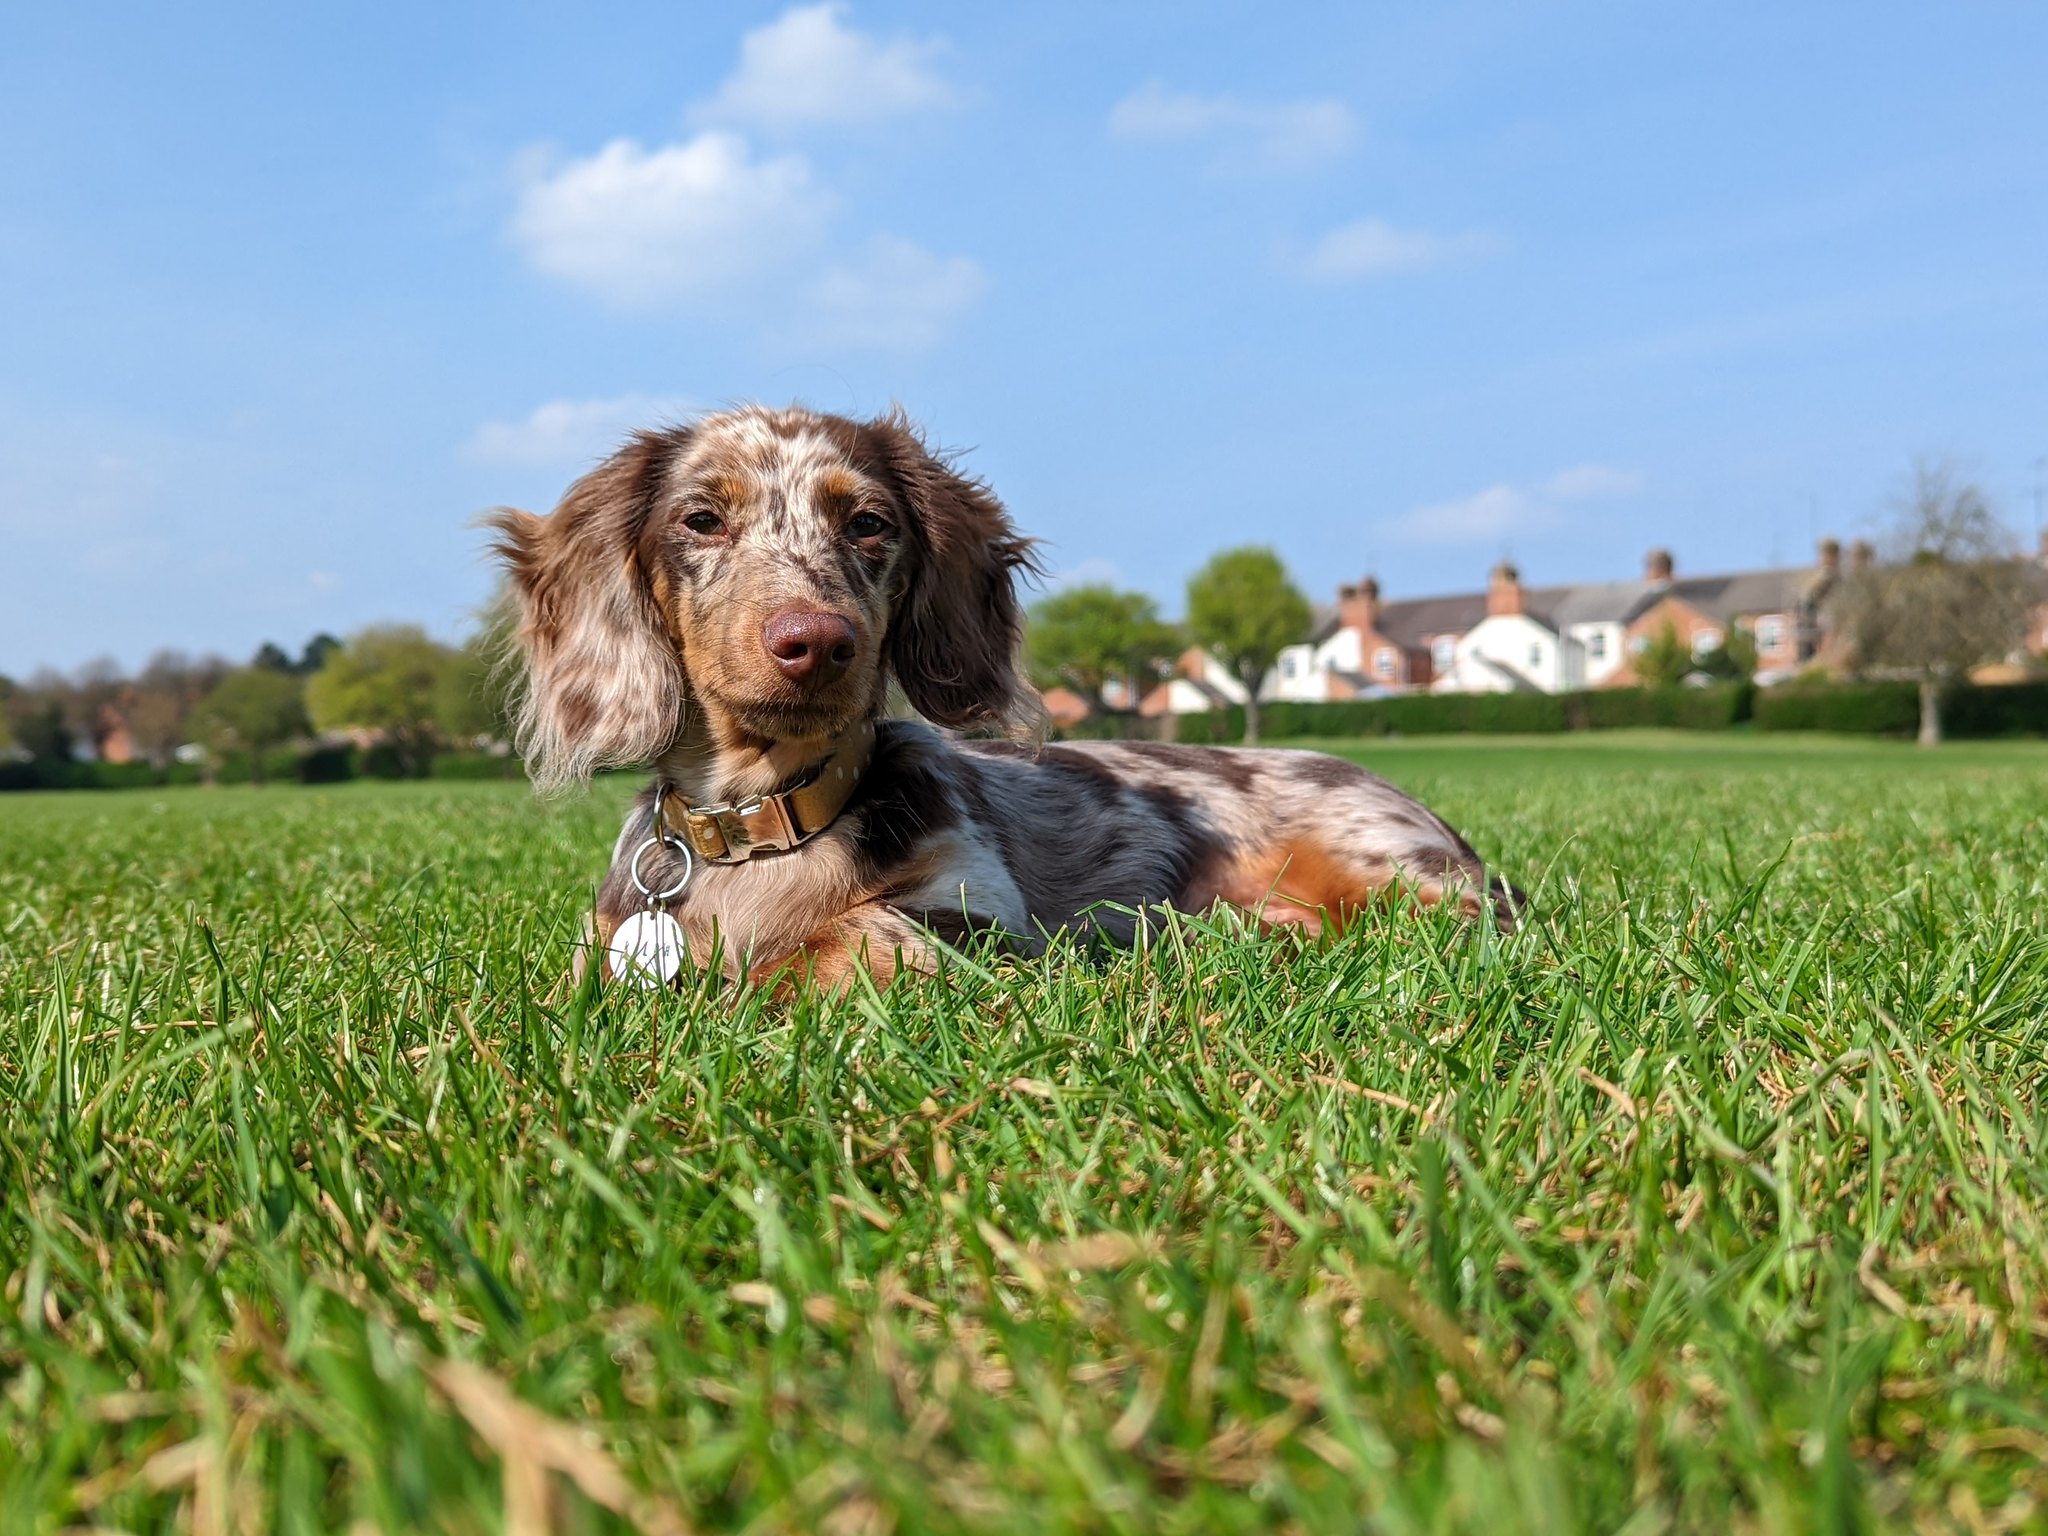 PXL_20220416_135901872.PORTRAIT by Godfrey Hatton, on Flickr
So I couldn't even set foot in the garage for the first few months while we were house training him. He's now nearly 11 months and is quite happy to accompany me into the garage, so literally just in the last month or so I've been able to try and gain some momentum back on the project.
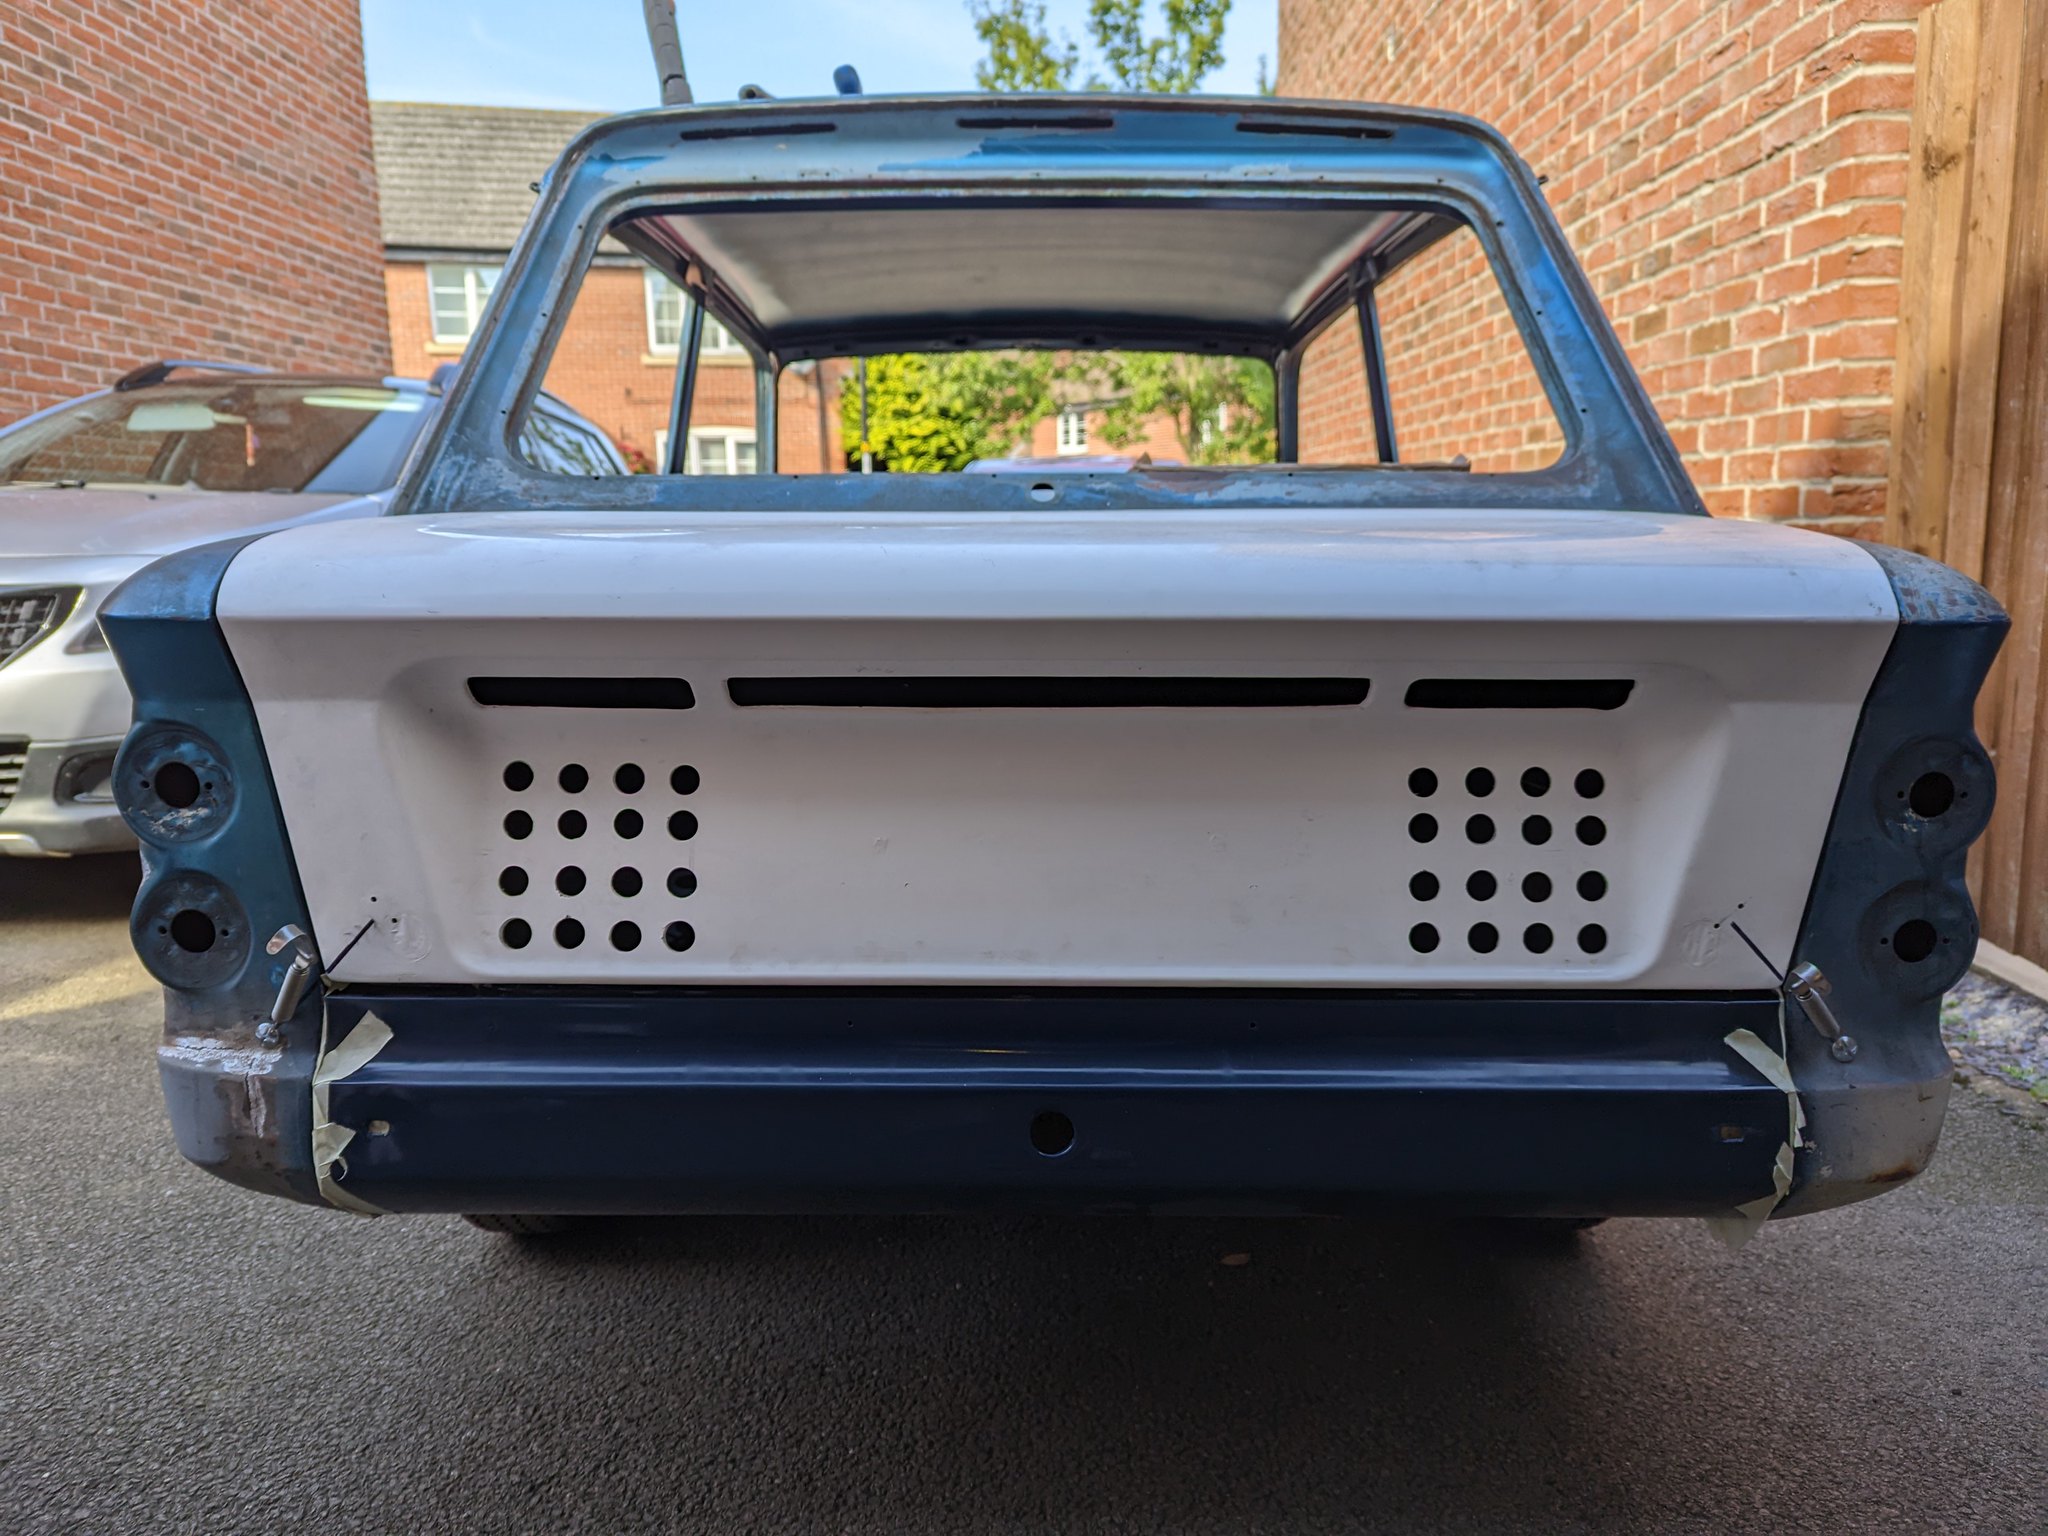
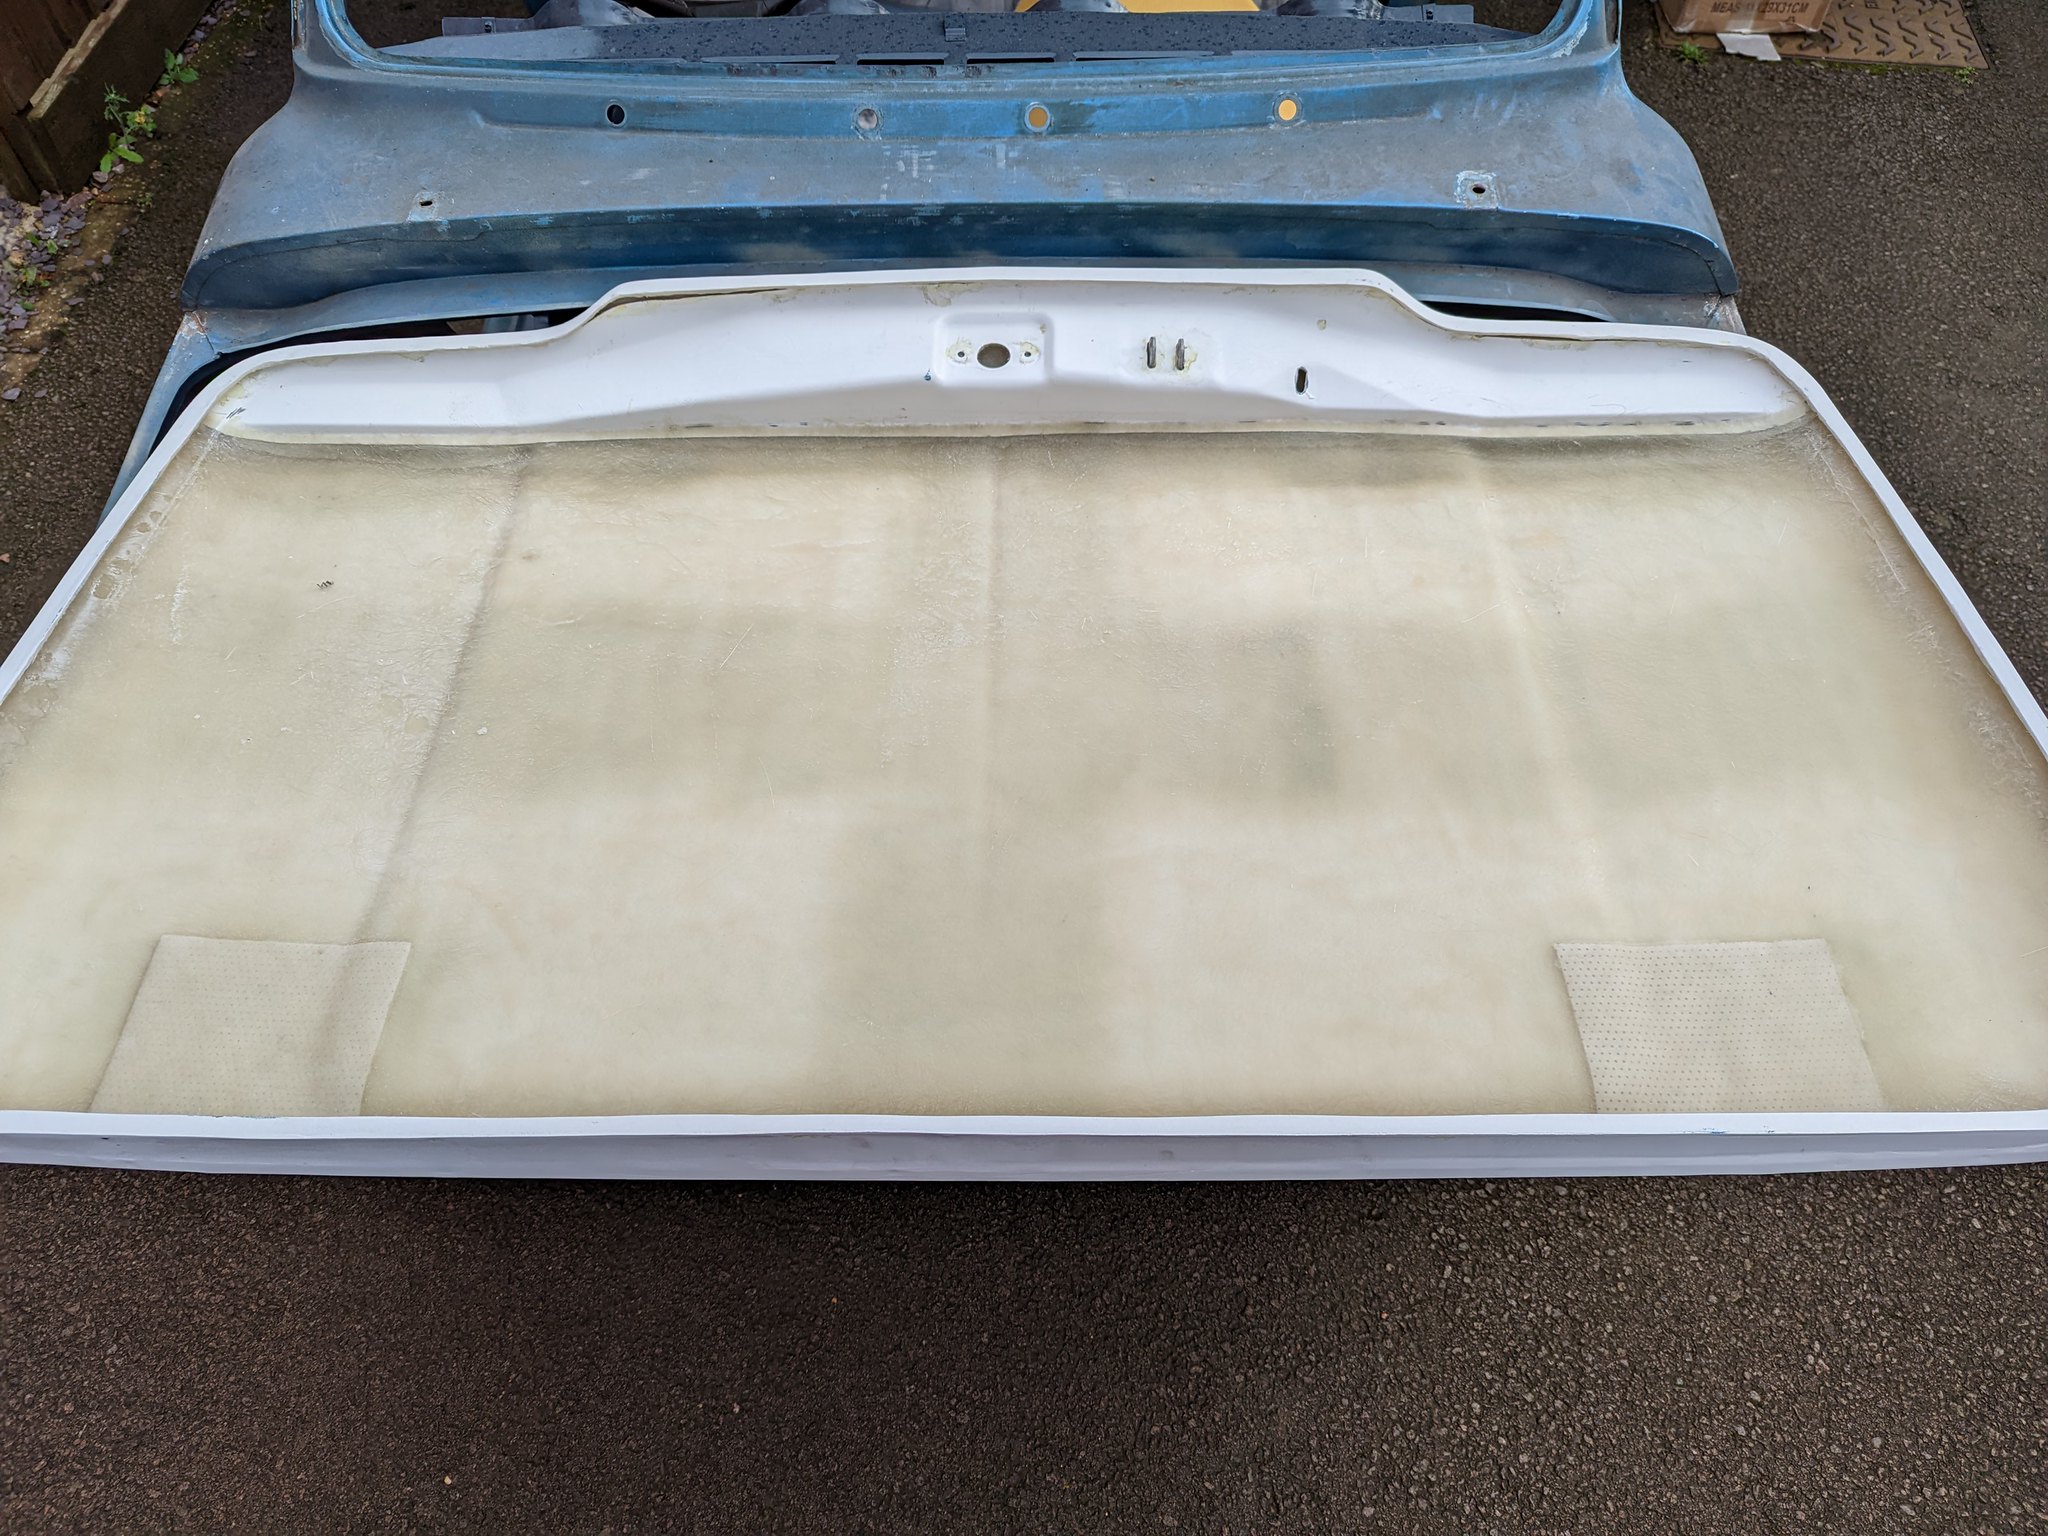
Some of you on the Facebook page will have seen I haven't been completely dormant, I've had a bit of a saga trying to source a fibreglass bonnet and engine lid. I purchased a lid and bonnet from a firm called Smith & Deakin Plastics, based in Worcester. The chap was very accommodating and was even happy to take on customising the engine lid with some cooling holes I wanted (prefer the look over sport slots).
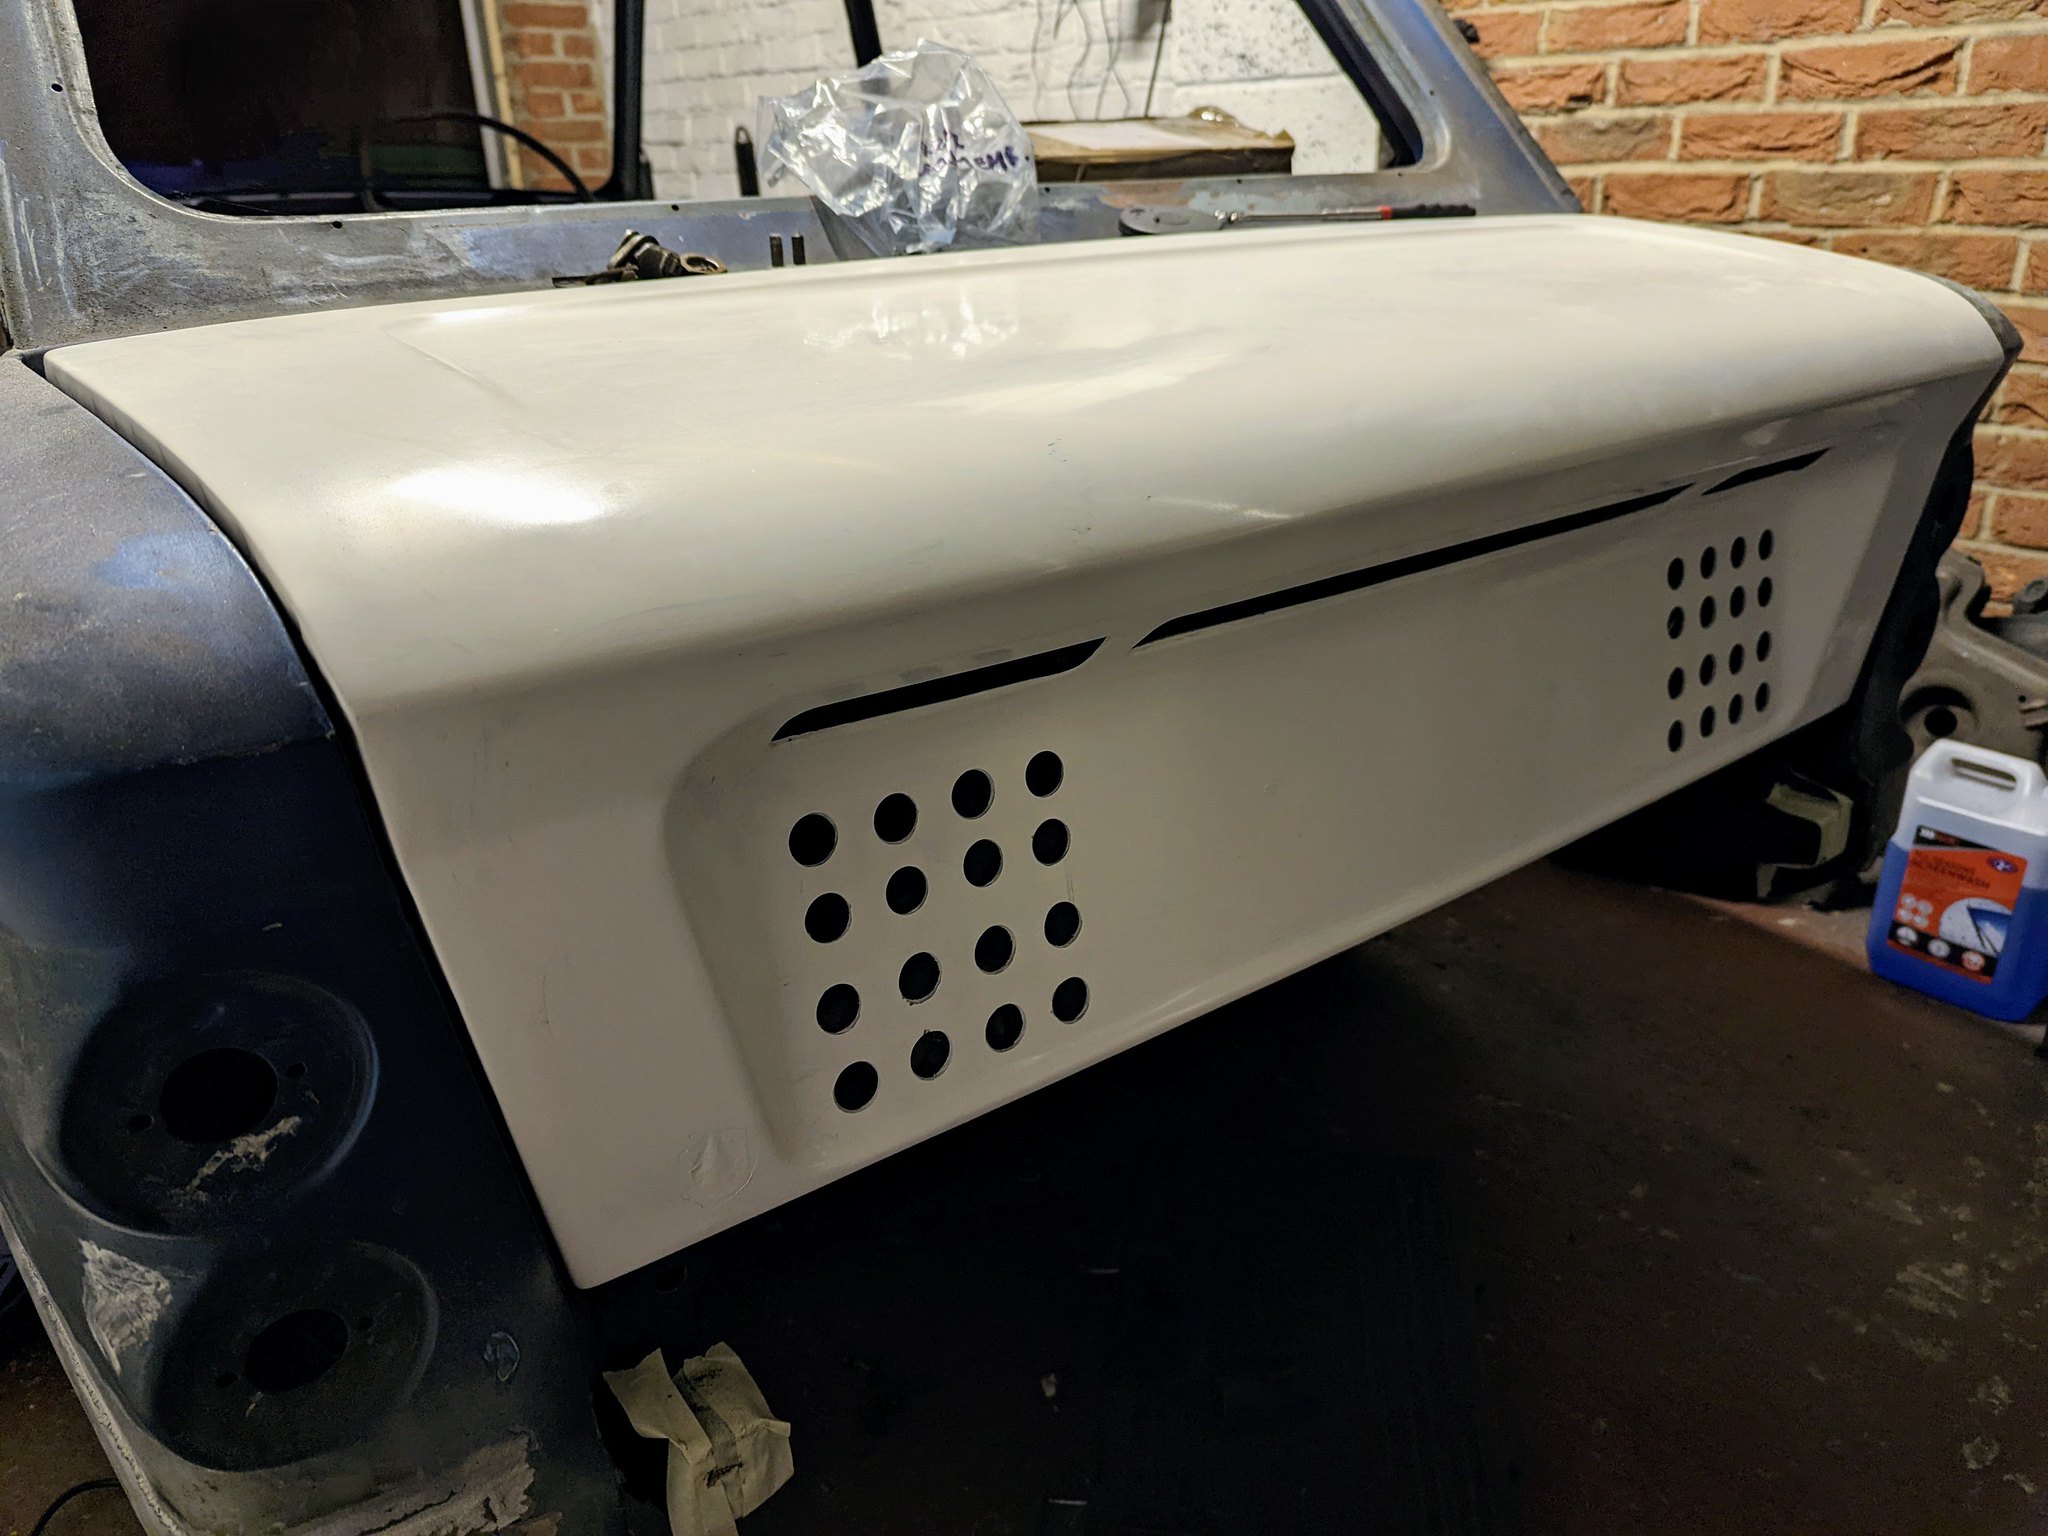 PXL_20211203_192250240_2 by Godfrey Hatton, on Flickr
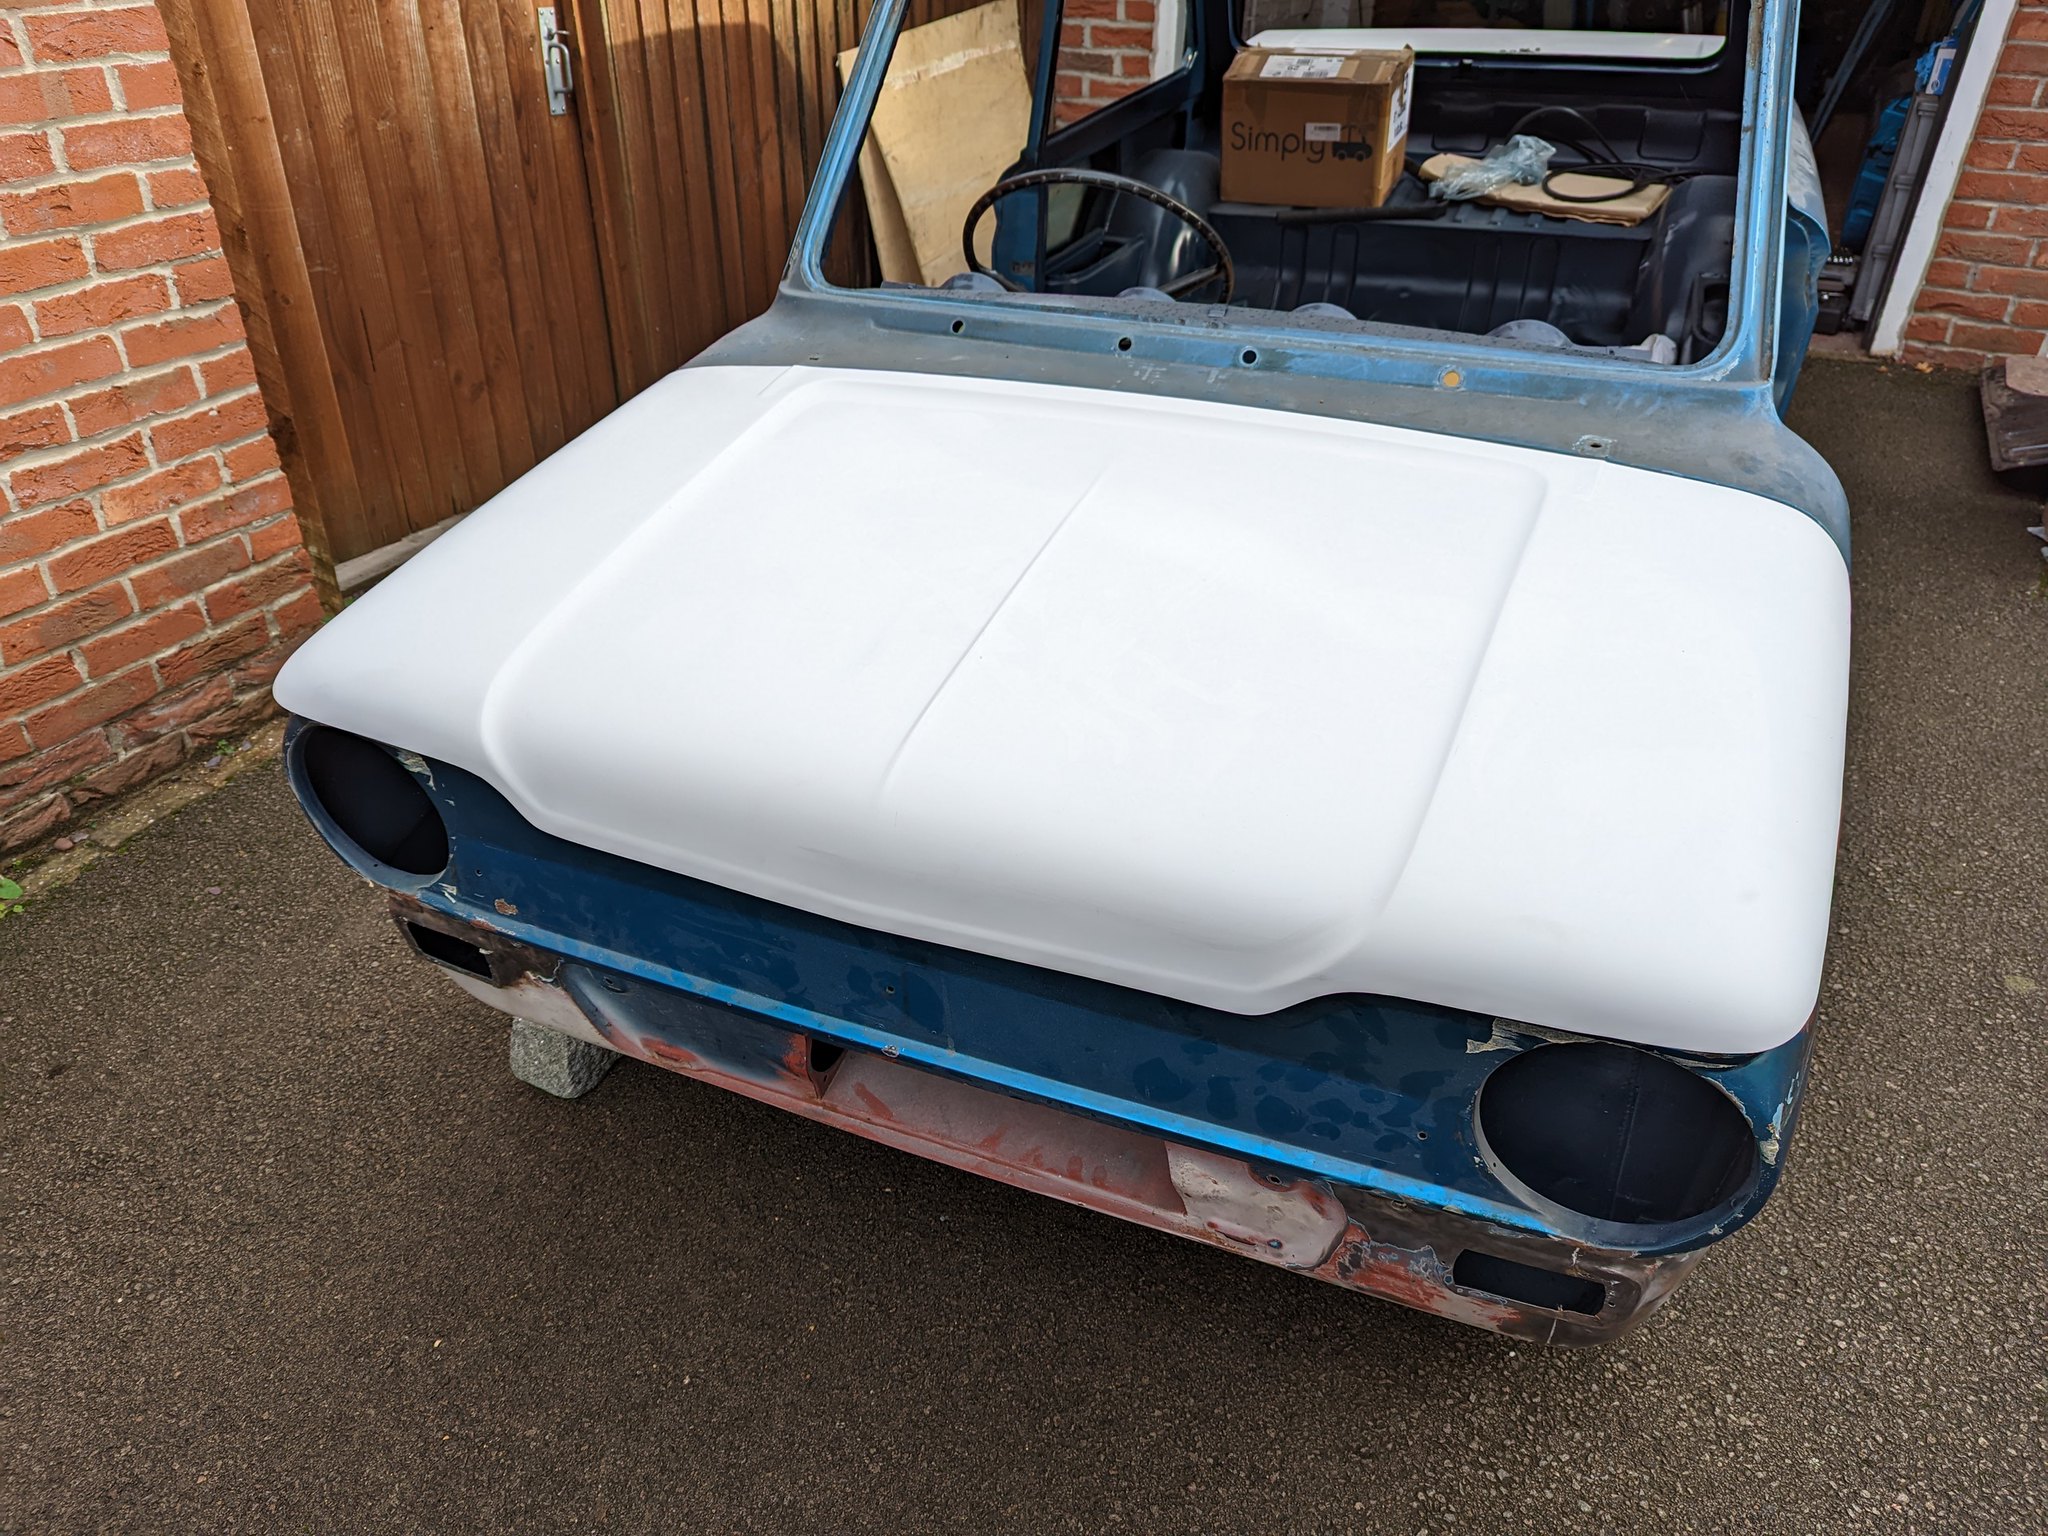
They were made just fine but when I got them home, while the engine lid fitment was about as good as it gets, the front bonnet had its issues. The sides and front scuttle profile were bang on, even better than the original steel bonnet, but it overhung the front panel by about an inch, far too much.
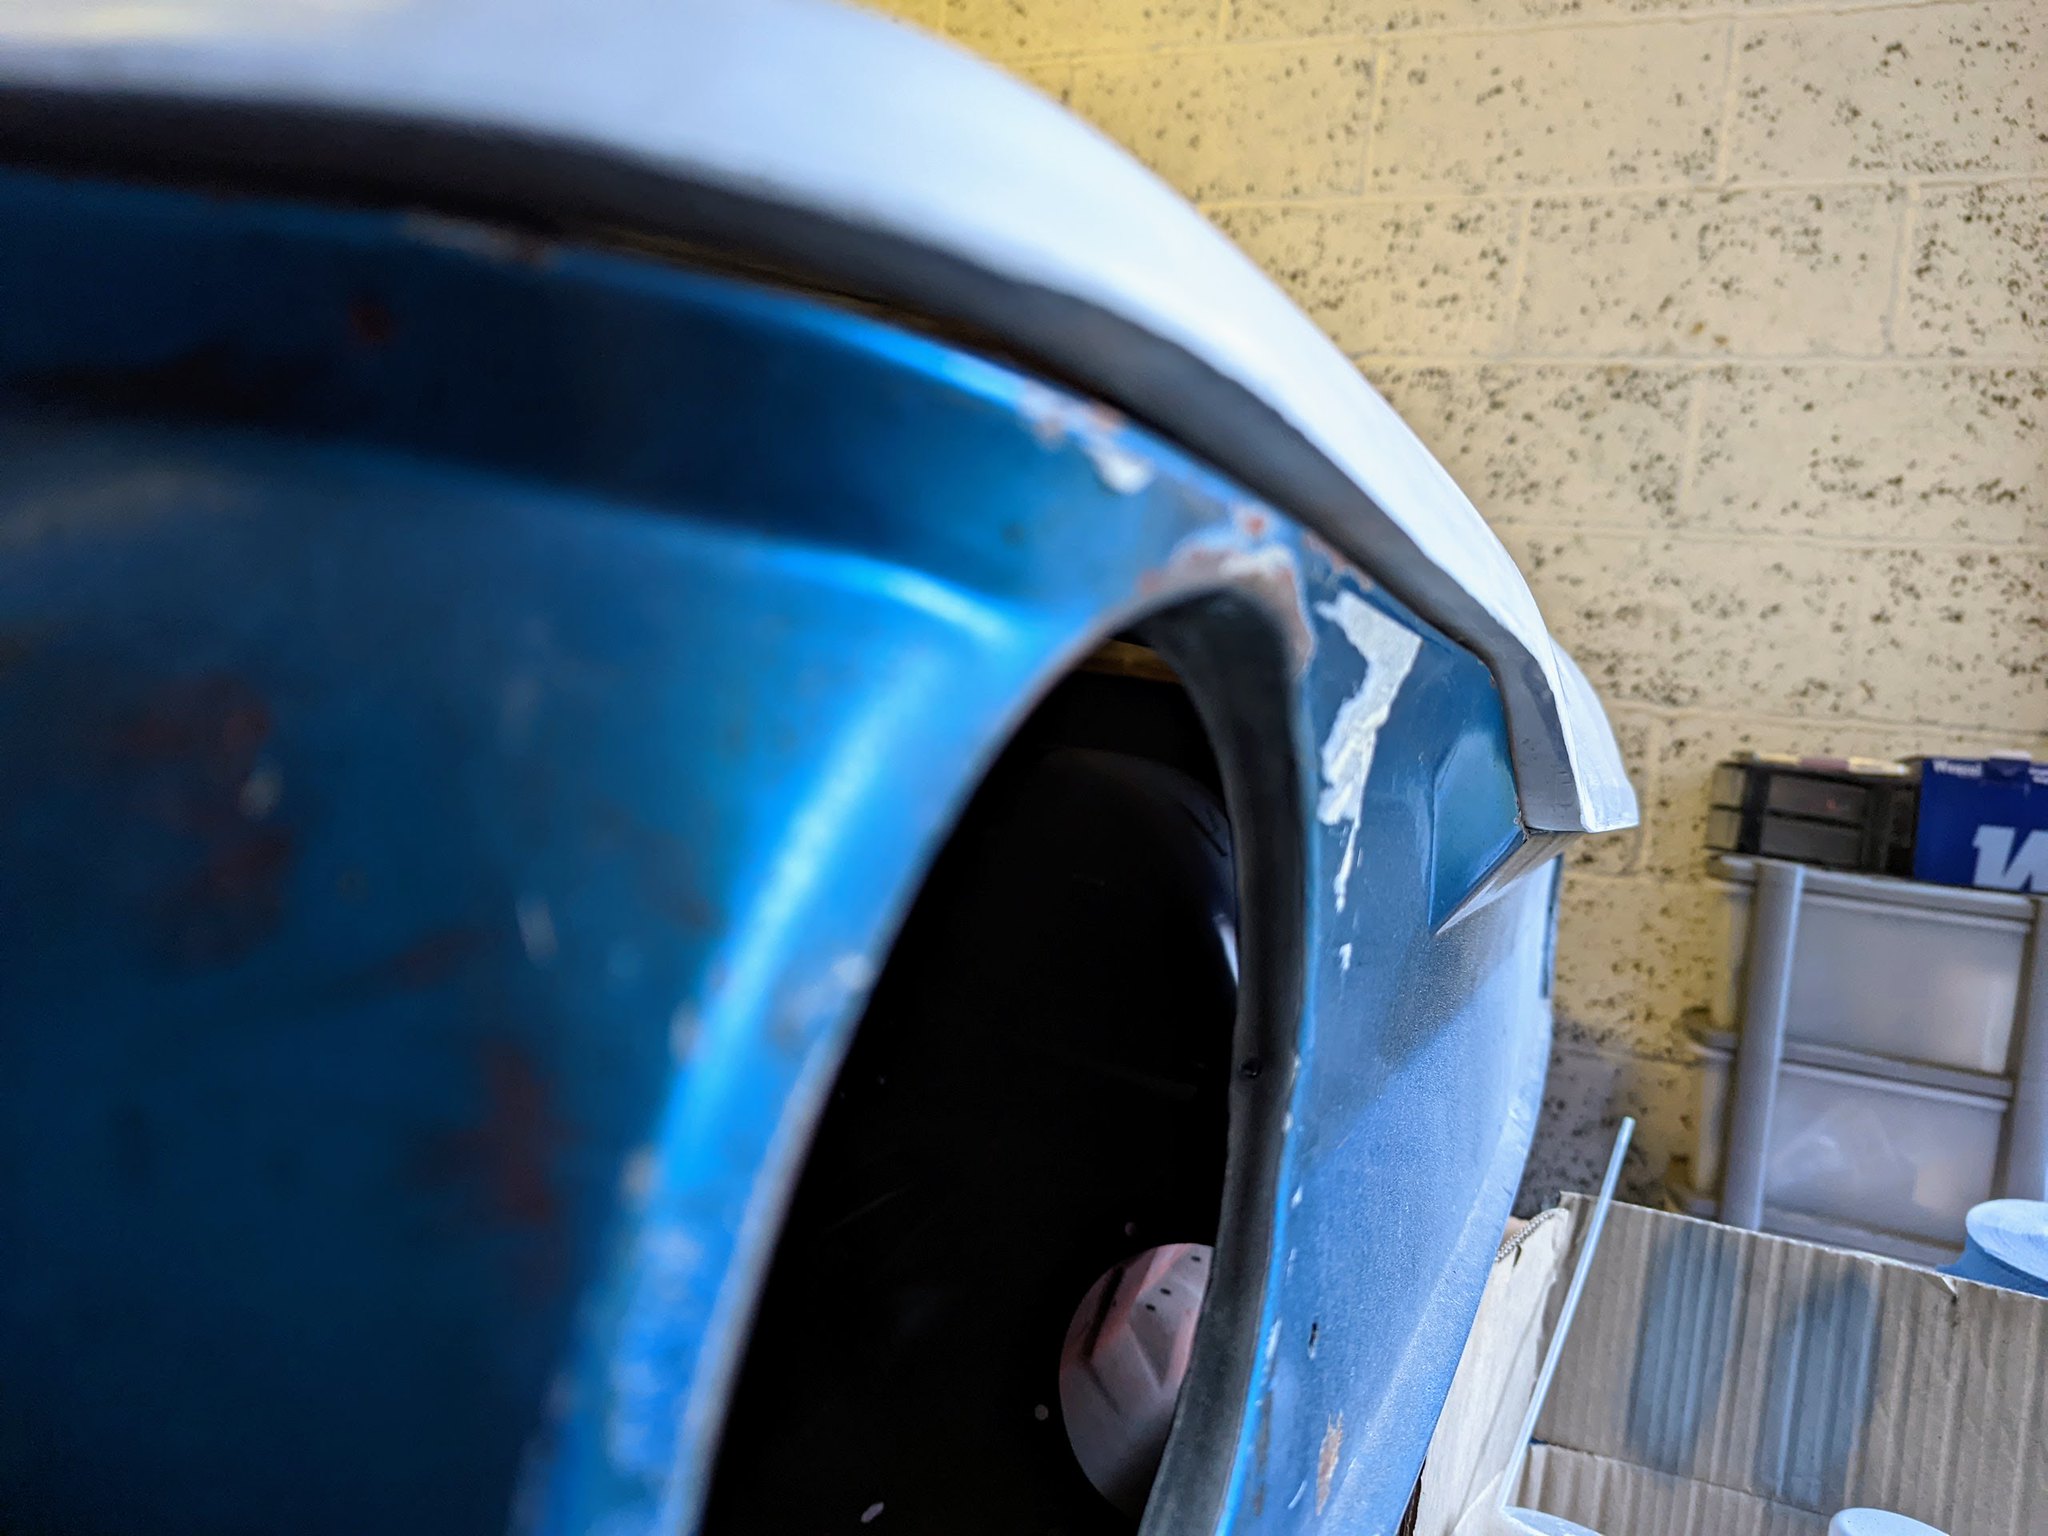 PXL_20220120_160625871 by Godfrey Hatton, on Flickr
It took about 3 months of going back and forth with Smith & Deakin (not least because the chap was in and out of hospital), but in the end he took his mould over to Honeybourne to double check and sure enough, he was able to confirm his mould had deformed, so it was never going to be right. Credit to him, a full refund was issued and I now have an order with Honeybourne for a replacement bonnet, so that should be with me soon. I've since found out just this last week that the chap at Smith & Deakin sadly passed away, which was a shame to hear. He really did look after me so well with my lowly order of 2 panels, when he was used to supplying Minispares with all of their fibreglass offerings.
I recently spent some time fettling the engine lid to get the panel gaps as good as they could be and then measured and drilled holes so I could fit some stainless spring stays (again, a cosmetic decision, I'm channelling the navy blue Moss Motors hillclimb car as it's just my favourite Imp) and I think it looks spot on!
 PXL_20221011_105023880 by Godfrey Hatton, on Flickr
Another reason not much has happened to the car even if I wanted it to, was I'm still weighing up the decision to send it away for the respray or not, as the test panel above highlighted the limitations and difficulties of doing it myself. But I'm finding that body shop people are one of the most difficult types of people to deal with. It's honestly taking months just to get quotes. I've had a few now, from as silly as £10k+, but the lowest I've received is £4500. Now I know how much work is in full respray, but I was really expecting that just an exterior paint job on an already stripped bare shell, would be in the region of £2-3k, or is that just wishful thinking?
Can anyone recommend a body shop that doesn't charge the earth? Nothing perfect, just need an honest paint job so I can finish this build!
Thanks all, hoping I can keep these updates coming!
Pog
I can't believe its been more than a year since I posted an update, and I'm slightly embarrassed the car is barely any further to being completed, how life gets in the way!
But in January we got a new addition to the family, a dachshund puppy named Ralph, who has completely taken over our lives
PXL_20220416_135901872.PORTRAIT by Godfrey Hatton, on FlickrSo I couldn't even set foot in the garage for the first few months while we were house training him. He's now nearly 11 months and is quite happy to accompany me into the garage, so literally just in the last month or so I've been able to try and gain some momentum back on the project.
Some of you on the Facebook page will have seen I haven't been completely dormant, I've had a bit of a saga trying to source a fibreglass bonnet and engine lid. I purchased a lid and bonnet from a firm called Smith & Deakin Plastics, based in Worcester. The chap was very accommodating and was even happy to take on customising the engine lid with some cooling holes I wanted (prefer the look over sport slots).
PXL_20211203_192250240_2 by Godfrey Hatton, on FlickrThey were made just fine but when I got them home, while the engine lid fitment was about as good as it gets, the front bonnet had its issues. The sides and front scuttle profile were bang on, even better than the original steel bonnet, but it overhung the front panel by about an inch, far too much.
PXL_20220120_160625871 by Godfrey Hatton, on FlickrIt took about 3 months of going back and forth with Smith & Deakin (not least because the chap was in and out of hospital), but in the end he took his mould over to Honeybourne to double check and sure enough, he was able to confirm his mould had deformed, so it was never going to be right. Credit to him, a full refund was issued and I now have an order with Honeybourne for a replacement bonnet, so that should be with me soon. I've since found out just this last week that the chap at Smith & Deakin sadly passed away, which was a shame to hear. He really did look after me so well with my lowly order of 2 panels, when he was used to supplying Minispares with all of their fibreglass offerings.
I recently spent some time fettling the engine lid to get the panel gaps as good as they could be and then measured and drilled holes so I could fit some stainless spring stays (again, a cosmetic decision, I'm channelling the navy blue Moss Motors hillclimb car as it's just my favourite Imp) and I think it looks spot on!
PXL_20221011_105023880 by Godfrey Hatton, on Flickr Another reason not much has happened to the car even if I wanted it to, was I'm still weighing up the decision to send it away for the respray or not, as the test panel above highlighted the limitations and difficulties of doing it myself. But I'm finding that body shop people are one of the most difficult types of people to deal with. It's honestly taking months just to get quotes. I've had a few now, from as silly as £10k+, but the lowest I've received is £4500. Now I know how much work is in full respray, but I was really expecting that just an exterior paint job on an already stripped bare shell, would be in the region of £2-3k, or is that just wishful thinking?
Can anyone recommend a body shop that doesn't charge the earth? Nothing perfect, just need an honest paint job so I can finish this build!
Thanks all, hoping I can keep these updates coming!
Pog
Young Imp Members Registrar
-
Roy Sims
- Posts: 78
- Joined: Wed Dec 17, 2014 4:47 pm
- Club Member: Yes
- Car Model: Spaceframe Stilletto, Singer Chamois
- Been thanked: 13 times
Re: EHK 744G - 1969 Super - How has it been a year?!
I had my Chamois sprayed by a mate who does loads of Escorts and Elans for hyper critical clients. He did a fantastic job on mine but it cost considerably more than your £4500. Initially I said I didn't want anything fancy and his reply was "I haveto do the best that I can, if I don't and someone asks who did the paint and you tell them, my reputation will be shot". Your other option is to go to someone who will give it a blowover and not care about reputation, in that case you would probably do a better job yourself. I know it seems harsh but good paintwork doesn't come cheap these days.
-
John A Ross

- Posts: 401
- Joined: Mon Oct 01, 2018 10:30 am
- Club Member: Yes
- Car Model: TOO MANY !
- Location: Stirling Scotland
- Has thanked: 240 times
- Been thanked: 209 times
- Contact:
Re: EHK 744G - 1969 Super - How has it been a year?!
Like Scott said, its all prep so the more you can do yourself the better but that said, mnost places I have used will insist on using their ownpaint bsystems as whats under is as important
Scotts work is fantastic on steel and fibreglass.
I reckon at least 60 man hours on most imps plus materials based on how long it takes me myself, you will eat money on consumables like you would not beleieve and before you know it the tenner and twenty quids here and there add up rapidly.
If yoiu have a fair bit of filler work to level off, you could hit 80 hours and if you get there at £80/hr which is cheap at some places you are at £6k plus
You get what you pay for and I used a paint shop (using term very loosely) a few doors down from us on assumption they would not like to crap on their own doorstep. BIG MISTAKE, I shoiuld have seen the writing on the wall when I seen the fella with roller door up fighting with filler/primer with snow on the ground outside.....
He did paint it right enough, I supplied it windows out, masked inside, even supplied the base sheet and all the poly then and cardboard blanks for the windows to mask them up (I used to keep blanks that just fitted window apertures rather than paper) however nothing was safe from being painted as he never even masked around the wheels but apparantly all upward facing surfcaes were out of boundsa as looks like the light was crappy or he could not bebothered to leand down...
Get it done cheap, end up doing it twice (second time myself)
You do not have the required permissions to view the files attached to this post.
- John A. Ross
-----------------
https://www.nx16.com || https://www.hillmanimp.org || Or find me on Facebook !
-----------------
https://www.nx16.com || https://www.hillmanimp.org || Or find me on Facebook !
-
Pog
- Posts: 142
- Joined: Sat Aug 24, 2013 4:55 pm
- Club Member: Yes
- Car Model: 1969 Super 'Betty'
- Location: Northampton, UK
- Has thanked: 10 times
- Been thanked: 37 times
Re: EHK 744G - 1969 Super - How has it been a year?!
Blimey John, I’d be fuming if that was mine! Did the shop rectify that or were you left to rectify the mess?
I picked up the new fibreglass bonnet from Honeybourne, very impressed with the finish, much better than the last one. And I’m delighted this one comes ready to bolt on with the bonnet latch fixtures already made into it, the last one I was gonna have to do that myself (didn’t have a clue how I was to tackle that, so phew!). Plus the fit is much better, doesn’t overhang the front panel quite as much, happy chappy!
 PXL_20221103_133804252 by Godfrey Hatton, on Flickr
 PXL_20221103_133557055 by Godfrey Hatton, on Flickr
But mostly… I have a body shop booked! My Imp is getting paint!!! As a last resort I asked my Northampton area centre for recommendations, and Dick Tompkins of Higham Autos fame gave me the number of a guy who’s done 7 or 8 Imps for him. A one man band who doesn’t advertise anywhere so it’s only through word of mouth. Man have I lucked out, I know we were discussing about going too cheap, but as I’m a club member he’s offering a special rate as he’s done so many for Dick already. So it’s a price I’m even happier with plus I know it’ll be a quality job. I am buzzing my face off
He should be ready to take it on mid December, so early next year, God willing, I’ll have a painted car I can finally rebuild! National next year is looking more and more possible.
Oh, and I’ve got a cunning plan with some rather rare French alloy wheels in the works too, I’ll keep you all posted soon
Pog
I picked up the new fibreglass bonnet from Honeybourne, very impressed with the finish, much better than the last one. And I’m delighted this one comes ready to bolt on with the bonnet latch fixtures already made into it, the last one I was gonna have to do that myself (didn’t have a clue how I was to tackle that, so phew!). Plus the fit is much better, doesn’t overhang the front panel quite as much, happy chappy!
PXL_20221103_133804252 by Godfrey Hatton, on FlickrPXL_20221103_133557055 by Godfrey Hatton, on FlickrBut mostly… I have a body shop booked! My Imp is getting paint!!! As a last resort I asked my Northampton area centre for recommendations, and Dick Tompkins of Higham Autos fame gave me the number of a guy who’s done 7 or 8 Imps for him. A one man band who doesn’t advertise anywhere so it’s only through word of mouth. Man have I lucked out, I know we were discussing about going too cheap, but as I’m a club member he’s offering a special rate as he’s done so many for Dick already. So it’s a price I’m even happier with plus I know it’ll be a quality job. I am buzzing my face off
He should be ready to take it on mid December, so early next year, God willing, I’ll have a painted car I can finally rebuild! National next year is looking more and more possible.
Oh, and I’ve got a cunning plan with some rather rare French alloy wheels in the works too, I’ll keep you all posted soon
Pog
Young Imp Members Registrar
-
John A Ross
- Posts: 401
- Joined: Mon Oct 01, 2018 10:30 am
- Club Member: Yes
- Car Model: TOO MANY !
- Location: Stirling Scotland
- Has thanked: 240 times
- Been thanked: 209 times
- Contact:
Re: EHK 744G - 1969 Super - How has it been a year?!
You have no idea, livid did not come close, ended up with police involvement as the guys were not just bad tradesman, they were up to all manner of other shennaigans. Still running as a garage but after all their nonsense the actual SITE is banned from ever doing MOTs again even under the new ownership.
Nice you have someone you can trust to do the work, sounds like it will be a good outcome.
I will be going through it all again beginning of the year on the MK 1 but trying a slightly different approach by painting most of the panel work before I actually fit them.
Sounds nuts but with the exception of weld seams, the spot welder actually leaves very little damage and I can do them one at a time in a dry lit and heated space. I have to epoxy tem all anyway so doing prime wet on wet in same session just as easy.
When you think about it bonnet, engine cover, doors are all off car anyway, I will be replacing full front and full lower rear wings, not much left after that
Next up
You do not have the required permissions to view the files attached to this post.
- John A. Ross
-----------------
https://www.nx16.com || https://www.hillmanimp.org || Or find me on Facebook !
-----------------
https://www.nx16.com || https://www.hillmanimp.org || Or find me on Facebook !
-
Pog
- Posts: 142
- Joined: Sat Aug 24, 2013 4:55 pm
- Club Member: Yes
- Car Model: 1969 Super 'Betty'
- Location: Northampton, UK
- Has thanked: 10 times
- Been thanked: 37 times
Re: EHK 744G - 1969 Super - snowballing quickly!
Hi all,
The project is starting to snowball rather quickly, some big updates to share with you! With the help of the legend that is Dick Tompkins, the car was trailered away to go to the body shop - a very exciting time indeed.
 PXL_20230111_132732154~2 by Godfrey Hatton, on Flickr
While the shell is away now is the perfect time to get all my ducks in a row and tackle all the other major puzzle pieces I will need. First, the interior:
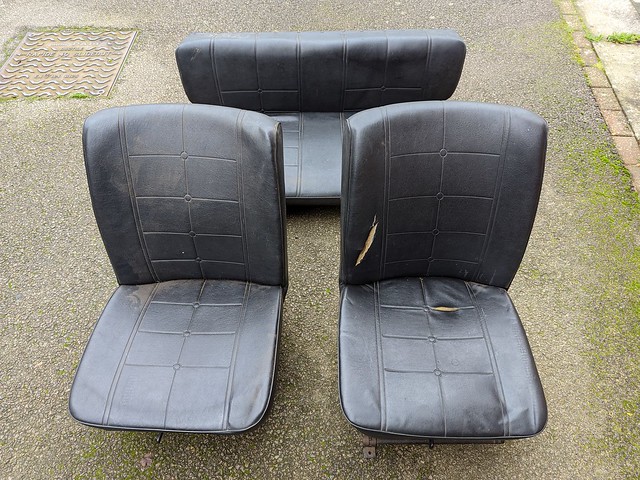 PXL_20221129_102425713 by Godfrey Hatton, on Flickr
I want to keep it simple for the moment, no point going crazy with fancy bucket seats when I’ve never properly experienced an imp interior for myself, so decided to stick with the original seats and just smarten them up to make them my own. While not a factory material, I love a fabric interior and I think they’ll look ‘period’ enough and look awesome in a midnight blue car - I’ve gone with tweed
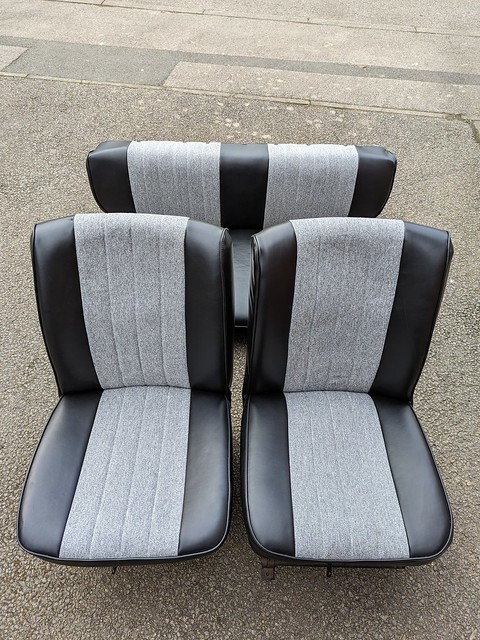 PXL_20230303_162030255 by Godfrey Hatton, on Flickr
A company called Auto Trim, based in Milton Keynes, did the retrimming and I can’t recommend Mark enough. He’s done a fantastic job and turnaround was just a couple of weeks, price was very reasonable too (I had received a couple quotes from elsewhere that were 3x as much). I’ve got the door cards and rear panels (using the new non warp material from Bob at spares) finished in the same grey fabric to match, along with the dash top recovered in fresh vinyl too. I am absolutely buzzing, they’re gonna look so good in the car.
Next is a big ticket item - the engine this weekend I drove over to see Mark Maynard to see if he could take on the job. Wow, what a guy and what a workshop! A proper Aladdin’s cave of wonders, I was there for nearly 3hrs just talking all things Imp and him showing me around. But eventually we worked out which of my bits were good to use, what will need replacing etc and then he handed me a piece of paper with a number on it… good grief, I can’t believe I’m going to be spending so much on such a small engine. Classic cars eh?
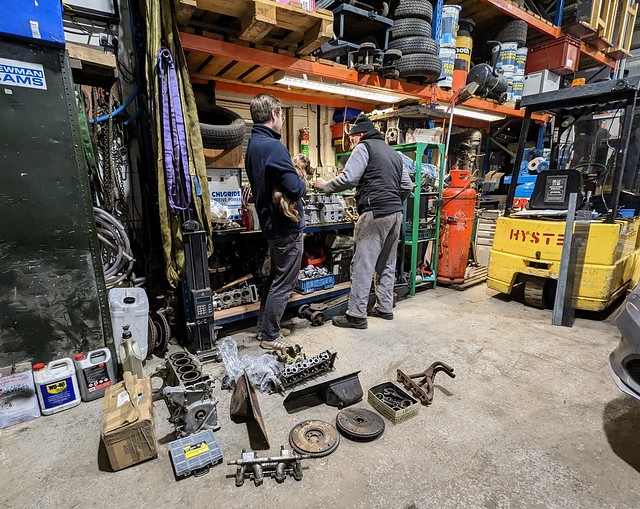 IMG-20230304-WA0003 by Godfrey Hatton, on Flickr
But what I’m very happy about is that it’s going to be built from the engine that started this whole journey - that unloved £9 engine I saved from eBay, I’m so delighted that it will become the heart of my little car. And he advises me it should make for a rather enjoyable engine, here’s the specs:
875cc + 0.020”
Freshly ground crank
Lightened flywheel - fully balanced
Block tapped for sport drain
533 head - enlarged to sport valves
Stronger valve springs
M14 cam - similar top end to an R17 but with the usable low end of a sport cam (sounds like the best of both worlds)
Ports matched to the inlet/exhaust manifolds
And lots of details that don’t need listing individually. I’ve asked Mark to build the head up for me (I really don’t want to screw up or faff with things like shims), but I’d like to challenge myself and build the bottom end myself, all part of the fun right? Lead time is who the heck knows, Mark couldn’t really give me one, in time for National or Wicked Welsh? We’ll see!
Still 1700 things on the to-do list, but it’s really starting to take shape now isn’t it!
As always, let me know what you think or if you have any advice going into this stage of a project, appreciate you all
Pog
The project is starting to snowball rather quickly, some big updates to share with you! With the help of the legend that is Dick Tompkins, the car was trailered away to go to the body shop - a very exciting time indeed.
PXL_20230111_132732154~2 by Godfrey Hatton, on FlickrWhile the shell is away now is the perfect time to get all my ducks in a row and tackle all the other major puzzle pieces I will need. First, the interior:
PXL_20221129_102425713 by Godfrey Hatton, on FlickrI want to keep it simple for the moment, no point going crazy with fancy bucket seats when I’ve never properly experienced an imp interior for myself, so decided to stick with the original seats and just smarten them up to make them my own. While not a factory material, I love a fabric interior and I think they’ll look ‘period’ enough and look awesome in a midnight blue car - I’ve gone with tweed
PXL_20230303_162030255 by Godfrey Hatton, on FlickrA company called Auto Trim, based in Milton Keynes, did the retrimming and I can’t recommend Mark enough. He’s done a fantastic job and turnaround was just a couple of weeks, price was very reasonable too (I had received a couple quotes from elsewhere that were 3x as much). I’ve got the door cards and rear panels (using the new non warp material from Bob at spares) finished in the same grey fabric to match, along with the dash top recovered in fresh vinyl too. I am absolutely buzzing, they’re gonna look so good in the car.
Next is a big ticket item - the engine
IMG-20230304-WA0003 by Godfrey Hatton, on FlickrBut what I’m very happy about is that it’s going to be built from the engine that started this whole journey - that unloved £9 engine I saved from eBay, I’m so delighted that it will become the heart of my little car. And he advises me it should make for a rather enjoyable engine, here’s the specs:
875cc + 0.020”
Freshly ground crank
Lightened flywheel - fully balanced
Block tapped for sport drain
533 head - enlarged to sport valves
Stronger valve springs
M14 cam - similar top end to an R17 but with the usable low end of a sport cam (sounds like the best of both worlds)
Ports matched to the inlet/exhaust manifolds
And lots of details that don’t need listing individually. I’ve asked Mark to build the head up for me (I really don’t want to screw up or faff with things like shims), but I’d like to challenge myself and build the bottom end myself, all part of the fun right? Lead time is who the heck knows, Mark couldn’t really give me one, in time for National or Wicked Welsh? We’ll see!
Still 1700 things on the to-do list, but it’s really starting to take shape now isn’t it!
As always, let me know what you think or if you have any advice going into this stage of a project, appreciate you all
Pog
Young Imp Members Registrar
-
ImpManiac
- Posts: 1855
- Joined: Tue Feb 01, 2005 3:48 pm
- Club Member: Yes
- Car Model: Singer Chamois
- Location: Houghton Regis, Bedfordshire
- Has thanked: 184 times
- Been thanked: 13 times
Re: EHK 744G - 1969 Super - snowballing quickly!
Your Imp is going to be a lovely little performer. Great work!
IM
IM
Paul Harrison
imp: a small demon : FIEND : a mischievous child : URCHIN
maniac: Raging with disordered intellect: affected with mania: MAD
imp: a small demon : FIEND : a mischievous child : URCHIN
maniac: Raging with disordered intellect: affected with mania: MAD
-
Pog
- Posts: 142
- Joined: Sat Aug 24, 2013 4:55 pm
- Club Member: Yes
- Car Model: 1969 Super 'Betty'
- Location: Northampton, UK
- Has thanked: 10 times
- Been thanked: 37 times
Re: EHK 744G - 1969 Super - body shop update
Hi all,
It's felt like an eternity since the car was collected by Dick Tompkins to go off for its respray, back in the middle of Jan. We're about 12 weeks in, sadly much longer than the 6-8 weeks I was advised (I get the feeling most body shops operate in this tardy nature )
So I decided to pay a visit (06/04) to see how it was coming along, and I was relieved to see that, although slower than I hoped, good progress had been made and it hadn't sat completely dormant in the corner like I was dreading:
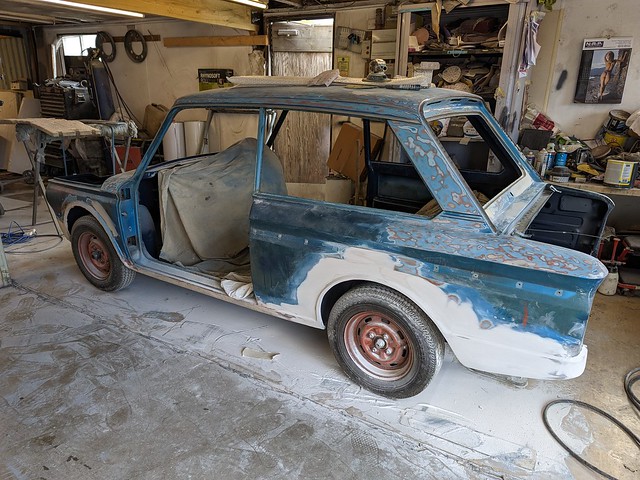 PXL_20230406_130400120 by Godfrey Hatton, on Flickr
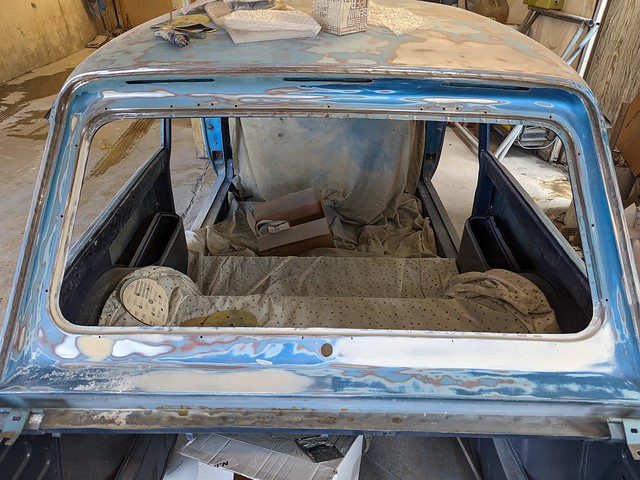 PXL_20230406_130510284 by Godfrey Hatton, on Flickr
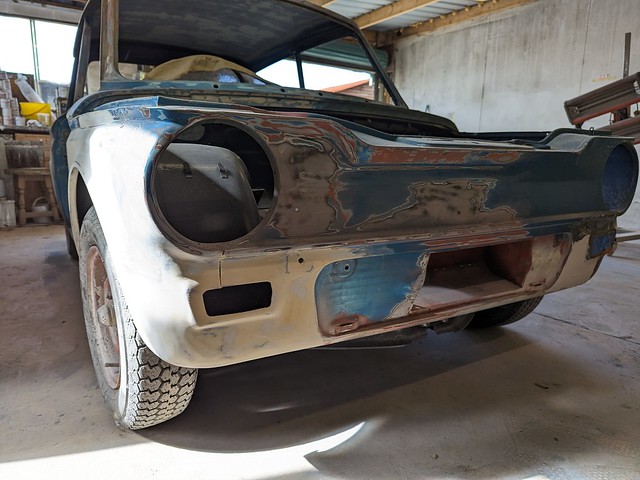 PXL_20230406_130713953 by Godfrey Hatton, on Flickr
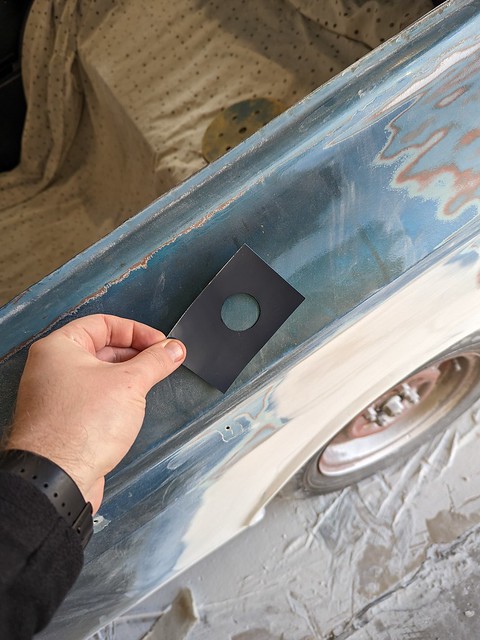 PXL_20230406_130756971 by Godfrey Hatton, on Flickr
Seeing the paint card really brought it to life for me and I just can't wait to see it in colour. In fact, a date has already been agreed for Dick to collect, 18/04. The chap was very confident that the most tedious bit was almost complete. It would then get sealed to avoid paint reaction, before primer then a final block and then colour. So as I write this, that's just 2 days away! Finger crossed 10 days were enough eh?
So this weekend was spent cleaning and organising the garage in preperation of receiving a freshly painted car. An important task was updating the to-do list, which hasn't been updated since I got the car to a rolling shell - now I have something to keep me in check on this next stage of the restoration (it's not an exhaustive list and no doubt I've missed stuff, but if I keep to it, I should have a car by the end of it )
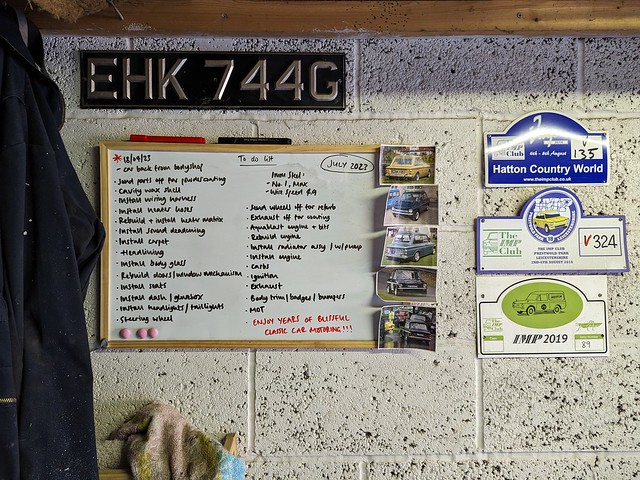 PXL_20230415_163145827 by Godfrey Hatton, on Flickr
I'll leave this here for now, I do have plenty I need advice about but I'll save that for another post. And fingers crossed you'll see a shiny car next time too!
Pog
It's felt like an eternity since the car was collected by Dick Tompkins to go off for its respray, back in the middle of Jan. We're about 12 weeks in, sadly much longer than the 6-8 weeks I was advised (I get the feeling most body shops operate in this tardy nature
So I decided to pay a visit (06/04) to see how it was coming along, and I was relieved to see that, although slower than I hoped, good progress had been made and it hadn't sat completely dormant in the corner like I was dreading:
PXL_20230406_130400120 by Godfrey Hatton, on FlickrPXL_20230406_130510284 by Godfrey Hatton, on FlickrPXL_20230406_130713953 by Godfrey Hatton, on FlickrPXL_20230406_130756971 by Godfrey Hatton, on FlickrSeeing the paint card really brought it to life for me and I just can't wait to see it in colour. In fact, a date has already been agreed for Dick to collect, 18/04. The chap was very confident that the most tedious bit was almost complete. It would then get sealed to avoid paint reaction, before primer then a final block and then colour. So as I write this, that's just 2 days away! Finger crossed 10 days were enough eh?
So this weekend was spent cleaning and organising the garage in preperation of receiving a freshly painted car. An important task was updating the to-do list, which hasn't been updated since I got the car to a rolling shell - now I have something to keep me in check on this next stage of the restoration (it's not an exhaustive list and no doubt I've missed stuff, but if I keep to it, I should have a car by the end of it
PXL_20230415_163145827 by Godfrey Hatton, on FlickrI'll leave this here for now, I do have plenty I need advice about but I'll save that for another post. And fingers crossed you'll see a shiny car next time too!
Pog
Young Imp Members Registrar
-
Pog
- Posts: 142
- Joined: Sat Aug 24, 2013 4:55 pm
- Club Member: Yes
- Car Model: 1969 Super 'Betty'
- Location: Northampton, UK
- Has thanked: 10 times
- Been thanked: 37 times
Re: EHK 744G - 1969 Super - body shop update
Sigh, got the phone call I was expecting - that it won't be ready today
Apparently it's fully painted now, shop just ran out of time getting it polished and interior cleaned. So should still be this week - but I'll believe it when I see it!
If I may ask for that advice now - headlamp assemblies. I'd like to upgrade to halogens for obvious reasons. The original bowls and chrome trims have seen much better days though. Eventually I'd like to restore them by powdercoating and re-chroming, but budget and time concerns got me searching on the tinterwebs and I found these: https://www.ebay.co.uk/itm/222054837202 ... BM7pqgvvJh
https://www.ebay.co.uk/itm/274032580748 ... %3A2047675
Are they a direct fit or is there another off the shelf solution?
Pog
Young Imp Members Registrar
-
John A Ross
- Posts: 401
- Joined: Mon Oct 01, 2018 10:30 am
- Club Member: Yes
- Car Model: TOO MANY !
- Location: Stirling Scotland
- Has thanked: 240 times
- Been thanked: 209 times
- Contact:
Re: EHK 744G - 1969 Super - body shop update
Blast and paint the bowls.
The outer polished rings are available for buttons from Ebay, about £20 delivered if I recall.
Rechroming these days given the cost is almost a non starter
John
The outer polished rings are available for buttons from Ebay, about £20 delivered if I recall.
Rechroming these days given the cost is almost a non starter
John
- John A. Ross
-----------------
https://www.nx16.com || https://www.hillmanimp.org || Or find me on Facebook !
-----------------
https://www.nx16.com || https://www.hillmanimp.org || Or find me on Facebook !
-
The Nun
- Posts: 2918
- Joined: Tue Jan 23, 2007 7:02 pm
- Club Member: Yes
- Car Model: Imp
- Location: South
- Has thanked: 74 times
- Been thanked: 104 times
Re: EHK 744G - 1969 Super - body shop update
You want to get the headlight retaining rings in stainless steel if your budget allows, about £32 a set.
You do not have the required permissions to view the files attached to this post.
Peter Nunn...ey im member 00033
-
Pog
- Posts: 142
- Joined: Sat Aug 24, 2013 4:55 pm
- Club Member: Yes
- Car Model: 1969 Super 'Betty'
- Location: Northampton, UK
- Has thanked: 10 times
- Been thanked: 37 times
Re: EHK 744G - 1969 Super - IT'S PAINTED!!
Today was the day!!!
I'm just going to leave these here...
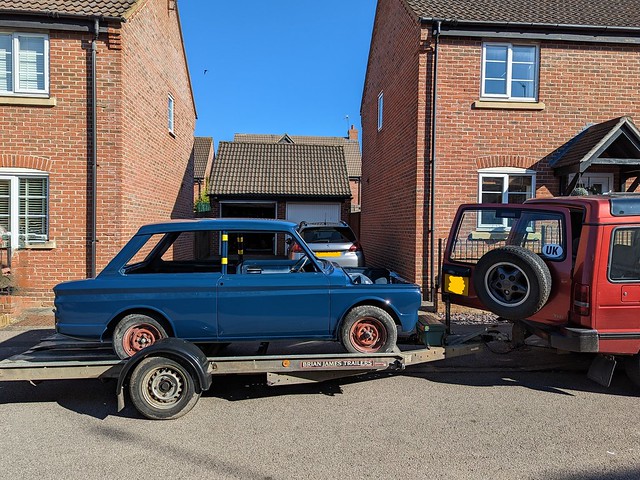 PXL_20230419_155114127~3 by Godfrey Hatton, on Flickr
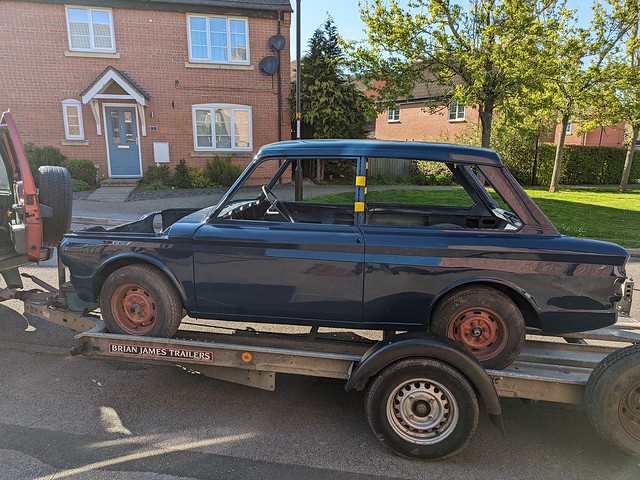 PXL_20230419_155157771 by Godfrey Hatton, on Flickr
Couldn't have picked a better day for it. I'm obsessed with this midnight blue, it's super deep in the shade but absolutely pops in the sun.
Major clean-up to do, the interior has just been left with 2 months' worth of bodyshop dust, which is rather annoying. But hey ho, at least now the fun can begin! Watch this space!
Pog
I'm just going to leave these here...
PXL_20230419_155114127~3 by Godfrey Hatton, on FlickrPXL_20230419_155157771 by Godfrey Hatton, on FlickrCouldn't have picked a better day for it. I'm obsessed with this midnight blue, it's super deep in the shade but absolutely pops in the sun.
Major clean-up to do, the interior has just been left with 2 months' worth of bodyshop dust, which is rather annoying. But hey ho, at least now the fun can begin! Watch this space!
Pog
Young Imp Members Registrar