Steve's Irish Clan

Post Reply
walshste
Posts: 93
Joined: Sun May 01, 2005 4:28 pm
Club Member: Yes
Car Model: Imp Super, Irish built and an Irish Clan
Location: Ireland
Has thanked: 1 time

Steve's Irish Clan

Post by walshste »

Here it is. Imp has been moved out of the garage (my mate's garage - i get 1 car space) for the summer and the clan is in. First thing to do is have a really good poke about. I've already found soft plywood and pushed my finger through it on the passenger side. It doesn't appear to be too big of a section. I will take some pics and perhaps someone here can advise on the best approach to sorting it. Then it's suspension off, refurb or replace and re-fit. I see a company in the North of Ireland fibretec sell inner door cards and dashboards. The 998 which was being built by Andy J for the imp will now go in this. I need seats, window seals, (windscreen is good) polycarbonate ... so much to look forward to doing!

More pics to follow.

Image
User avatar
Lotus-e-Clan
Posts: 678
Joined: Thu Aug 10, 2006 10:08 pm
Club Member: No
Car Model: 75Clan 1040BVSSH GB72 mapped ign DHLAs -Waterless!
Location: North Yorkshire
Has thanked: 10 times
Been thanked: 10 times

Re: Steve's Irish Clan

Post by Lotus-e-Clan »

I like the colour scheme.

On the sills issue. Main source of water ingress (and mud) is from the front wheel arches. The fibreglass closing plate over the hinge posts are, more often than not, poorly fitted from new (certainly for the Crusader, not so sure if they did in fact improve the closure plates for the Irish Clan?). Once sealed properly, you shouldn't have much trouble with the inner sills rotting. Use marine ply coated with resin for replacement sills panels - just to be sure they will never rot again. But like I said the important bit it closing off the sills from the front inner wheel arches.

Other sources of water ingress includes the bottom corner of the windscreen allowing the foot well to collect water, so therefore coat the replacement sills with resin on BOTH sides. A minor water ingress source is the bottom bolt holes where the hinge posts are fixed to the upper sill ledge (under the door). If you have the hinge posts out then seal these bolts /bolt holes too.

Clan004
74 Clan Crusader 1040 Red 190 bhp/ton
The Nun
Posts: 2919
Joined: Tue Jan 23, 2007 7:02 pm
Club Member: Yes
Car Model: Imp
Location: South
Has thanked: 74 times
Been thanked: 104 times

Re: Steve's Irish Clan

Post by The Nun »

The Irish Clan front arch closing covers, if you can call them that, dont cover, I had to remake mine in fibreglass so they were the correct size to seal off fully all around. As supplied they had big gaps, they might prevent a bird flying in to nest but that was about it.
The sills didnt have drainage holes/tubes in the bottom front and rear either so on the off chance of wet getting in it would stay in and the wooden panels used in the construction wasnt marine ply as far as I was aware and wasnt treated either so once moisture set in it was on the road to nowhere.
There was heaps that could be done to improve the body but I suppose its all down to cost as always, do as little as you can get away with.
Peter Nunn...ey im member 00033
walshste
Posts: 93
Joined: Sun May 01, 2005 4:28 pm
Club Member: Yes
Car Model: Imp Super, Irish built and an Irish Clan
Location: Ireland
Has thanked: 1 time

Re: Steve's Irish Clan

Post by walshste »

A half decent poke about this evening. That was after a lot of faffing about trying to get the clan in the air. Boy they are low and the front arb really makes it tricky.
I need to get the suspension off it. To do that is it ok to support her with planks across the underside? Or better along the sills? No wheels , engine or box or interior for that matter. So should be light (bar the cage which is chunky)

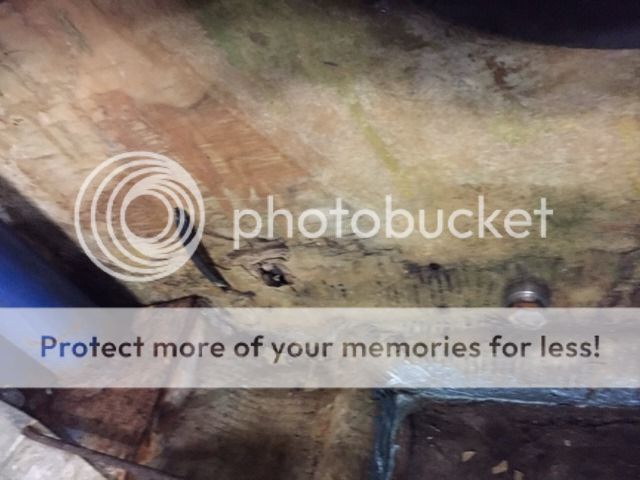
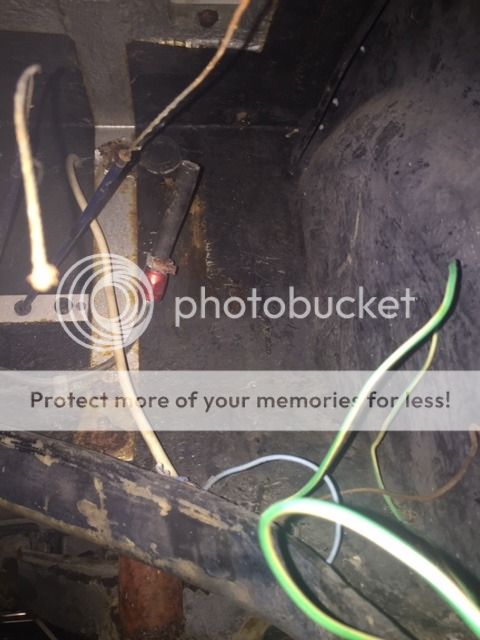
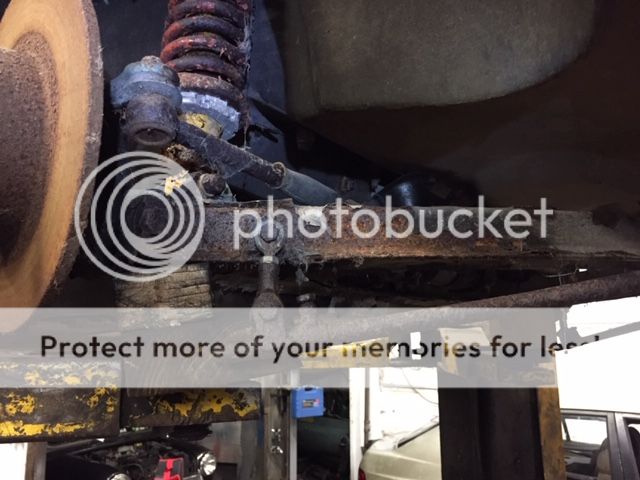
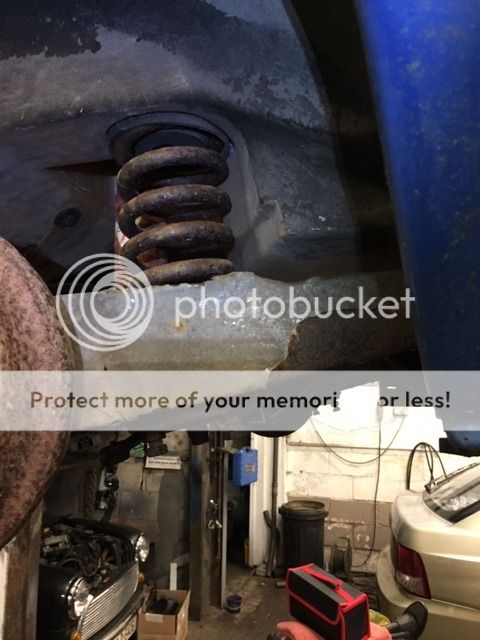
Anyhow some pics and any advice/comments for repairing some of the inner ply that is soft/ now holed as my finger went through it gratefully accepted.

Soft area to the rear of the door aperture. Cable tie holds front rad pipes. See hole just in front.

Image

Rear bulkhead. See to the right of the starp , this is soft here. (strap is part of anchoring for inner harness eyelets.

Image

Very rusty
Image

Also rusty, see adjustable height. Big koni shocks.
Image
Teddie2003
Posts: 120
Joined: Sun Feb 20, 2005 10:06 am
Club Member: Yes
Car Model: Clan Crusader & Davrian Mk6
Location: Gosport, Hants
Been thanked: 3 times

Re: Steve's Irish Clan

Post by Teddie2003 »

walshste wrote:A half decent poke about this evening. That was after a lot of faffing about trying to get the clan in the air. Boy they are low and the front arb really makes it tricky.
I need to get the suspension off it. To do that is it ok to support her with planks across the underside? Or better along the sills?
I used scaffold planks across the car on the underside of the floor with good axle stands when my one was being stripped out for a re-build.
walshste
Posts: 93
Joined: Sun May 01, 2005 4:28 pm
Club Member: Yes
Car Model: Imp Super, Irish built and an Irish Clan
Location: Ireland
Has thanked: 1 time

Re: Steve's Irish Clan

Post by walshste »

Image
Image
Image
walshste
Posts: 93
Joined: Sun May 01, 2005 4:28 pm
Club Member: Yes
Car Model: Imp Super, Irish built and an Irish Clan
Location: Ireland
Has thanked: 1 time

Re: Steve's Irish Clan

Post by walshste »

Some activity on the clan. Rack fully rebuilt, (first one i have had apart and the belleville domed washers weren't broken) and back in. Front wishbones and suspension back in, front arb too. Some work on the dash. Plenty of dials!

(speedo and rev counter should be recognisable)

And mile to go before i sleep and miles to go before i sleep ---- > a long way to go.
walshste
Posts: 93
Joined: Sun May 01, 2005 4:28 pm
Club Member: Yes
Car Model: Imp Super, Irish built and an Irish Clan
Location: Ireland
Has thanked: 1 time

Re: Steve's Irish Clan

Post by walshste »

My good pal has sorted my front hubs. He had to do this for me on my imp also as i had an awful brake judder. (Though most folks must be ok with their discs, not sure why I have been so unlucky)

Basically the problem arises from using discs , they are mounted to the hub flange which was never meant for discs and this can cause braking vibration. My imp was really bad. So we checked the clan hubs and they were atrocious.
I guess it comes down to the fact that for drums this surface is not so important. My hubs were far from flat.

Now I've built all the front suspension up and it is back fitted to the car. Concentrating on the rear arms next. I have one cleaned and painted with one more to go.

Image

Image

Image

The discs on my clan are turned down MGB units. The studs are pushed through the rear of the disc, then the hub sits on the outside of the disc and finally a spacer.
(And yes, i need new wheel nuts and washers. Any recommendations on where to get them?)

Image
User avatar
bazzateer
Posts: 1269
Joined: Sun Apr 02, 2006 12:27 pm
Club Member: Yes
Car Model: 68 Chamois Sport, 72 Imp Sport, 76 Datsun 260Z
Location: Watford and very occasionally Fareham
Has thanked: 68 times
Been thanked: 88 times

Re: Steve's Irish Clan

Post by bazzateer »

If I told you I was a pathological liar, would you believe me?
Barry Blackmore - Chiltern ACO, apparently.......................
johnh875
Posts: 166
Joined: Fri Sep 19, 2003 7:52 am
Club Member: Yes
Car Model: 64 Grp N race car, 66 Mk2, 68 Super
Location: Melbourne Aust
Has thanked: 8 times
Been thanked: 12 times

Re: Steve's Irish Clan

Post by johnh875 »

Thanks for the tip about checking the hubs when mounting discs!
Imping (on & off) for 20+ years
User avatar
Lotus-e-Clan
Posts: 678
Joined: Thu Aug 10, 2006 10:08 pm
Club Member: No
Car Model: 75Clan 1040BVSSH GB72 mapped ign DHLAs -Waterless!
Location: North Yorkshire
Has thanked: 10 times
Been thanked: 10 times

Re: Steve's Irish Clan

Post by Lotus-e-Clan »

I can't quite work out for sure from the pictures if yours is the Fiesta disc kit located via the wheel studs, or the Micra kit located on the hub centre?
But I'm thinking yours is the fiesta kit (I've never seen one in the flesh)?

Mine's the Mirca kit which locates the disc on the machined concentric shoulder of the stud flange -not by the studs. Generally these run without balance or judder issues straight out of the box. However, I think Jeff Day said (who developed the Micra kits in the distant past) that he's had to reject some hubs with eccentrically-machined bearing housing surfaces relative to the stud PCD. These hubs, even with his Micra kit, will produce some imbalance because the whole hub runs eccentrically on the stub axle...they would obviously cause issues with the Fiesta kit too. Clan004
74 Clan Crusader 1040 Red 190 bhp/ton
The Nun
Posts: 2919
Joined: Tue Jan 23, 2007 7:02 pm
Club Member: Yes
Car Model: Imp
Location: South
Has thanked: 74 times
Been thanked: 104 times

Re: Steve's Irish Clan

Post by The Nun »

The Irish Clan did use MGB discs and calipers at least mine did as supplied by them. Had the 13" Wolfrace Sonic rims (pepper pot) again as Clan fitted then.
Peter Nunn...ey im member 00033
User avatar
Lotus-e-Clan
Posts: 678
Joined: Thu Aug 10, 2006 10:08 pm
Club Member: No
Car Model: 75Clan 1040BVSSH GB72 mapped ign DHLAs -Waterless!
Location: North Yorkshire
Has thanked: 10 times
Been thanked: 10 times

Re: Steve's Irish Clan

Post by Lotus-e-Clan »

The Nun wrote: Mon Mar 02, 2020 6:11 am The Irish Clan did use MGB discs and calipers at least mine did as supplied by them. Had the 13" Wolfrace Sonic rims (pepper pot) again as Clan fitted then.
Oh yeah! I forgot that the Irish clan had front discs as standard. :oops:

IIRC the front track is wider as a consequence?

Any possibility of eccentric bearing housings would have been sorted by now so I guess that this issue won't apply to this Irish Clan. Clan004
74 Clan Crusader 1040 Red 190 bhp/ton
walshste
Posts: 93
Joined: Sun May 01, 2005 4:28 pm
Club Member: Yes
Car Model: Imp Super, Irish built and an Irish Clan
Location: Ireland
Has thanked: 1 time

Re: Steve's Irish Clan

Post by walshste »

bazzateer wrote: Sun Mar 01, 2020 10:03 pm For wheelnuts try https://www.mistertee.co.uk/
Thank you, ordered from Maurice. Good guy to deal with. Steve
User avatar
bazzateer
Posts: 1269
Joined: Sun Apr 02, 2006 12:27 pm
Club Member: Yes
Car Model: 68 Chamois Sport, 72 Imp Sport, 76 Datsun 260Z
Location: Watford and very occasionally Fareham
Has thanked: 68 times
Been thanked: 88 times

Re: Steve's Irish Clan

Post by bazzateer »

walshste wrote: Tue Mar 03, 2020 2:00 pm
bazzateer wrote: Sun Mar 01, 2020 10:03 pm For wheelnuts try https://www.mistertee.co.uk/
Thank you, ordered from Maurice. Good guy to deal with. Steve
I've heard good things about him.
If I told you I was a pathological liar, would you believe me?
Barry Blackmore - Chiltern ACO, apparently.......................
walshste
Posts: 93
Joined: Sun May 01, 2005 4:28 pm
Club Member: Yes
Car Model: Imp Super, Irish built and an Irish Clan
Location: Ireland
Has thanked: 1 time

Re: Steve's Irish Clan

Post by walshste »

Some pics of my recent activities, basically the status now is;

All suspension parts cleaned up (lots of sand blasting and wire brushing incl knotted wheels) painted and now refitted.
Bias box (with new master cylinders ) cleaned up and fitted.
Gear change mechanism and handbrake cleaned up (with a new gear-change ball) and refitted.

Turning my attention to the front compartment and some soft wood and the lamps. Big hassle trying to get the lamps out, in the end I had to cut the pivot bars.

Now I am thinking of making templates to cut new ply and putting this fresh ply over the original ply and using epoxy resin to bond the new ply over the old. Then I hope to use fiber matting to strengthen on the top and bottom. I've been watching videos on the west system epoxy resin bonding and filleting. The alternative as I see it is to cut out the old ply and bond in new. I'm not so brave to do that and to be honest the ply is good further in to the nose of the car. It's really just the areas for the headlamp pivot brackets that are bad , in particular the passenger side.

I know I have considerations from adding an extra layer of ply ( I've not decided on the thickness yet) that means brackets are moved by whatever that thickness is. But I think it is doable. Any alternative ideas gratefully accepted.
Image
Image
Image
Image
walshste
Posts: 93
Joined: Sun May 01, 2005 4:28 pm
Club Member: Yes
Car Model: Imp Super, Irish built and an Irish Clan
Location: Ireland
Has thanked: 1 time

Re: Steve's Irish Clan

Post by walshste »

I've got the car rolling again, wheels on.
Image

Now for some ply repairs. I've made my templates for the front sections where the headlamp motors mount and I need to attend to some soft wood on the inner sill diaphragm.
However i can't get the darn rad pipes out of the sill. I hoped i could pull them out through the speaker hole. No way.

I now think they must come out through the front arch liner.

Perhaps it is through here I need to go.
Image
Image

Here are the pipes when the cage was in;
Image

Image
Marine ply, darn expensive.
walshste
Posts: 93
Joined: Sun May 01, 2005 4:28 pm
Club Member: Yes
Car Model: Imp Super, Irish built and an Irish Clan
Location: Ireland
Has thanked: 1 time

Re: Steve's Irish Clan

Post by walshste »

Some pics

The front rad pipes were extracted through the front wheel arch liner. I cleaned them up and bought new rubber hoses. I used Gates brand from Car builders solutions.

Image

Some paint work. The pods and engine cover were poor so I took them home to "tip away " on them in the evenings. I brought the bonnet in to a paint/.motorfactors and they made up some aerosols to match it. I am happy enough with the way they turned out. Lots of sanding, gelcoat filler, primer and layers of paint. (I've learnt quite a bit from painting the wheels and these parts, like adhesion is chemical or mechanical - i.e when painting and looking to put on 5 - 6 layers just let the solvent flash off , @5 mins and then add the next thin layer and build it up that way. Mechanical meaning sanding to give a "key" for the paint - so after i left the primer to harden for a day I then sanded (mechanical) and then added layers of topcoat leaving just 5 or so minutes between coats)

Image
Image
Image

Again, something new. Using the West System - 2 stage bonding i did the repair. I put a larger piece in behind , first wetted out and then using fillers - 404 high density filler - to bond. Then made up a small piece to fit in the gap. New rubber pipes protruding.

Image

Finally, new marine ply cut out for the front. My plan is to clean up the existing wood, (remove all the rot etc and stabilise what is left with epoxy) and then bond the new piece over it. I have the fabric to add then , I hope it will add in real strength at the top and bottom, though how I can do so at the top as it in blind will be tricky. Perhaps I will sit the top in to a bed of thickened epoxy. Basically I am not brave enough to cut out all of the existing wood so this is my approach.
Image
walshste
Posts: 93
Joined: Sun May 01, 2005 4:28 pm
Club Member: Yes
Car Model: Imp Super, Irish built and an Irish Clan
Location: Ireland
Has thanked: 1 time

Re: Steve's Irish Clan

Post by walshste »

New front ply . Passenger side I was able to put it in as one piece. Drivers side i wasn't so i used an angled cut.
I used the West System epoxy wet out and bonding with 404 filler powder process. And tried my best to add a fillet along the joins.

I think I mentioned before that I left what was good of the original inner ply so the new is bonded to it. I know some might say that it should be completely removed and new added in.
I wasn't brave enough to do so and I am happy with this approach. I fully wet out the original ply, both sides before bonding the new panels in.

I think I asked before whether these panels were structural or just used to hold the headlamp motors and a few other small items (mine had the washer bag hanging on it and also a bracket for the electric fuel pump)

When you look up , use an old rear view mirror, in to the way they are tied in at the top to the inner wing I think they are not structural to the shell of the car. So little mating up there, a few weedy strips.

Plan next is to fabric top and bottom, top will be tricky but i'll get it done and it will be way stronger than original.

Image
Image
bks974c
Posts: 1401
Joined: Thu Aug 19, 2004 5:26 pm
Club Member: Yes
Car Model: all the above
Location: Edinburgh, Scotland
Has thanked: 152 times
Been thanked: 243 times

Re: Steve's Irish Clan

Post by bks974c »

This section is not present in the original Clan so not structural but will add strength as well as acting as mountings for headlight mechanisms.

Scott
User avatar
Lotus-e-Clan
Posts: 678
Joined: Thu Aug 10, 2006 10:08 pm
Club Member: No
Car Model: 75Clan 1040BVSSH GB72 mapped ign DHLAs -Waterless!
Location: North Yorkshire
Has thanked: 10 times
Been thanked: 10 times

Re: Steve's Irish Clan

Post by Lotus-e-Clan »

I would have thought that the holes cut for the Irish headlight pods would reduce the integrity of the shell in that local area a tad? For example the Crusader boot gutters alongside the lights are partly supported by the Pod recess platform spanning across to the front wheel 'fender'. Clan004
74 Clan Crusader 1040 Red 190 bhp/ton
bks974c
Posts: 1401
Joined: Thu Aug 19, 2004 5:26 pm
Club Member: Yes
Car Model: all the above
Location: Edinburgh, Scotland
Has thanked: 152 times
Been thanked: 243 times

Re: Steve's Irish Clan

Post by bks974c »

Lotus-e-Clan wrote: Sun Aug 09, 2020 6:30 pm I would have thought that the holes cut for the Irish headlight pods would reduce the integrity of the shell in that local area a tad? For example the Crusader boot gutters alongside the lights are partly supported by the Pod recess platform spanning across to the front wheel 'fender'. Clan004
Good point, the gutter seems very solid without the plywood but certainly adds anything back lost by the removing of the recess.

Scott
walshste
Posts: 93
Joined: Sun May 01, 2005 4:28 pm
Club Member: Yes
Car Model: Imp Super, Irish built and an Irish Clan
Location: Ireland
Has thanked: 1 time

Re: Steve's Irish Clan

Post by walshste »

I've taken the doors off. I can bring them home to work on them. I'm also very lucky to have some very knowledgeable mates when it comes to car building/motorsport/classics etc and i can , well basically, arrive to them with the doors seeking advice and assistance. I have fiberglass panels to go in them. I got them with the dash from Ivan McKeown in the North of Ireland. I have polycarbonate windows complete with slider kits I hope to fit. They're from a 6r4 and will cut down.

Re the doors - inside the door there is an alloy bracket, it has the channels for the wind-up glass and is quite sturdy bracing. As I am going with fixed polycarbonate can i remove that bracket? With it in place it is going to make refitting the bolts for the hinges very difficult. Removing them was ok, but trying to get the 3 bolts back in for the upper hinge from inside the door is going to be very difficult. What way do people tackle this?

Image
Image

Some pics of the front ply and now strengthened with fabric.

Image

Annoyed with myself, I put black bin liners over the front while i was using resin on the front ply. I taped them to the car with packing tape. I hope a little heat from a hair dryer will soften the leftovers enough to pull off the residue.
Image
Image
Peel ply to pull off tomorrow.
Image

I managed to get a nice bit of fabric/resin in at the top too. I'm no Andy from "Boatworkstoday" but i quite enjoy the resin/fabric!
Post Reply