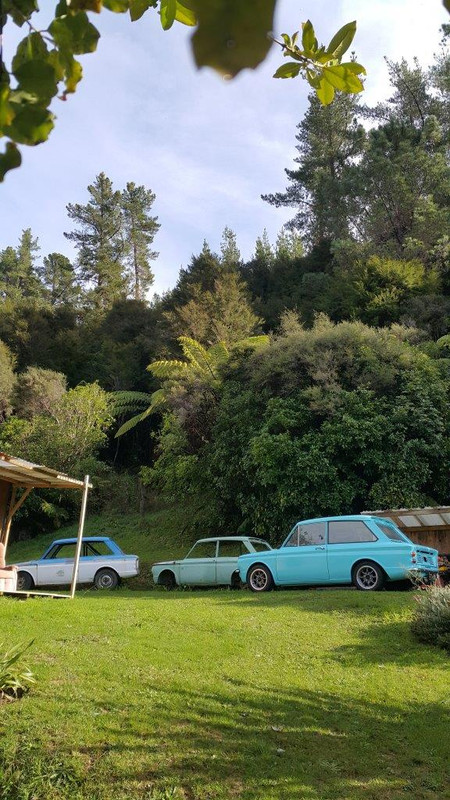
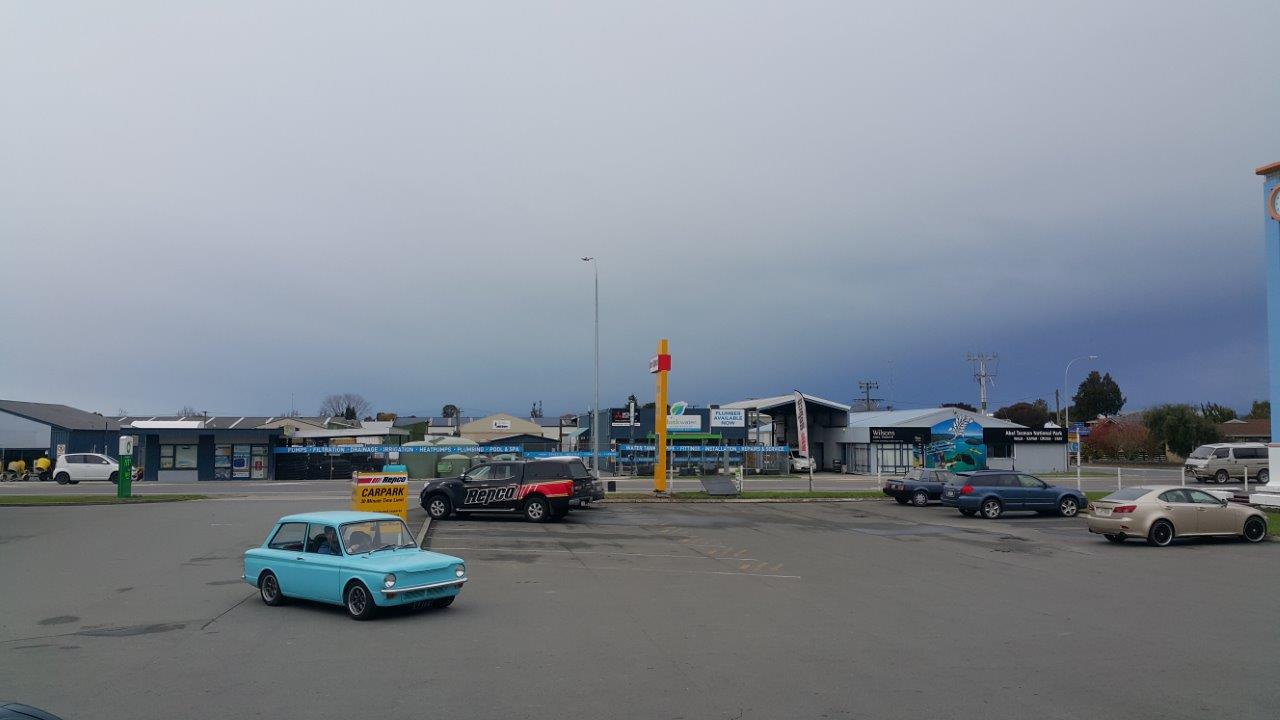
This morning we met up with a fella who had got in contact with me via Oldschool.co.nz. He has a Sunbeam imp. Very tidy little car fitted with a later Talbot 930 engine . Took it for a spin. First time I have driven an Imp since Hannah had hers in 2002. I had forgotten how fun they are to drive and its was just the inspiration I needed to crack on with finishing my project...
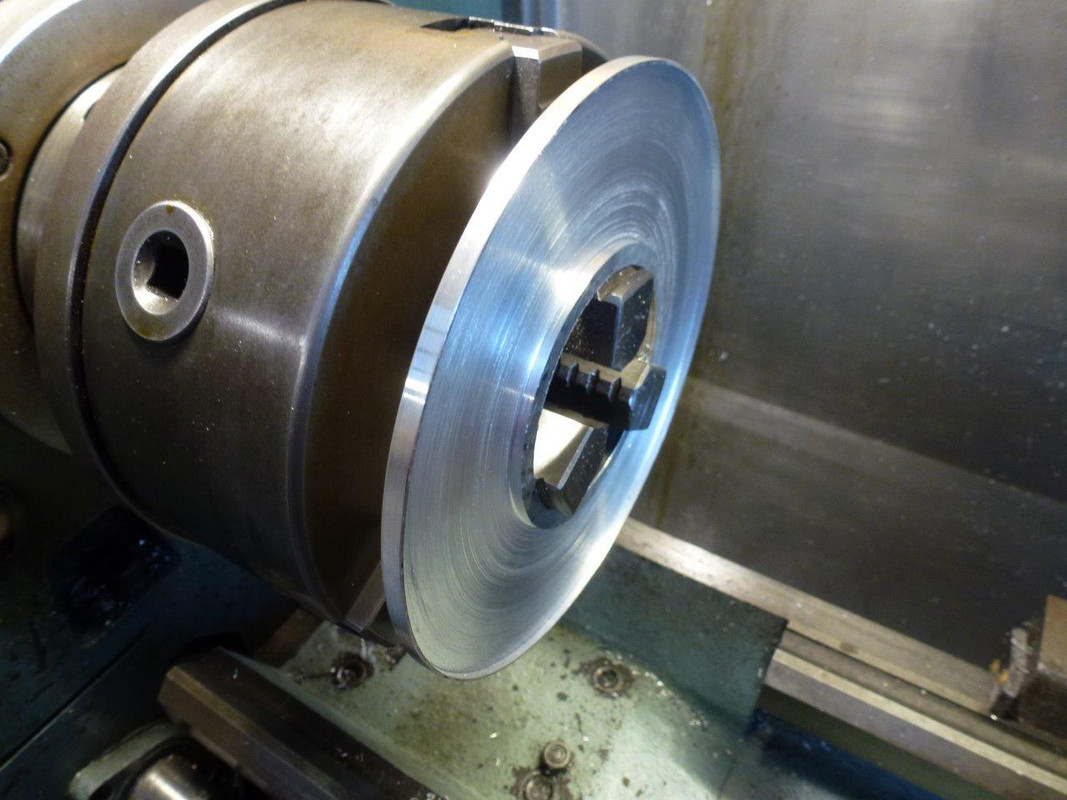
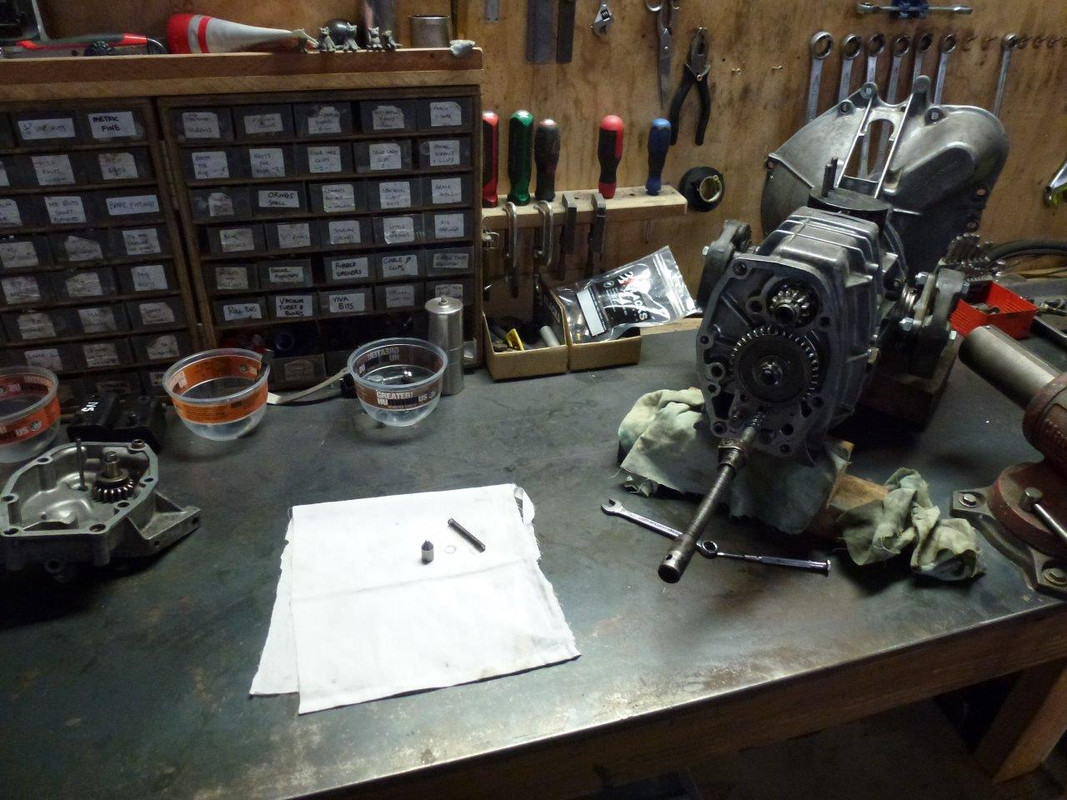
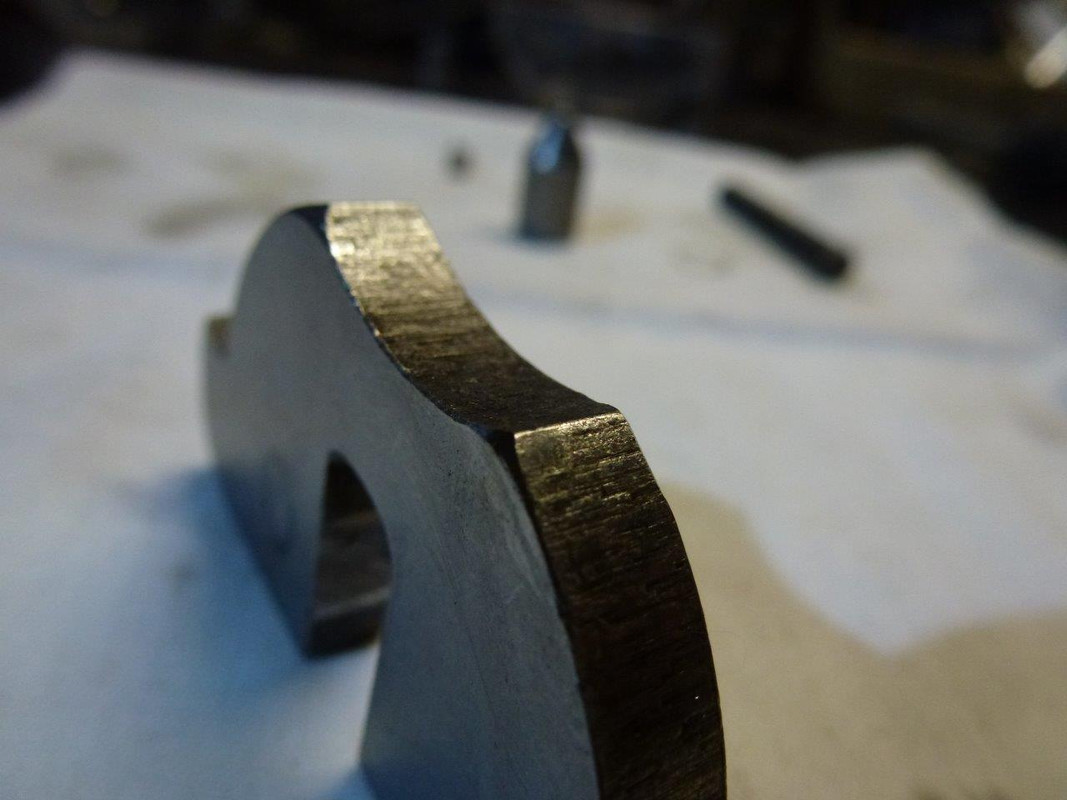
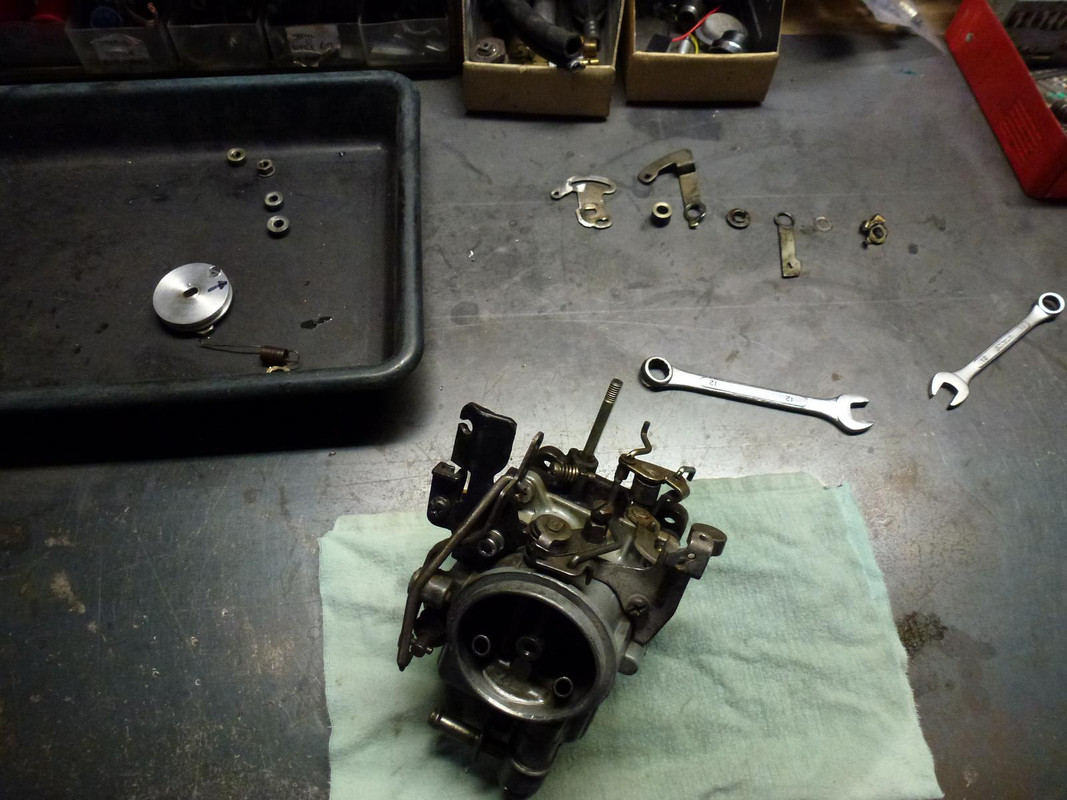
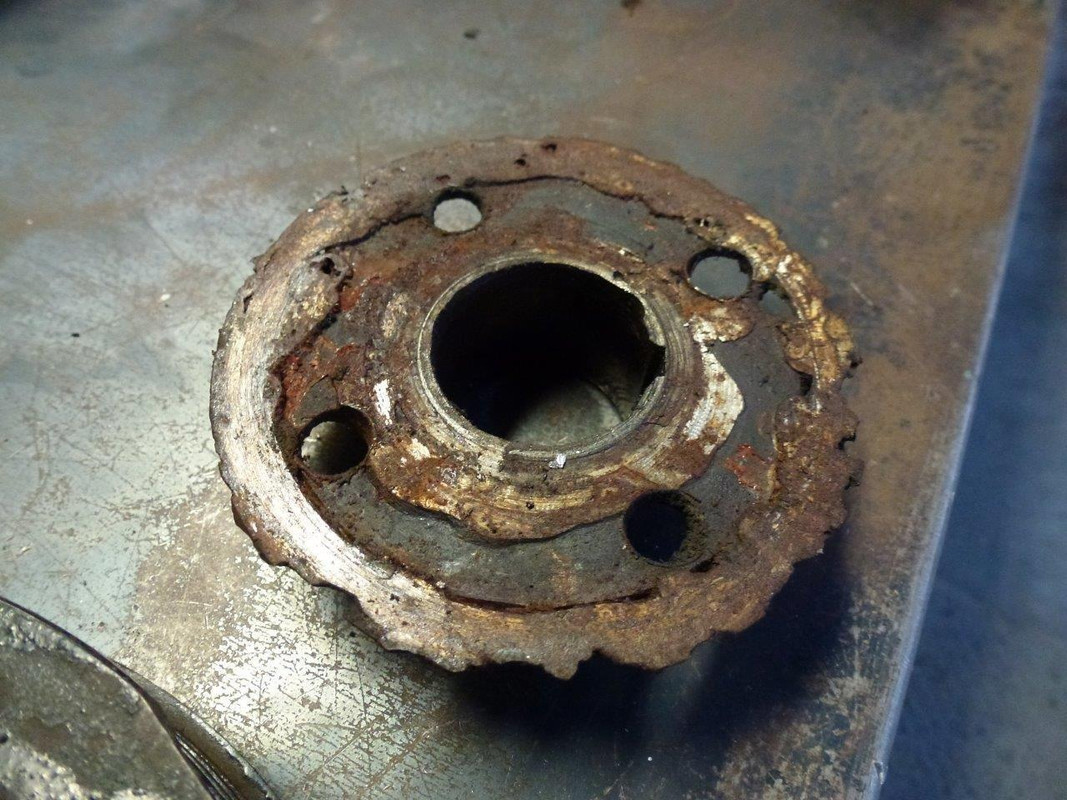
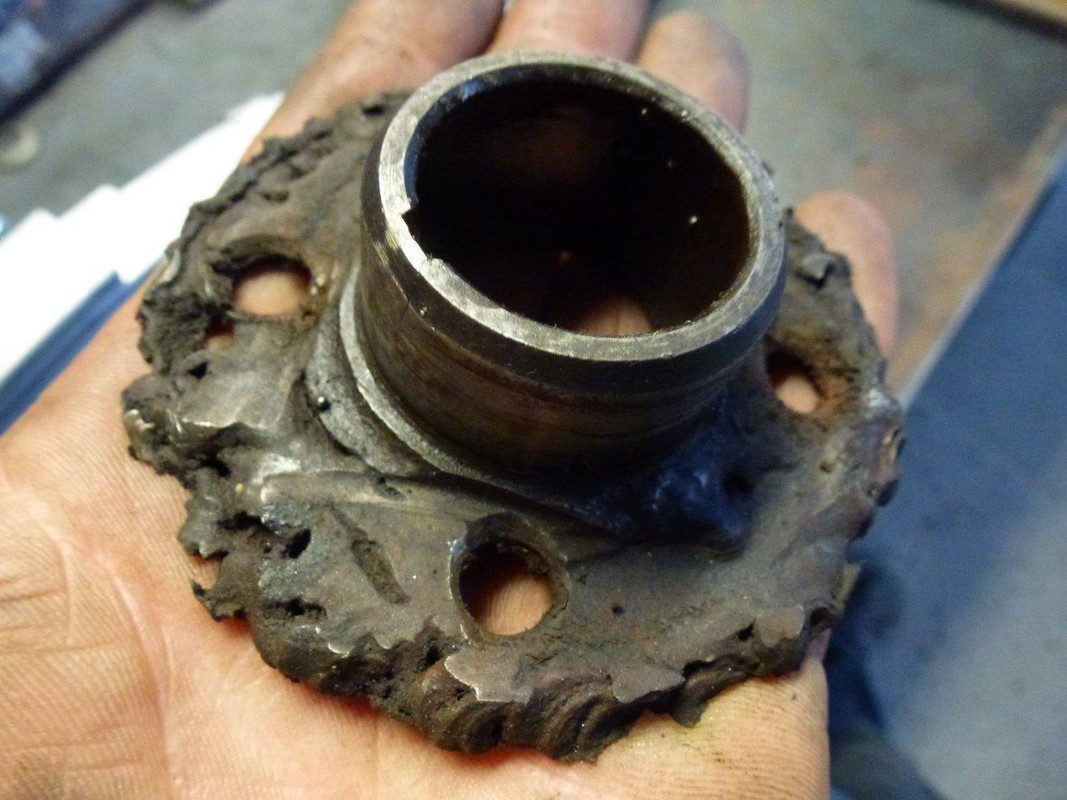
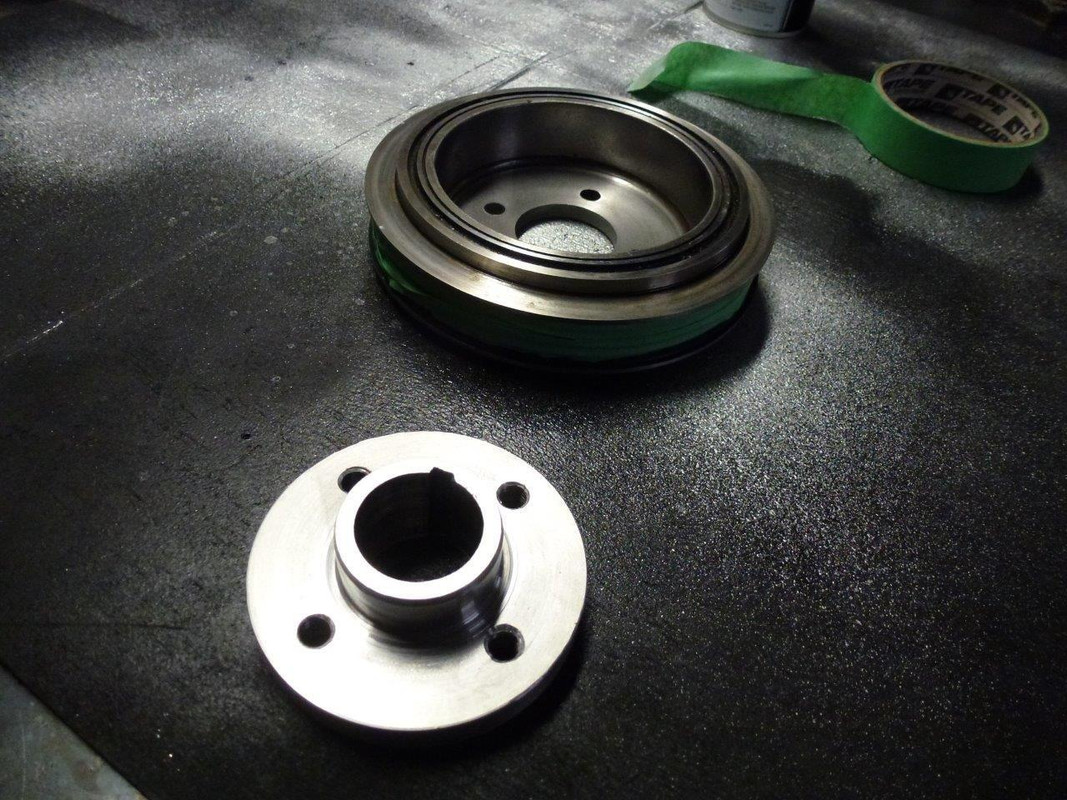
With the pipework tunnel pretty much finished I moved onto the seat rails. I had bought some MX5 seats a fair while back with the intention of fitting into the Imp. However, rather than have them sit around doing nothing I ended up fitting them into my Viva wagon. They were great but didn't quite suit it. I then bought a lovely pair of Recaros, fitted them to the wagon and have the Mx5 seats once again for this car. I had sort of roughed out how I wanted to fit them a while back but not sure exactly where to mount the supports. I needed a Datum. So I scored this beauty...
Strangely it came fitted in a freshly imported Hiace van from Japan that I did a load of rust repairs to. The owner didn't like it and agreed to give it to me if I got a decent standard Toyota replacement. This was harder than I thought as most of the old Toyota steering wheels from that era of Hiace have become loose on the top of wheel and so twist in ones hands feeling horrible. But eventually I found a decent replacement, got my prized wheel and promptly fitted it to a boss kit I ordered from overseas. With it taking pride of place I sat the seats in the car and made some carefully measured brrmmm brrmmm sounds and worked out the seat placement...
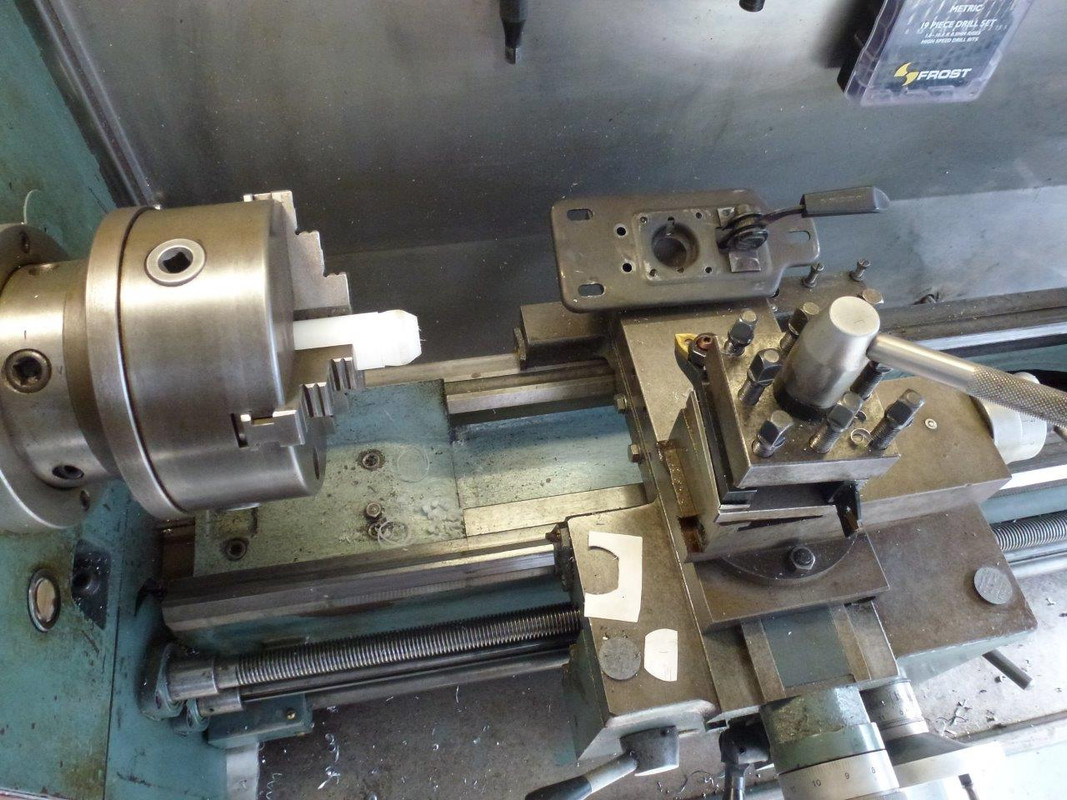
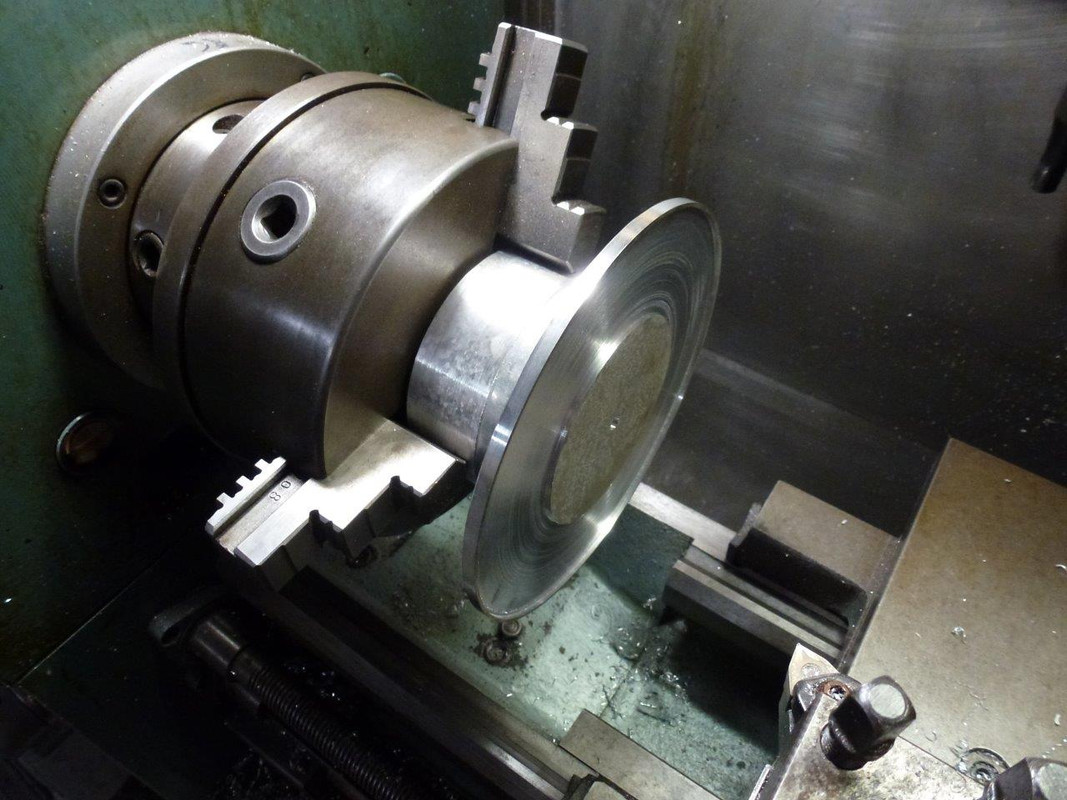
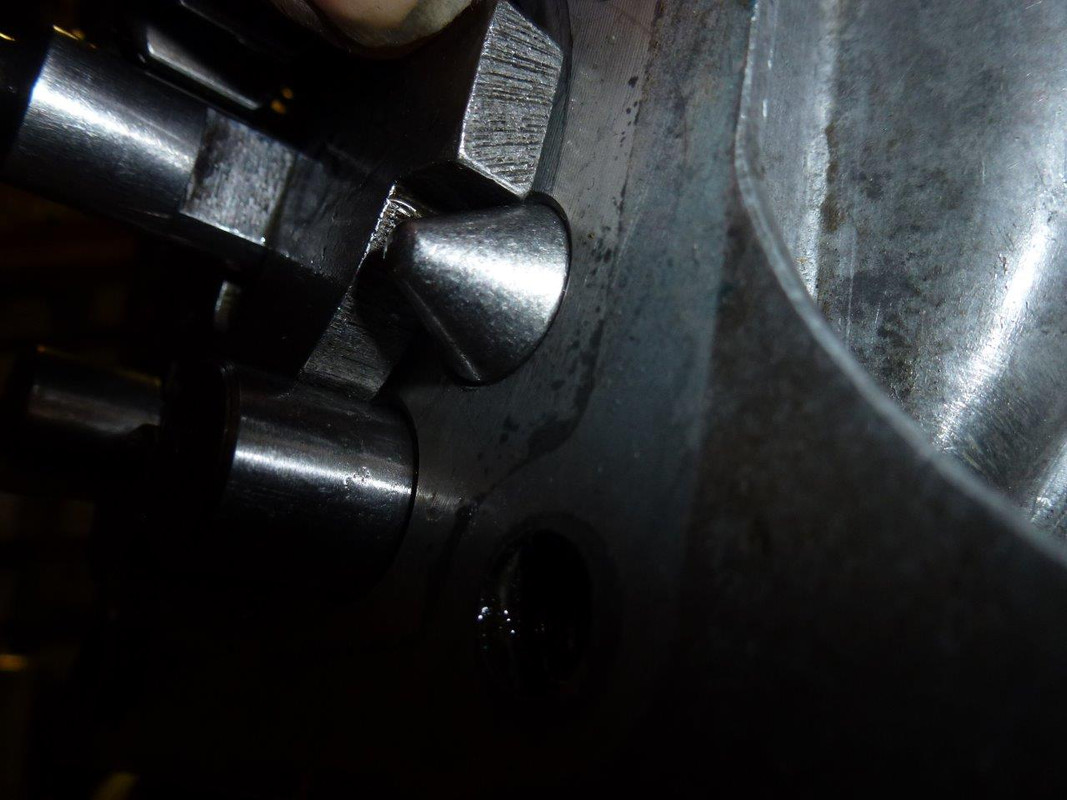
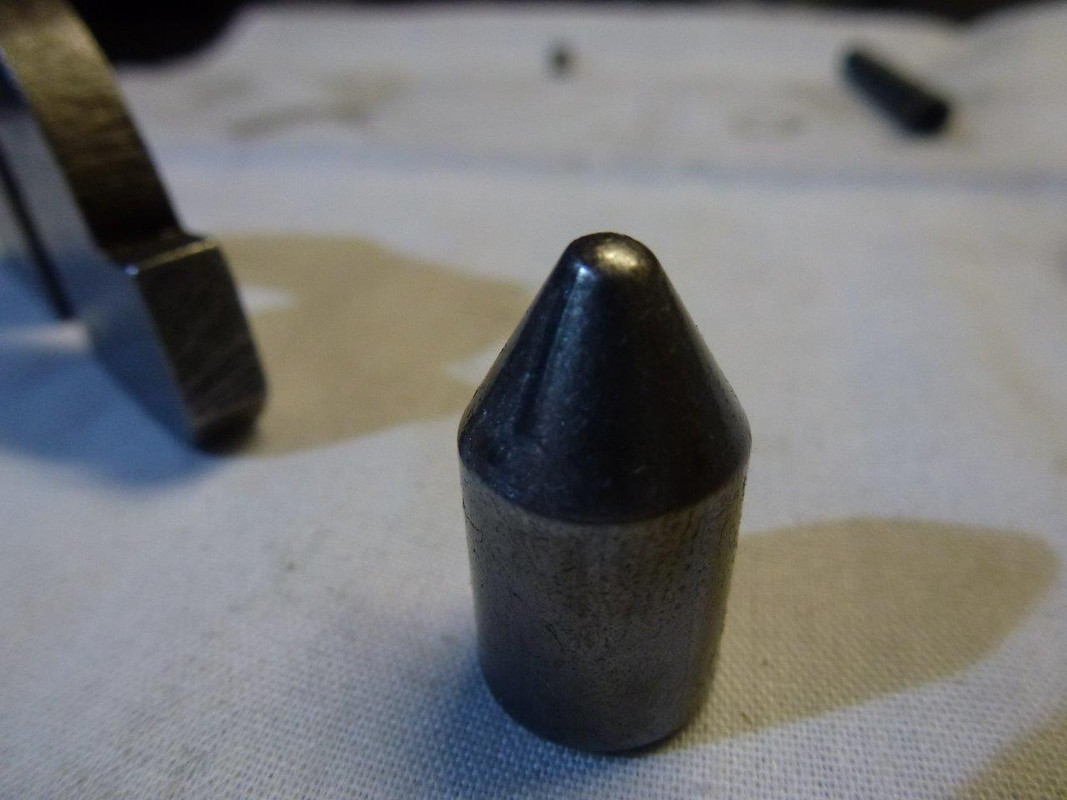
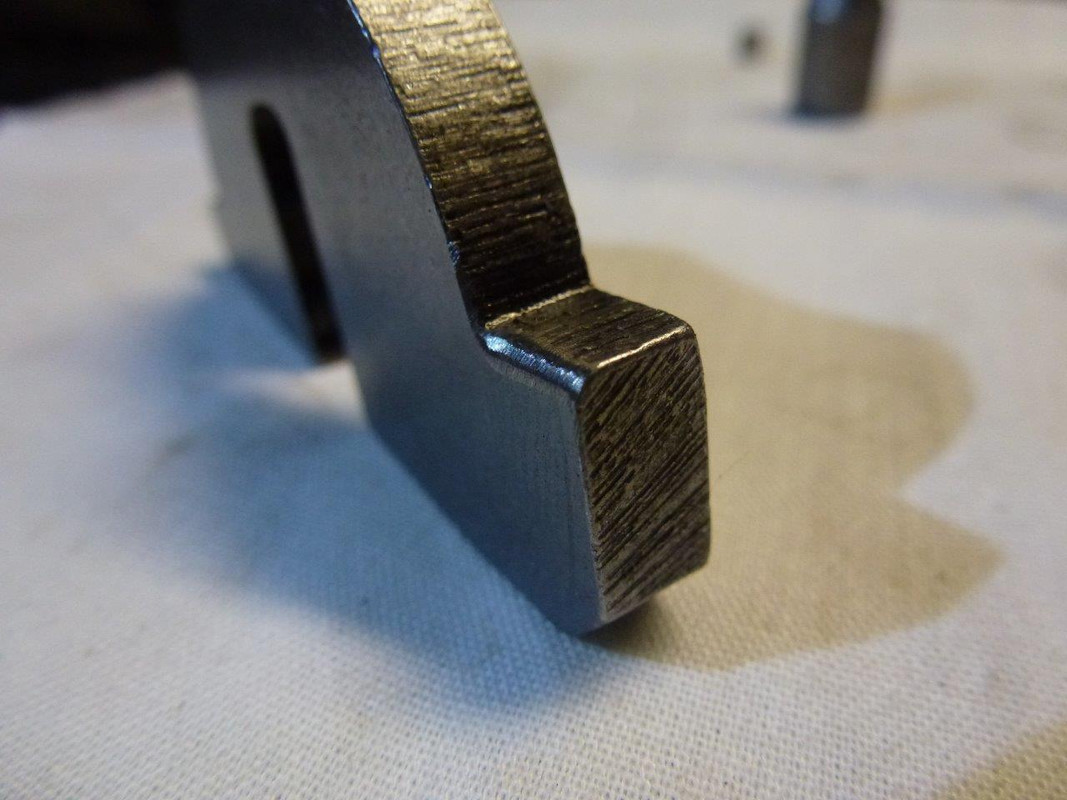
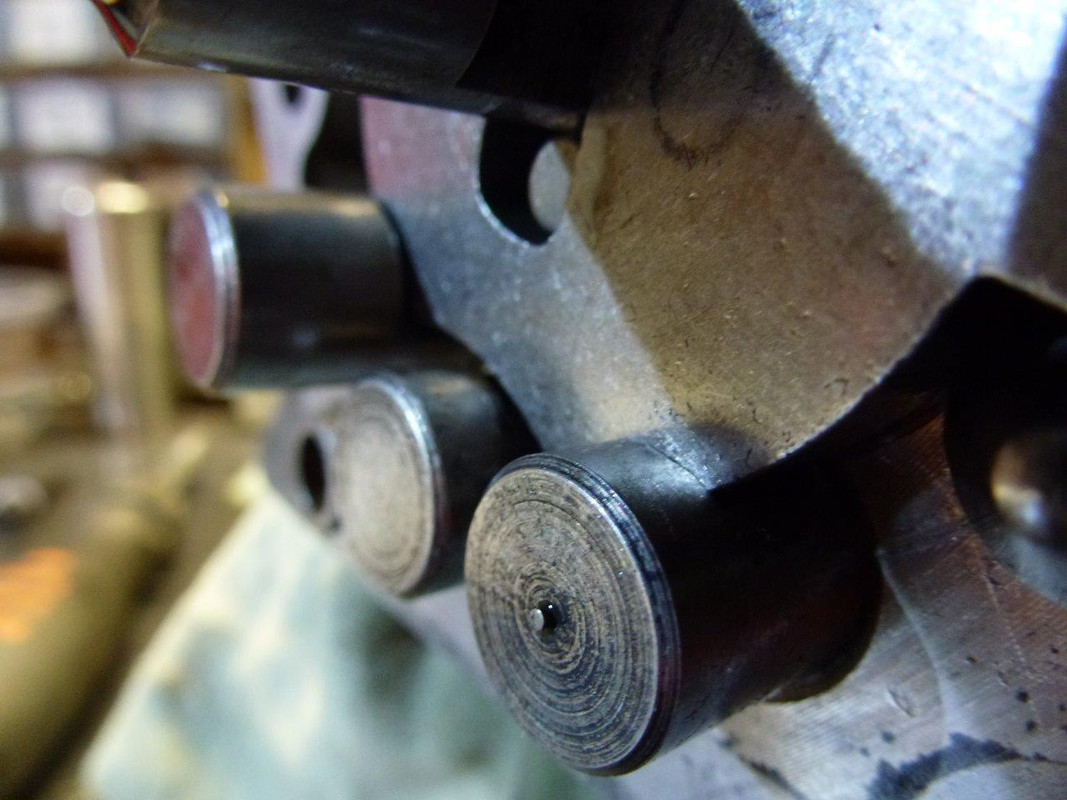
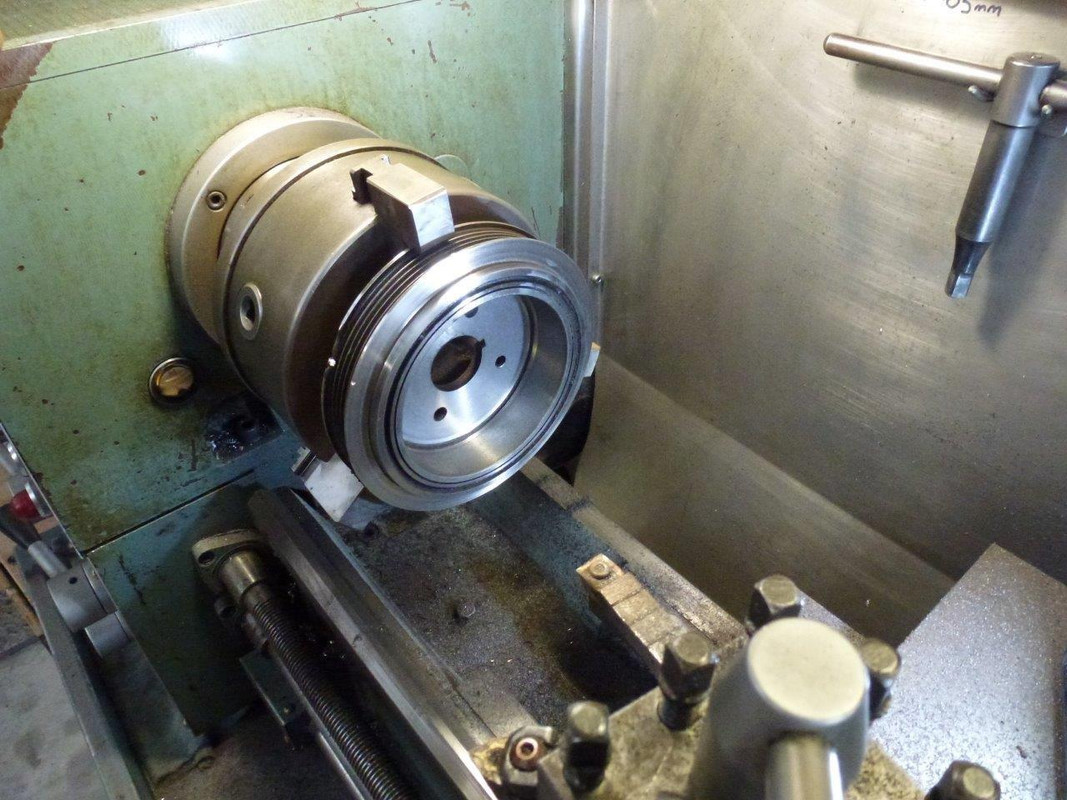
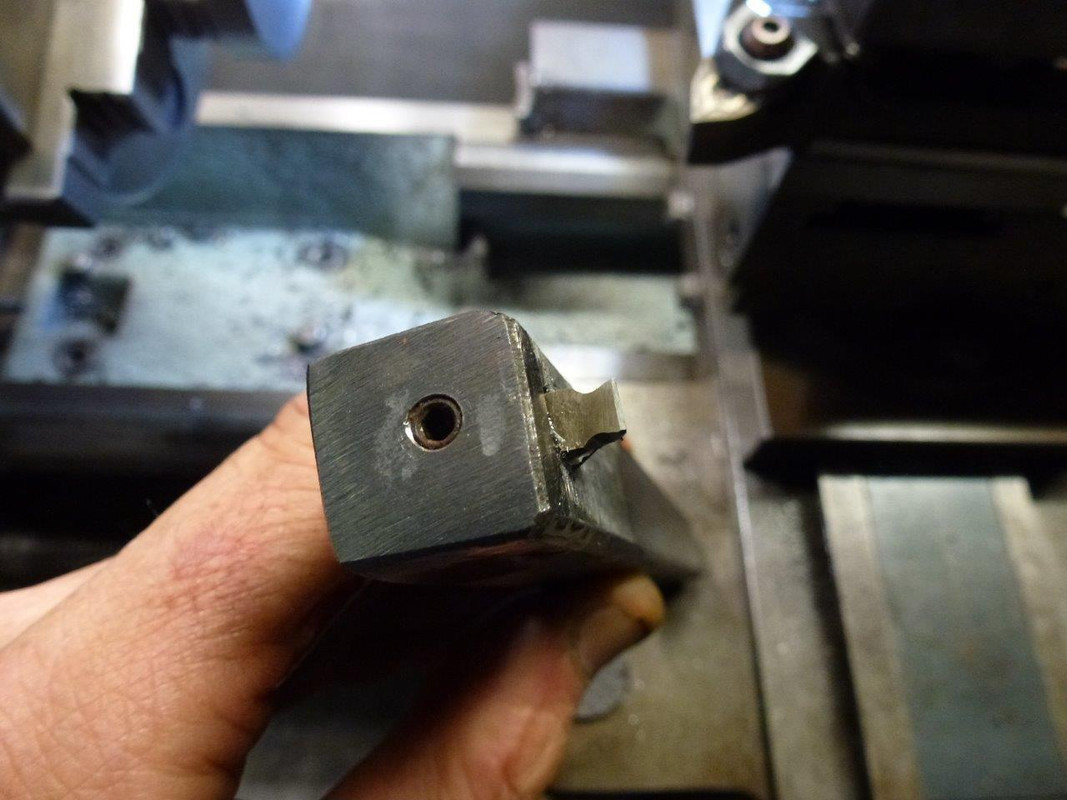
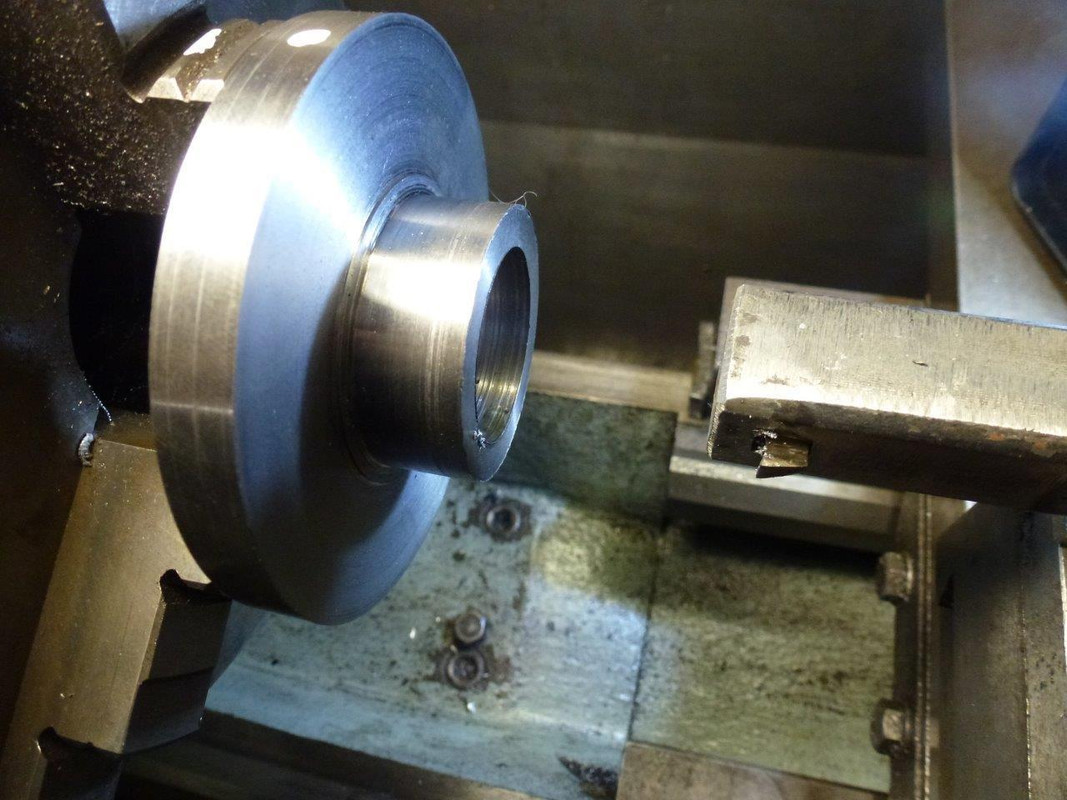
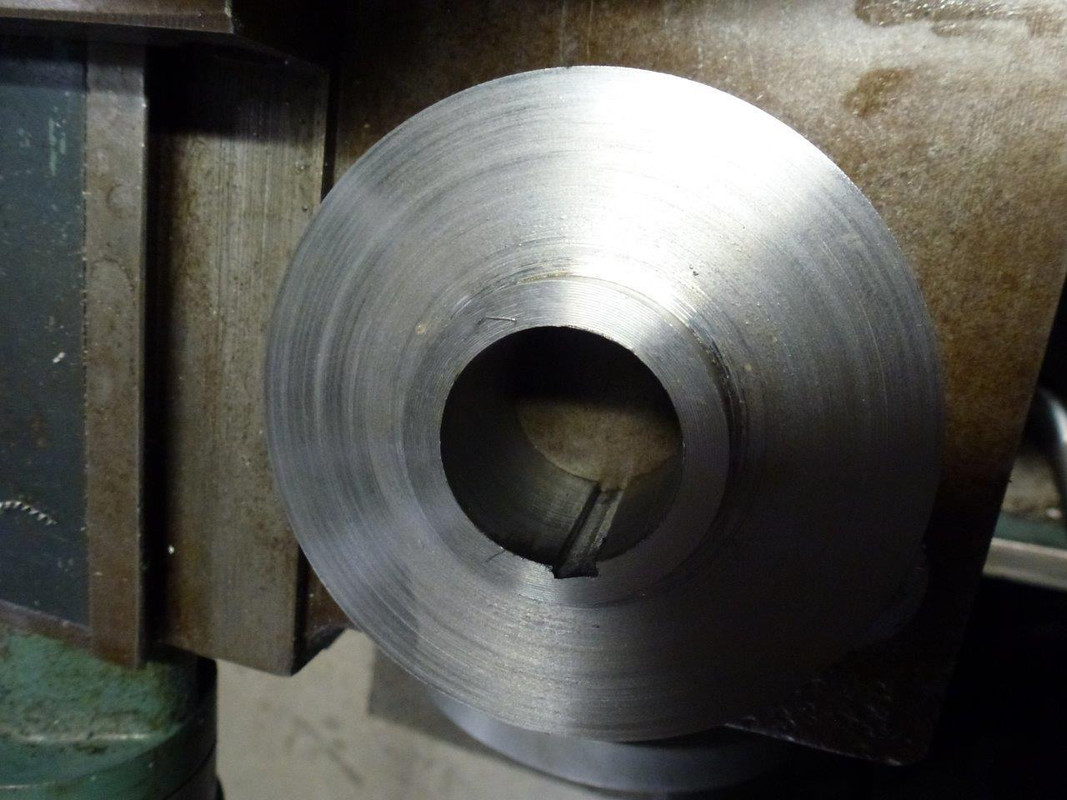
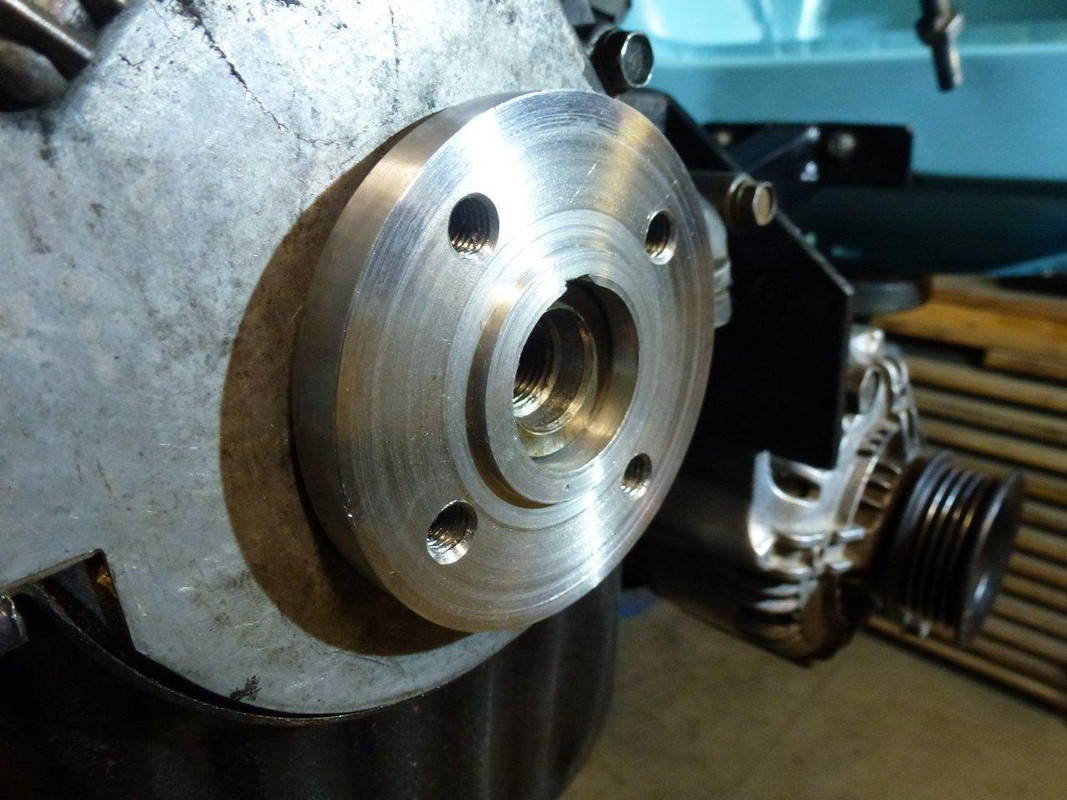
Before work could continue on fitting the seats I needed to machine some locating spacers. But in order to do that I needed to fit the brand new 16mm centre height tools to our replacement lathe of which the stock tool post was set to an absurdly high 12mm, meaning it could only use the little baby 12mm tools available (odd for what is a fairly medium sized lathe). So I needed to machine the tool post down with our old drill mill ...
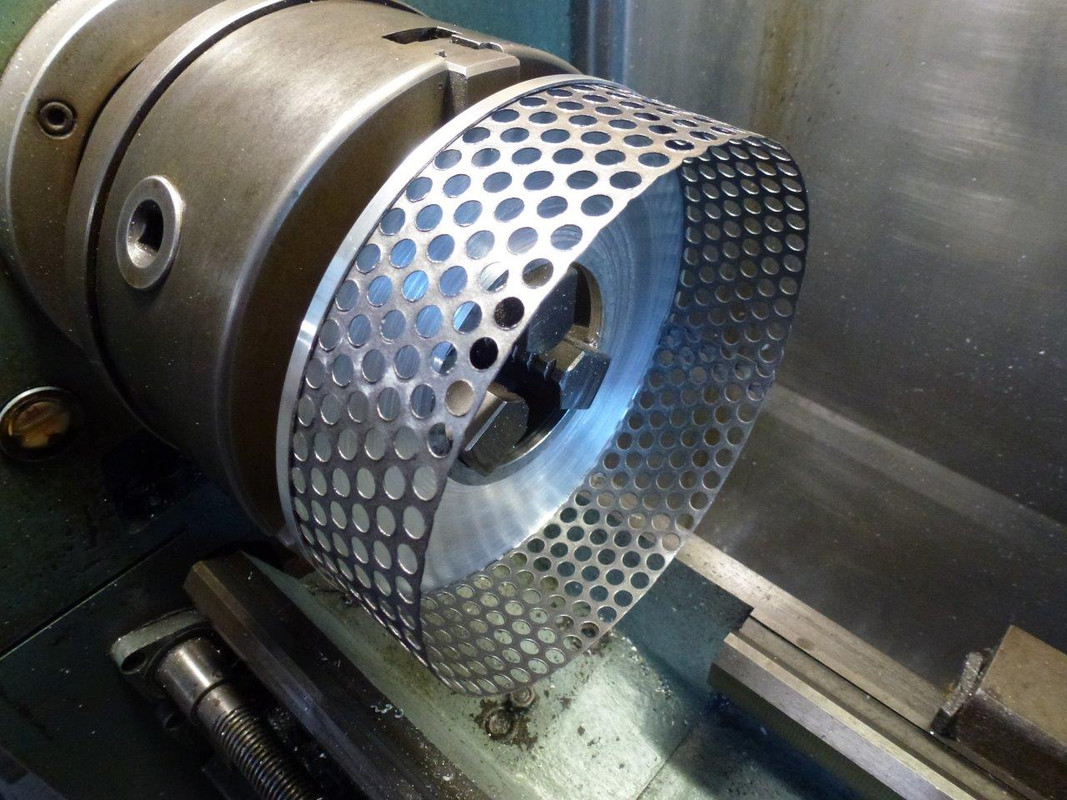
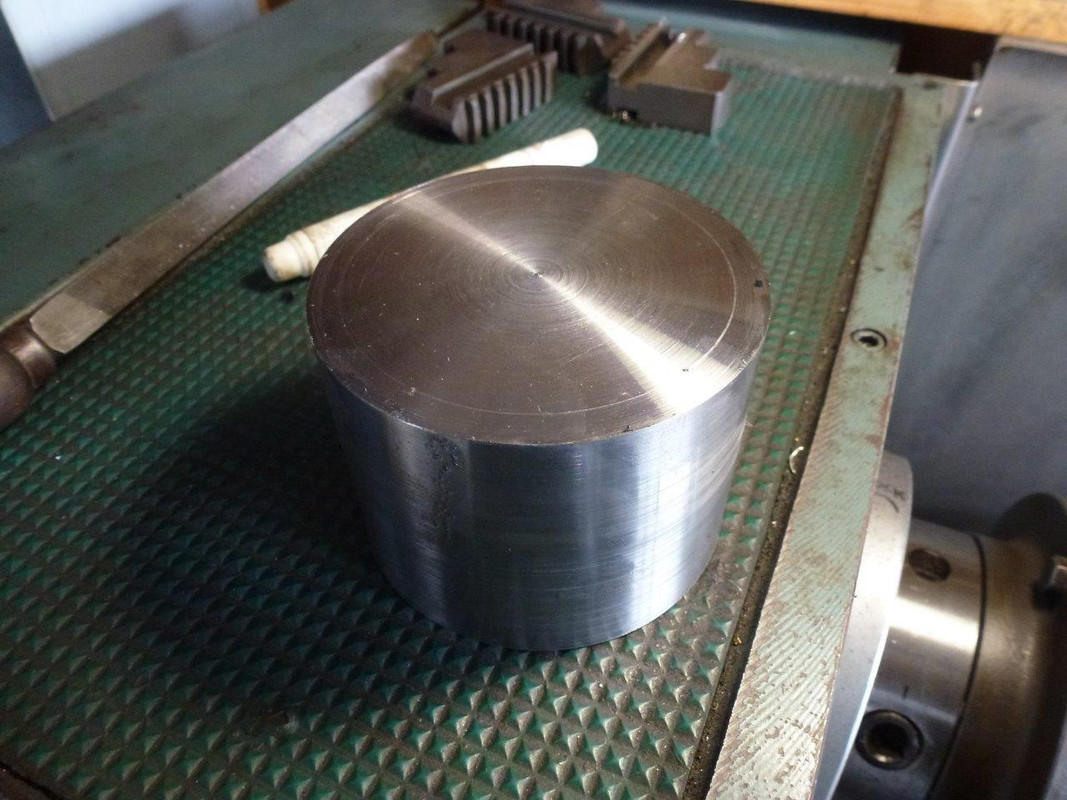
Then I machined these...
Which allowed me to sit the seats neatly onto fabricated supports that I welded across the floor, the rear passenger one strengthening the floor where the new pipe tunnel is...
I bolted the seats in and was very happy. The seats can go right back giving heaps of leg room for my lanky body but slide forwards more then enough to get into the back. I have mounted them quite far inboard to line them up as best I can with the pedals...
I had finished off the pipe tunnel too, leaving it exposed at the back for fitment of pipes. I'll cover those bits with removable lids and will have to modify a section of the rear seat base for clearance. I'll sort out the finishing details once I have welded up the stainless pipe I have bought.
Oh also- ages back when I was stripping out the green Imp (number 3 Imp) I found the build sheet. A neat thing to find...
Crikey its hot here! Perfect time to spend hours in a workshop filling and sanding then, with the occasional bike ride and swim to keep my sanity.
I don't really get too excited about paintwork. In fact- really posh paint jobs, all shiny and bling just dont suit old cars imo. But I realise that if I want to sell this car down the line (to fund the Viva project etc) then its going to need to look nice.
But going back a week from now I finished a few tiny welding jobs and added some much needed seatbelt mounting points. This car being a really early one only had diagonal belts and the positioning was horrible along with mounting points that were only holes through thin panel steel. I welded long sections of 20x10 fms inside the A pillars for the top mounts and then some plates to the floor and inner sill in all the appropriate size steel and nuts.
I also cut and shut the rear seat base frame so it would clear the radiator pipe tunnel..
I then had to sort out the removable rear valance/cross member. I have three to use. The race car one was hacked about and rusty. A spare one I'd collected from the Christchurch Imp graveyard was rusty and dented. The original one from this shell was just rusty. I chose that one. I started by cutting out the unneeded and quite heavy original engine mount part.
Then rebuilt it all, removing the rot, adding in a length folded steel along the width to support a small bit of box section.
Why? Well because I like bicycles and I like to travel to places for nice bike rides and why would I choose to do such a thing in a boring modern car! Much more fun to go on road trips to biking places in a interesting old car...
So, just like on my Rx3 and my previous Viva I added a mounting point for custom made bike racks to suit each car. For this Imp though I wanted something that will be hidden by the number plate when not in use. I'll make a basic rack to suit.
Then together Hannah and I painted this and any other remaining bare steel with industrial 440 epoxy primer. It already started looking better...
Now back to that filling and sanding. Its been a week of many 30 degree days here, often hotter at mid day. According to our thermometer yesterday was 34 ! Our place is like suntrap and we don't get the wind that even our neighbours over the road get. Great for winter but can get very hot in summer. Luckily the workshop faces directly north to the sun and with both doors open we get good light and a gentle enough breeze through to keep it from turning into too much of an intense oven. Plus it takes the filler dust out!
Inside the 'not so hot' oven...
Still a yucky job and to stop giving up I have to keep reminding myself that 'a good paint job is 95% preparation' etc etc. Yawn.
pffff. I'll report back in a week or two, broken and covered in dust.
Update. I hate paint prep. I could never be a car painter. Ugggghhh- so boring. Sand, fill, sand, fill, sand... luckily I have a belt sander...
(Joke)
Then cover the whole lot in white filler primer and spot all the bits I missed. FFS....
In between all the filling and sanding I did a few other bits. Just to take a break from sanding really but also because these jobs are ones I cant do once its painted.
The engine lid (bonnet at back?) I'll be using is the fiberglass item from the race car. It fits OK and is very light plus its the much nicer looking sport item with extra vents. However it was fitted to the race car on pedestals and held down with sprung latches (I dont know the proper term for these so I just made some names up)
I wanted it to fit like an original lid so I had glue some steel brackets to it. Plus it sat flat along the front edge so an extra bit of steel welded between the brackets with a curve set in would fix that issue. I welded some m6 bolts in so making captive studs. The job in photos...
Brackets bolted to hinges and ready for glue....
Lid glued on and taped in place over night...
It works! Yay...
Now to hold it down with original style handles. I had a set of handles on one spare lid and some working latches on another. I cut things up, broke rusty bits, oiled this, wire brushed that, ground this, drilled that and other fettling until I had some working bits I could glue onto the F/glass lid. Photos of the process...
Again leaving for a few hours until the glue set (which btw is Sellys 'The One' adhesive and sealer which is really good stuff for all sorts Of jobs I have found) and once I fitted the handles in place they worked a treat. Panel gaps are ok too for a F/glass lid...
Part of the body prep was spraying Resene Industrial 440 epoxy primer over a few bare steel parts and the roof. I sprayed the fan assembly and radiator shroud while I was at it. Looked much better for some quick spraying and will be nice and durable...
Then back to sanding. Finally I had it at a point where I could slap some primer on. It took a long time to sort the side out that had the massive cave in and dents. Its still not perfect and never will be. The bonnet too- given I had rebuilt most of the complicated front edge in steel I was not surprised that it needed a skim of filler and its still not perfect. Show car it wont be...
Now this was to be the first time I have used 2 pack paint. I have previously painted cars in single pack acrylic (lacquer?) and they've come up OK but not very durable. Shane who owns the paint shop, Custom Colors, next door to where I used to work, gave me some advice and helped sort me out the right stuff for the job.
This stuff is nasty and I was not going to risk breathing in vapours filled with all sorts of crap for the sake of painting an Imp. So I bought a decent full face mask and an air feed kit. I also splashed out and spent big monies on a Hvlp spray gun too! $60 at Supercheap in a sale. It'll do the job fine for the amount of work I'll be doing. I appreciate the lovelyness of all the Devilbiss and Iwata guns but not the $500 plus price tags.
Also- big thanks goes out to the friendly helpful fella, Mort, at Patersons paint supplies in Nelson.
So to the paint booth. Well actually to the workshop in which I had thrown some sheets over the pushbikes, strung some clothesline across the width from which hung some the doors and bonnet and shuffled things about so not to trip over whilst waddling about in my stormtrooper white coveralls making Darth Vader sounds from within my airfed mask. Its summer so I am pretty much always barefoot as is the way in NZ. However in order to not end up with primer covered tootsies I wore some old socks. I dusted everything down this morning and swept the place out, blew the car down. I opened the roller doors to an exact amount to allow just enough flow to pull the mist out (which did not work...) and preceded to very carefully and patiently clog my spray gun up.
Some paint ended up on the car though. It was certainly a big lesson. This paint, a heavy primer, certainly goes off quick in the pot and at first I had not thinned it down enough. Combined with a 1.4mm tip size more suited for thinner top coats and I ended up making a mess of my bench as I frantically cleaned out the gun, tipped away one pot of paint, cursed a bit (a lot), turned the music up, and got back to spluttering my $160 primer all over the place.
I got there in the end, muttering to myself the whole time 'not to worry..its only the primer stage' and the car now looks resplendent in white. Amazing how a lovely coat of uniform colour makes something look so much neater.
Also amazing how a lovely coat of primer shows up all the little pits, chips, dents, edges. Fcuk.
On with the sanding. Luckily there is really only one part that I don't like which is on the horizontal swage line near the 'big dent job'. Its too flat and needs the edge building up with a bit more filler...
But screw that for now. I cleaned the gun, turned the lights off and went out for a bike ride.
Yeah this is what I'm hoping. I'll tidy these small blemishes. Flat it all back. Give it another coat and then flat back for top coat.
The primer I've used is this...
I've already spent way more time then I had ever planned on this shell so what ever happens it'll now be better then planned
The Imp is finally all painted, after first sorting out a bulge in a panel. It looks great and I'm stoked with the colour. I'll do a proper update soon. But in the meantime here's a quick peek at the colour. But which one is it?...
OK so I was thinking I was not far from painting the shell when I realised my repairs to the rear guard behind the drivers door had a slight bulge, maybe 5mm outwards in relation to the edge of the door shuts. A classic case of working up close and not standing back to look at the complete picture. It showed up worse when I sat the door in place. I thought I had taken a photo but alas no- trust me when I say it would have done my head in noting it each time I looked down the flank. This panel had been badly bashed in at some point we had popped it out. But obviously too far sadly I never realised until now. I tried beating it back in but no luck. It had been previously repaired by someone else and was full of lots of sharp dents. So this happened...
Following that I did a super careful replacement of the steel, butt welded in, with very slow careful welding so not to warp anything. In pictures...
It turned out great. I still needed a skim of filler to get it spot on but considering what it was like prior I'm happy with it now. It lines up really well with the door...
I then gave this and most of the rest of the shell another coat in primer, smoothed it all back with 400. Oh yawn. Helps having beer and loud Reggae playing. Hannah just loved sanding...
With the sanding done I then preceded to turn the workshop into something resembling a Smurf murder house. If there was a song to be played afterwards it would have been this...
We masked it all up and I painted the door jams, door backs, engine bay, interior, frunk, door bins etc.
Next day, re- masked the shell and painted the rest. On the first days painting it was so hot at 34 degrees...
The following day time I started as early as I could but it was still about 28. Luckily a very dry heat. Not fun in all the gear...
I never really considered how far the blue mist would travel. It covered everything. Great fun. Now we have a blue floor which luckily is slowly going to wear off I think. I hope. After it was finished I shut the doors and let it bake in the oven that was the shed, drank a cold beer and went to the beach for a long swim.
Here is a blue Imp. Its very similar to an original Imp colour I like so I went with this. Not sure of the name of the colour. Its very bright and changes from a mint blue to a aqua blue in different light.
I'm so relieved to have finished the painting. It'll need a flat back to get rid of the orange peel and shine so it looks more like a original paint job. But I'm going to ignore that job until after the car is road legal. Enough body work and painting!!!! Its time to bring the other Imps inside and play musical chairs with all the various parts. Pick the nicest bits and reassemble one car from them all...
It certainly is a fair bit better then when we first looked at this shell a year ago and I'm pretty stoked to be at this point in the restoration
I just couldn't help myself but take this photo...
Having fun stripping remaining bits from the other two Imps, cleaning and painting bits and generally playing about with what is a big model car. Proper update soon.
Looking very good, and thanks for the reminder re the original race Imp.
I can sympathise with the hot weather, had similar when I was clearing out my grandparents' shed both of my Imp parts and a lot of my grandfather's old stuff, might have been over 40, I tried to pay as little attention as possible to the temperature. Probably 20 m3 of stuff altogether, filled a 10 m3 bin in half a day plus a few hundred kilos contribution to the scrap metal pile on my uncle's farm and some donations to a local museum. Many boxes of Imp stuff including a dozen timber wine crates and 10 engines or part thereof, etc! For some reason 5 doors...
Luckily John its cooled down somewhat here. Sadly we have had a huge bushfire in our region, about 50km away, which is still blazing. 2000 Hectares plus. Nothing like the fires in OZ but reallyy big for here! Hannah and I are both in our local fire brigade and got called out for a 14 hour night shift. This didnt help me with progress on the Imp. Knackered to say the least and worried for others. If folk reading this are interested just type in Nelson bushfire into google. Very very dry here at the moment. Scary dry!
Oh I forgot to mention a while back that I managed to get my Mum to do a spot of sanding to when she visited. I doubt she would have lasted log though but I think she did like the fact she had a trapped audience to waffle on to while she did sand...
However- that was obviously before paint. Now we are right into the fun jobs of piecing back together the big kitset. The trickiest thing is trying not to get too carried away with cleaning things but it always does seem such a shame to put messy, rusty or dirty items onto a clean shell. I think in the future I'll try to stick to ratty cars like the Viva wagon. Saves time when things can be messy
So yeah.. cleaning things. First the bumpers. I straightened both as best I could and Hannah then cleaned the backs and painted the surface rust in Por15...
I then trial fitted the front but once bolted up it was slightly wonky. I ended up having to whip up a bending tool to straighten out the slightly bent mounting points...
All straightened I mounted the bumper and stood back to admire the first bit of bling...
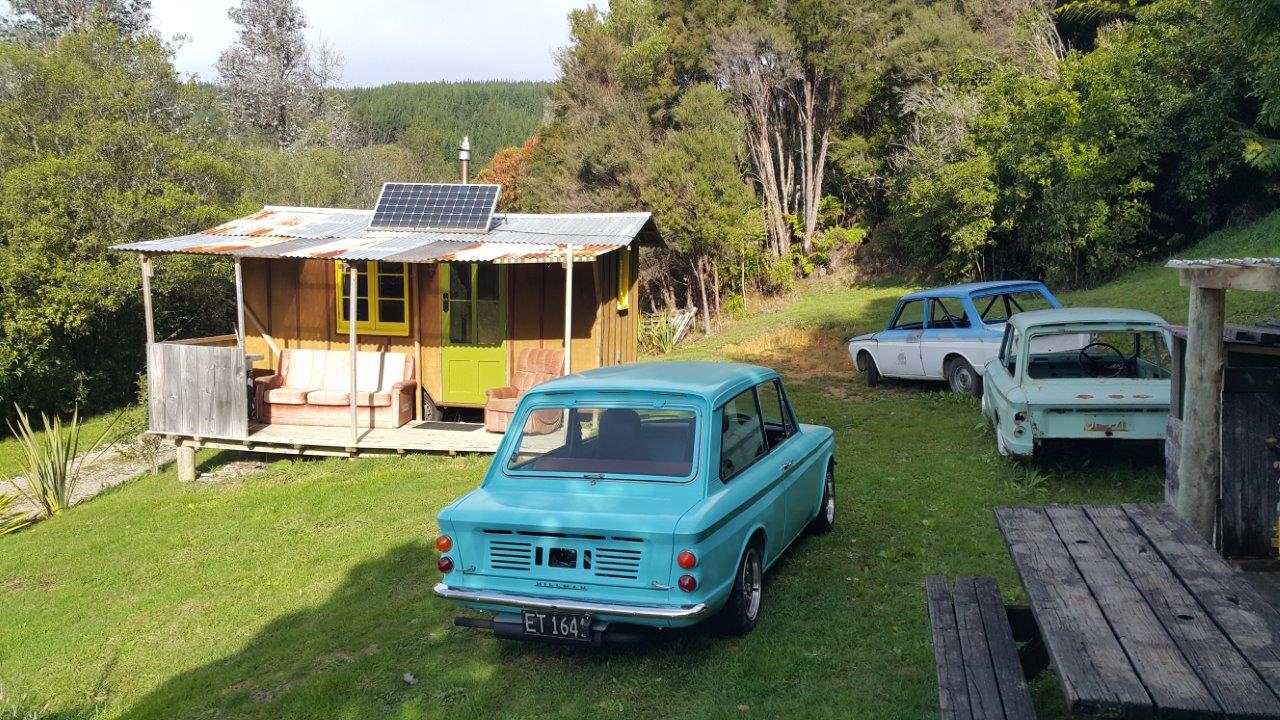
We then hauled in the other two Imps and went over them like a team of car stripping Piranhas and removed all the last morsels of useful bits...
With bits removed they then needed cleaning. Hannah quite enjoys these jobs and did a stirling job of making things all shiny again...
I filled the roofline and inner wings over the rear arches with cavity wax. Much more enjoyable this time round then the first time I ever used some back in Blighty on my Rx3, in winter on a very cold day. This time round it flowed perfectly...
Together we fitted the head lining we removed from Imp 3- the one rescued from Christchurch. Its a bit discoloured around the edges where the contact adhesive that the original factory worker had brushed in place has stained it right through. Not much we could do with that. But its rip free, pulled up nice and tight and looks better then nothing. Its in keeping with a 54 year old car...
I then made a engine cover stay. Because the cover is fiberglass and had no mounting points for a stay I had added some before painting along with a suitable point on the car with them further apart then the standard imp placement to take away extra leverage over a flexible f/glass lid. Now to connect the dots. I had a rough Idea of what I was going to make when I added the mounts and just went with it. I had a piece of stainless the right size and used a plastic knob from an old broken cafetiere I had stashed in my bin of 'might be useful one day' bits. I bent the stainless rod in such a way that when the lid is opened it slides up and drops over a stainless bolt then cant go further. To drop the lid you have to lift the knob slightly- this way a gust of wind cant lift it and make it drop. It works sweet as!...
Next big job was to get the wee car back on its wheels because I had some work coming in that required the hoist. I refitted all the suspension and luckily had collected 4 decent shock absorbers with good shafts. However the springs were going to be too long. I'd happily pay the $200 for some Montie Carlo springs. However the freight costs for a set to NZ is too much for me to cope with and anyway I have 3 full sets of springs I can play with for free. I like free. So out with the Makita...
After doing a heck of a lot of web browsing I deduced that one coil off the front and half off the back would be a good starting point. Totally aware that I'd be raising the effective spring rate I reckoned this would still be OK. The car is going to be a touch heavier all round anyway but too much extra stiffness to the coils without adding extra damping would be no good. I definitely cant afford new posh dampers at this point so I played it safe...
I then heated the cut ends up with the Tig in several zones, flattening the coil as I did. This worked well- the heat didn't travel very far. Its not optimum. Optimum was what I used to do back in the day when I spent 3 months of my apprenticeship working for a Blacksmith resetting leaf springs and shortening coils etc. But I dont have a big furnace at my disposal now
Then cut the ends flat and they came up sweet. It will be really interesting to see how it sits on these and this I wont know until the car is fully built up to full weight.
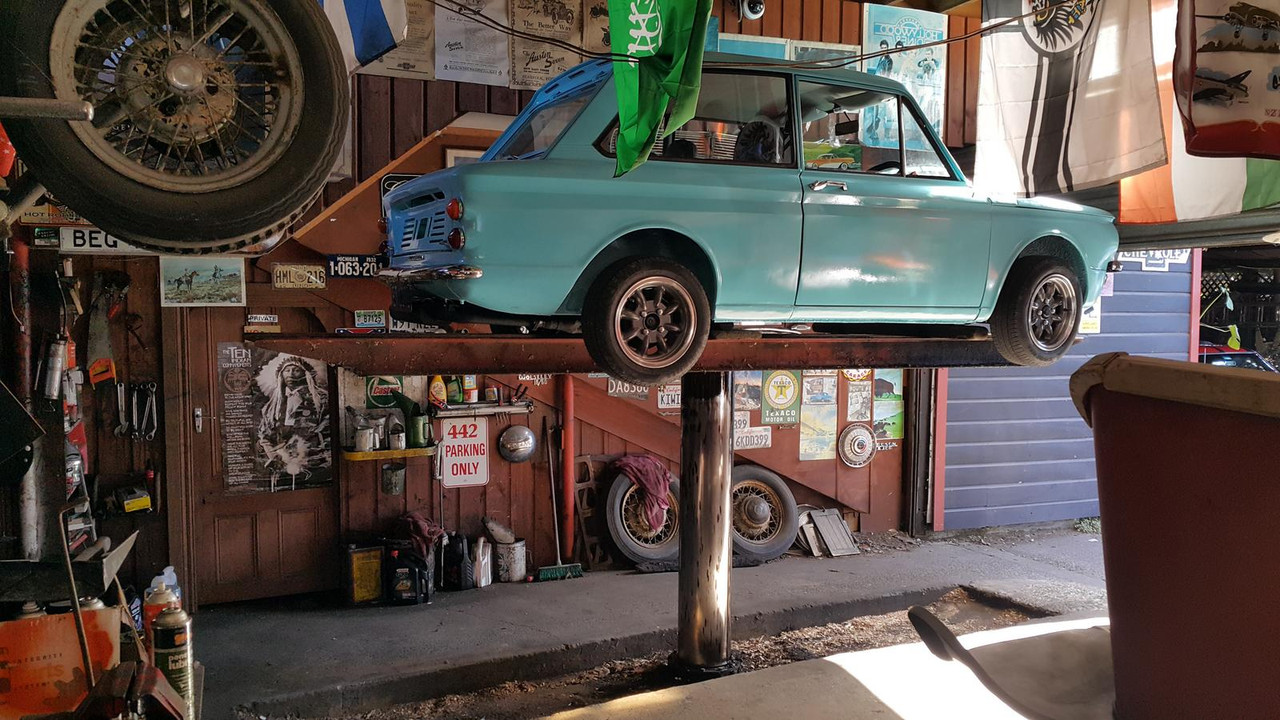
I reassembled the struts and finally I was able to fit the minilight wheels from the racecar on and lower the Imp to the ground. Ooooooohhhhh. I dont know when this car was last rolling but I suspect it was a very long time ago! It felt so good to roll it away from the hoist, stand back and admire it. Plenty of premium positive camber to come out as the weight piles on. I'll soon be ordering some better sized new tyres and getting them onto the rims. While the car is off the hoist Hannah can continue assembling interior bits and I'll be attending to some work on other peoples cars.
The pivot bushes on the low pivot arms are fractionally longer and larger and the low pivot arms are 1/2" shorter than the high pivot. The change was made because the pivot point of the arms were 1/2" further outward in the low pivot model. I believe that this change was made to alter the bump steer characteristics of the car. The sum of the two changes means that the track measurement between high and low pivot cars should be identical unless parts are inter-mixed. As far as differences in early and late cars, Frank Schoenberger (alias Bodgy) had an extensive list at one stage if my memory is correct. You could try him.
Ahhh OK. That makes sense. I'll ask Frank. Would be neat to have a thread which lists all these little changes in one place. I'll ask Frank. I've been in contact with him sincs sorting out some seals etc and yeah he seems to know his onions
Early and late arms, altering pivot height, spring length and dampers settings all need to be thought about as a package if going low for race purposes high pivot with later arms may well work for the springs and dampers you have and also the reverse. i run later arms and the low pivot on the rally car with RAC springs to gain ground clearance for rallying set up with my developed dampers the car is so predictable and balanced i can do anything i want with it on any surface if i went to race circuit and put on some race tyres the car would have a good go at keeping with a race car with suspension as is (all other things being equal , Gbox ratios engine BHP) it would never beat a race car as that suspension is developed for a circuit much the same as putting gravel spec tyres on a race car and competing against me on a gravel test or stage. You can work with what you have to make improvements and for fast road use and track days i would suggest 1/4 to 1/2 deg negative camber static with weight of fuel and passengers onboard. tracking as per standard toe in 3 mm. Monte spec sprics and the best dampers you can buy bring tyre pressures closer to be equal and adjust to suit. On modern rubber the cars handling will be fantastic. Going wider for looks or fitting wide wheels etc can make the steering feel poor compared to standard and not improve handling. The thought of moving more weight to the front to achieve nearer 50/50 because other types of race cars are like this is not realistic on an imp because it has the swing arm and trailling arm set up to work with the engine/weight in the rear you need to be patrick head to work out suspension settings if you move the weight to the middle of the car. Moving 100 Kg 3 ft forward has a massive effect on the front suspension loadings and just banging monte's on will probably not cut it.
Work has been continuing at pace on my large model car build as we both clean bits and piece it altogether. Its fun. Its taking far more time then I ever remember. I always forget about just how long these 'little jobs' take. Made longer because the car looks so clean and fresh so how can we possibly put dirty or crusty bits back on.
I ordered some new 175/60 13 tyres last week. Of course the rims look yucky. Not a fan of all silver rims, especially Minilights. I have always planed to paint them to how I want them to look. Really make the rim dish stick out as much as possible. So my friendly local garage where I now get my tyres from popped the old tyres off, we took the rims home and I did this...
Which was fun and quick. Very handy that the Viva shares the same 4" PCD. The rims ended up like this..
I then selected a colour from a book of swatches lent to me by the local paint shop. This process of selection took bl***y ages! Just how many 'metallic greys' does the world really need?!!!
Paint finally selected, bought and Hannah masked the rims very carefully (I tried to do one rim and gave up- I really have no patience for that). I threw some paint at the rims...
Because Hannah had endured the boredom that is masking wheels she got the fun job of peeling off the tape..
They looked fantastic. I was very happy. So here is a sexy rim shot...
then with tyres...
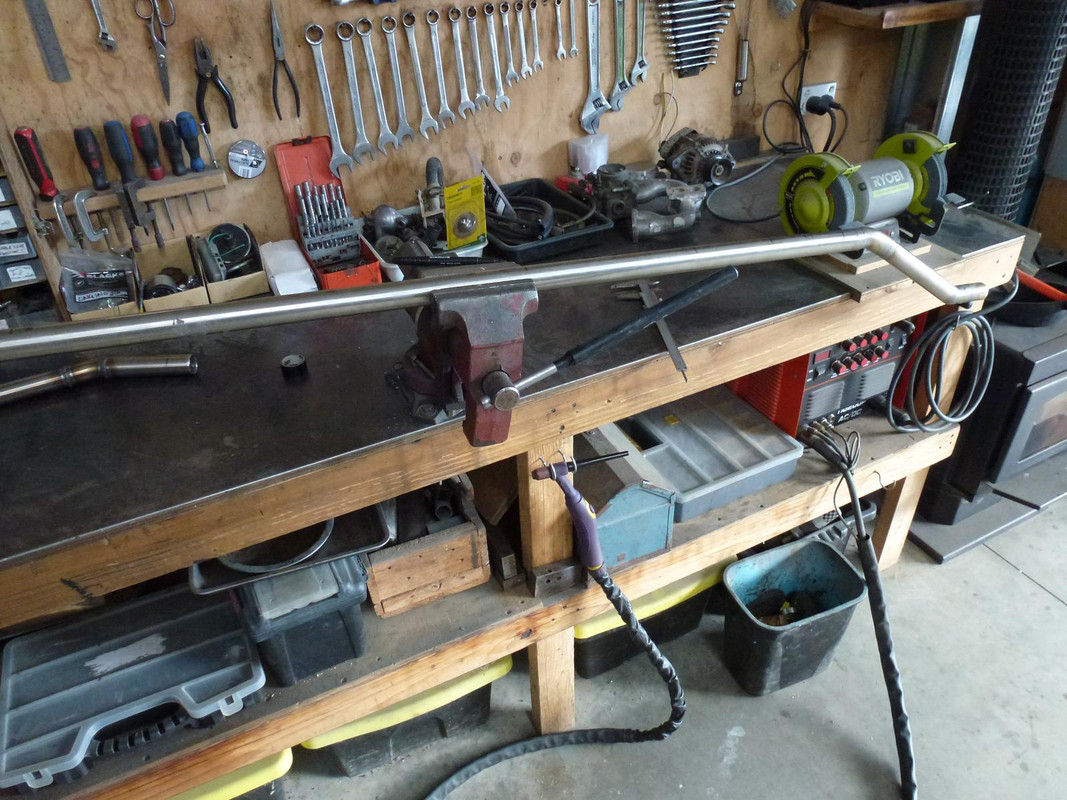
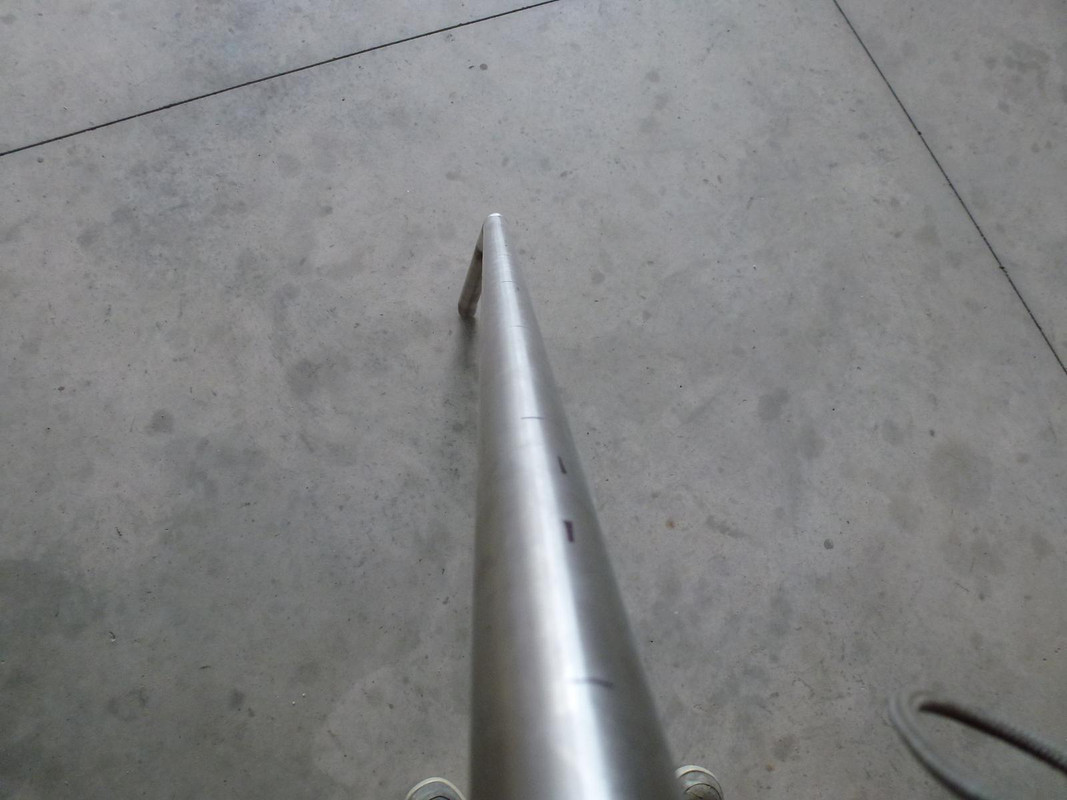
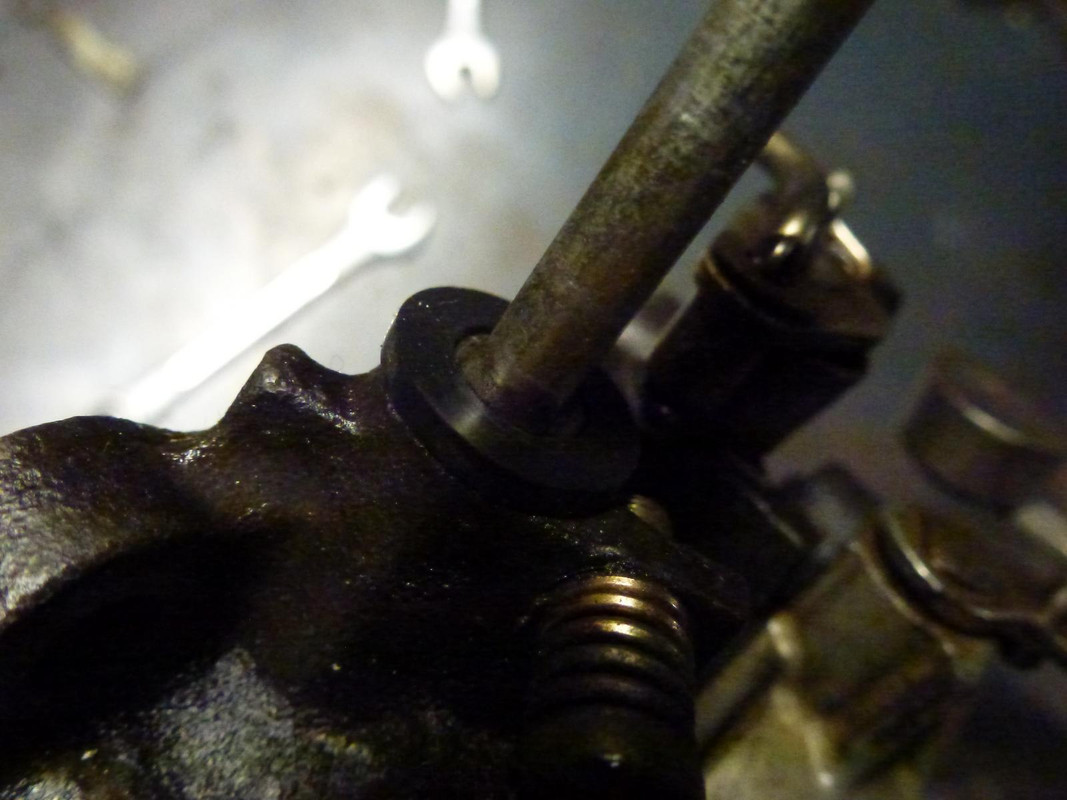
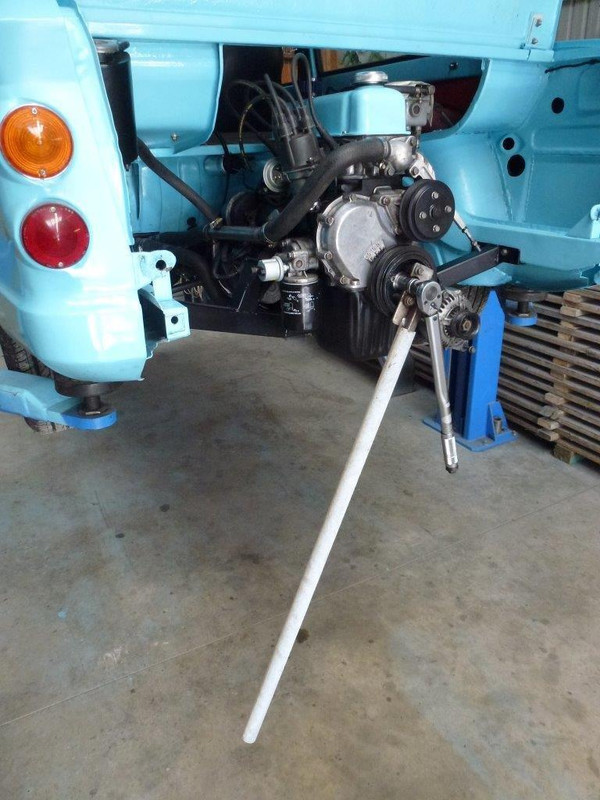
But they cant go on the car just yet. Many jobs to do with the Imp back on the hoist. First off. Radiator pipe work. I had bought a length of stainless pipe a while back along with some 90 degree bends I could chop up. I measured, cut, tacked, checked, tigged and ended up with these...
I blocked the ends up and filled them with water to double check them. Two little pin holes. Glad I checked. Whilst full I weighed one. 3.5kg. Not as heavy as I was expecting. Phew. I then fitted them up...
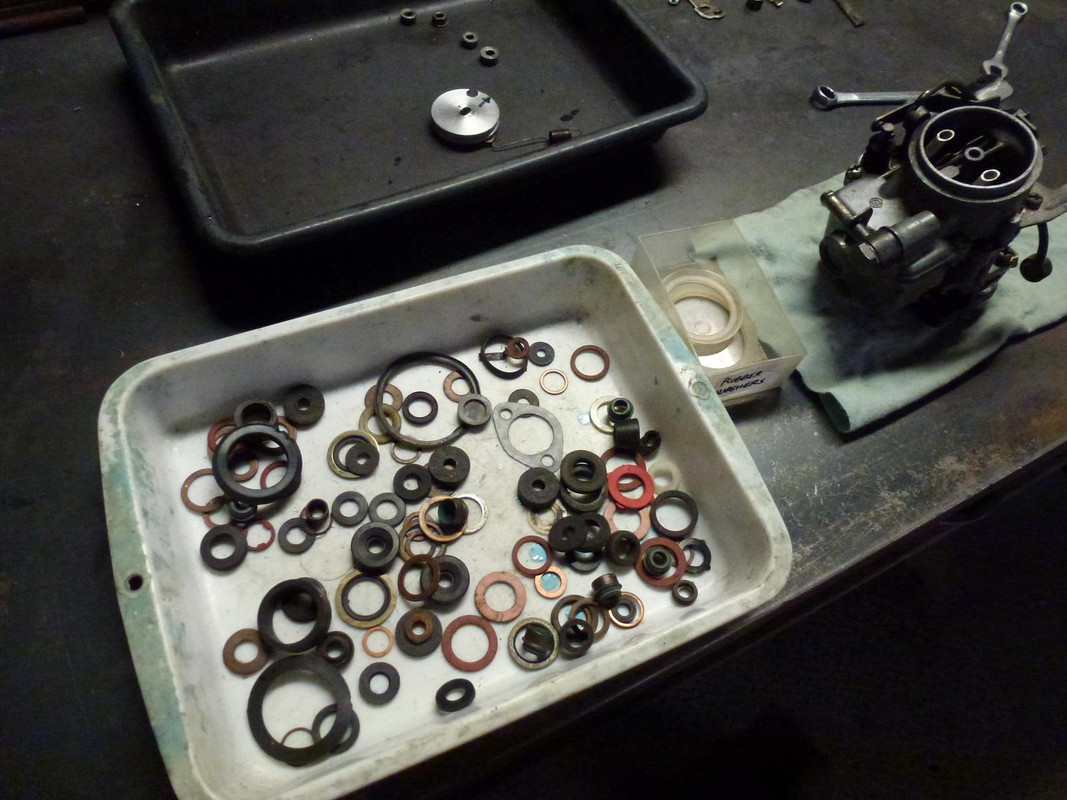
Next step was the brakes. The front calipers and discs are from a ED Honda civic. I had never bothered to check that they were free when I removed them from the race car. Oh. Wish I had. Seized! bother. I managed to free the pistons with a bicycle track pump and sure enough the pistons were rooted as were the seals. I priced some up from several places. !!!!!!! Crikey. Rebuild seal kits were horribly expensive in NZ. I wanted to sort them out asap so didnt want to wait to get stuff from the states. So I tried an old place in chch I've used in the past who re-sleeves brakes in stainless. He sold me some seals cheap and I machined up new pistons from some stainless. Made quicker by the larger drills we got from my uncle with the lathe...
Front brakes all sorted. While I was there I machined up some nice spacers for the caliper mounts rather then the stack of odd washers that had been doing the job.
I also added back in the missing flexible line tabs I'd forgotten to do whilst rebuiding the shell..
I then re-fitted the rear brakes, after having unstuck, cleaned out and reassembled the wheel cylinders which luckily appeared new, as do the shoes and the drums!
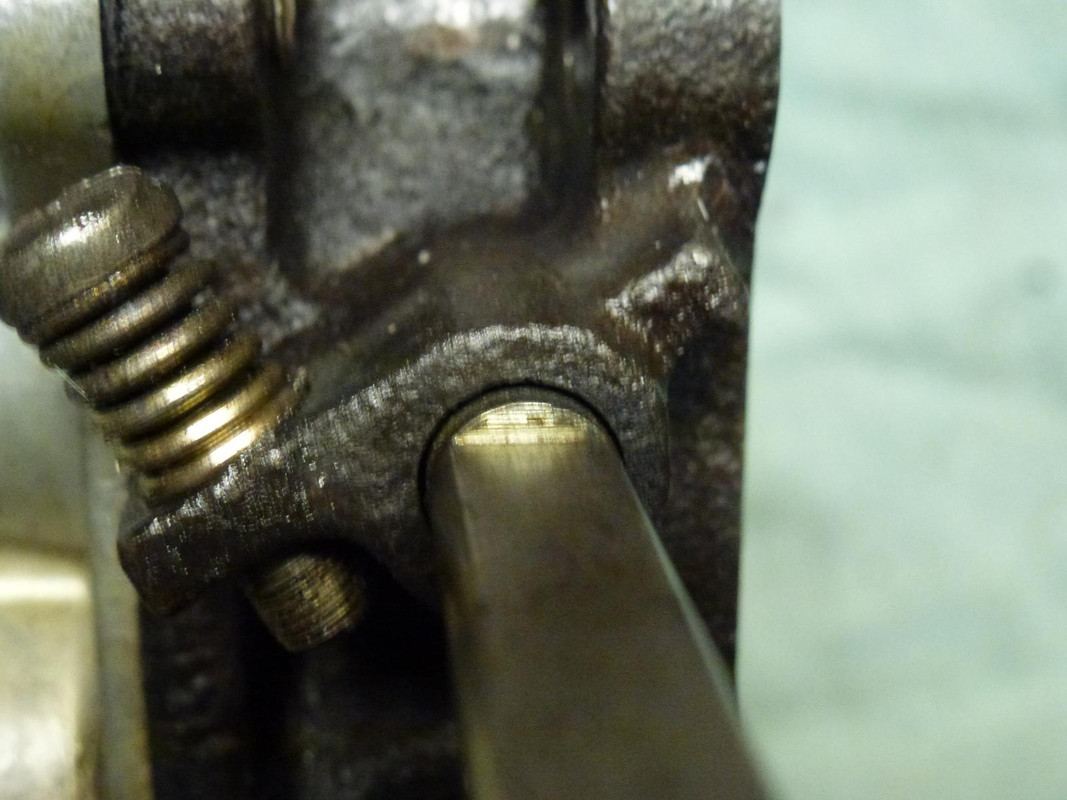
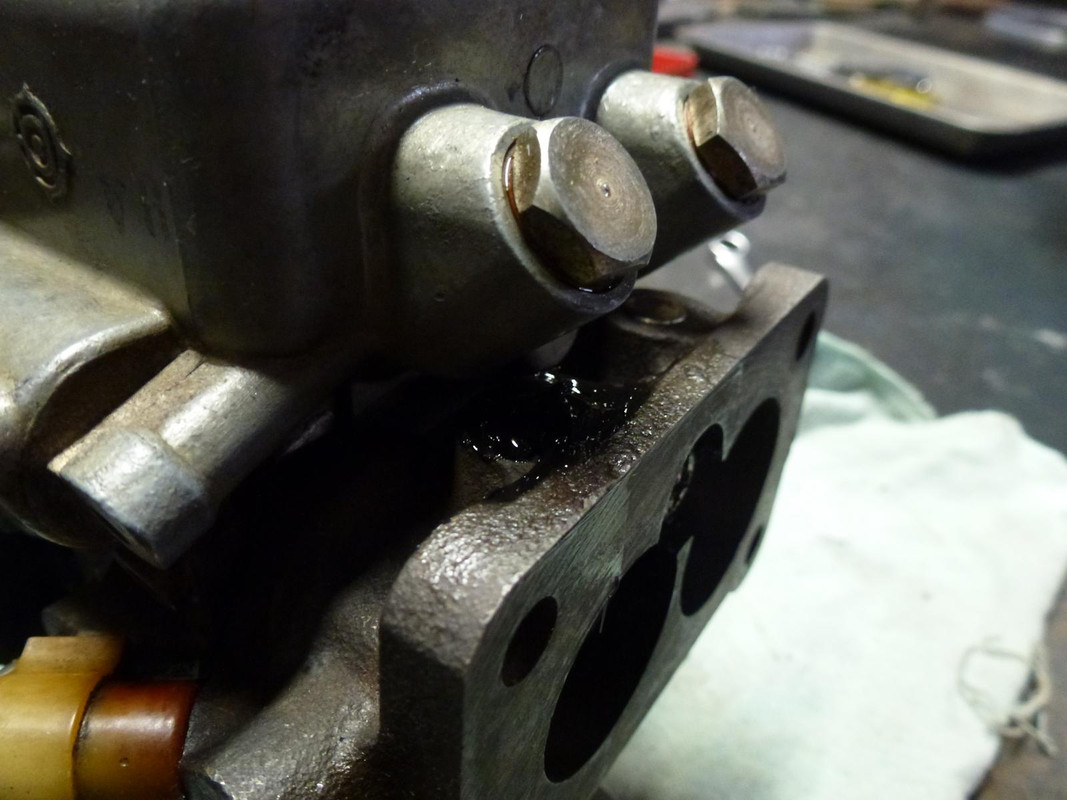
Then onto the master cylinder. That lovely one from Russia with love. It fits so well into the imp pedal box but I needed to make a push rod, something to secure pushrod in place and a pushrod yoke. All really fun little jobs at the bench. It came up well and fits in nice.
Fitted it in place and made all new brake lines and clutch line. Re-used the old 8mm fuel line from the race car but neatly this time. Ideal for future power upgrade... Clutch line was copper, left over from the Rx3 in the UK. Fine for clutch lines but not for brake lines in NZ, which have to be steel. I've made the pipes long enough to swap positions on the master depending on whether it has biased springs inside. Time will tell on that. Added new tubing from the, nicely cleaned and fitted by Hannah, fluid reservoir...
While I was in there I had also found an ideal piece of stainless mesh left over from our compost toilet build. Perfect size to fit in here neatly...
The steering rack boot had a small split and was leaking like a proper British car does- all over the floor. I was getting bored with placing bits of carboard everywhere I moved the car but I cant afford a new boot plus shipping so instead, as per some advice from a fellow local Imper friend I added some grease nipples. Much better then oil puddles everywhere and no protection within the rack!...
Fitted a new universal on one of the driveshafts to replace a knackered one. New one has a grease nipple. Yay for IMProvements..
We both worked together on the door cards, a job we had been putting off. Glued some new felt on to the new hardboard and then glued on the sweet looking red and black vinyl, which had come with the car from Christchurch. They'll look great against the blue...
This afternoon Hannah cleaned up the Datsun engine, masked it up and I sprayed it with Black epoxy (Resene Durapox). I had also cleaned up the rocker cover and fuel tank for the same paint. The rocker cover will get some nice blue next...
And that is all for now folks. I was really hoping to have the car on the road for a classic car show next weekend but there are still so many jobs to do. Wiring, put the transaxle back together with its new bearings, make a new improved, tidier engine crossmember, plumb in the engine. However it was great to have a date to aim for and we are both really excited about getting it on the road before Hannah's brother comes to visit in a few weeks time. So I'll just keep cracking on with it (in between the paid work we have building up that is..)
Have a think about running pipes so close and not insulated from each other as the hotter coolant flows one way the colder side picks up heat as it travels back from the radiator and you can get a higher temp at the water pump into the engine than came out of the radiator. i insulated my stainless pipes with firesleeve https://www.sleeveit.co.uk/products/pro ... re-sleeve/ very handy as the pipes run inside the rally car to protect them and the firesleeve is red as the rules state pipes inside the car that contain coolant have to be red.
I was wondering about this but unless I down size the pipe size there's nothing I can do- you could barely slip a Rizzla paper between them. I'll take another look and I'll just have to try it and see. One good thing is that they are outside the car where there is airflow. If I can slide something really isulative between them- a long strip of something that not only stops the pipes actually touching but also reflects radiating heat then that would be good.
Luckily the engine to be fitted is known as one of the toughest engines ever made
Imp work has taken a back step due to this rusty old 4wd bus thing that has come in for work...
However we are both still sneaking in plenty of time on the wee car. Its so exciting to see it come together that we cant help it. Hence I have also been fairly quiet on the forums etc.
So when I left off last time it was door cards I think. Or painting the engine. Yeah- that little engine. It looks quite pretty with a little blue bonnet on its head I must say...
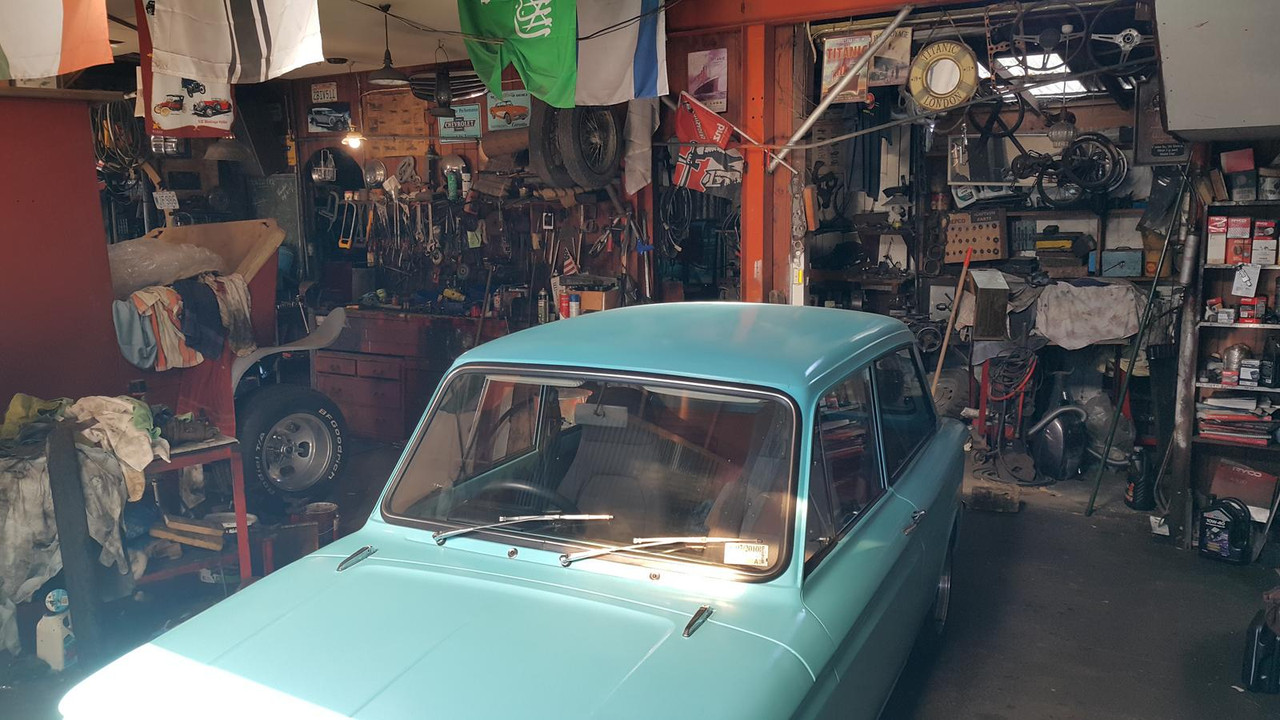
Now the doors. I cleaned out the threads on the hinge plates, oiled them, cleaned and painted the old screws and then we carefully manoeuvred the doors into place and set the gaps. I knew they would come up good because they were good on the car when we got it. They do look good. They look factory. However I think this car was assembled on a Friday afternoon at the NZ Todd Motor Corp and they had been into the beers already. The wing tops, factory, don't quite match the profile of the door tops, factory, which don't quite match the door or sill bottoms. Factory. Looking at other Imps I think this is fairly par for the course on what was a cheap run around. I'll live with it
Then it was the careful task of fitting the 1/4 light windows and the rest of the glass and runners. I rummaged through all my window parts and pieced together the best I could from the stash...
I had to lengthen the front glass runners to suit the new bailey channel seals that I'd bought. The new type is soft backed whereas the old ones were steel backed. The runner extension bridges a 40mm gap between the bottom of the 1/4 light and the runner. I folded up a profile the same, butt welded it, cleaned it up and all good..
I fitted the runners, the best glass I had (or so I thought at the time having since now found extra windows hidden behind the lathe which appear to be even less scratched) and then fitted new weather strips on the outside. All very posh for a 53 year old car.
Then the door handles. Again it was into the stash of parts. Hannah had already selected, cleaned and polished the best handles of the bunch. I went through all the door locks, hatch lock and ignition barrel managing to get a working set which matches one key. Always a nice thing.
I had to make new handle rubbers as the old ones were completely perished. Trying to cut neat holes in thick rubber is never easy but over the years I have made a set of hole punches to suit. I needed a new larger one though...
which then made neat holes...
Handles fitted and working fine we moved onto the door cards. Actually genuinely excited about this because after the restoration of them came up so well we knew they would look ace against the blue. Even not to bad with the mx5 seats. Nice clean shiny interior handles too along with freshly painted door bins. Very happy with it all...
The Mx5 seats dont look too bad in there but we would much prefer to have some red seats..
To match the rear seats which I reckon look great!...
I had also fitted the door seals. Not original and a bit too thick to start with but once I cut the bottom out they now now squish perfectly and work well. However- they have either shrunk or were never cut long enough to start with leaving a gap an inch long. I shall have to fill it with some more of the same profile.
Now the doors were done it was onto finishing the transaxle rebuild. Ages ago we had scored a later stronger mk3 box (a rare thing in NZ it must be said! ) from an Imp at the Marshlands graveyard in Christchurch. This car here in fact...
I then had a right good collection of boxes...
I had stripped down the broken box from the race car which had some chips in the teeth and was generally in a bad way.
These transaxles are so cute (if a gearbox could be cute?..). So dinky. The little diff. Nicely made wee boxes...
Sadly when we removed the box from the car, which was on its side, I had forgotten to release the gear change coupling from the shaft. The box at one point ended up hanging its weight off this and bent the shaft plus broke the casing. Initially I thought I could just swap the end casing over but they are a different design. There is a breather hole plus the o ring seal that seals the shaft was moved from the shaft itself to the inside of the alloy guide stub (in order to move wearing the alloy down from an O ring attached to a shaft sliding with the hole to fixing the o ring so the hardened shaft now runs within the ring- good idea that man)
Photos of broken bits. Note the different casings...
I had to fix the casing. I skimmed it flat in the mill..
Milled a step down...
Made a small tool with some HSS to machine an inside groove...
Machined groove in alloy and a step to on outside for a slight interference fit into plate lug which was then tapped into place with some retaining compound...
Cool. Sorted.
Then I did some cooking...
and pressed a brand new frozen bearing into the case to replace a fairly rough feeling old bearing...
I had to weld a block of alloy into the bellhousing to take the pivot ball for the Datsun clutch assembly and then the whole lot was reassembled...
Then I had to do a three point turn within the available space, easy with an Imp, so I could par it in a spot with better access to the rear.
Next up is to sling engine in place and make a new crossmember to suit because I dont like the one it came with.
If you strip a gear box and put it back as you found it without changing bearings then you do not need to shim anything other than setting the back lash on crownwheel to pinion which requires a dial test indicator. you only need the special tools if using a new pinion and crown wheel or replacing the casings to require shimming and the special tools just make the job of measuring clearance quicker and easier it can be done without. There are other special tools for the nuts etc but you can bodge your way round this or do ads i do and improve the shaft nuts to special aerospace locking ones.
Moose- yeah I was pretty sure that was the case. I was originally going to swap across the bellhousings so I didnt have to modify the new one however when I read about them being line bored as a set I knew that then I'd run into problems with clearances changing etc. Wasn't worth the risk.
I re-used the old nuts and did Mr Hayne's ball bearing trick in a 15/16 spanner. However even just 45 lbft was tricky to get because it was hard to hold the gears from spinning. I didn't want to lock the gears and run stress through them. Got there in the end
Btw- I'm quite keen on seeing your nuts Mr Moose.....
Its been a while since the last update but i have been chipping away at this project. I finished the weldathon on that bus and it was picked up the next day. The owner is really happy with my work and it turns out he has quite a collection of classics. He now wants to bring me some of the cars, including a mk1 mini cooper, for some rust work. Cool!
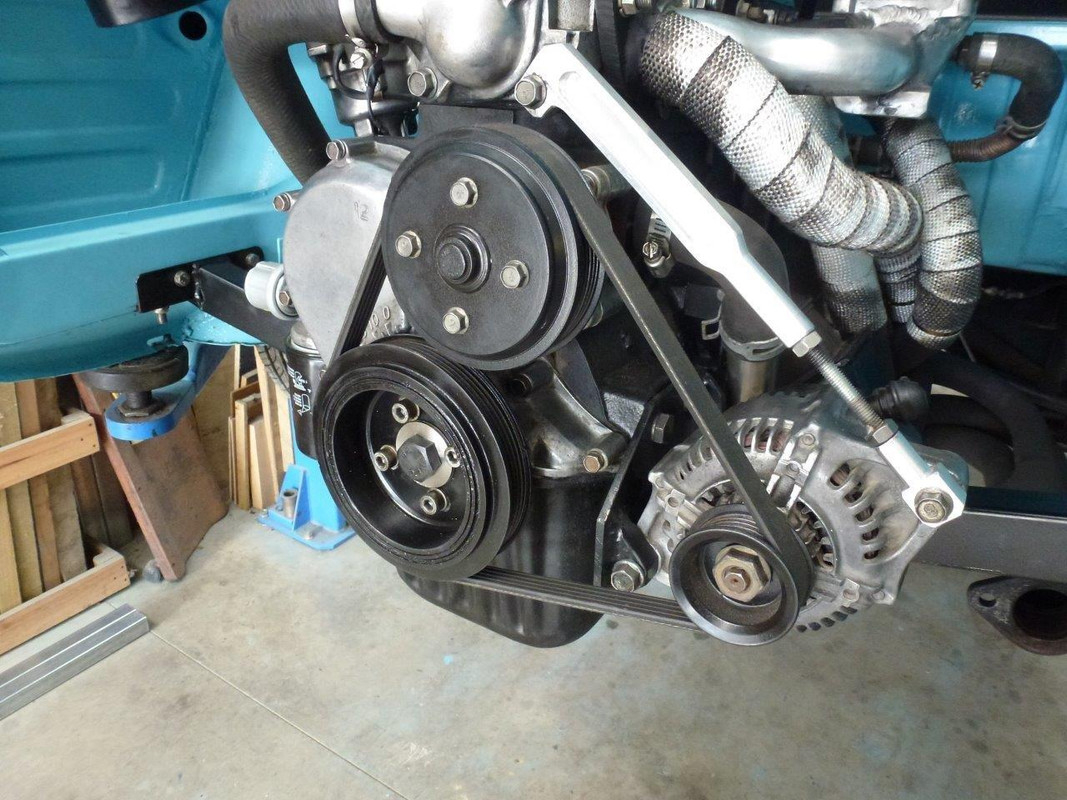
While the bus was taking up space I had been sneaking in some work on the wee Imp. I fitted the engine up to the transaxle, weighing the engine first. 87kg with the flywheel in place. Not too bad at all. Not super light like the standard Imp all alloy unit however I have moved so much stuff to the front that it should still be well balanced. I do love the idea of an all alloy Nissan cg13 twink from a K11 Micra- however that would require a full re-certification. I prefer the idea of a Goldwing engine engine more!
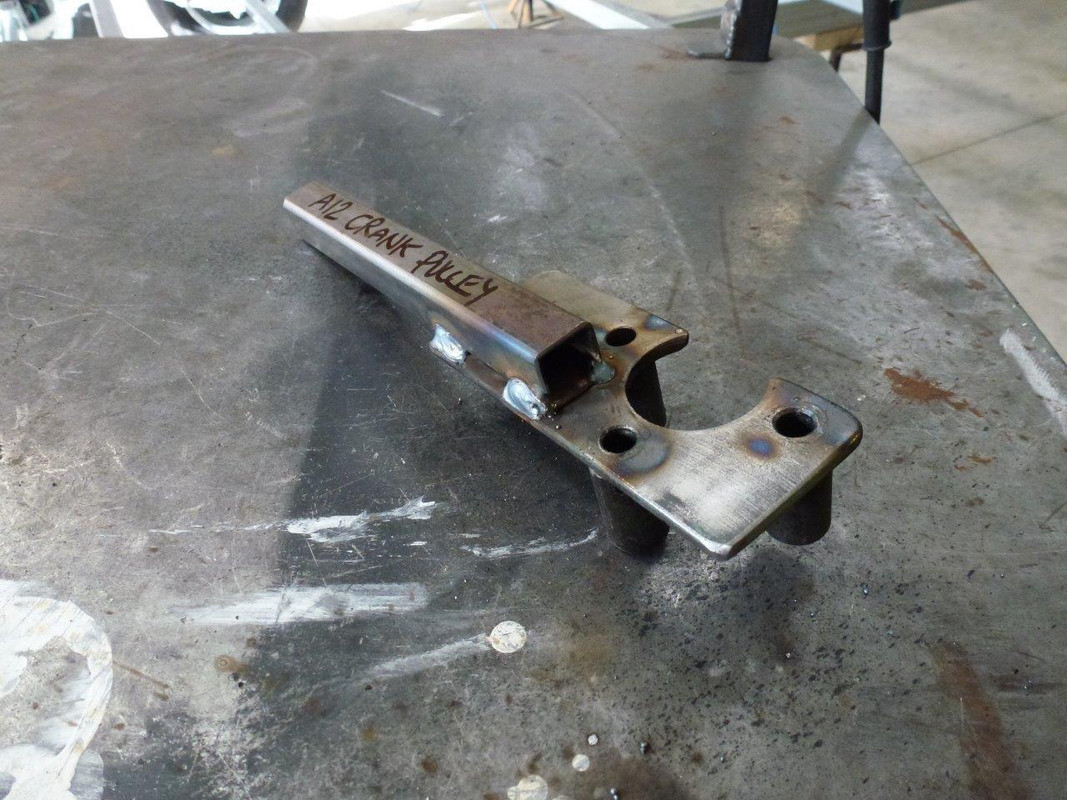
I digress. So anyway- I had slung the engine in place using a lump of timber and a ratchet strap. Worked fine. Then started making new engine mounts and cross member. I was not happy with the state or look of the old one and knew it could be far better. Not really a lot to say about making fabricating it all- the usual story of lining the engine up exactly central and building things to connect. I wanted to make sure that the exhaust manifold and starter could be easily removed without touching the cradle. I probably over built it with extra bracing (I even ended up adding extra gussets just before painting it, because ocd paranoia) but all up it still only weighed in at around 7-8kg.
In photos. I didn't take many as work progressed on this bit really quickly..
Clearance under the car was still really good, considering how low the sump looks from the back. I think an optical illusion due to the rear panel not being in place.
Then painted in black epoxy..
Next up was the exhaust. The manifold that came fitted was running really close to the drive shaft! Enough that it would contact when the car was lifted off the ground.
There was quite a bit of damage, dents, poor welds and other bits that needed attention so I chopped it all back and carefully shortened the bottom pipes then systematically pieced it back together. I required quite a bit of forward thinking because the access to weld to pipes all the way round was really tight. No photos of work though as I was so immersed in the
process I forgot to take some. Really happy with the result though. Fits perfectly, cleaner runs and still equal length (as if a Datsun A12 with a carb the size of a small cup would care. But hey, every little helps )
Later on I painted it and then wrapped the upper pipes to ward off heat from the inlet and coolant pipe. I know some dont like heat wrap but I think its great! Its worked well on my last several car builds. Luckily I live in a dry enough area to get away with it and not worry about potential corrosion.
With that sorted I moved onto the rest of the system. I have always had a picture in my mind of what I wanted it to look like and I wanted it to be rear slung with a side exit to avoid the car filling with exhaust fumes. Apparantly these early Imps with the roof vents can suffer from fumes being pulled into the car by the vacuum. I also had a rough idea on how I would build my own silencer and there wasnt anything available that fitted my ideas with a price I liked.
I had built one for the Mazda Rx3 and it worked well. Money is tight (I'm too tight..), time is plenty and I love making things so I started building. Using the pipe from the original straight through muffler..
Then fabricating my silencer using some ideas I nicked from Google along with extensive coffee fueled airflow thinking in my mind. I have no idea on what it will sound like but it was a fun process and looks neat. The stainless pads worked well in my last muffler along with some glass matting I got from the neighbour. I'll report back
In photos...
I had a pipe bent to 90 degrees and added mount points to the muffler so it slings up under the rear valance. I made a stainless heat shield to deflect heat away from paint and bottom pulley. You'll see that later. I have yet to decide on the length of the exhaust tip, cut it and then weld it on to finish.
Then the inlet. Because the Datsun engine sits flat in this Imp, unlike the rear sloping angle in its usual Datsun 1200 home, the carb is not level. I chopped off the mounting face and milled the manifold at angle to suit. Then I welded it back in place. Carb is now level. I filled in an unused vac hole, cut off the extra unused lugs and gave the whole thing a clean up till it was nice and smooth.
While I was playing with alloy I made a new alternator bracket...
and had to rebuild a very corroded thermostat outlet. it was knackered...
I was given a better spare by a nice fella with a Datsun 1200 ute but it pointed upwards. My outlet, most likely from a van, points down and suits the pipework routing I wanted to do. So I had to fix it. I found a suitable piece of alloy pipe on an old scooter handle I had rescued from the local scrap metal pile at the dump...
Much better!
Then onto the pipe work in the back...
Just a case of sussing out a neat route to suit my tastes, remain easy to work on and remove and allowing for a potential Davies Craig electric water pump just in case the Datsun pump is not up to the task (and also because I do rather fancy the geekiness of the little display unit not to mention how much better it could work)
With the pipes sorted I replaced the transaxle output seals because well, for $20 it made sense to do them now. I machined up a stepped tool to make sure they went in straight and to the correct depth. New seals..
Then mounted the brand new BMW couplings I bought from Rockauto. I had to make some spacers to suit as they are narrower then the stock Rotoflex couplings. With the car on the ground the driveshafts sit almost bang on parallel to the ground which is good for their longevity. I didn't fancy reusing the red Nolathane couplings that came with the race car because whilst strong in shear and rotation they didn't have much flex in and out which would impose quite large stress on the transaxle casing as the rear suspension went through its motion I felt.
I then did some fun little jobs (but its all fun really..) like cleaning and painting the starter and alternator...
I dug out my old art oil paints and mixed up a suitable orange to paint the inside of a very faded rear indicator lens. It'll do for now but I do look forward to locating and buying some better ones when I go to Blighty in July!
Then began the wiring! Like all my other previous car projects, I enjoy this part immensely. I love the challenge of hiding as much of the wires away, re-configuring the circuits to suit add ons or just to make them better. Adding some fuses will be a good start!!!
It also has a terrible dash wiring layout whereby you have to unplug everything to remove the instruments. Almost everything seems to run off just one piddly feed wire coming from the key. I'll sort that lot out with some plugs.
Add in some relays for the lights, fan. Wires for a potential electric pump, sound system, high stop lamp (I have a neat idea floating about in my head for that) and making sure its future proof because later on I would like to inject this engine. I have also added in a tail to attach a trailer plug to. Because that will be a thing
So I had two extra looms going spare which I pulled apart. I now had a large amount of extra wires for my project. Wiring isn't the most exciting thing to take photos of. I have now finished the engine bay wiring and I'm pretty happy with it. Now I've refitted the rear valance panel and exhaust and can lower the car down and start on the interior wiring. I'll be making a removable fuse box/relay unit and fit it under the dash if all goes well.
Some photos of where I'm at now...log burner in use as the nights get colder.
Sofa wheeled over to middle of workshop for max stereo imaging whilst I drink beer and play with wires...
Wires hanging from engine bay..
Engine bay completed (missing hose clip noted..) but for an over flow tank from header tank to fit. I will build a better two part tank in the future I think. Exhaust tip length yet to be decided and cut. Note stainless heat shield. Bumper also to go back on, with bottom mounted rego plate.
Alex,
I heartily endorse the above compliments offered by Peter, Andy and Dave.
Not only is your fascinating blog most informative and descriptive; your light, spirited presentation style makes an enjoyable, easy read.
You and Hannah are blessed with talent, a good dose of improvisation ideas and key "can do" attitude - inspirational stuff!
I look forward to your further updates.
Best,
Rob
Langebaan, South Africa
I can only echo what others have said. I don't think I've ever seen someone build their own exhaust silencer or rebuild a rusty stat housing, and with no apparent fanfare either!
This makes fantastic reading, so please do keep posting - I (and evidently others) always enjoy your updates. I very much look forward to reading of its first outing!
Thanks again to the others who have just posted up kind words. You are making a grown man blush.
I have chopped the exhaust back a little bit further in then that mark. I can always chop more off it but for now I shall just test and see. It'll be the last of my worries in the grand scheme of the first road test.
I also need to ask someone to measure one of their balls for me
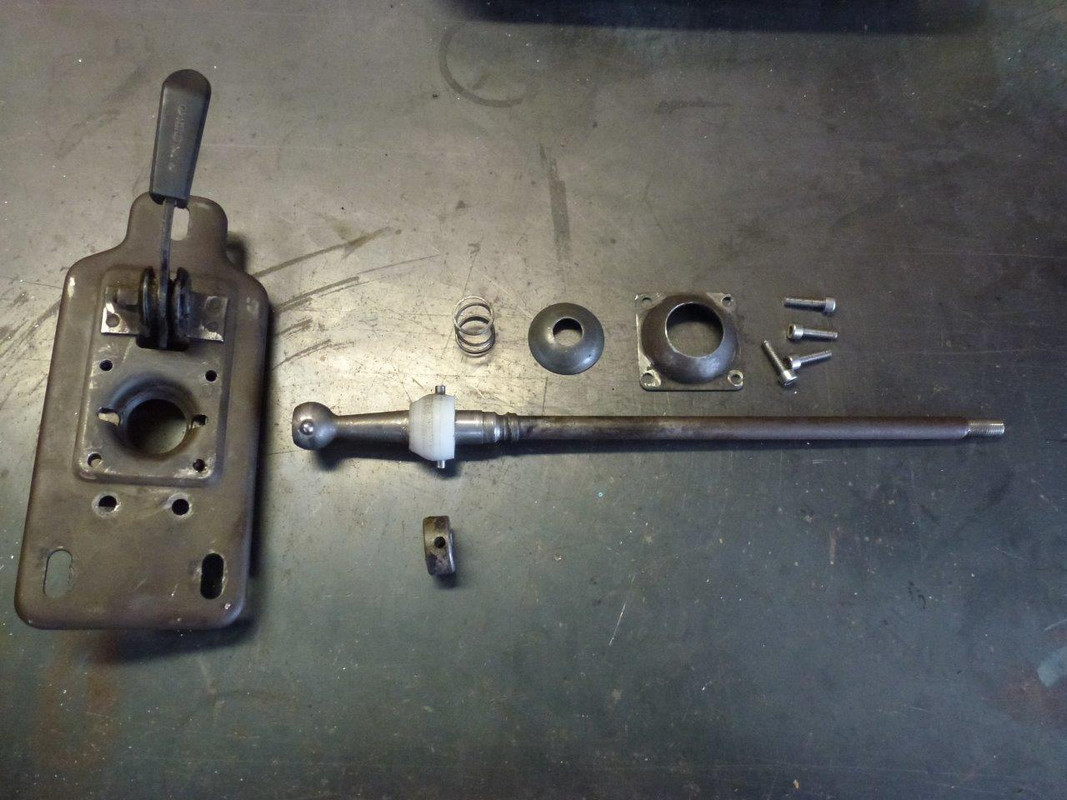
Gearstick ball that is. The nylon things. I have left it too late to order one for now and I have discovered that the rubber on what I thought was a good condition stick is shot. All crumbly. So I have some nylon that I can machine one up from. However I have no datum to work to. The distance from the centre of the pin to the bottom of the sphere is probably the most critical bit. I can guess fairly well at the diameter of the bottom curve. I can draw a picture later of the measurements I need. I have messaged Malcolme on facebook too. I am guessing he is the most likely to have some sitting about
Here's a pic of my exhaust. I'm pretty sure I have packed up my Imp parts, including a ball, as I'm about to move house. I know I have a gear shift in the garage still, don't know that it has a ball though but will have a look tonight.
You do not have the required permissions to view the files attached to this post.
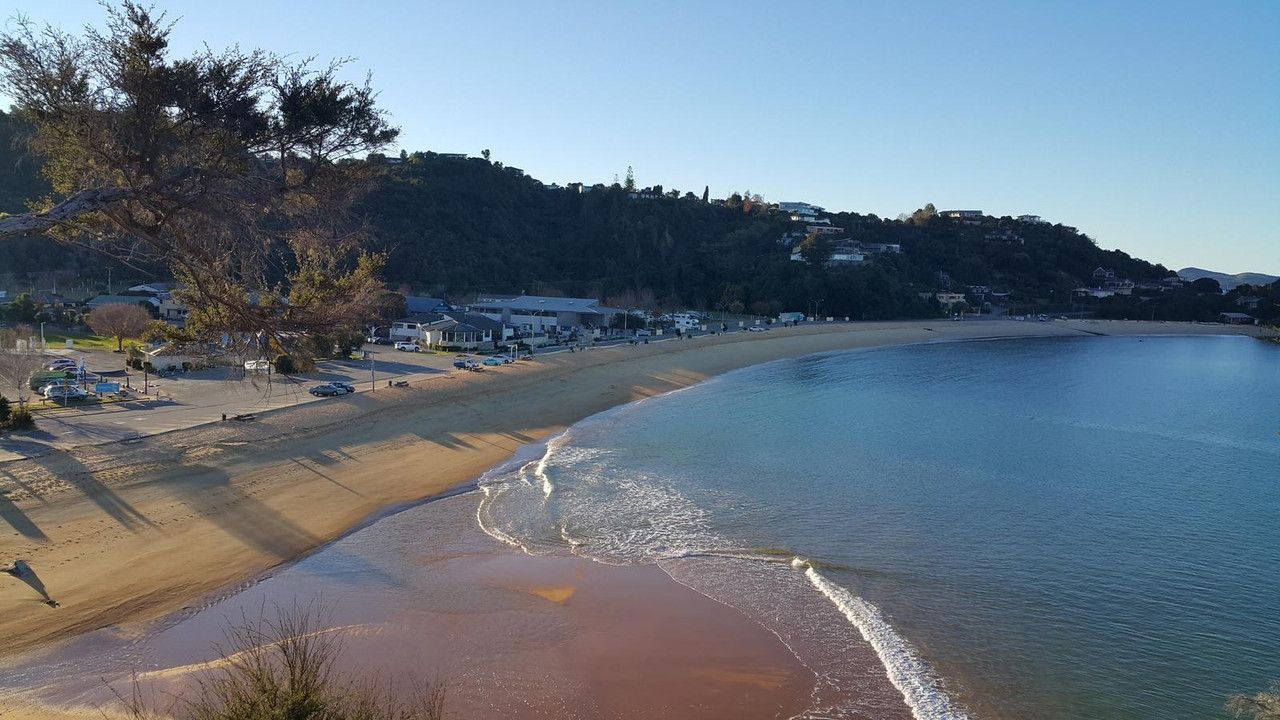
Wow. As the new title suggests. All those little jobs. As all those who have or are undertaking a car project will agree these little jobs certainly do add up. I can skip them or rush them especially as the canvas upon which they attach is so clean and tidy. So is no particular order, due to the fact that some of them I start, then stop when I realise I am missing a vital part which has to wait until the next visit to the big smoke, start on another job in the meantime, go back to last job, forget where I was at with it, then realise I forgot to get the bit even though it was on a list, then start on another bit. While all this happened there was also a fair bit of mini adventures going on because Hannah's brother was over from the UK on holiday. We did some very nice camping, biking, hiking trips with him. Because we all like pretty pictures here's some from a few of the adventures had in a last few weeks...
So yeah- working on a car project is tricky when tempted by the outdoors like that
Back to the Imp. First big job since the last update was to sort out the wiring. I basically re-wired the whole car. The original layout was not going to work how I wanted it to. There was a fair bit to add for safety, extra features, ease of disassembly, neatness. I bought an extra fuse box as I realised 6 fuses were not enough for what I wanted to do. Photos..
The wiring shop....
I have a fair bit of automotive cable I have collected over the years to use...
I mounted the boxes and relays onto a piece of clear lexan. It worked out a very neat way to do it.
I also took the instrument cluster apart and cleaned it out 50 years of dust.
You can see the amount of connectors that have to be undone to remove the instruments...
It just does my head in when I am so used to a couple of plugs, even on the Viva which is the same era. So I added multi pin plugs to the loom. Easy now. Fuses and relays in position...
The race car came with an extra gauge pod below the dash. I bought a new electric oil pressure gauge, got given a very neat wee rev counter by my good friend Dean (cheers!!! ) and kept the Smiths temp gauge in place. I didnt like the way the pod was wider then the heater control bracket I was mounting it to. So I made a tapered mount to fit between them....
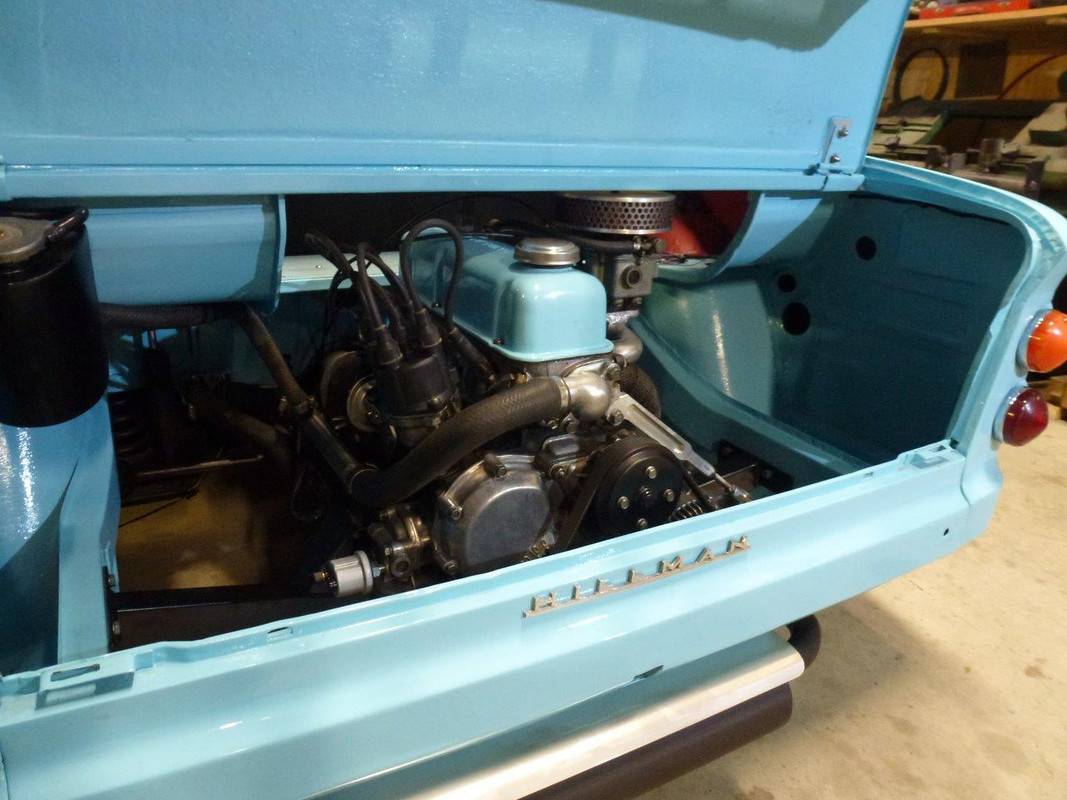
Gauges and dash etc as it now...
Other things added were a neat wee push button switch for an electric washer pump because all the squeezypush type squirty rubber butons had perished. I added extra wires for a stereo, amp, electric water pump, under dash footwell lighting etc.
Moving to the back. I re-wired the whole lot. Not much to see because all the wires are now tucked out of the way. I needed an alternator belt tensioning bracket. The datsun item was horrid..
So I made a new one. However I cocked up and soon found out it didnt quite line up. I had to had a bit....
In the end it turned out sweet and I'm very chuffed with it ...
Now moving up to the front. The battery. It needed a home so it wouldn't slide about. I made an alloy box from some thin sheet. It bolts in place to some alloys bars attached to the bulkhead so i only need to remove two cap screws and it can be removed if I need to take the tank out etc. In photos...
I made a stainless bracket to take a washer bottle, of which I can not remember where I picked up but have had for years waiting to use on a project. Finally a home for it ...
Heater tap. I needed one. The Imp one was knackered so I went to the wreckers and got a couple that would work. Picked the best fitting. I think its from a Honda. Really neat item and should last. Would be an idea replacement for a stock Imp setup too. However I am running both hoses, inlet and outlet, from one side now where they tee off from the main lines. Anyway. Photos. I needed to adapt the old brass fitting so I machined it out and soldered in the straight section of the old u angle pipe...
Altered the Honda bracket and made it all fit...
Played with some hoses...
and ended up with this...
Clutch time. hannah and I had a hell of a time trying to get it to bleed up. I finally worked out two things. Firstly- the replacement seal that I had been sold by a 'reputable' brake specialist was the wrong one and its heel diameter was slightly too large meaning the piston was struggling to return. It was a friday, no chance get another so I went through all my seal collection and found this...
However it was too large and wouldn't fit. I looked again. Next up out of the box was this...
Still no good! bother. So instead I machined a new piston to suit a seat that was the right OD but had a larger ID...
Now the piston returned. But it still would not drag in fresh fluid. I took the master apart for the 14th time and looked at some other diagrams online. I soon realised that there was a teeny tiny spring washer missing behind the rubber inlet washer. Its not visible in the Haynes manual or mentioned that I could see. I made one from a coil of spring and now had a fully working master cylinder. The clutch bleed up pronto and works fine now! Phew.
Latest job I did was last night. I removed the exhaust and added a boss I machined from a 18mm nut for an O2 sensor. Then I was mucking about prepping an 18mm bolt to make a plug for the time being and remembered I still had not only a boss but also a stainless plug left over from the Innovate wideband kit I had fitted in the V6 Viva. Sweet. A nice treat.
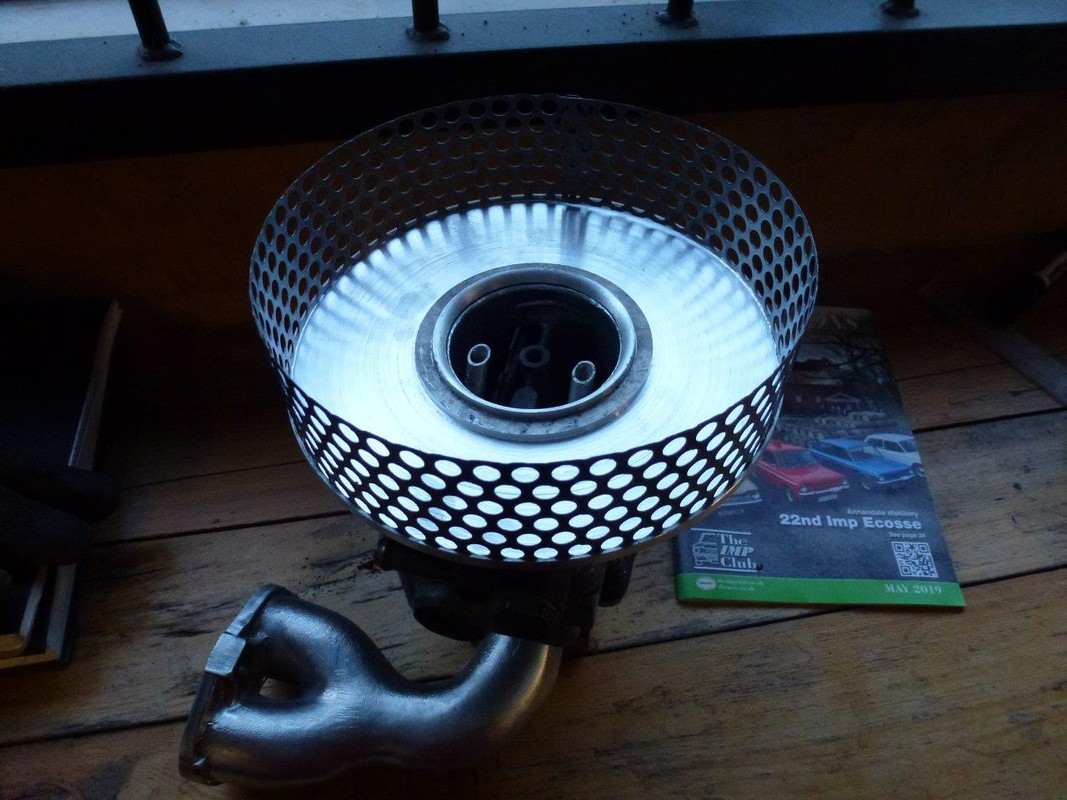
And that is all for now. Its getting very close. Engine has a new oil filter and oil, coolant needs to be added (and I bet some leaks will need fixing....) and then I just need to make an air filter assembly for the carb. Nothing available to fit the space, at a price I like, so I will build my own from one 5th of a Mazda Van filter
I also need to machine up some Nylon bar I bought to make a new pivot ball for the gearlever. Big thanks to the above posting John875 from Australia who bothered measure one of his balls for me and post a photo online for me
I, like others, am totally in awe of your ability to make components when the one you need either isn't to hand or doesn't exist. I'd love to have your skills (and equipment). Good luck with the imminent firing-up.
Member number 6. First Imp bought in 1972, 10 more between then and 2019. Currently Impless.
Another great update, esp. the scenery shots. I'm sure the engine will be fine! At least easier to find new bits/donors than an Imp if it's not.
Thought I would add a comment for completeness about the holes in the rear crossmember on my car - the engine has a vertical brace from the block to the parcel shelf above, mostly to stop rocking of the engine but it would also take some of the weight. I'm assuming the sister car had the same setup (Jerry Lenstra who I bought it off had 2 Imp race cars) which would have helped when the flywheel or clutch let go at a race start many years ago and destroyed the bellhousing & broke off some bits of block it bolted to.
Now the forum is back online here's the latest update..
Exciting times here at the only Imp workshop in the valley.
It runs! But typically there are a few small hiccups. Some actually quite comical. I think we should re-wind back to where we left off last time.
So I needed a new ball to see the gear stick through until I can get a decent proper replacement. I had bought a section of nylon/teflon bar. I made a gauge from card to match the curve inside the socket that the ball would rotate. Then I reversed that into a gauge that I could place over the bar as I machined it. Not exactly brain surgery. Which leads me to a little giggle about this bit of comedy gold...
he he. Love it.
So yeah.. easy job. I got a pretty match and it came out OK.
Works well enough but the reverse lockout plunger spring is a bit too keen and popping the gearstick left into the reverse plane requires quite a sharp movement. Luckily it would be easy enough to sort, except for that removing the engine and box bit.... I might just put up with it. At least I'll never accidentally select reverse when dropping down into second before hurtling around a tight corner feeling the full force of the mighty 68 little Datsun Ponies as they rocket me forwards.
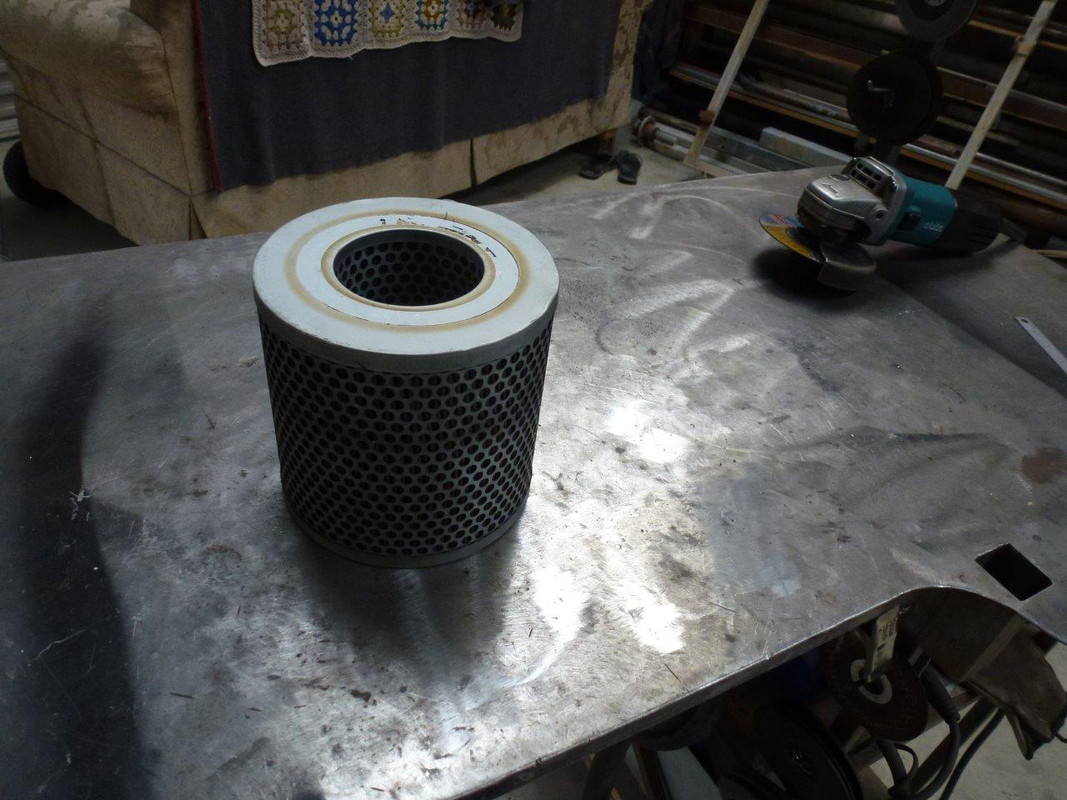
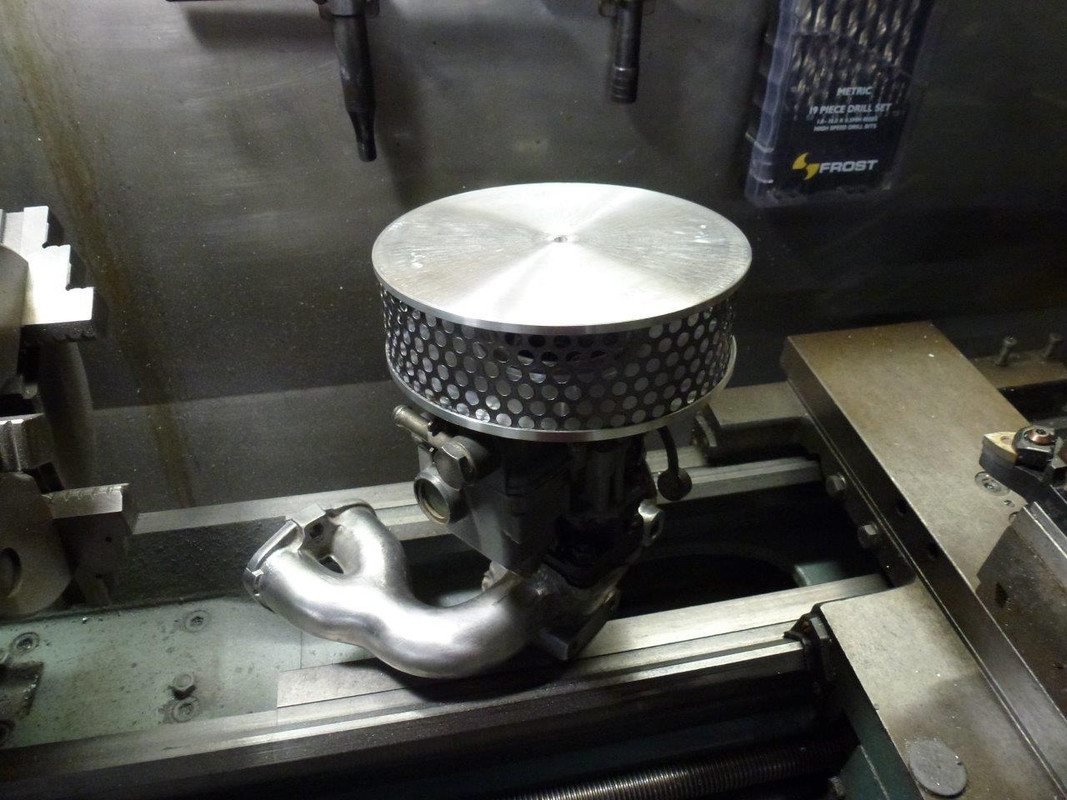
But before I got too excited about such F1 levels of performance I thought it might be prudent to protect those little Ponies from breathing in dusty air. I needed an air filter that fitted the space I had (not much area in height available), looked good and was cheap. There was nothing available. So I'll make one. I started with an old but perfectly usable filter from a customers Ford econovan (Mazda really..)...
I chopped it up, essentially slicing off a section of the right thickness to suit the height I had. I then grabbed a section of 5mm alloy sheet I had in stock, chopped out two discs with the Jigsaw. Put a hole in one with a holesaw which allowed me to hold it in the lathe to machine it down. Reduced the thickness by 3mm leaving a neat lip around the edge to not only hold the metal filter outer in place but hide and seal the edges...
For the lid I welded an old steering wheel boss I had kicking about onto the plate. Then I machined the plate down to suit, like the bottom one and then cut the boss off. Cleaned up the marks and ended up with a filter that fits and looks the part too. I'm very happy with it
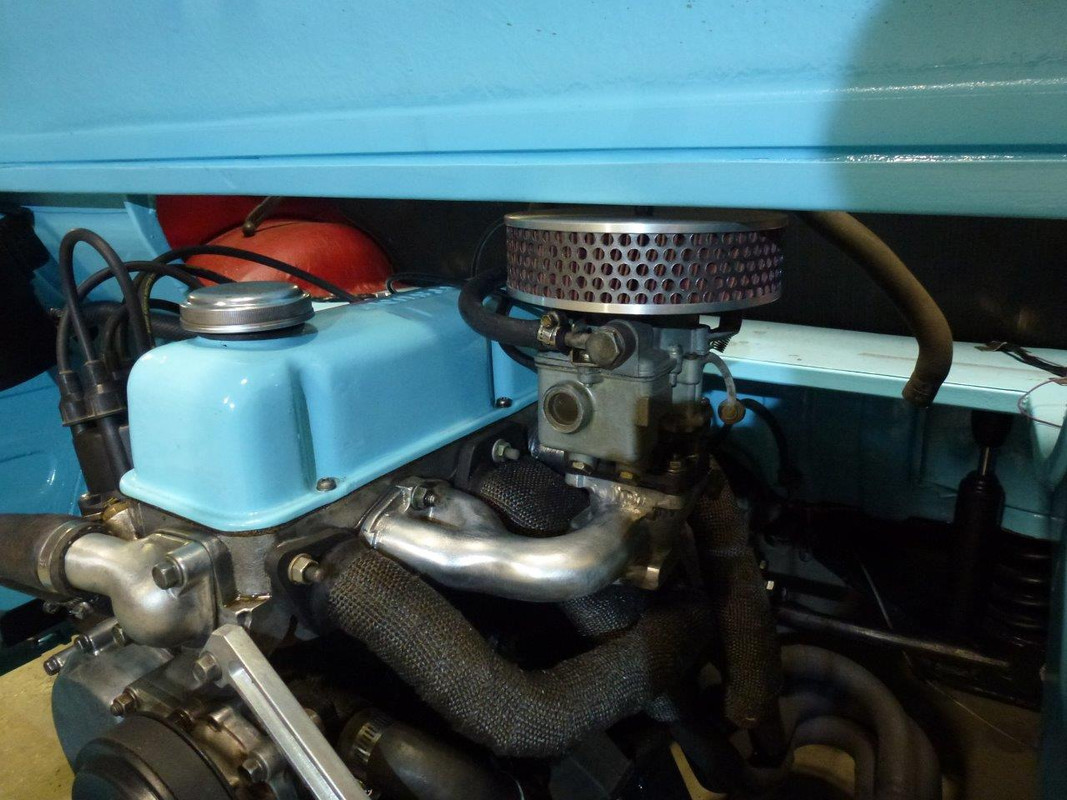
In place...
Note the ugly pipe hanging from the rocker cover breather. I need to sort out something there.
The manifold the carb sits on seems to be spot on level since modifying it. Welding castings like this can often be a bit tricky what with porosity and dirty alloy. The datsun item seemed quite clean in this respect...
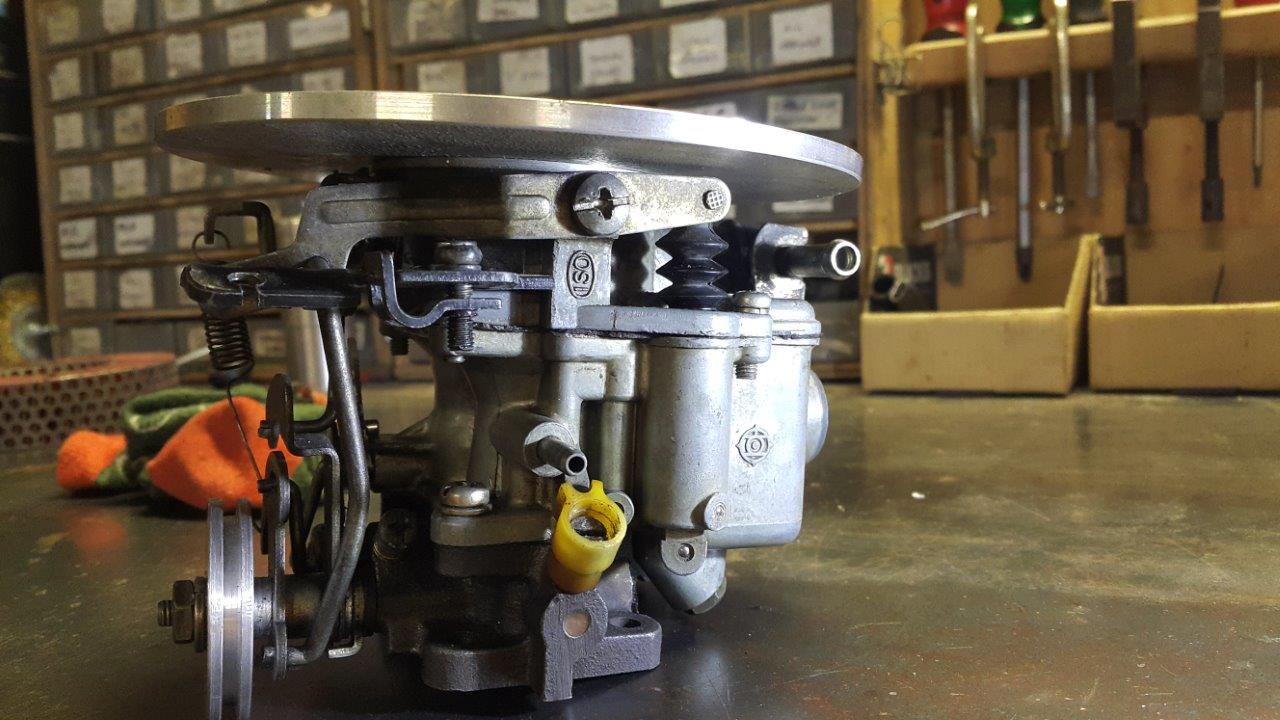
The tiny little Hitachi twin choke carb that sits on top is so dinky. I have no idea exactly what model A series engine its from as I had been given it by a friend who had got it with a job lot of Viva parts. I can only hope that the jetting is correct. I'll soon find out. I might try again with research on the numbers.
I had to reconfigure the throttle cable layout to suit its new home. This involved a new pulley to suit the cable pull on offer from the stock Imp throttle pedal...
So the filter was sorted, carb in place, cables all hooked up (after buying 3 metres of Shimanos finest brake cable outer to suit the stainles brake inner for a tandem bicycle) and it was all getting a bit exciting. I was starting to get those 'first start, will it start, will it blow up, is the engine actually rooted?' feelings and thoughts.
I double checked everything and put some petrol in the tank. No coolant yet- no point if the engine turned out to be a plonker. It would only be one more thing to have to remove.
Turned the key as Hannah excitedly watched the engine from the back...
curse word. Well that battery that charged up ok, seemed ok, was obviously not OK.
So we connected the booster pack on. Winding winding winding. Nothing. Hmmm. Has to be spark. Fuel pump, barnd new, was working fine, fuel at carb and at correct level. Fuel smells from exhaust.
Spark then. I checked the coil- yep. Power to the coil. I checked it had power when turning over (some ignition switches can fail like this). Yep all good. Checked for spark with spare plug on lead. Nothing. Checked on king lead. Nothing. took cap off and checked rotor. Good. Checked continuity on leads to and from coil to electronic pickup in dizzy. Fine. At this point I was getting a sinking feeling that the pickup module in the dizzy was broke. However I knew that the previous owner had the car running not long before I bought it and there was nothing I'd done that could break it. I checked the polarity on the two wires. It was correct according to the electronic ignition swap thread on Datsun 1200 wiki. i had a look at all the photos I had taken of the wiring before I pulled the car apart. Hmmmmm- the two wires are the other way round. I did some more quick googling and it seems that they should be that way. Tech wiki- you lie.
Swapped the two wires and this time we had spark- which my hand can attest to as it had 20,000 volts jolt through it.
Reconnected plug lead, tried again and this time something. A muffled backfire. Tried again- same thing. Hmmm- timing is way out. Dizzy timing and it was fine- I had previously very carefully setup TDC using the stick and two marks meathod to double check the marks on the crank pulley because the car has got Toyota 5 rib pulleys on it (previous owner had at one point been running a supercharger on this engine) Everything seemed fine.
Then Hannah quipped up and said "maybe its 180 degrees out and its on the exhaust stroke?"
She was correct. I had spent all that time checking the tdc but not properly checked if both valves were closed. Oh silly me! So we spun the dizzy round and reset its timing. Jumped in the car and on about the second go it started. Yay!!!
It sounded good. Not too noisy. Ran it for half a minute, workshop filling with smoke as all the paints, spilt oils, greasy finger prints burnt off. Decided it was worthy of some coolant and so Hannah filled up the system. It took ages to swallow about 9 litres of coolant, even with the bleed nipples open up front. sadly there was a pinhole on the thermostat housing I'd repaired and the old Smiths temp gauge decided that because its parent company was Lucas it would wasn't going to turn up to work. It was getting late so we called it quits and I removed the housing to seal the pin hole. I swapped the gauge over for another one and went to bed.
The next day I thought would be the day of the first drive. I excitedly put the number plates on. I didnt want to fit the rear plate in the usual position on the engine cover. There are no holes there, no light, no light mount and the plate is too wide that it akwardly covers over a section each side of the main centre hole. So I drilled two tiny holes and mounted it below the bumper, with a light on one side. I think that I'm going to change the light though for a neat one hidden in the un used and slightly bent crank handle hole on the bumper.
But back to the that drive. ooooooh exciting. So exciting I had to go have a nervous poo. Once back I started the car, with the help of the jumper pack and warmed it up a little. Clutch in. oh. That feels weird?.. let the clutch out eased the car out of the workshp into the sunshine, first time this shell has moved under its own steam for a very very long time. Awesome! Righto- lets go. Then suddenly.. gurgle gurgle splatter splatter. Coolant starts running out of the heater onto the passenger floor. curse word!!!!! Arrrgggggggghhhhhhh!
Righto- thats it. I'm over it. We pushed it back in to the workshop, into the corner of shame. I muttered some more choice words and then said to hannah "fark this...Lets go for a bike ride"
So we jumped on our cyclocross bikes and went for a strop in the local mountain bike park. I got to contemplate the problems and felt much better once we got home.
Then this happened...
I had the heater matrix out and on the bench in about one hour of the Craig Charles funk and soul show.
Turns out it had frost damage, from cold Canterbury days sitting out in winter (this heater was from Imp 3, the Christchurch car).
Luckily I had a good spare!...
Then that clutch. It had over extended itself and when I tried it again once back home it curse word fluid everywhere, having jammed a seal...
I have swapped in a spare seal, extended the pushrod so it starts from the very start of the piston travel and will watch it- you can pump it out with quick clutch foot action so something aint right. I suspect its the flexible line has inside kink. I'll look to replace it. In normal use the clutch seems ok. Time will tell.
Well that was a wall of text! I hope you all enjoyed my ramblings. Oh and the spare temp gauge I fitted is crap too. I'll buy a new complete setup.
I promise the next installment will be full of joyous Imp driving tales
Yeah I think you could be quite correct.
Spoilt by the superb modern shifting on the 68 Viva wagon, the 87 Toyota 4wd hiace van and our 1985 hino truck
Is still raining here. Yesterday I started looking into modifying front turret area as per many other cars I've spotted plus I'm welding lower seats I've just machined up onto the front dampers. With a raised top hat for the dampers then I get to keep using my stock full length items which seem to be in great working condition.
Lower spring seats with some adjustable sleeves I have will allow me to choose between my stock 195lb front springs or use my 1 " shorter cut springs which are now around 215lb. I think the softer longer springs will give me a nicer grippier softer riding front end.
We removed the 20mm spring seat ( so in total maybe 1.5" lower than stock) and sat the car down. The car sat much better with the front just I tiny bit lower then the back measured at the sills. The front camber is almost bang on 0. Maybe a touch negative.
So I'll aim for around this height and see how it goes.
Be careful not to make this modification too stiff (ie don't use plate that is any thicker than original steel) when making the closing plate for the outside of the H bracket. I made this mistake a long time ago on a Stiletto, and it made the front end of the car very hard and 'crashy' over uneven surfaces as the shell didn't seem to have any 'give' in it. (Even though the shock were fully adjustable, and set soft to compensate).
Hiya,
I boxed it in with 1.6mm steel. However I think it'll be sweet as. Everything around there is shaped for stiffness and strength but they had to leave that clear so one can get to the bolts. Now with access through the top It makes sense to box it in and stop stuff getting in there eh. But its interesting to see that you noted extra harshness? I've always followed the idea that the chassis and platforms should be as well located as possible so in order for the suspension to do its job and track true - allowing of course for flex within factory bushes. I cant see why there would be any flex designed into that area?
Did you still have the top rubber insulators installed?
In other news... I drove the car yesterday. I made it a full further 1metre over the last effort before stopping to look for the cause of a terrible rattle coming from the flywheel/clutch area upon engaging the clutch only. I suspected the spigot bearing (which foolishly ...when will I learn... I thought was a bit worn but it would be OK..)
Upon Hannah sitting in the car depressing the clutch for me to investigate the sound, the drive to the box stopped. bother ! I thought it might be a broken friction disc hub etc.
Same scenario as last time... push the car back in feeling quite a bit pissed off and this time we both went for a run. Get away from that car!
Last night whilst in the middle of engine and box removal I discovered that the clutch slave had pumped out, again, and was holding the clutch in I released the bleed nipple and the clutch fork returned home So I now suspect two things here. Either the flexi hose has broken down inside and restricts fluid returning quick enough so instead the master refills from the reservoir. I'm getting a new hose to rule that out.
Or the little one way valve within the master, of which I had made a new spring for to replace the missing item, opens too easily. Possibly easier for the master to draw fluid in quicker via that valve then refill from the returning fluid from the slave. Hence the slave gets pumped out with each push of the pedal. It stays out in increasing amounts by about 4mm each stroke! So I'm getting a new 'proper' spring too.
That noise? Yet to find out. Hoping it is just the spigot bearing slack allowing the first motion shaft to wiggle up and down and rattle the disc as it gets garbbed by the pressure plate. From what I have read its an issue that can be had on stock Imps? even though my Imp has a Datsun fly, plate, disc, release bearing, arm and half a Datsun/half Imp first motion Still all the same movement etc. The noise is only there on take up. Its a loud vibrating rattle, kind of high pitched. Almost like the diaphragm fingers are being knocked- but if that was so then it would do it as soon as the pedal is compressed.
While the lot is out I'll pop the selector cover off the box and tweek that reverse plunger/plate interface issue. I have an Idea there. I'll report back.
Quite upset that Its all happened like this but hey....I soon get over it. Good proper exercise certainly helps to take my mind off things when things go wrong Anyway- mucking about with old cars. We do it for fun eh Its a little challenge.
Righto. Exciting news. However I shall start where I left off. So last time I moved the car under its own steam resulted in quite literally its own steam, all over the floor when the heater matrix decided to give up. I swapped that out with a spare unit I had, replaced that seal in the clutch slave cylinder, fixed another couple of wee things and prepared it for the big drive. I also lowered the platforms on the front dampers and got the car down to a much better height. I may well raise the front by around 5mm later on so to get the camber a little less negative. I'm not a huge fan of excessive negative camber nor does it aid in handling unless corning at 9/10ths all the time. The car looks so much better low all round. I took some photos..
Now lets take it for a drive!
This time I made it about 1 metre further then last time. Then I stopped to look for the cause of a terrible rattle coming from the flywheel/clutch area upon engaging the clutch only. I suspected the spigot bearing (which foolishly ...when will I learn... I thought was a bit worn but it would be OK..)
Upon Hannah sitting in the car depressing the clutch for me to investigate the sound, the drive to the box stopped. Bug-ger! I thought it might be a broken friction disc hub etc.
Same scenario as last time... push the car back in feeling quite a bit pissed off and this time we both went for a decent run. Get away from that car I thought! Proper exercise is my go to thing for instantly feeling happier
So that night whilst in the middle of engine and box removal I discovered that the clutch slave had pumped out, again, and was holding the clutch in I released the bleed nipple and the clutch fork returned home So I now suspected two things here:
Either the flexi hose had broken down inside and was restricting fluid returning quick enough so instead the master refills from the reservoir. So I had a new hose made to rule that out.
Or was it the little one way valve within the master, of which I had made a new spring for to replace the missing item, opening too easily. Possibly it was easier for the master to draw fluid in quicker via that valve then refill from the returning fluid from the slave. Hence the slave was getting pumped out with each push of the pedal. It stayed out in increasing amounts by about 4mm each stroke! So I bought a new 'proper' spring whilst I was at the brake shop too.
So there it sat- engine not exactly where it should be. But I do like this shot though...
So out with the engine and trans. I made a wooden cradle this time which I lowered the engine into. It made it much easier and meant I was able to have the engine and box sitting on the large mobile steel bench and I could then work on it at a decent height. I removed the transaxle, then the clutch, adaptor plate and finally the flywheel. Gave all those bits a clean. The flywheel has been lightened quite extensively and weighs up at 6kgs. A standard item is about 9kg...
Here is a good shot of the alloy adaptor plate that joins the box to the engine. Its quite nicely made...
The spigot bearing was indeed pretty worn once I had a good look at it...
It was indeed allowing the first motion shaft to just tap inside the release bearing guide tube. I bought some Phosphor bronze and made a new spigot bearing.
No photo of resulting new bearing- but rest assured it looks pretty much like the old one but this time without enough room between its bore and the shaft to house several Badgers.
I reassembled that lot and had a looksie at the transaxle reverse gear plunger...
I was not happy with how much effort there was involved in moving the gearstick into the reverse plane. I knew what was 'grabbing' and had an idea on how to improve it...
There is that lockout plate that rotates in an arc as you move the lever across the gate in neutral and has to push in the spring loaded plunger to select the reverse plane. However the edge on the plate is very sharp and rather then sliding against the plunger as it pushes it in it digs in a bit. I could feel it through the lever. You can see it here...
You can see scrape marks on the cone of the plunger...
So I gave the edge of the plate a gentle tickle with the grinder..
I also took the corners off on the plate here...
where they slide through the slots as you move across through neutral here ...
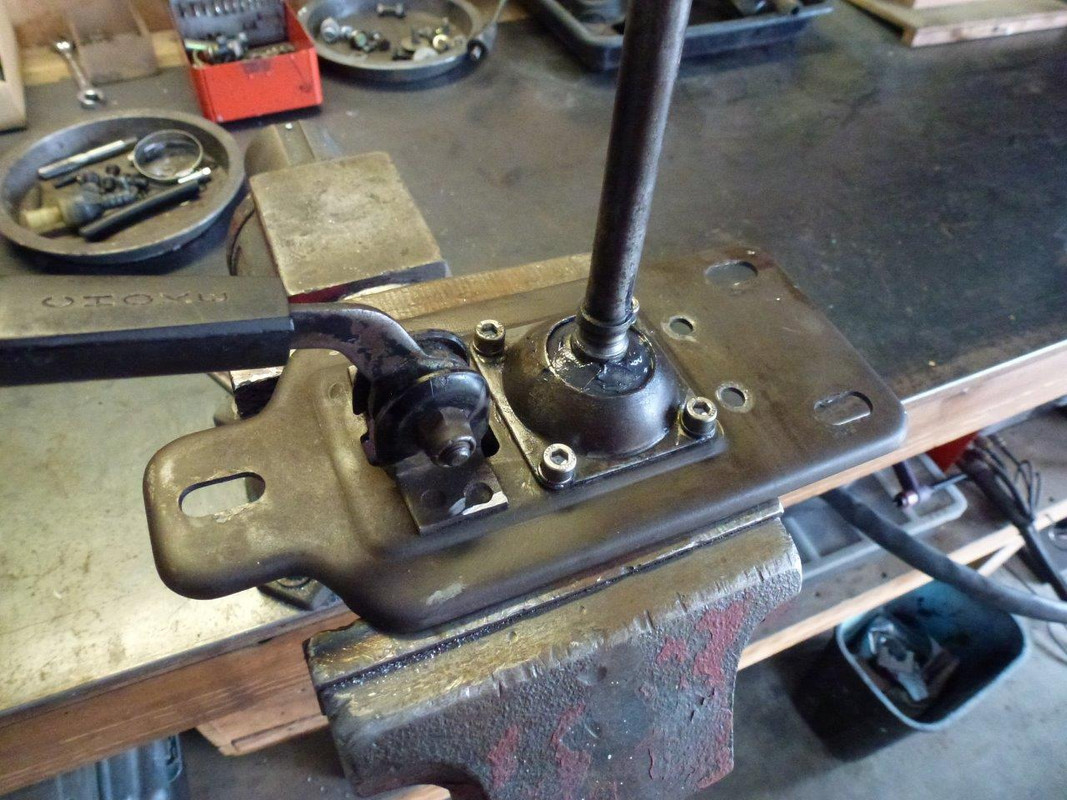
Resulting in a much nicer shift. It will be improved further when I get a proper ball for my shifter and I suspect my flexible coupling at the end of the shifter tube onto the transaxle is a bit too flexy.
The trans was reunited with the engine and slung back into the Imp. It all went back in nicely. This morning we re-bled the clutch system and YAY !!! It works better with the slave returning instantly.
Filled the cooling system back up, having added a bled nipple on the thermostat housing which improved the bleeding of air from the system hugely.
I'd also forgotten to mention that a fair while ago some of you might remember Moose mentioning that my stainless tubes that run under the floor should not really be touching each other all the way down. The hot one will heat up the cool one. Not good. I didnt think too much of it but it bugged me so quite some time back I ended up ovalising them which gave them clearance all the way down...
I also made a throttle stop so not to break the cable...
With that it was about time to go for a drive..
Success! This time no rattles from the clutch area, clutch worked fine, battery was good. Ran it up to temp and bled all the air out. Temp went up to about 80 degrees C indicated and sat there. It was a fantastic sunny, hot late Autumn day- much like a good English Summers day....
All the smoke from oil spills, coolant spills etc burnt off. I checked the timing which was about spot on at factory setting. Gave the carb a tweak so the car idled nicer but it'll need more attention. It has quite a worn primary throttle spindle and I think that combined with that light flywheel makes it hard to get a super smooth idle. Enough is enough though. I finally took the plunge and did this...
I came back beaming. It drives pretty well. Wanted to stall when stopping, because of that lumpy idle. Has a slight flat spot down low but once on the secondaries it fair flies along (well.. for a Datsun powered Imp) It sounds much better then I was expecting. I parked it up and checked all the usual things. No obvious leaks and the fan came on after I adjusted the knob on the thermoswitch. Fan is loud but works really well- very efficient.
Happy, relieved, excited. We both sat down on the sofa, had lunch and a cold beer and admired the little blue car in the sun.
Good to see a transplanted Imp in usable condition - so many don't get finished as Scott implied.
If you intend to use it in all weathers (may be not?), then I would consider installing under body panels to stop road filth messing-up that good-looking engine bay.
With your 1st class fabrication skills you should find it relatively easy to design and fit a flat floor to the engine bay without compromising cooling. It should improve aerodynamics too.
Cheers fellas. I do know exactly what you mean Peter. Often is the case that once the hard work is done and a project is near completion all those little boring jobs that add up to finish it can kill off the mojo. I've followed many projects on the likes of retrorides or oldschool where the person gives up and the updates stop coming.
A project can certainly drag on.
This is still on going and will never be truely finished, as Scott was implying so many finishing touches, so many upgrades planned, more modifications.
I like the idea of an under tray and will look into it. Even a half tasty that extends back to just behind the engine cross member would probably suffice at stopping the vacuum. It would then become a true super car with fully designed ground force aero.....
A subtle front lip spoiler is on the cards for sure.. Just on looks alone.
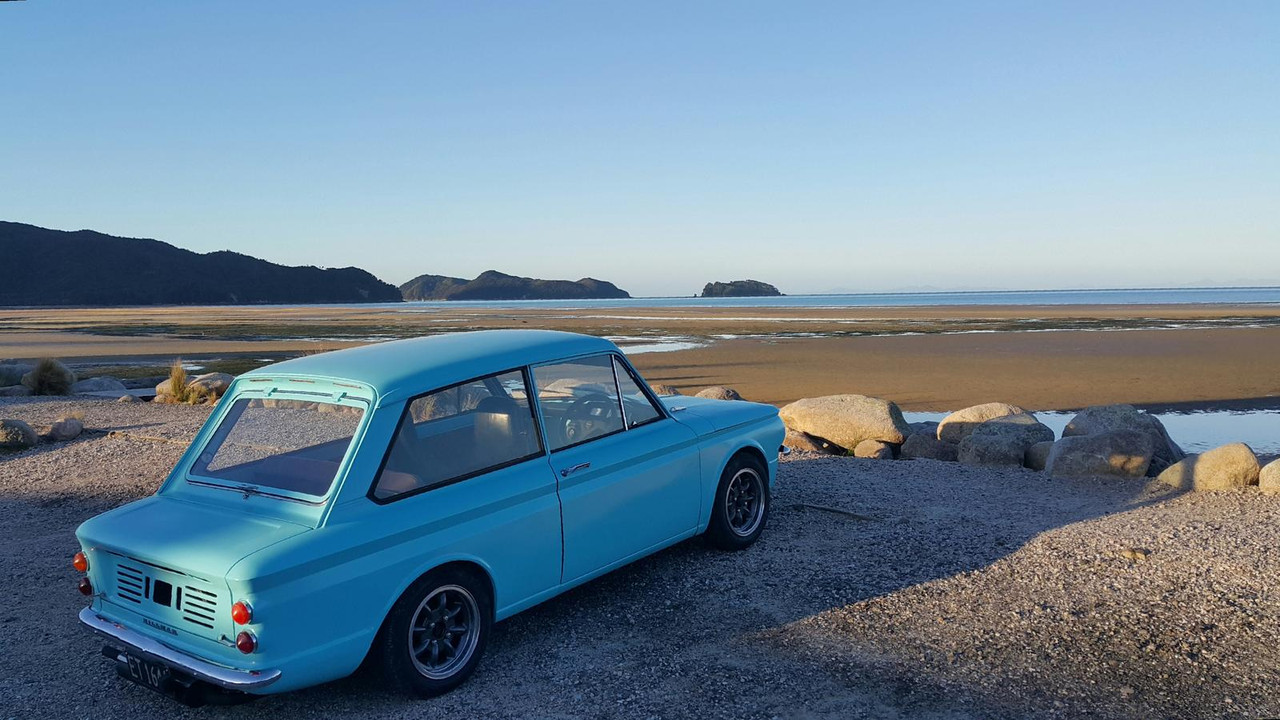
Hannah got to drive it yesteryear evening. She loves it! I knew she would. Hannahs first classic was a little imp super she bought in the UK and she joined the imp club back then. Did a few local meets in Oxford. This was her first drive of one since then.
We went down to the coast, about 3km down the road from our property. First photo is from our neighbours place around the corner from us.
Its going well but for the stumbly idle. Update on that soon.
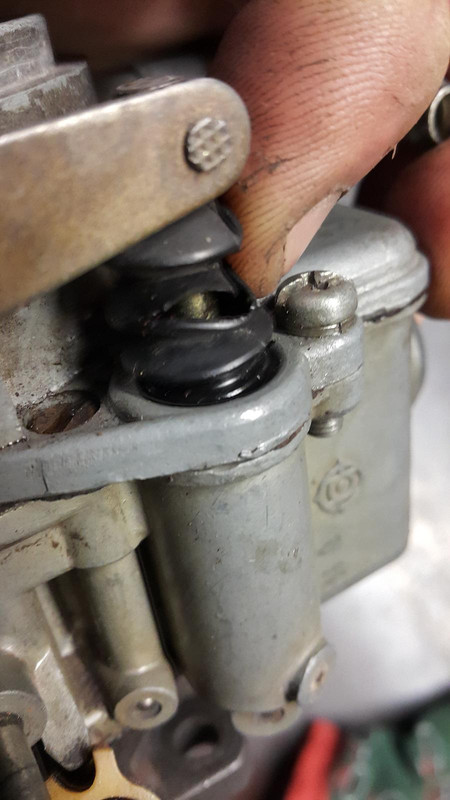
So this stumbling idle. I cant quite tune it out because the throttle spindle was so worn. So last night I took the carb off and stripped off the linkages...
The gap is quite large! ....
I'll keep a look out for a better carb body but for now I have to improve this one. So I went through my collection of rubber washers and found one to suit, which I did. Its a good snug fit over the shaft and sandwiches in neatly between the body and the first bit of linkage...
Then the other end. Nothing to sit a washer on. So I dabbed a bit of automotive silicone on top and let it set. It flexes enough to let the shaft turn so its now well sealed...
I have yet to try it out. The car is booked in for a wof (MOT) today so wish me luck
I refitted the carb this morning, hoping for the best but it was still terrible. I just couldnt get it to idle below about 1500 rpm and it had a big flat spot on light acceleration. So I gave up and we drove it to town, the long way through Kaiteriteri so I could have some fun on the windy road there. Wow its fun! Soooo much fun. Even with an engine that wouldnt pull properly, horrible flat spots, tyres that are definitely too high in pressure, a few clanks from the yet to be fully secured pipework, noise from the un-insulated engine bay shelf, noise from no carpets, fumes being drawn in through the old heater hose routing holes etc etc... it was still fun. It really is like a big go cart. The steering is lovely. Gear shift is great. Brakes getting better as they bed in. The temp gauge sat pretty much bang on an indicated 80 degrees C whch I reckon is more about 90. Fan only came on when we stopped, as expected so I was really happy about that.
We got to town and straight into the booked WOF slot. Our local friendly wof man just loved it. Kept saying how cute it was, how neat the install was etc. Really impressed. Did all the check things as usual, test drive and it was all good. We looked about all the neat stuff in his workshop....
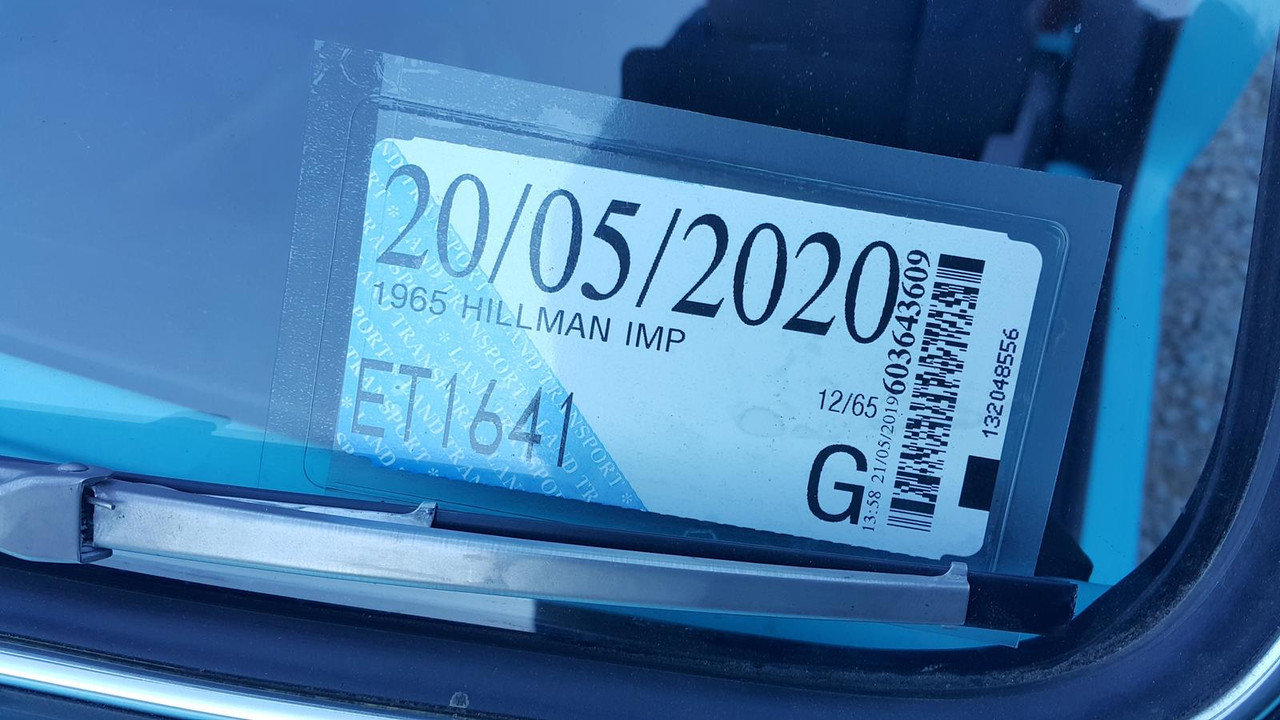
WOF attained and we went to the local council and got a years license. $47 - yay for old cars.
Did a shop at supermarket, did the proper look back over my shoulder at my little Imp, sitting there in a sea of bland grey modern cars, looking sooooo tiny.
On the way home we popped in to show it to another couple of fellas who run a nice country workshop and had sorted out the tyres for me. They too loved it and the older fella reckoned it was running way too lean and certainly had a big air leak somewhere. Then off home, this time driving over the much steeper longer climb. No worries even with terrible carb. No increase in temp. Yay for that.
I got home and removed the carb. Discovered two things. Firstly. Spot the schoolboy error here...
Yep- That accelerator pump can go downwards for sure, but not if the lever pushing it down cant go up at the other end! My air filter base was stopping it. This also meant that along with only a tiny bit of travel I was also not getting the secondaries to open properly. Easily sorted with a hole, some alloy and some epoxy.
Second thing- this...
There goes my air leak. Air getting pulled in through that huge split, past the accelerator pump piston and into the venturi. Well at least I am pretty damn sure that this is the culprit!
Cheers John. Yeah its all little things now. The big job is over. I'm really relieved that so far it seems that the main modified things like brakes, cooling, clutch etc are all good. Really happy the cooling system is working well.
It certainly needs a bilge blower fan installed in the vent duct. There is heat there at the matrix but it needs to be pulled off better. Only above say 50km do you get any ram effect.
Going to strip carb down later and give it a good look over.
Because I'm such a hardcore Friday night raver I'm here doing an update on an old car whilst my cat sleeps in front of the fire. Rock on.
This little Imp...its great fun!!!! I have not really clocked up many miles yet, as you'll find out why soon, but those miles that have been driven have been fun. Its taken a little while to get used to the balance, steering feel, brakes and sheer grip that exists. Still not fully confident at flinging it about but getting there. Its a giggle. I'm just weary of the slippery wet corners that are about now we are into winter here.
The little Datsun engine is a gem! Its still not quite perfect at idle and just off idle but once rolling its great. I can really see why the Datsun 1200 cars have such a following- they are about the same weight as an Imp with similar gearing and were well known for being peppy little performers. The engine sounds pretty cool when trashed. I have since found out that this is indeed a completely stock unit and it was a different engine that the previous owner, Rob, had fitted with a supercharger.
Anyway- onto fettling. There are always a few things to sort on a fresh build. First off was to sort out the dodgy running carb. In my previous update I thought I had found the problem with the accelerator pump boot being split. Turns out that wasn't the problem...
I managed to locate a couple of A12 carbs from a local fella for beer money. One was a complete standard 1200 carb with stock sized jets etc. I took my fitted carb apart and soon discovered that not only were all the jets completely wrong, way too big and pretty butchered as well they were also housed in the wrong carb for my engine! The carb I had fitted was off an A15 which has larger throats and venturis. Great for a slightly hotted up motor but not what I'm after right now. The leaning out issue was because someone had fitted a air bleed that was way too big for the primary jet, among the many wrong other jets.
So I rummaged through both carbs, got the best bits from both and assembled a nice new carb that was stock and set to factory specs. I had a page covered in jet numbers and felt happy in the knowledge that I can now possibly join the elite group of carb Barries forever chasing the perfect tune (when the know full well that injection is just soooooooo much better in every way! )
A photo of some carbs in pieces....
So with the Imp now fitted with the right carb I took it for a spin. Because the work shop is now clogged up with the start of a tiny house build I had to drive it out from the back of the workshop and up the grass drive to the cabin. I thought it best to get some photos of it next to the other Imps...
I did a few test drives and I had to remove the carb a few times to dial in the float height, getting pretty quick at that process I must say. The difference is huge. Much better all round except for a hesitancy just off throttle. I'll continue to tweak things and see if I can improve it but I am starting to wonder if the vacuum unit I got from another car for my electronic dizzy has too stiff a spring. I think it might not be advancing the ignition enough under light throttle loads as it should. Ill get back on that.
Next issue was a funny one. Not funny for the amount of pissing about I had to do to fix it but funny in what I found. A work of art really. Rob has to be proud of his handy work at creating such a masterful bit of Barry engineering! The story goes like this..
After getting back from a quick drive checking the carb was OK I noticed a horrible vibration in the engine. I popped the lid to discover a very out of balance main pulley. bother. I knew it was a hybrid pulley made up of what I think is Toyota pulley on the Datsun hub but I had never looked further into it because it just worked. But not any more. I removed the pulley to discover this on the back...
Hmmmmm. Lovely welding. Purposeful. I'll have to grind that lot off and make a new hub. I'll start by removing those two screws....
Eh?!!! its not weld. Its magic fake weld thats been machined into a flange(like)thing. Its wonderful! Just look at this art ...
The Datsun hub had a crack running through down the keyway too. I had no choice but make a new hub to suit. First off I cleaned up the pulley and had its running perfectly true...
Then I popped to my local steel supplier and get a big lump of steel bar from which I machined a new hub, with a centre locator to tightly locate pulley central. In photos..
Then the internal keyway. When I was working as a (young) fitter turner back in the 90s I would use either a broaching machine or a shaper, depending on the size of the key way. I have none of those tools. I did contemplate milling it from each side with a end mill and filing it out square but that would take ages on this fairly hard 1040 steel. So I made my own internal shaper bar to use in the lathe and just scraped out the keyway using the carrige. I bought a lump of 20mm bar at the same time as I got the round and cobbled together a tool holder from it. This will now be handy for future jobs I'm sure...
and in action (well about as actioney as a photo of a non moving lathe tool can be...)
Resulting in a nice neat keyway..
Which fits nicely right here. Beefier then the original Datsun offering too
Hub drilled and next to pulley..
And altogether now, in a uniform coat of black paint...
Much better. In order to tighten the main bolt, of which I had to buy a new slightly longer one to allow for the beefier hub, I had to make a tool to hold the pulley. I had tried tightening it up with the car in gear, on the ground, with the handbrake on but I didnt like the feel of trying to put the 110 lbft through the transmission like that. so yeah- tool time. Now I have another random tool to got in my wooden box of other random tools specific to only one thing...
Doing its random tool thing...
So I had a working Imp again that was not going to rattle apart. Best thing I do is to take it for a drive. I took it to town where we met Sam and is son Chris, who jumped at the chance to go for a ride with his Dad in the little blue car. Here they are returning...
While in the shop buying stuff a Honda city turned up and parked (badly) next to the Imp. What I always think of as tiny cars looked huge next to the Imp...
We went to the steel merchant for some more steel bits for another project. The rear opening window is handy for shopping. Note the lovely old land cruiser...
While in town I rang Rob, the previous owner of the original race car shell that donated all the running gear for this restoration. He popped down and met us and had a good look over it. I reminded him of how I'd love the Weber sidedraft manifolds he had left over from his ownership. Well good old Rob actually popped home afterwards, found them in his piles of stuff, tracked us down later on in town and handed over these to me ! ...
Wow! awesome. Top bloke. I'll now be able to fabricate a decent inlet setup for injection in the future. Yes!!!!
Later on that afternoon we parked next to another small car...
This evening Hannah and I took the Imp out for a hoon on our local roads which are just perfectly made for little nippy cars. It was such fun! I love it when the (tiny) little secondary opens up. Its got a lovely induction sound (right behind our ears, even with two thick blankets covering the engine cover..)
We went for a nice evening walk and I took a photo of it parked up on the near the beach...
Closer...
Tune in next time to hear about the stupid mistake I made when buiding a cold airbox setup....
Your Imp's stance is very cool as is the colour scheme.
Driving rear engined cars will make you a better driver once you have found the limits ..just make sure to do it on a big open car park rather than on a country road with ditches like I did as a stupid 17 year old!
You can do fantastic handbrake turns on dry tarmac into 90 degree corners when you've mastered it. At least I used to be able to as a less-stupid 18 year old (about a year after ditching it)....45-ish years later I'm not so sure I'd catch-it right. And you will learn pretty quickly NOT to lift-off in corners (if you haven't already). Keep your foot-in and you can feather the throttle to manage the rear stability and front's tendency to understeer..even in the wet.
Flippin heck. Dangerous country out there! Those utes have far too much power for their chassis maybe!
The front end is sensitive to wheel camber. If you have too much negative camber it will understeer in the wet at normal low speeds on roundabouts (normal road tyres up to 175 width at the correct pressure).
I found that no more than 1/2 a degree negative on the front is good. The camber measurement is made laden. Unladen (depending on springs rate fitted), you might see a tad of positive to get 0 to 1/2 a degree negative laden (need to experiment). Too much negative and there is less tread gripping the road on initial turn in and it will plough-on in the wet at low speed (very little body roll at low speed to increase grip).
My clan is currently still on 135/80/13 front winter tyres (stretched side walls on to 5.5J rims) and turn in great with near 1/2 a deg of camber. Rears are unstretched 175. You don't need a lot of width on the front (of a Clan) for road use. 135 digs in nicely. I will be swapping to sticky 175/55 13 fronts (Avon CR500 semi-slick Caterham tyres) soon as the summer properly starts up here (205/50/13 rear). The CR500s are great wet or dry as long as the temps are not too cool. The car has less acceleration on the wider rubber and more drag at high speed...so there is a cost with the wider sticky rubber unfortunately.
yeah i'd like about that much camber. no more. I'll measure it again and I can set happily raise the frnt end ever so slightly to bring it back. I wanted to drive it a bit and let things settle. I have spacers between my lower mounts and the spring platforms so I only need to make slightly longer items to suit.
This has 175/60 tyres on it. Certainly not a flash brand but they seem nice and soft. I was not sure on what pressure to run them at so I have gone for 30 on the back and 23 on the front. It certainly rides and grips much better then when it had 28 on the front (what they came pumped up to me after fitting).
Id love to know what pressures, with the relevant tyre sizes, others on here are running?
I'm also going to corner weight it. I tried with our scales but until I lowered it down on a back wheel I was not sure how much the scales would go up to. They tapped out at 130kg. I'll try again with a pair of scales otherwise i'll look to using a friends proper race car corner weights.
23 psi is a tad high for fronts - especially as 175 is wider than std Imp fronts.
I run 18 psi on the skinny front winter tyres and 16 psi on the 175 CR500 fronts.
18 psi is a std Imp number. and 16 psi is a standard Clan number for fronts.
TyrePressure.JPG
The fat summer rears would bounce the car off the road at 30 psi so 24 is the 'dialed-in' number for these. Depending on sidewall construction and profile, wider tyres as a rule of thumb grip and handle better with less pressure.
BTW. I don't run a front rad. Those that do might want slightly higher pressure in the fronts.
You do not have the required permissions to view the files attached to this post.
Clan is definitely lighter than the Imp by about 100 -150 Kg but std REAR pressures for a std Clan are the same as std Imp ie 30psi on 155/80/12 road tyres.
Imp std front is 18 psi on 155/80/12
Clan std front is 16 psi on same tyres - this accounts for the lighter Clan front in particular.
However the lightness differential between the Clan and the Imp is more significant in the dramatically different spring and damper ratings. This is a major contributor to the Clan's superior grip handling and ride.
Clan 68 lbin front spring - Imp something like 195 lbin front.
The std Clan rolls a lot on the softer springs and so the weight transfer into the corners is greater (relatively) than the Imp . The roll/weight transfer adds to the grip when turning-in. Lotus engineers selected the spring damper rates for the Clan. Lotus have a long tradition for preferencing well-damped soft springing with a long travel.
This suspension design philosophy is well proven - but unfortunately the roll on the Clan LOOKS AWFUL in mid-corner - not quite as bad as a Citroen 2CV -but almost!
That's one reason (dreadful roll) many Clan owners uprate the spring rates (me included). It's the wrong thing to do mind - I do regret the stiffer springing on mine from time to time. The Clan turn-in was much better on the softer fronts and the ride was definitely better. The Lotus engineers knew their stuff.


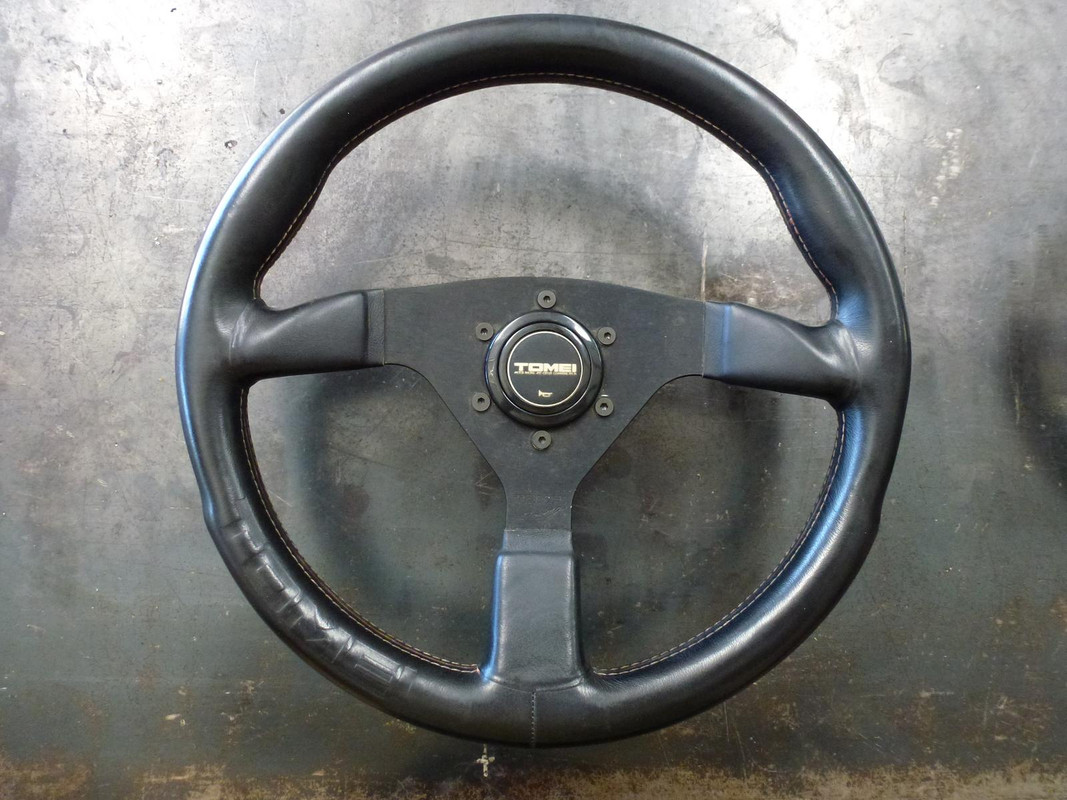
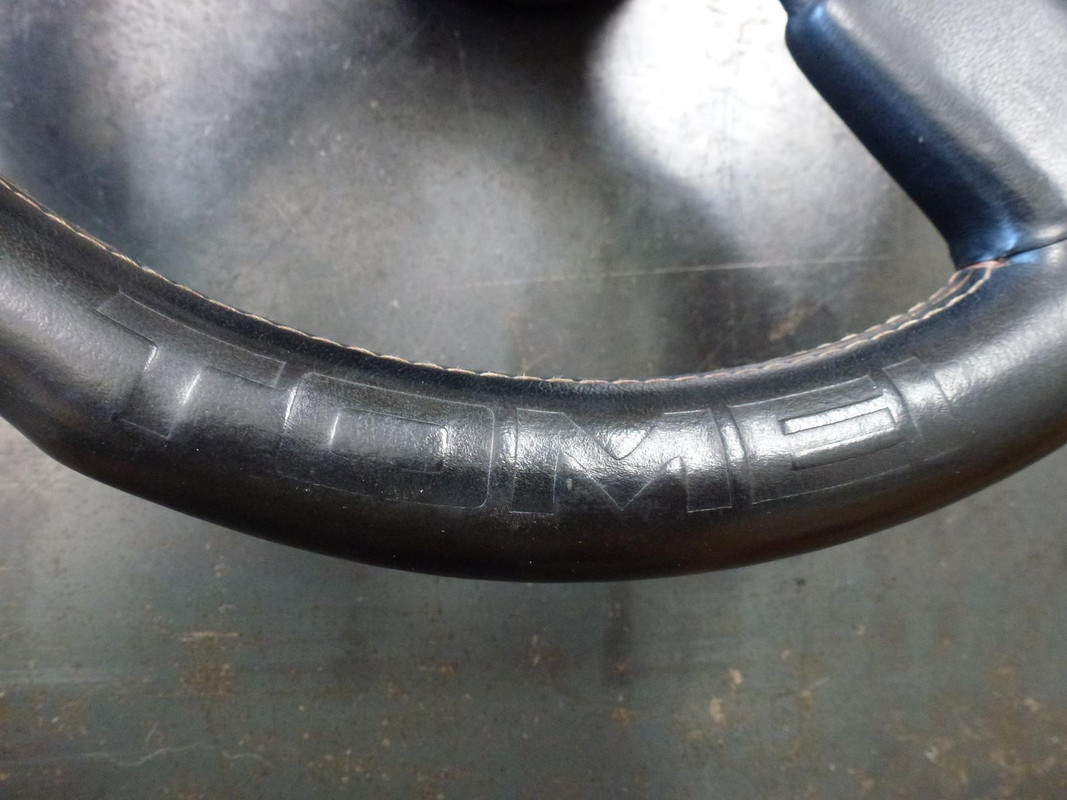
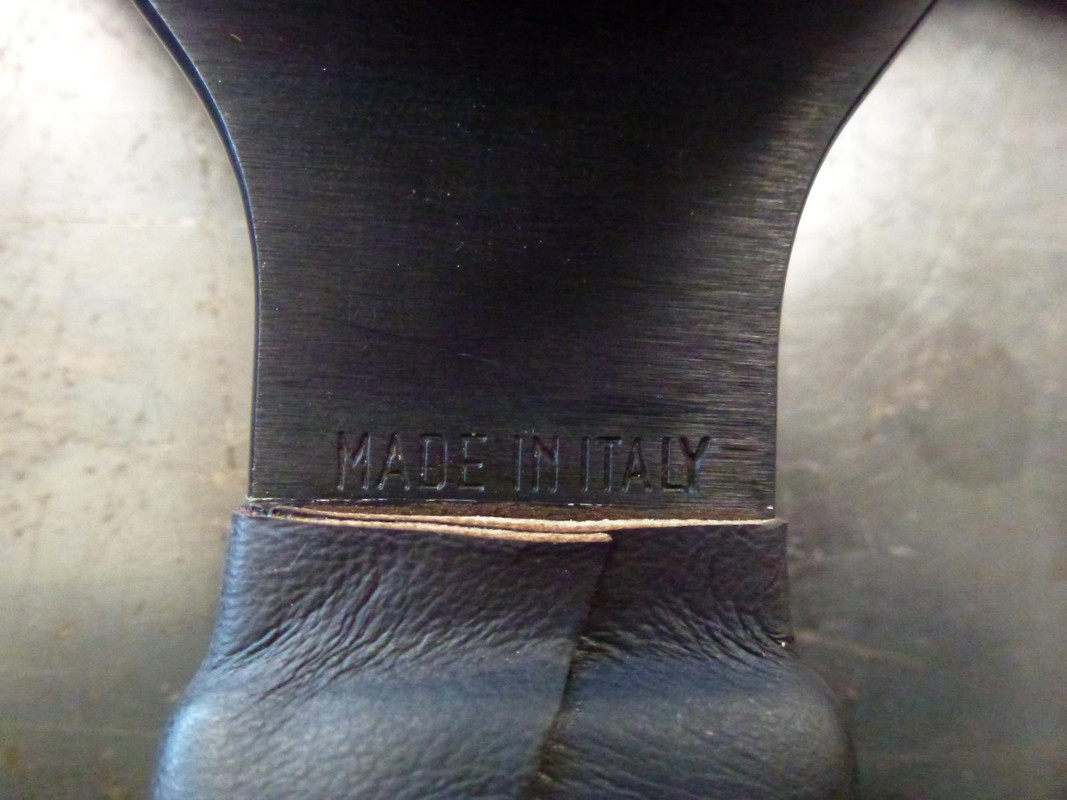
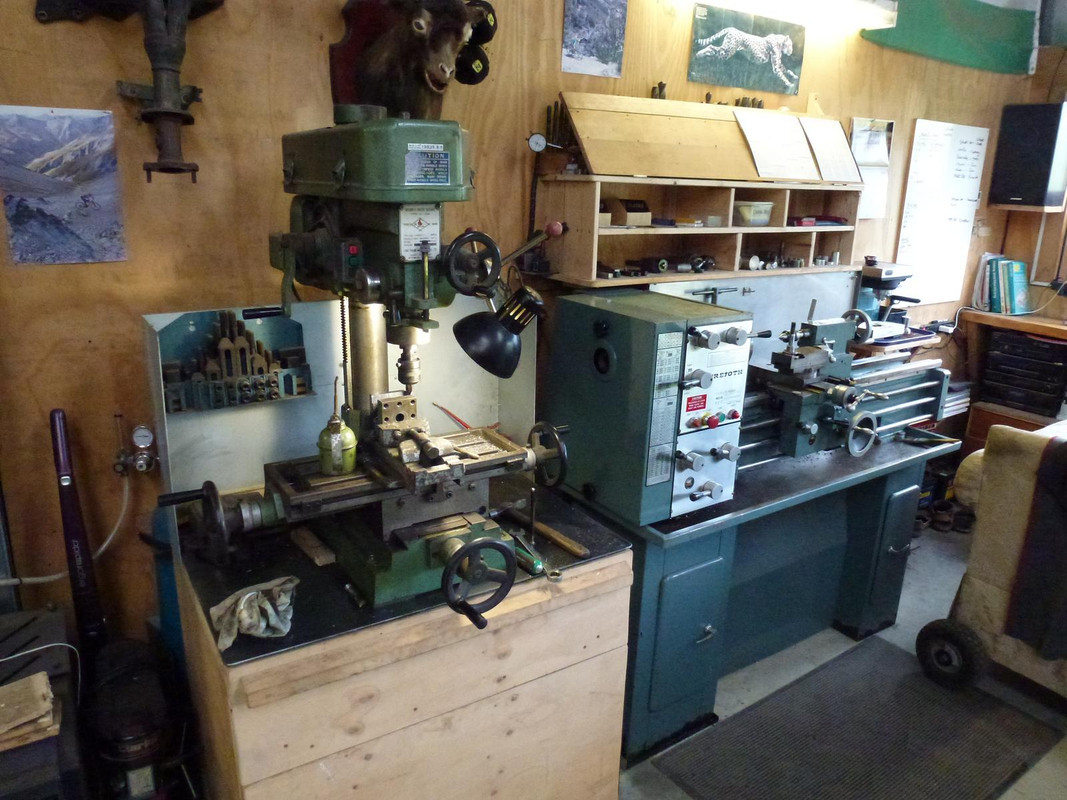
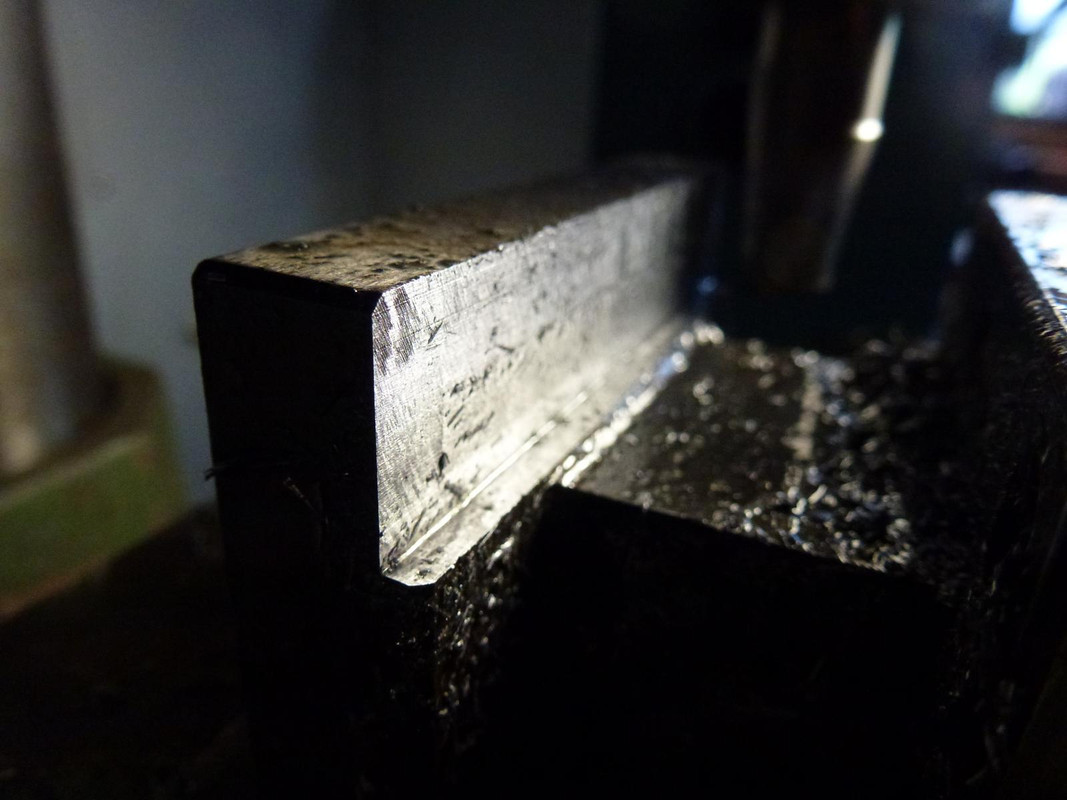
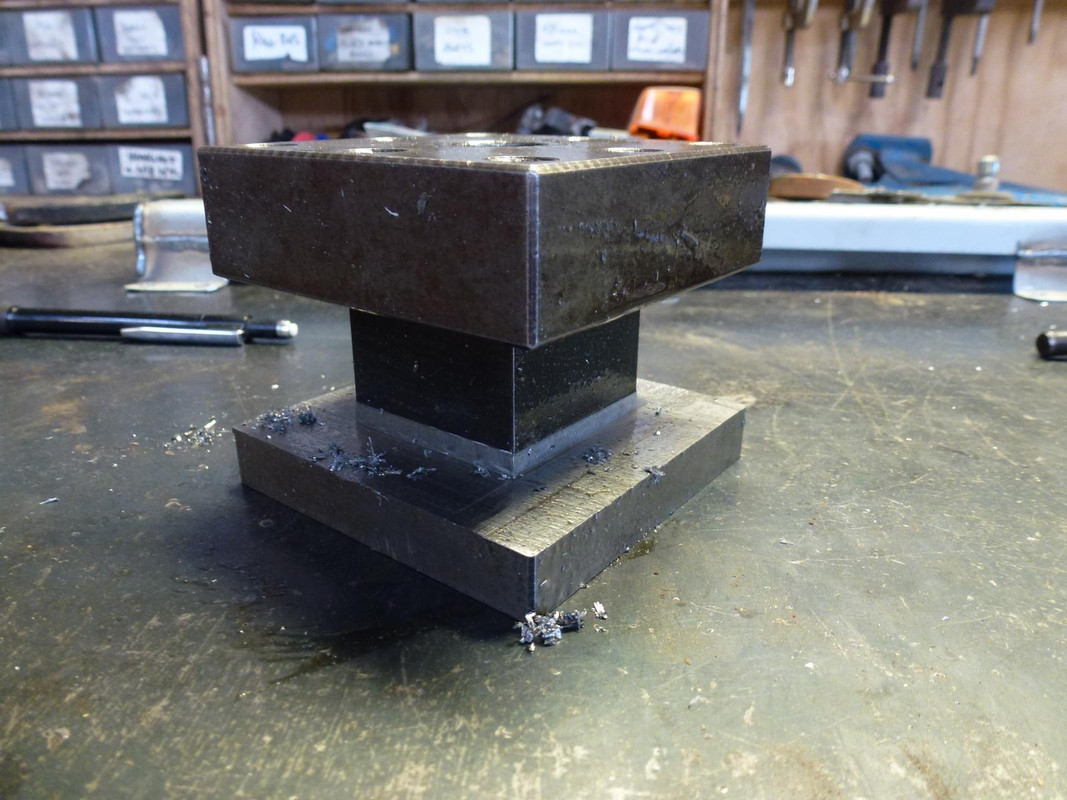
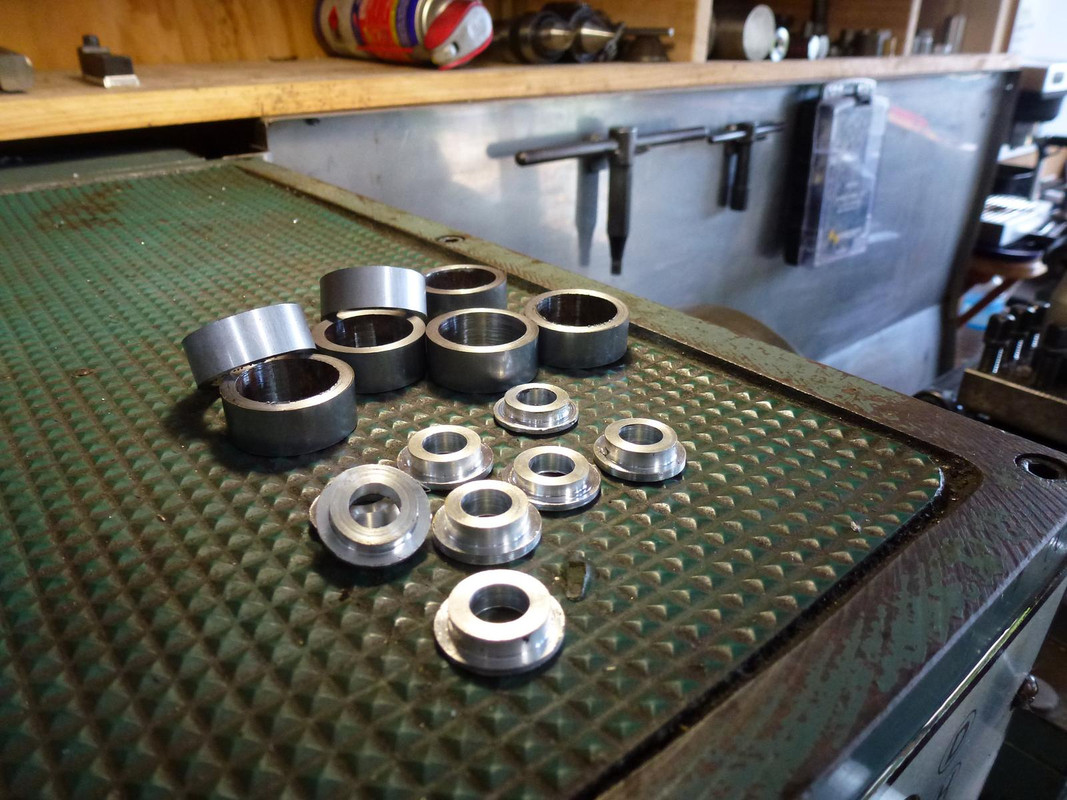
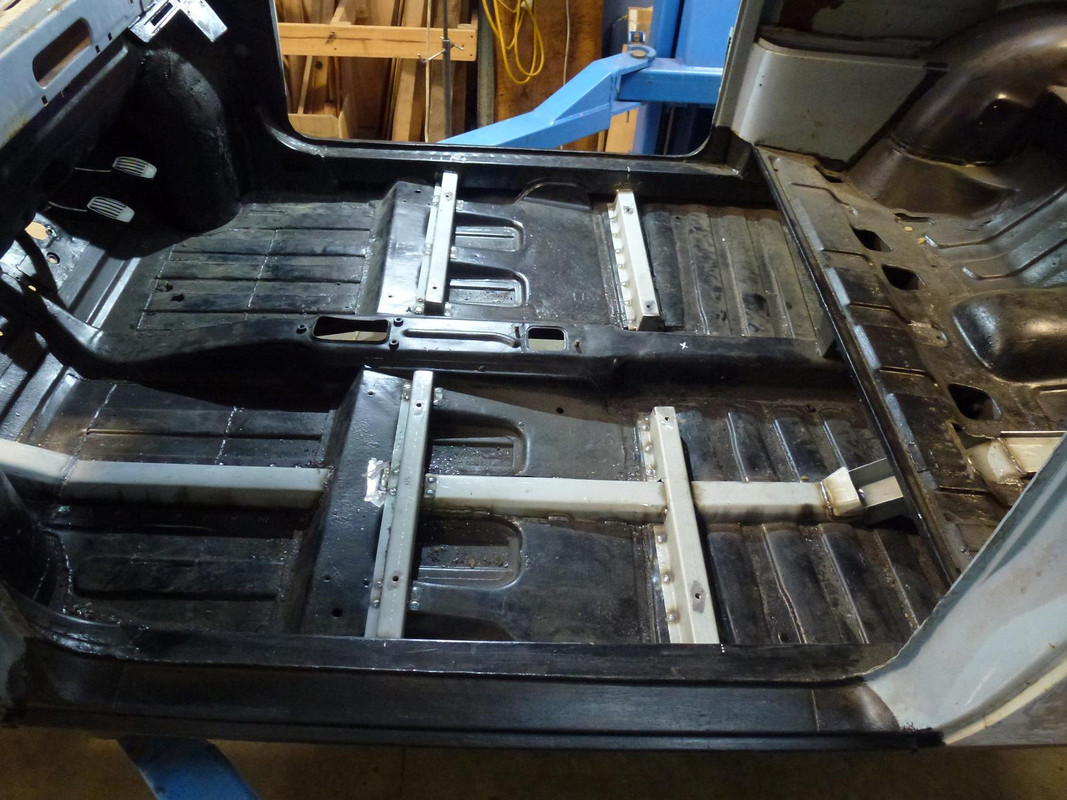

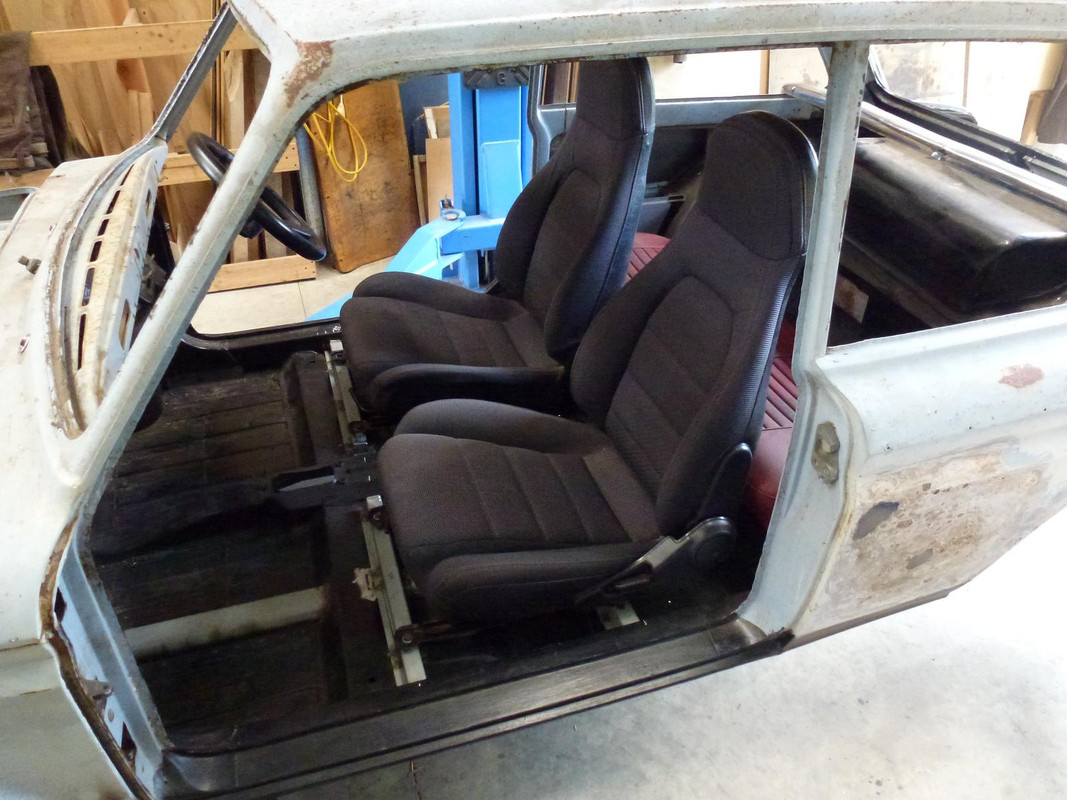
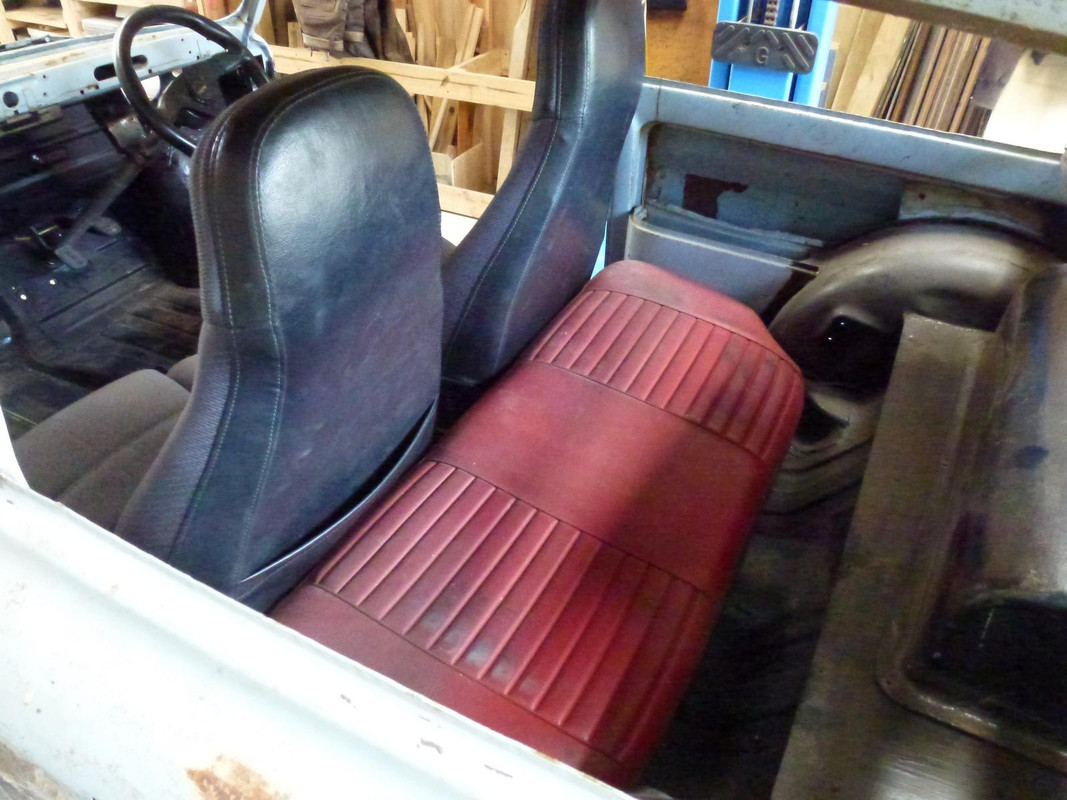
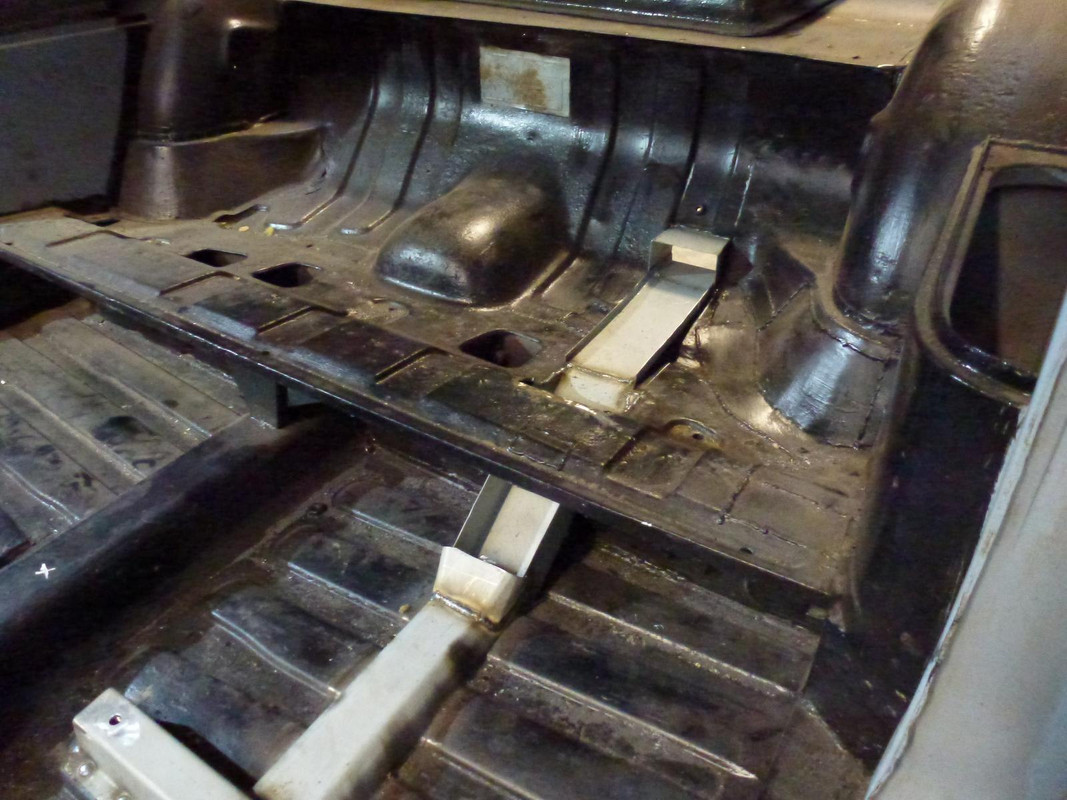
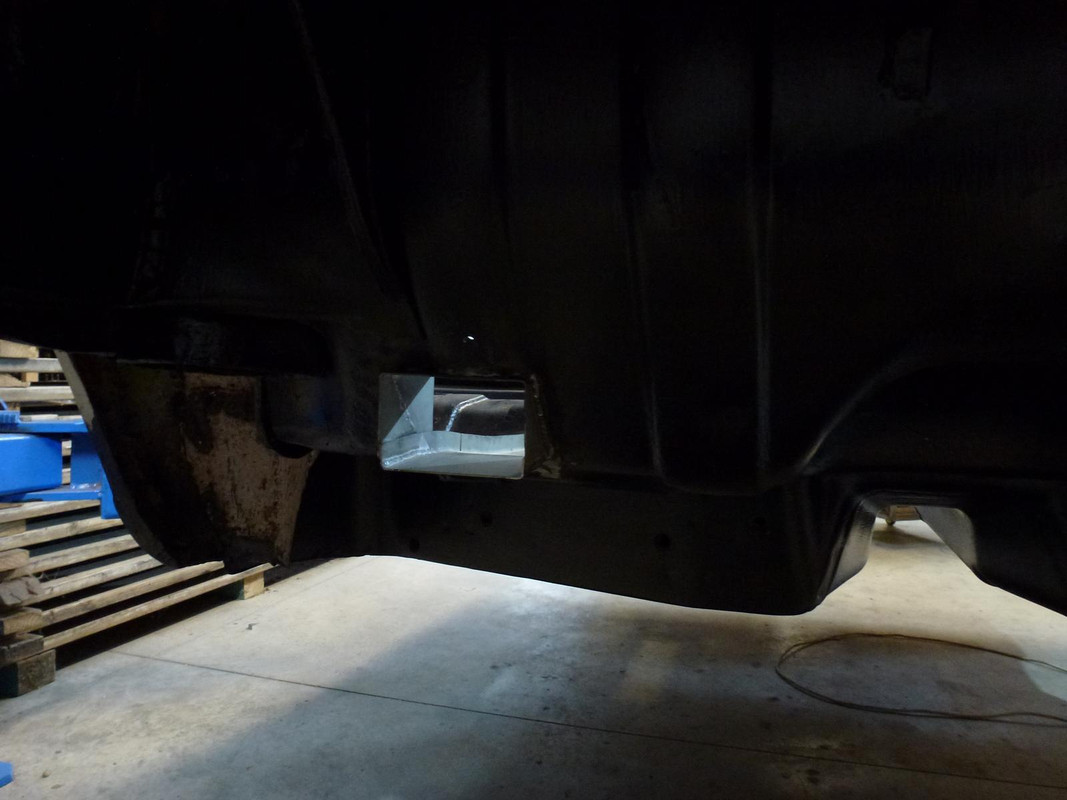
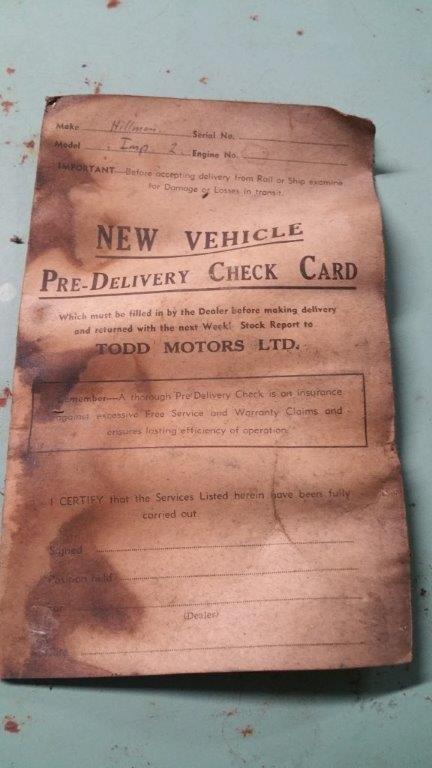
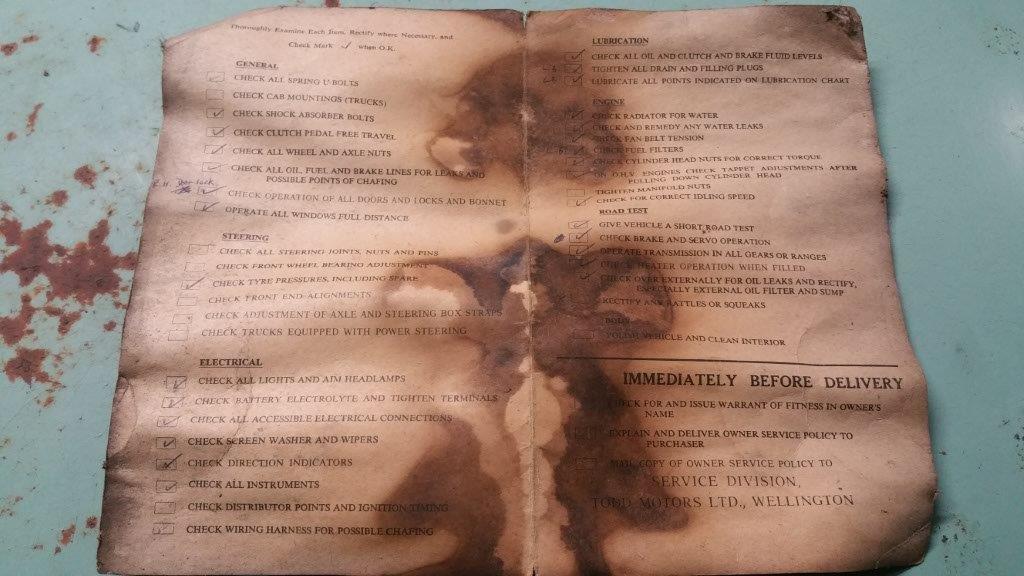

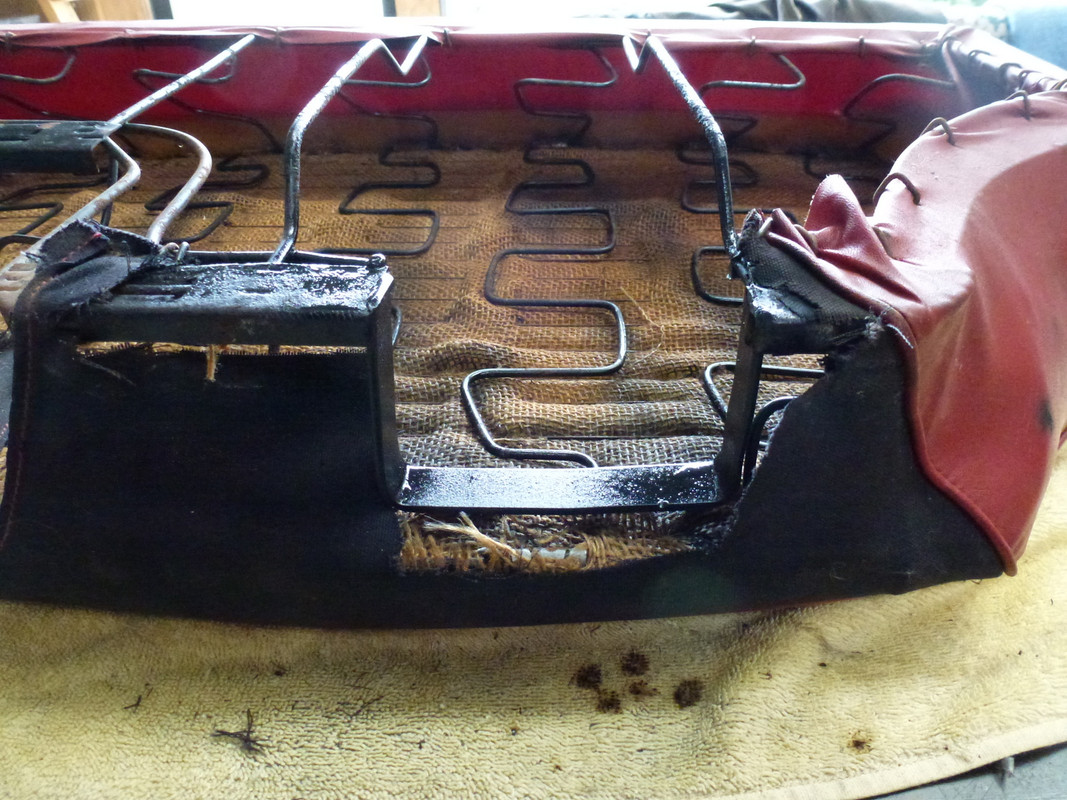
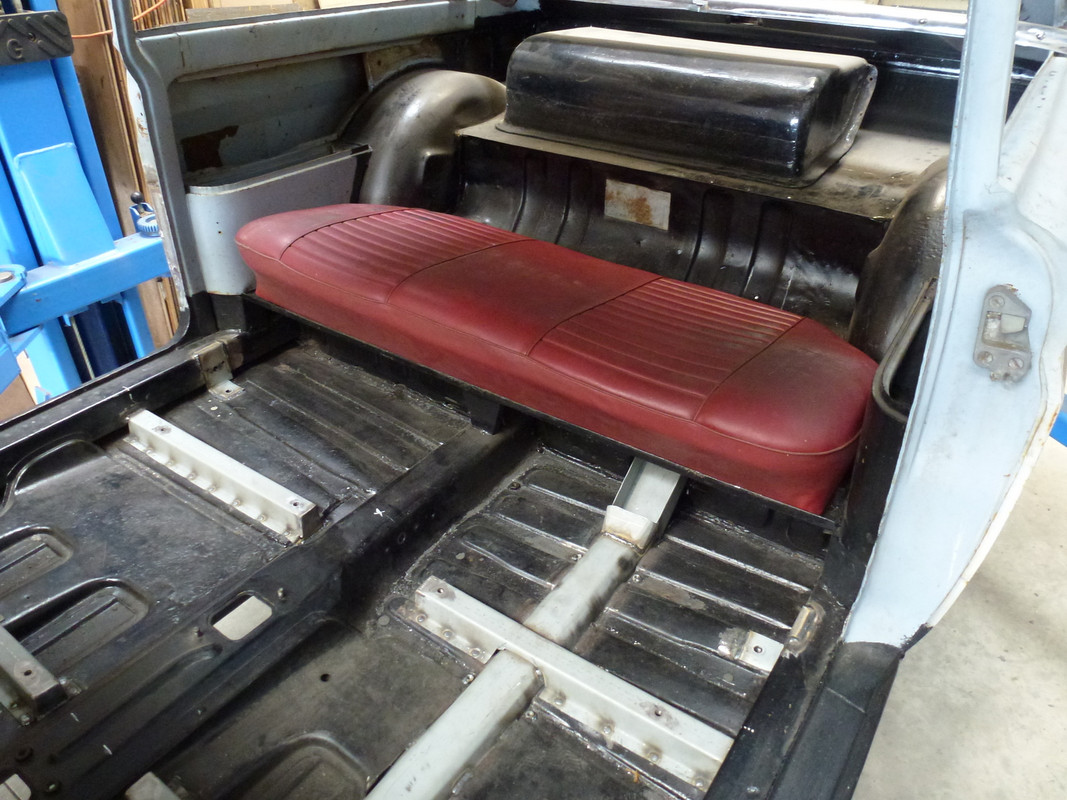
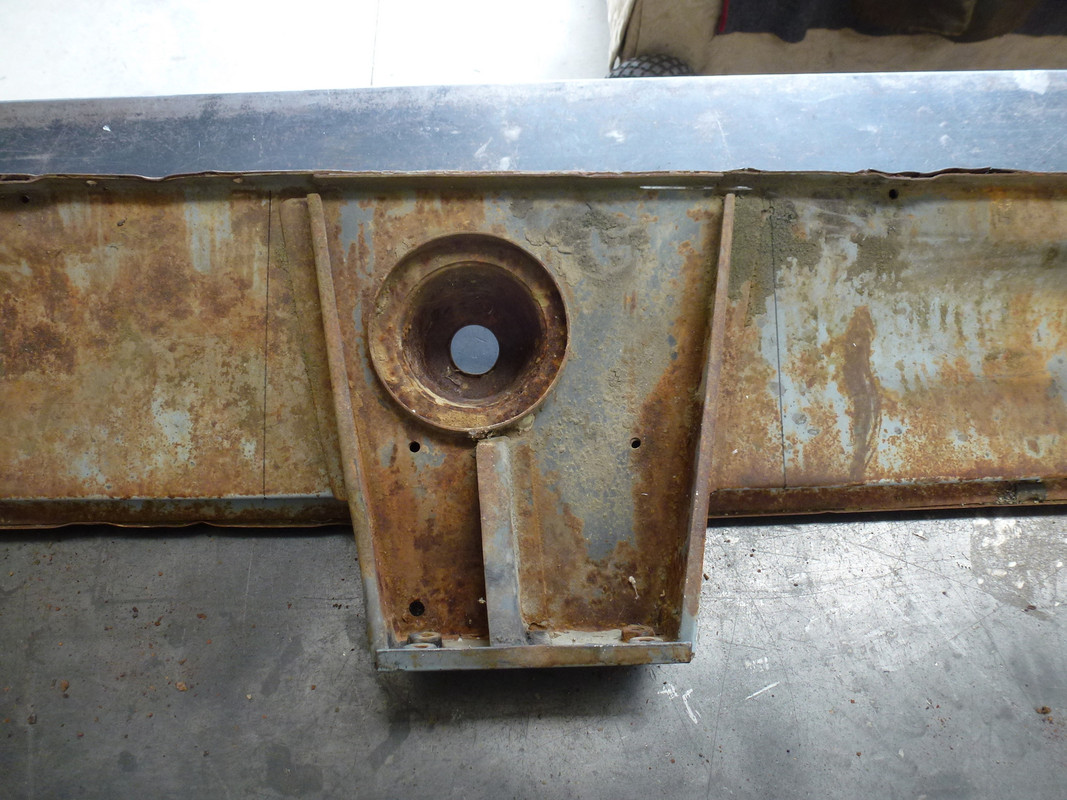
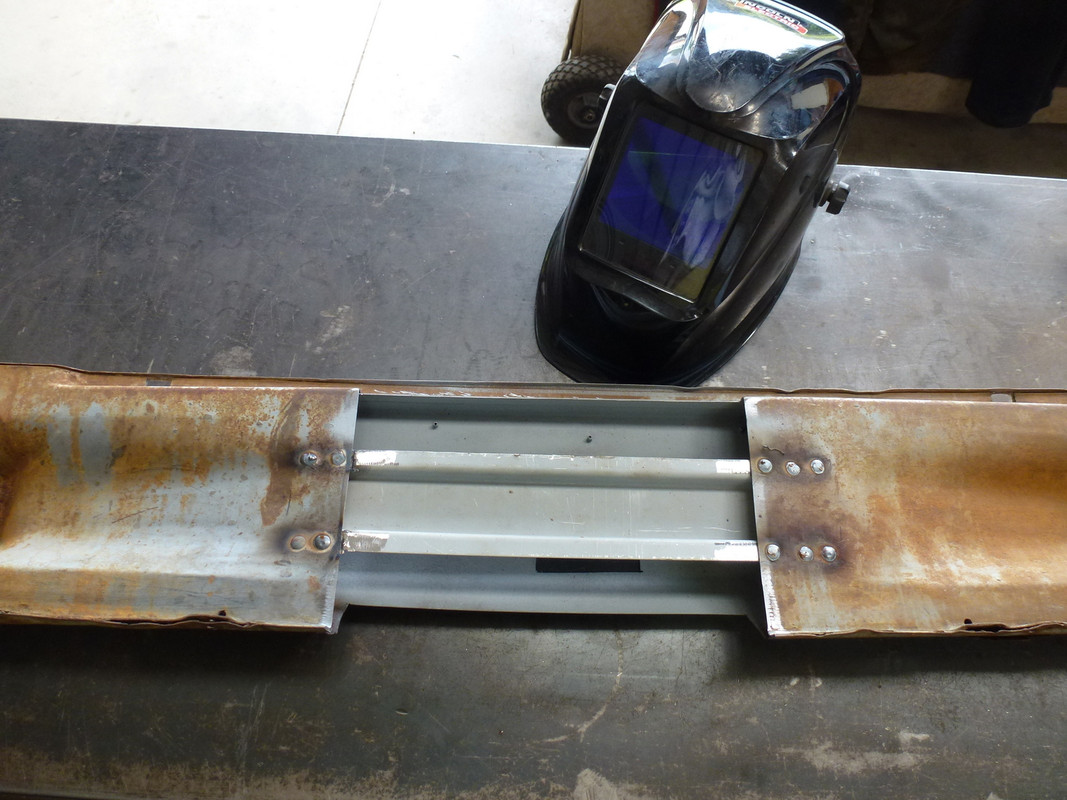
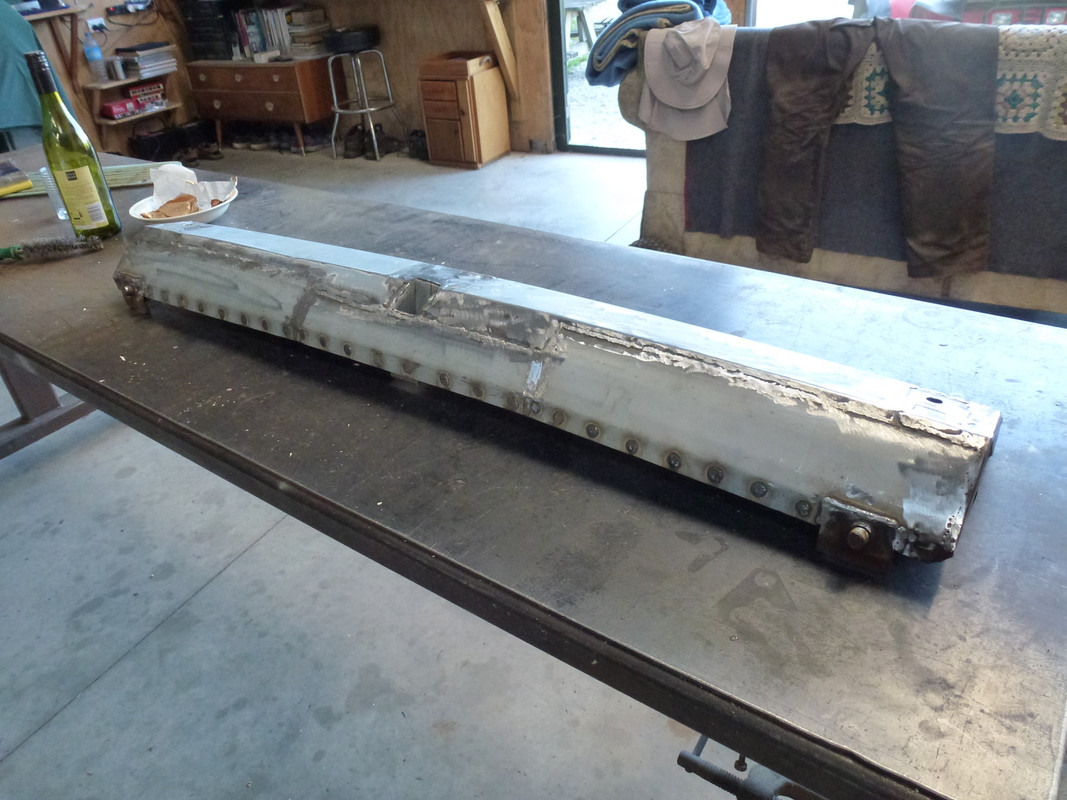
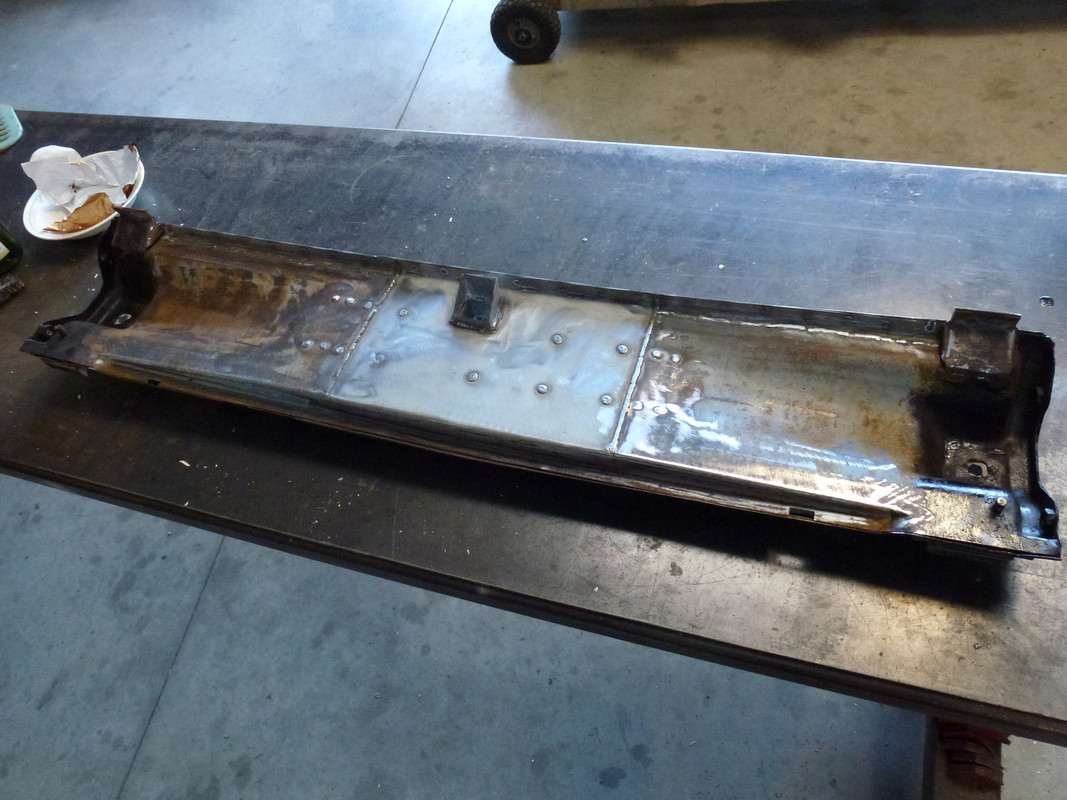

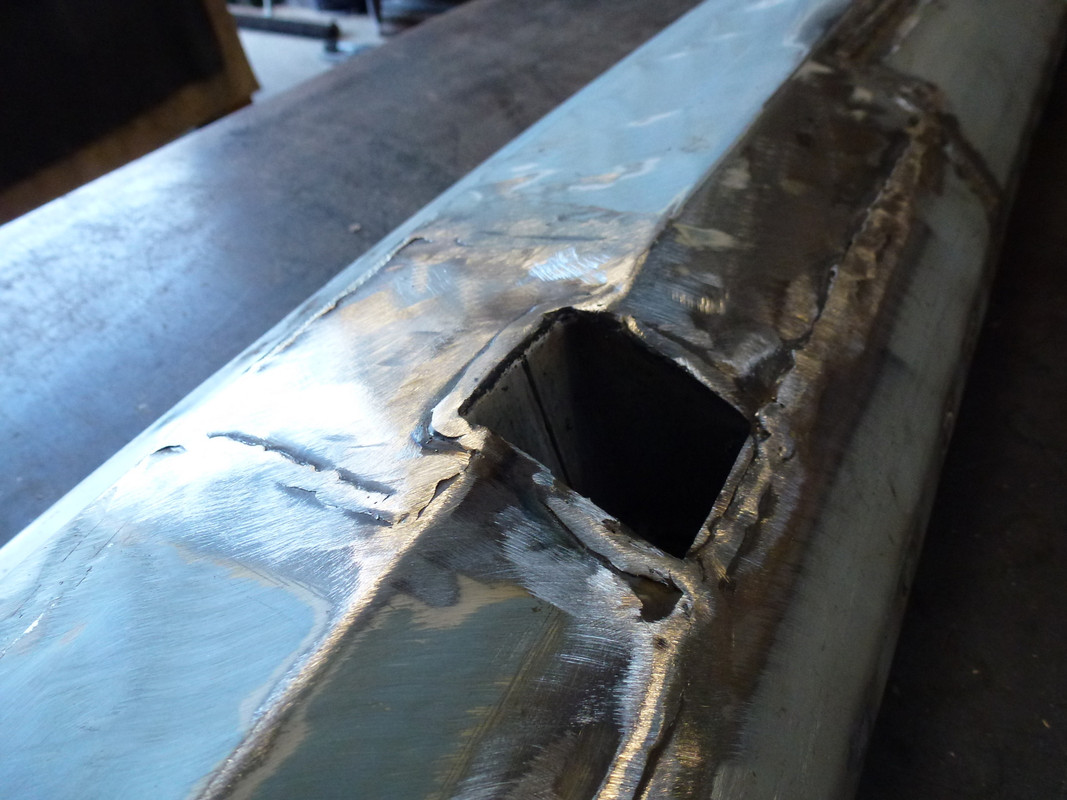
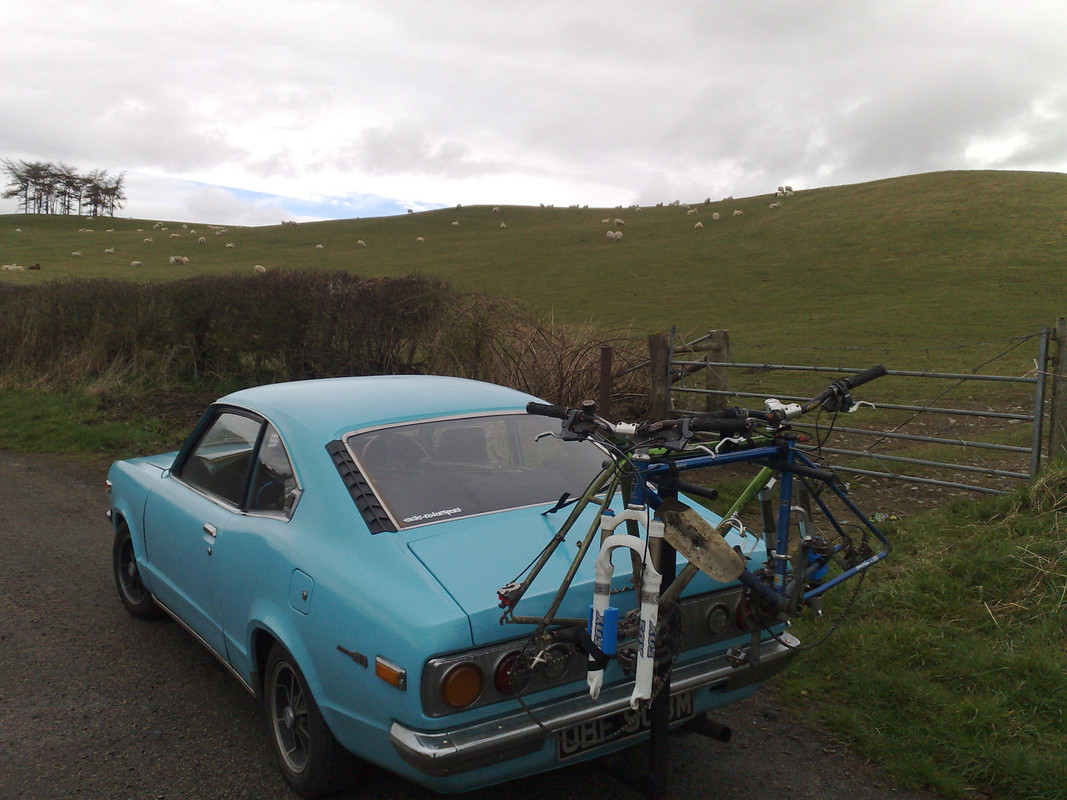
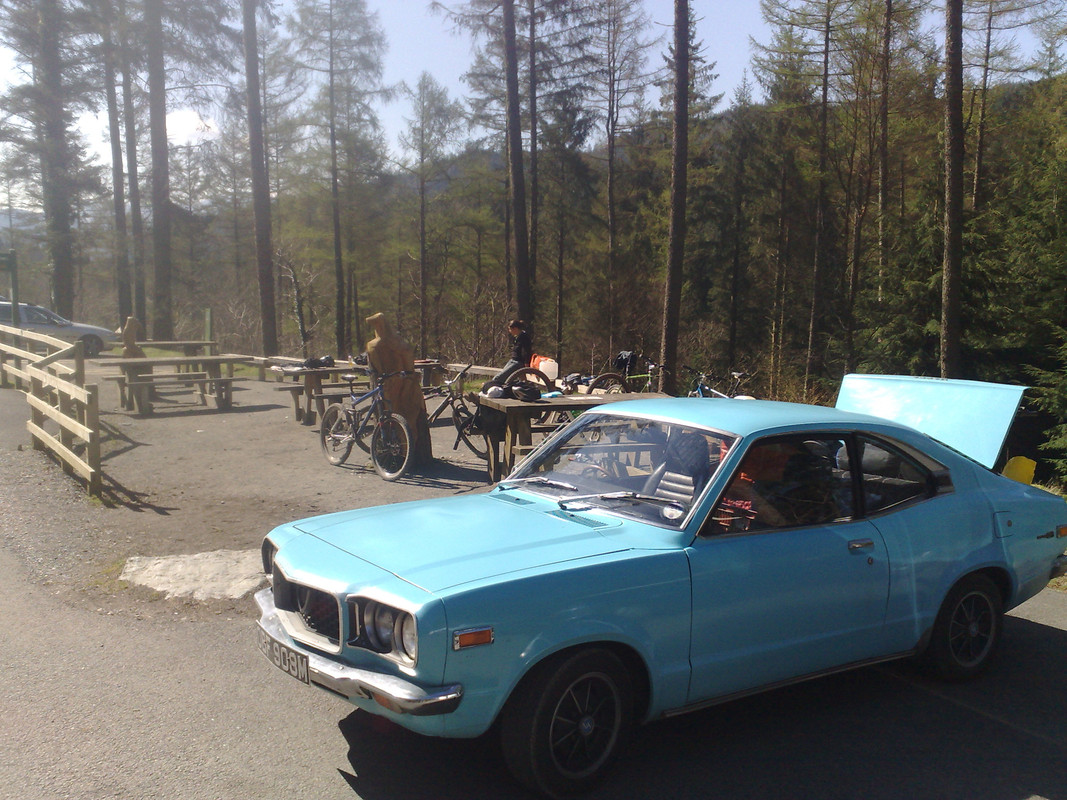
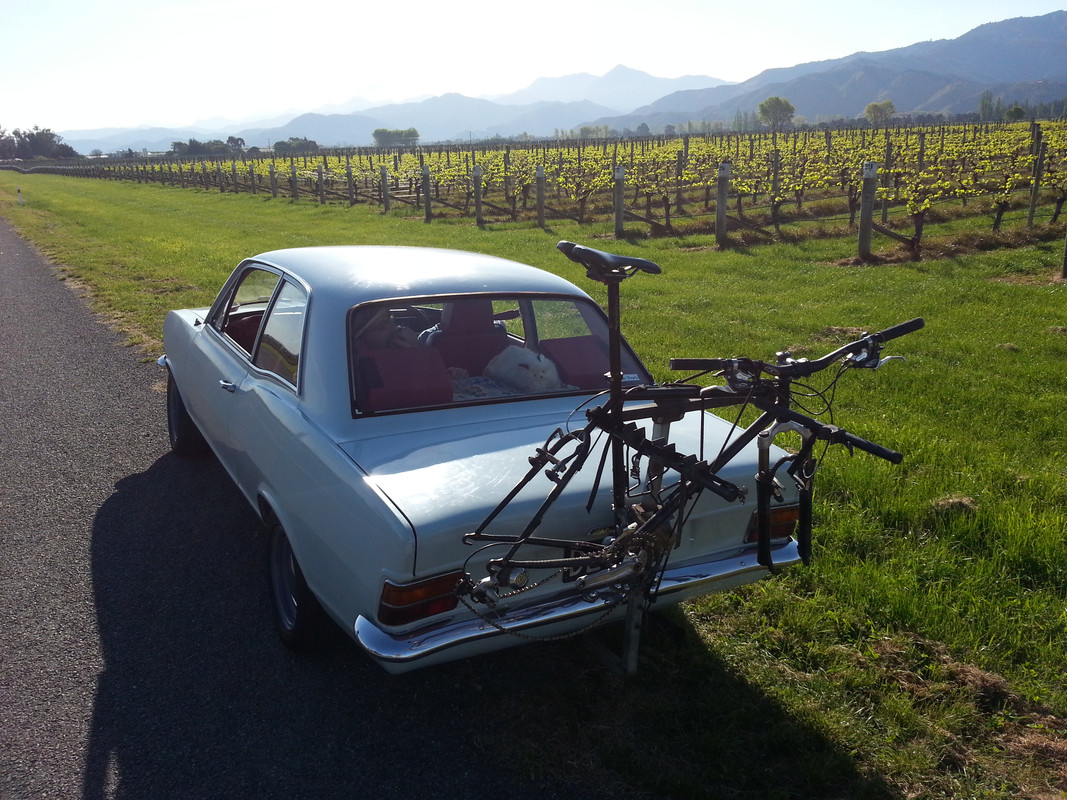
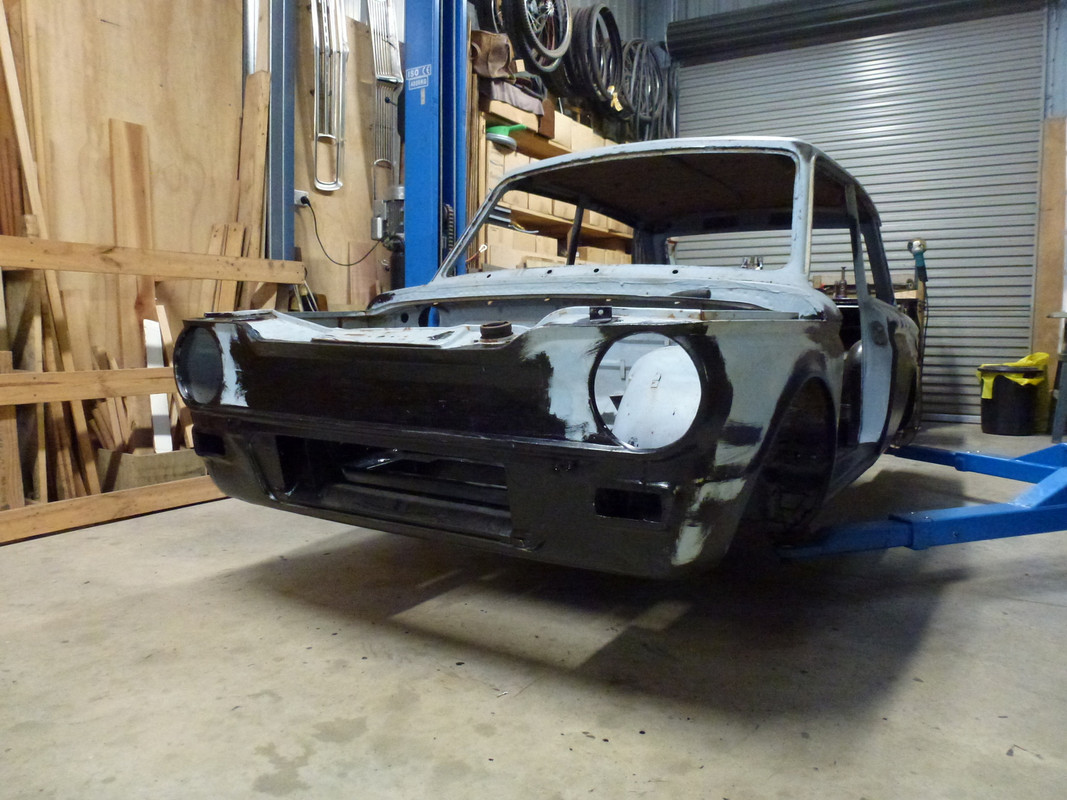
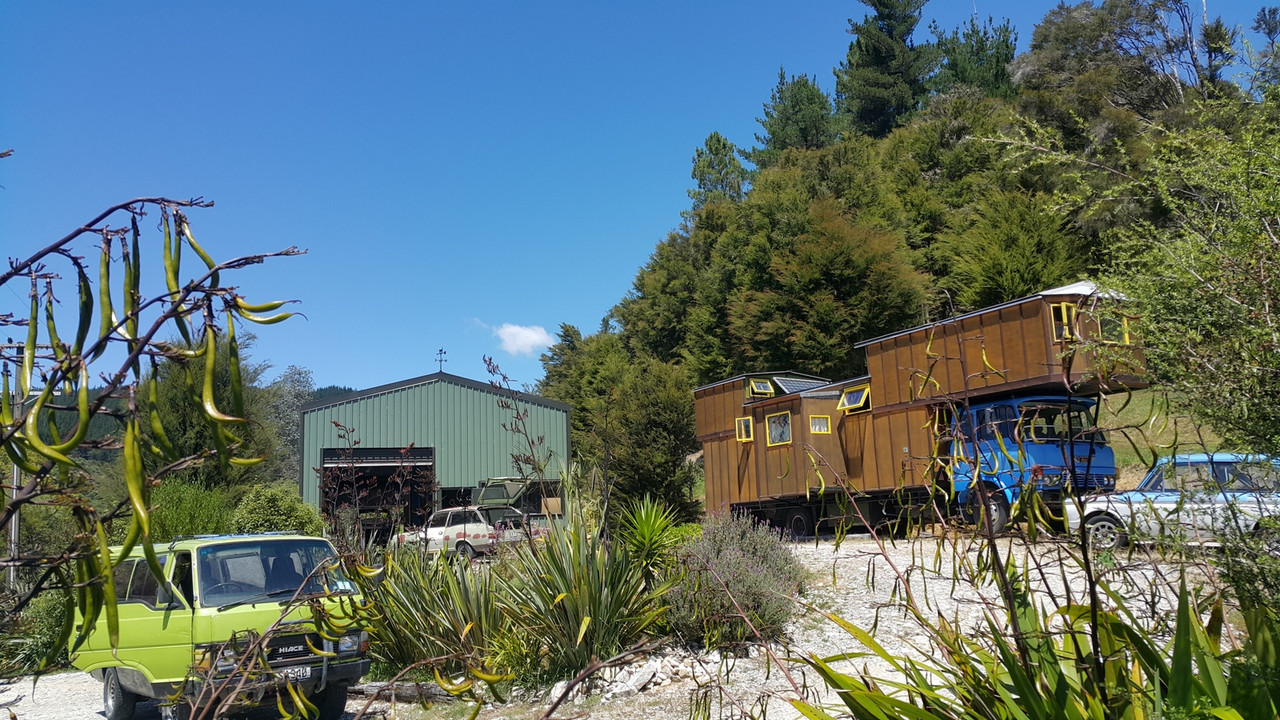
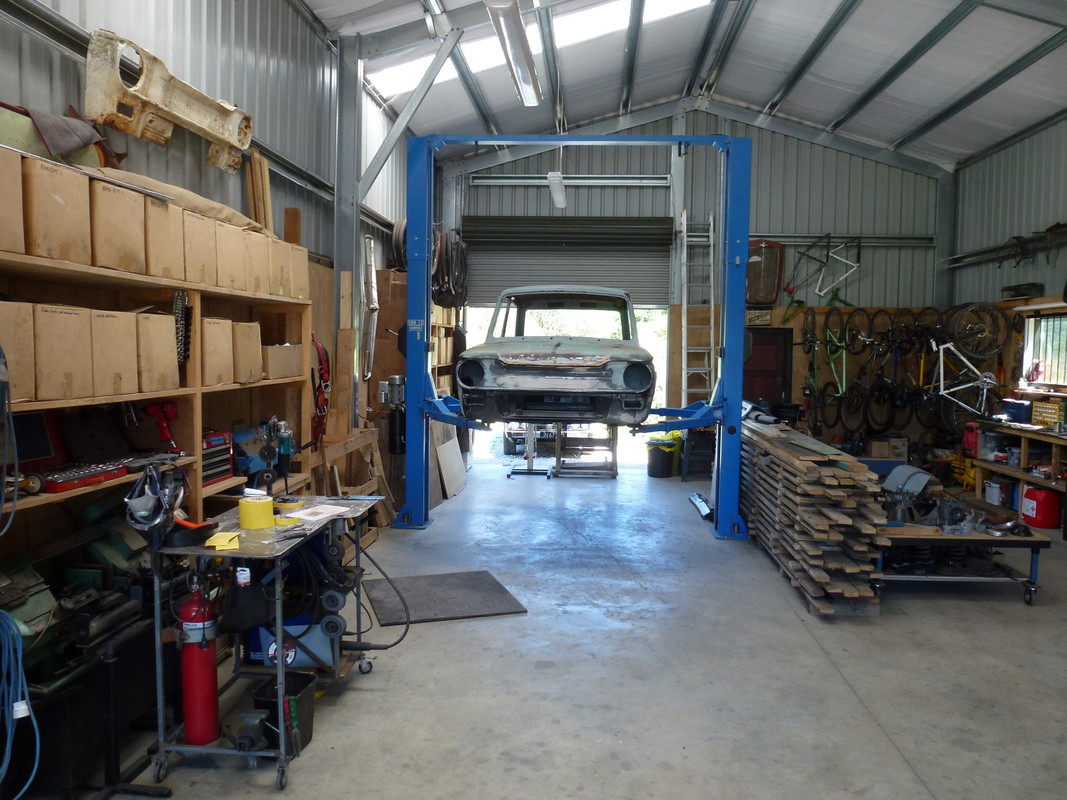
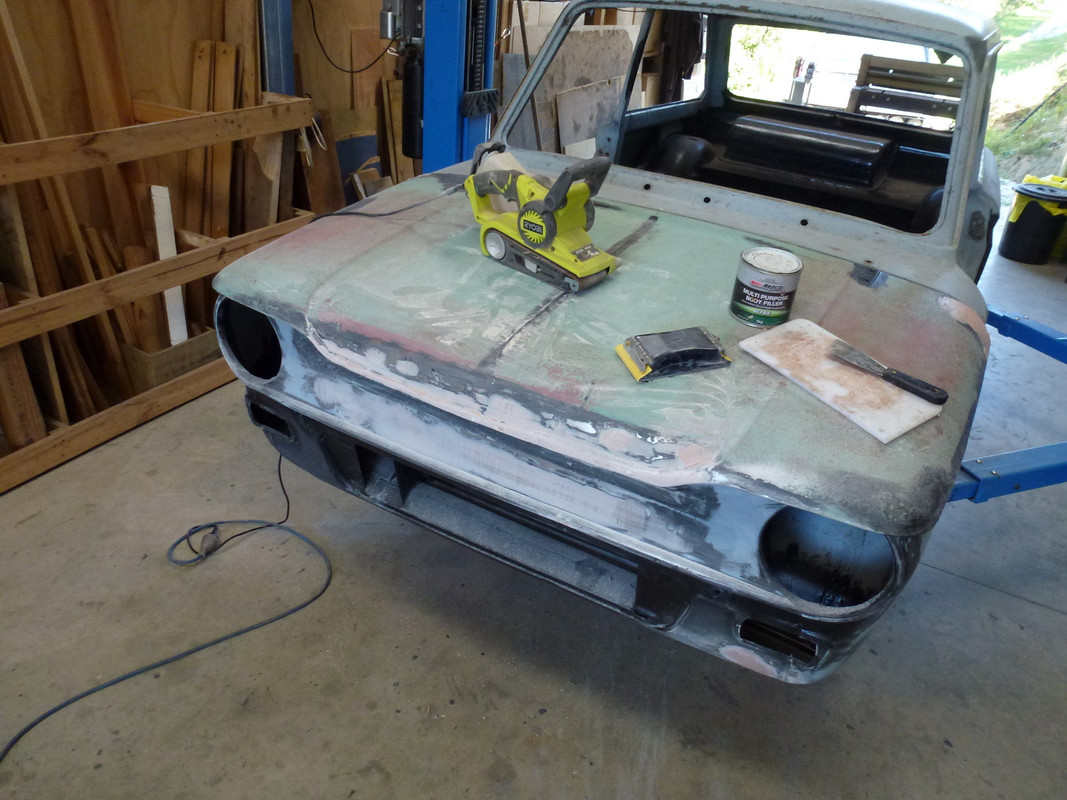
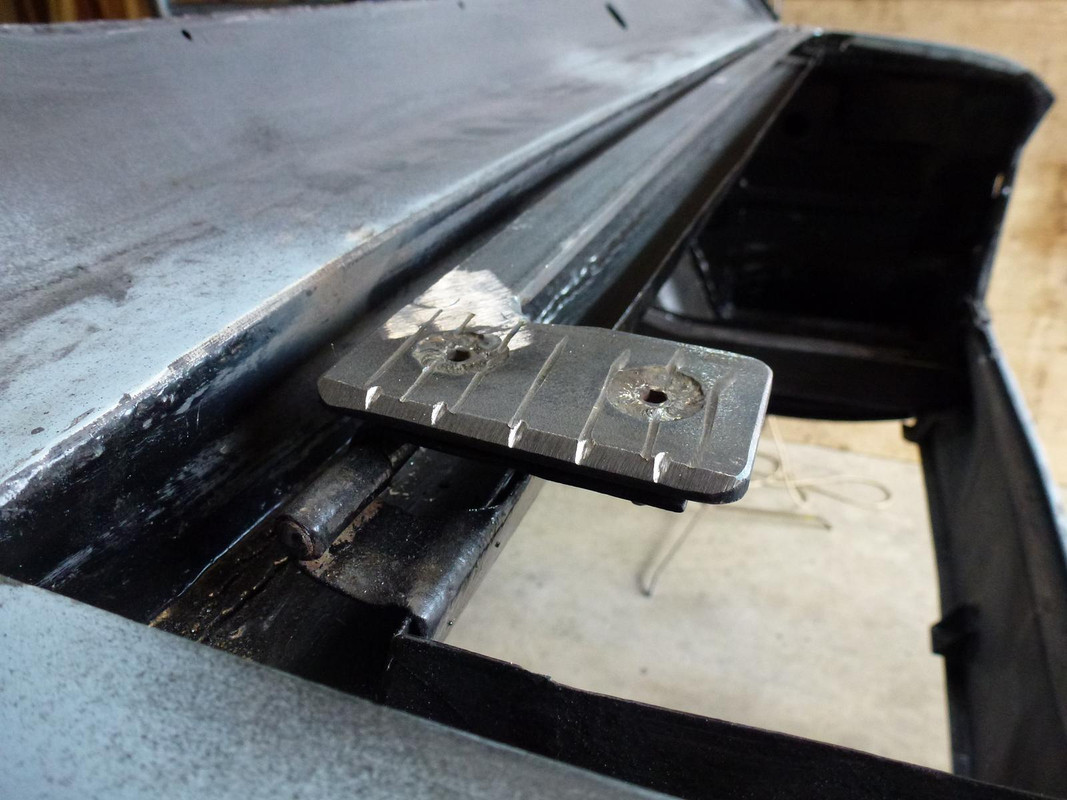
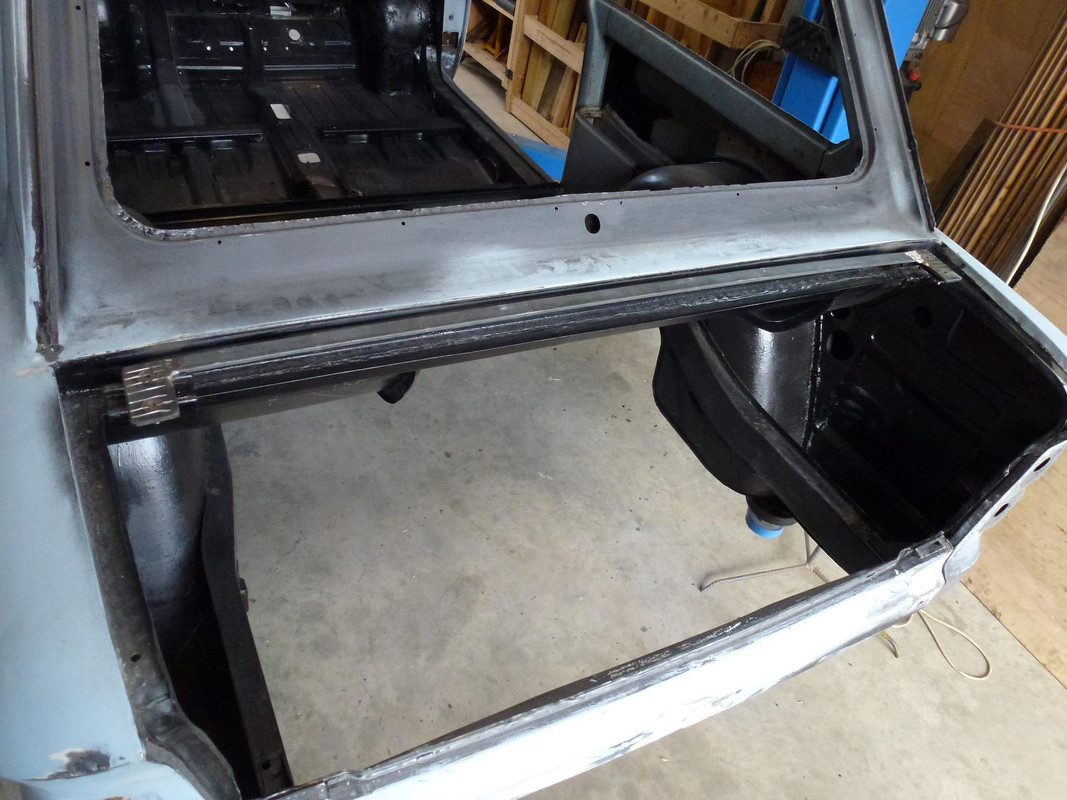
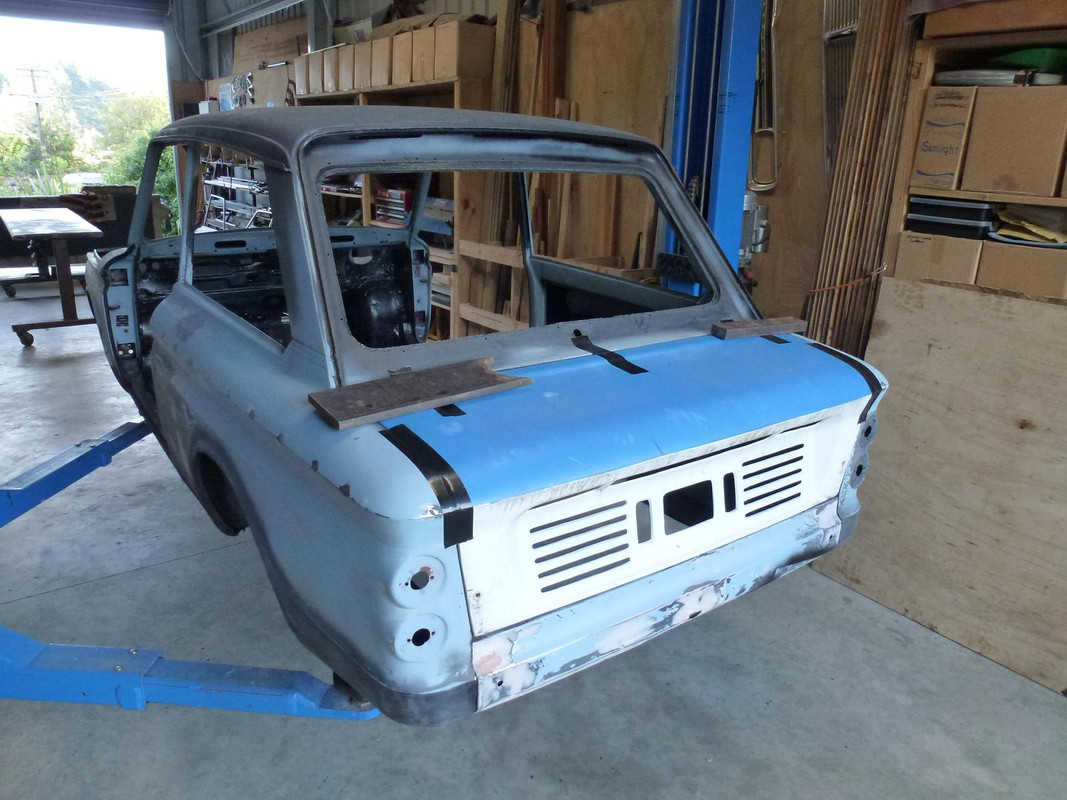

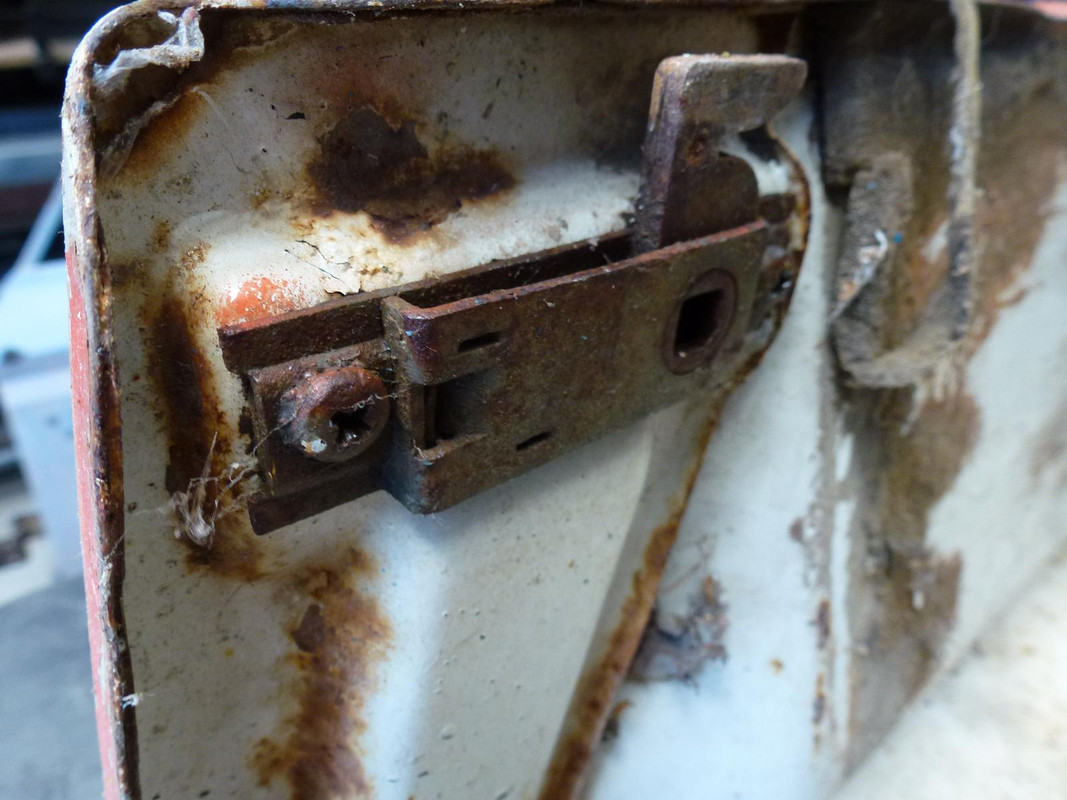
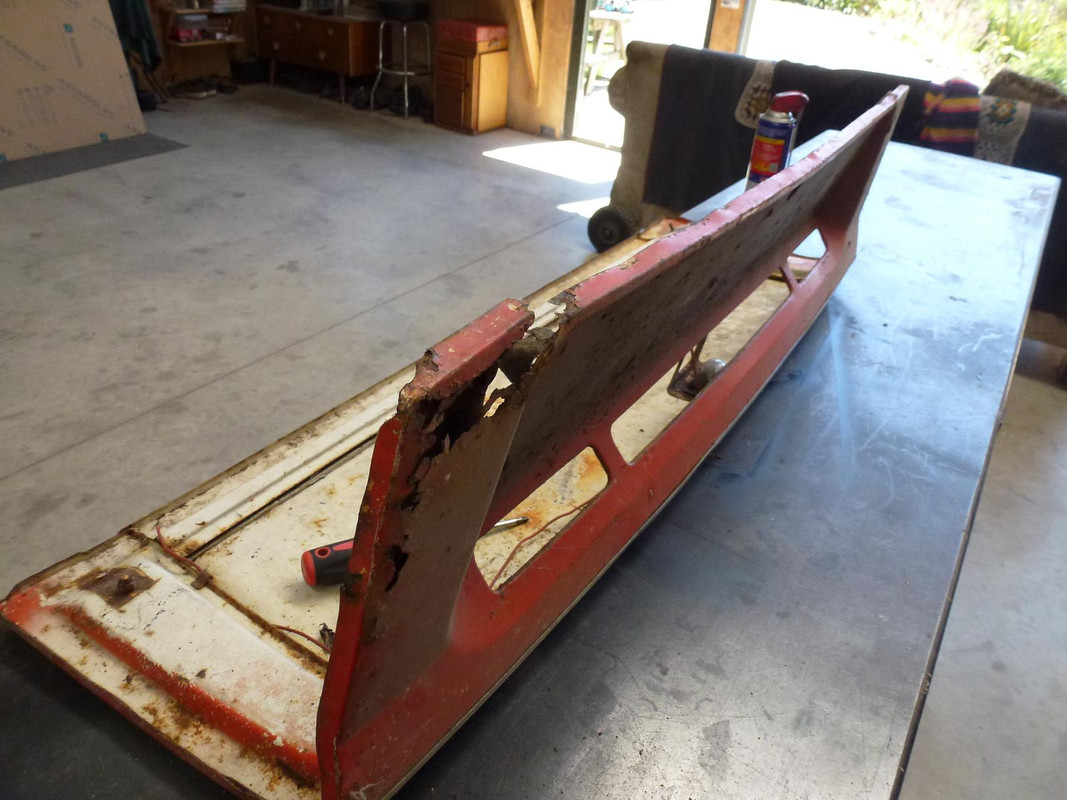
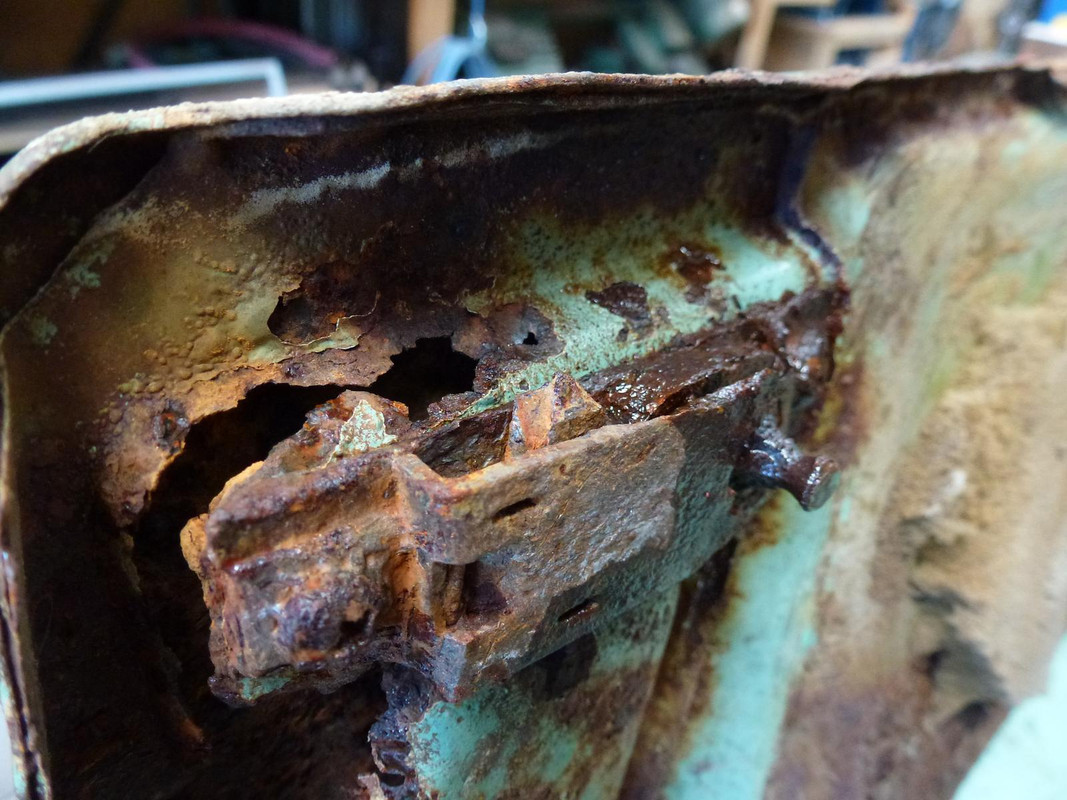
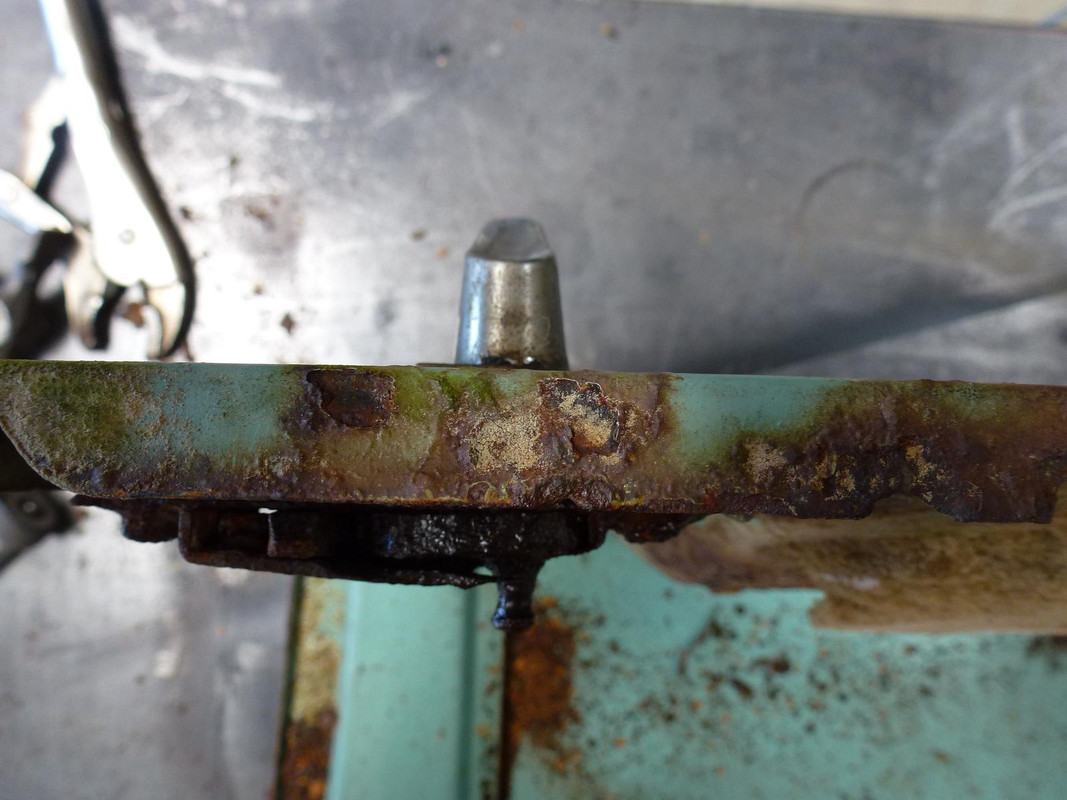
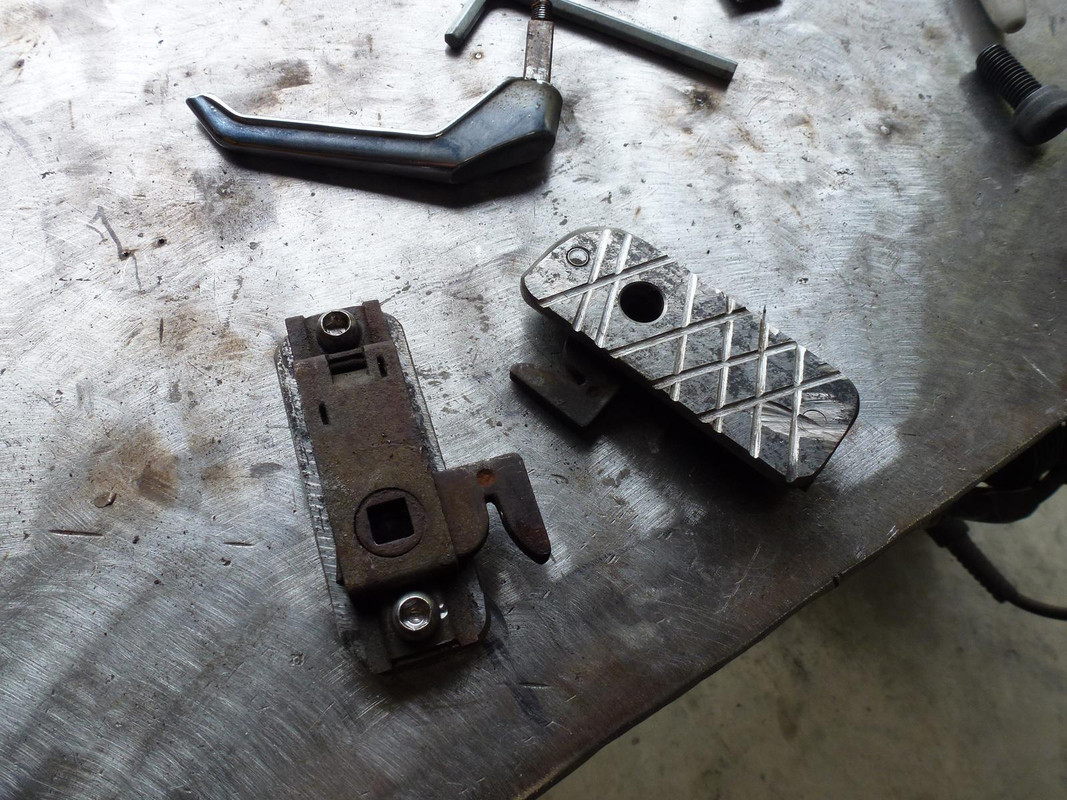
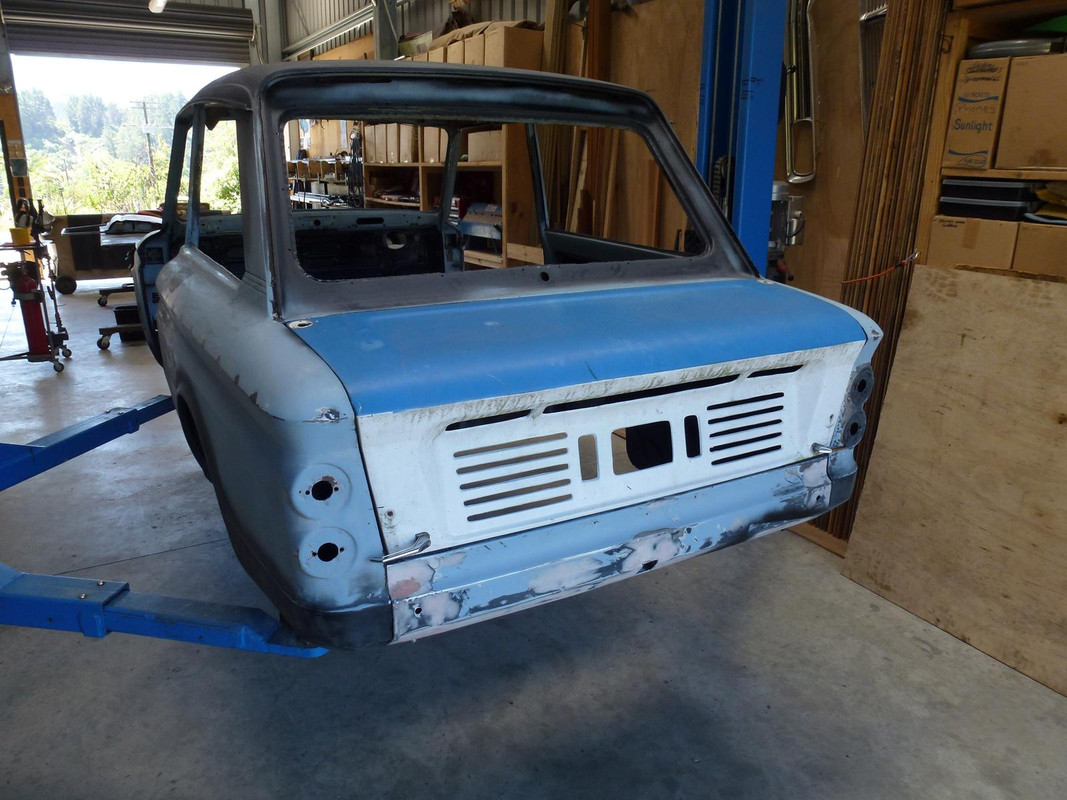
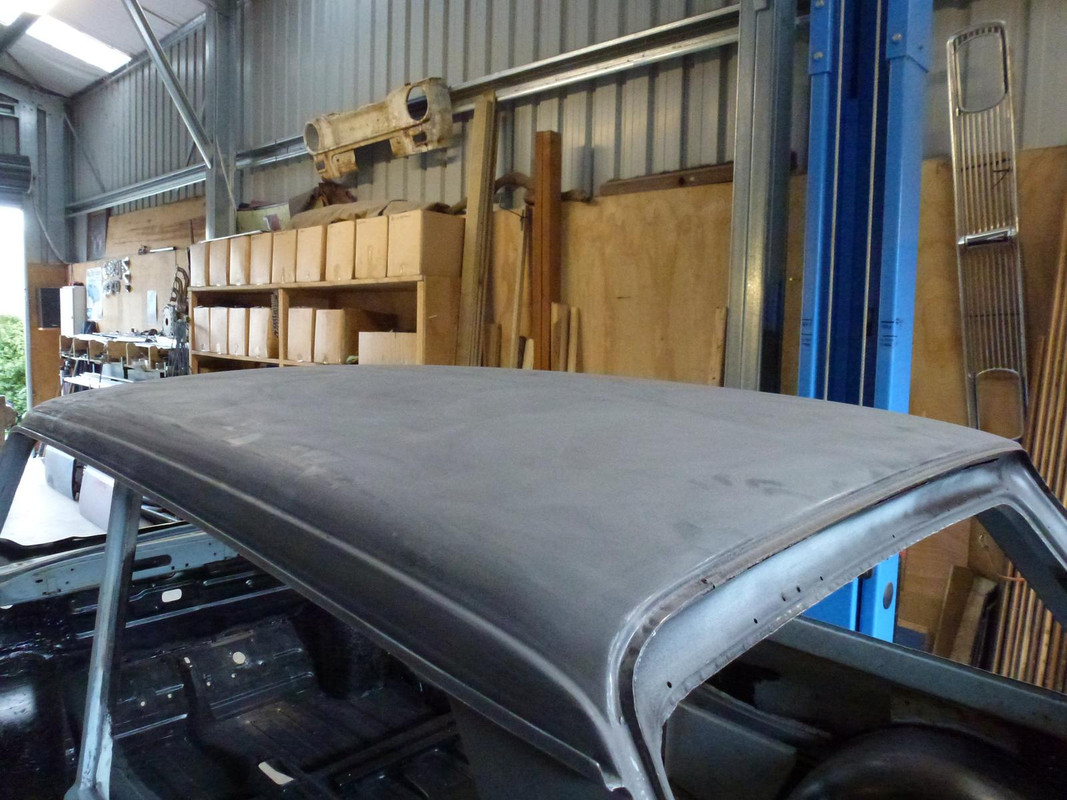
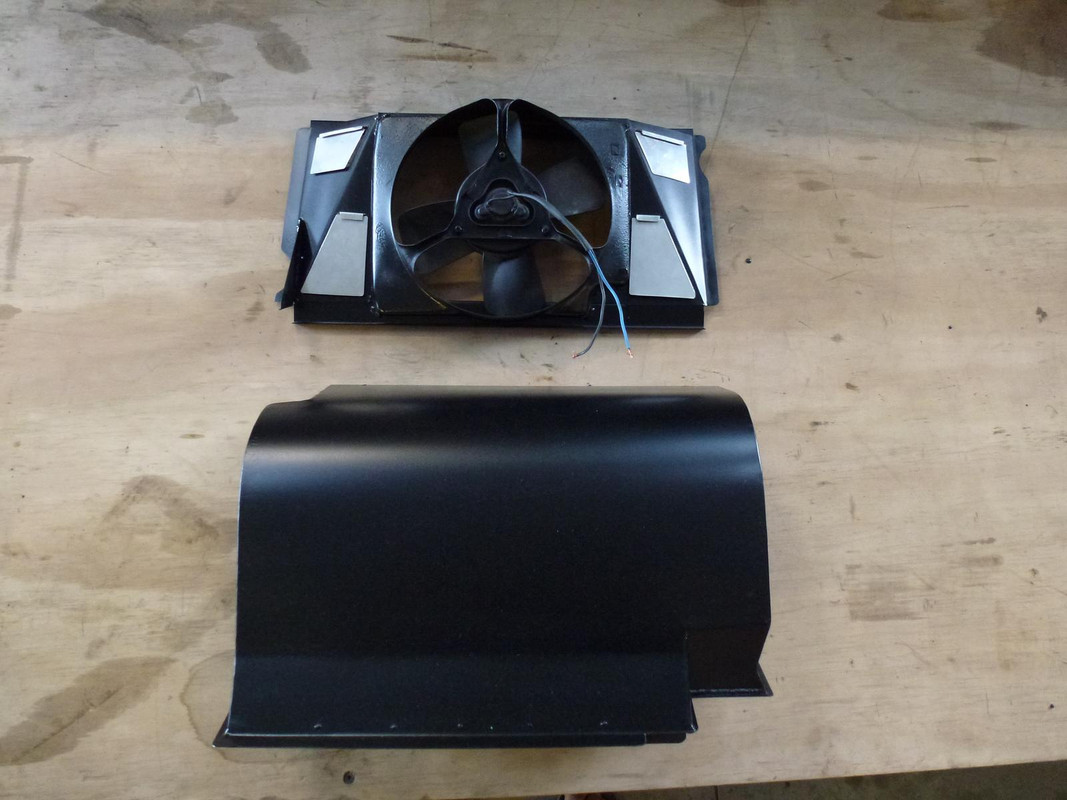
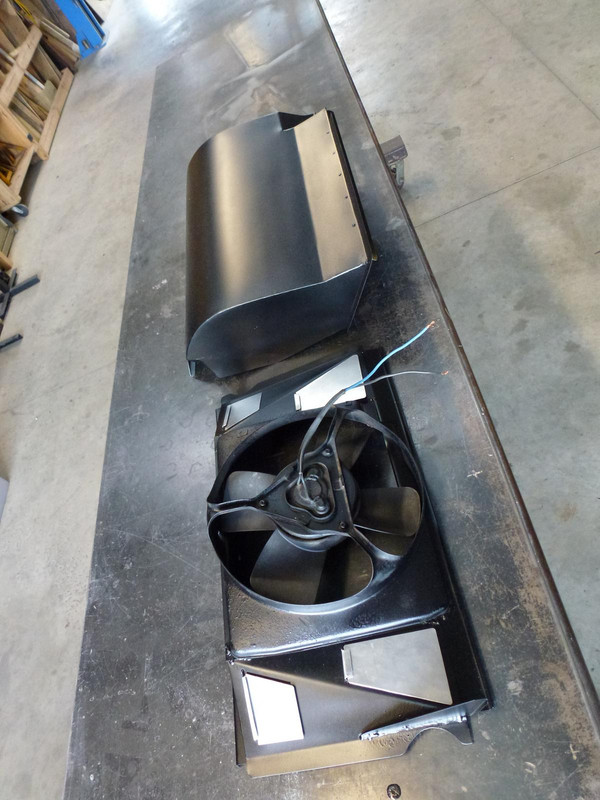
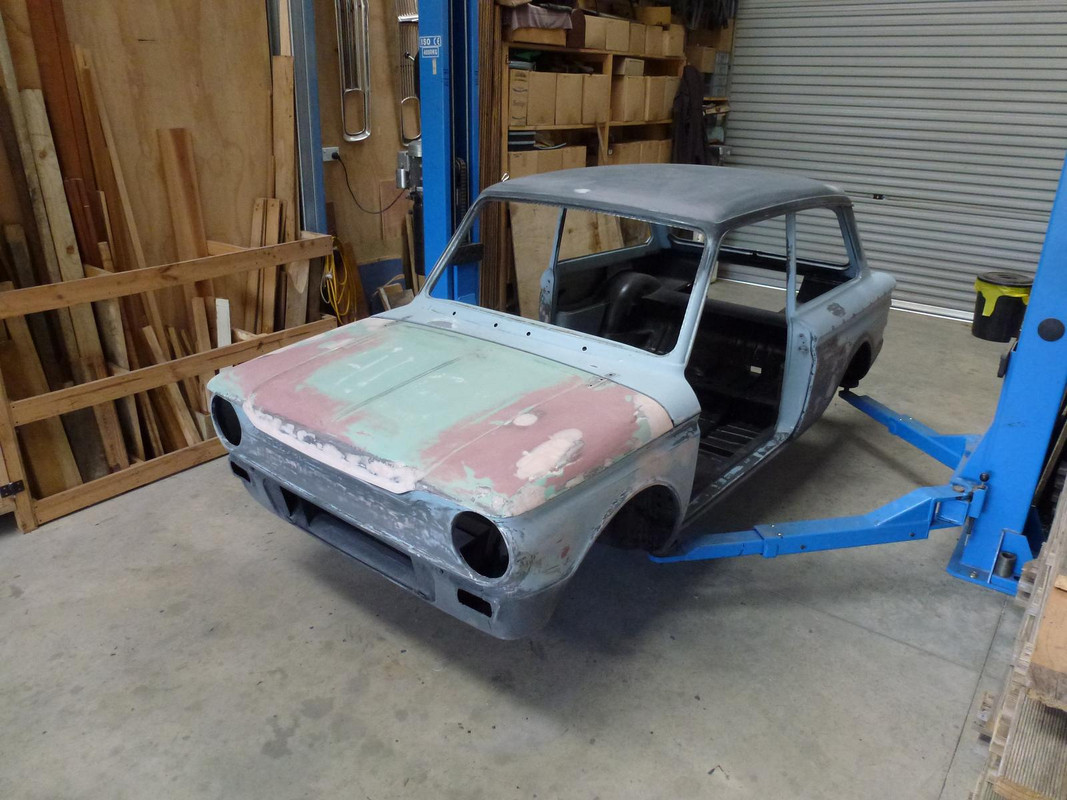
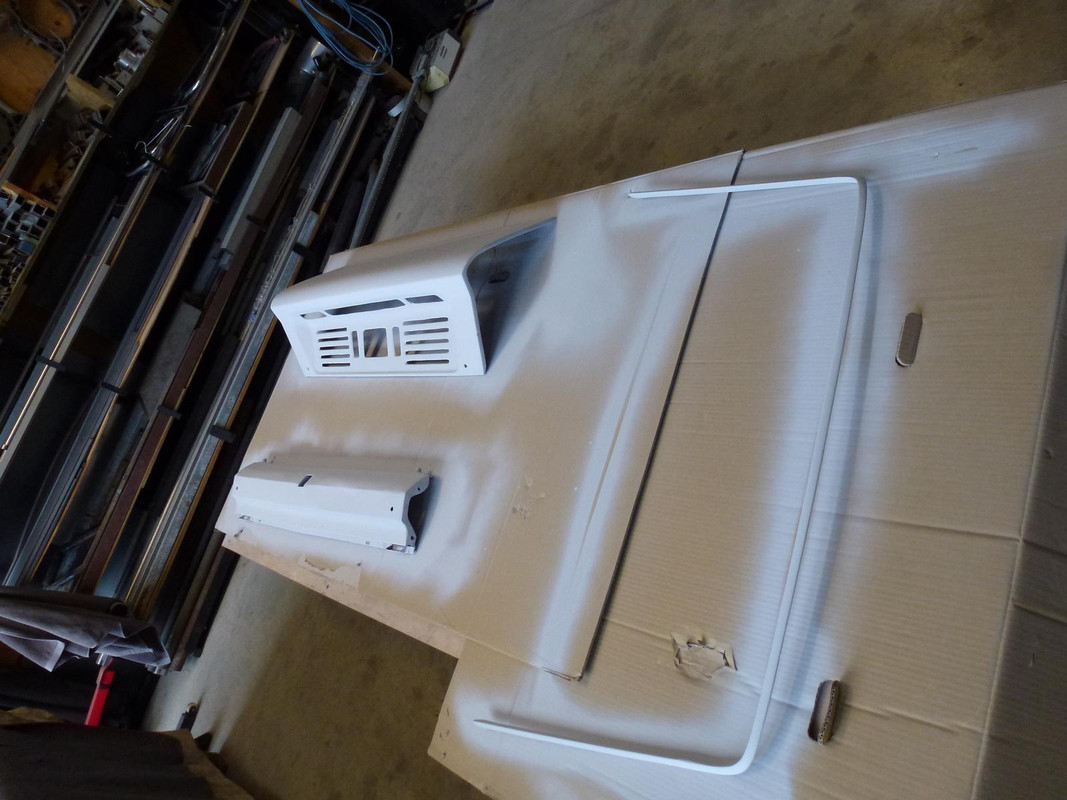
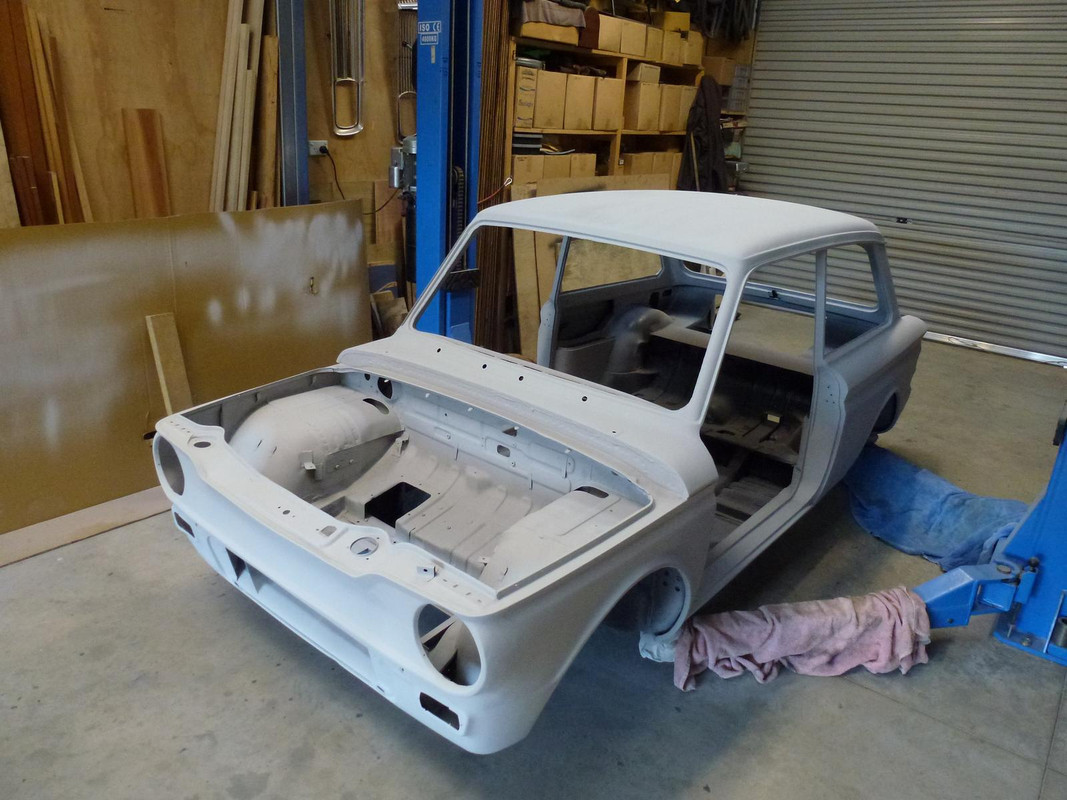
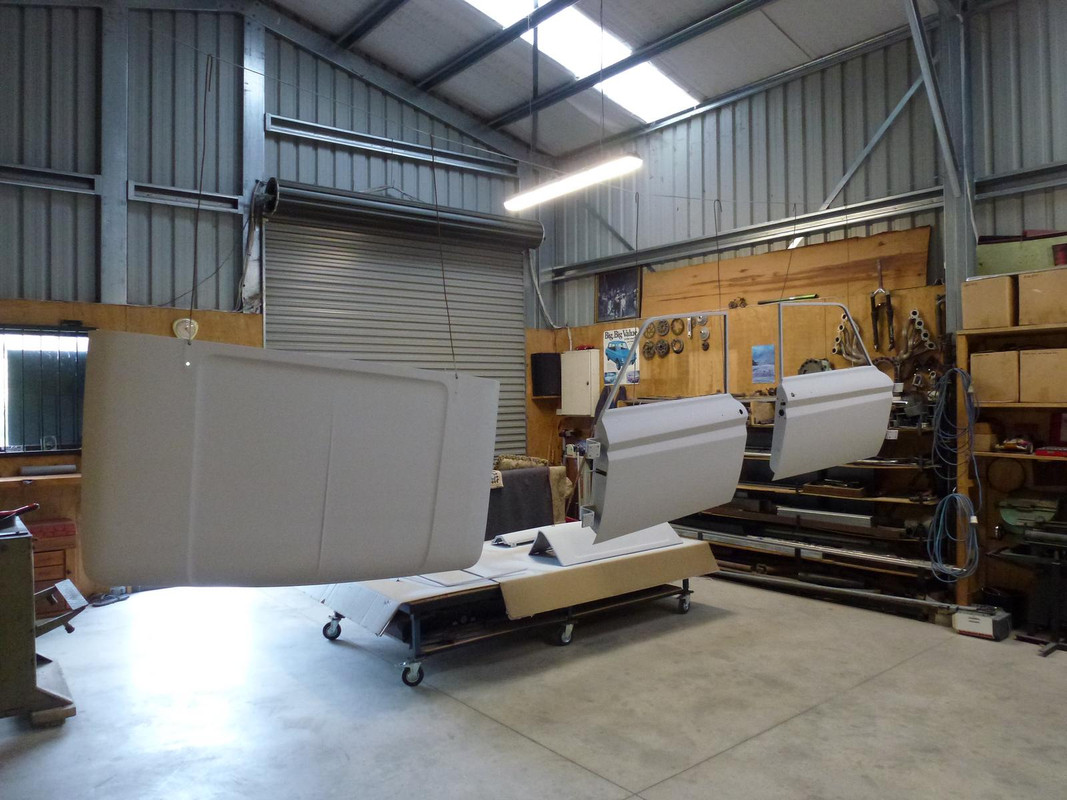
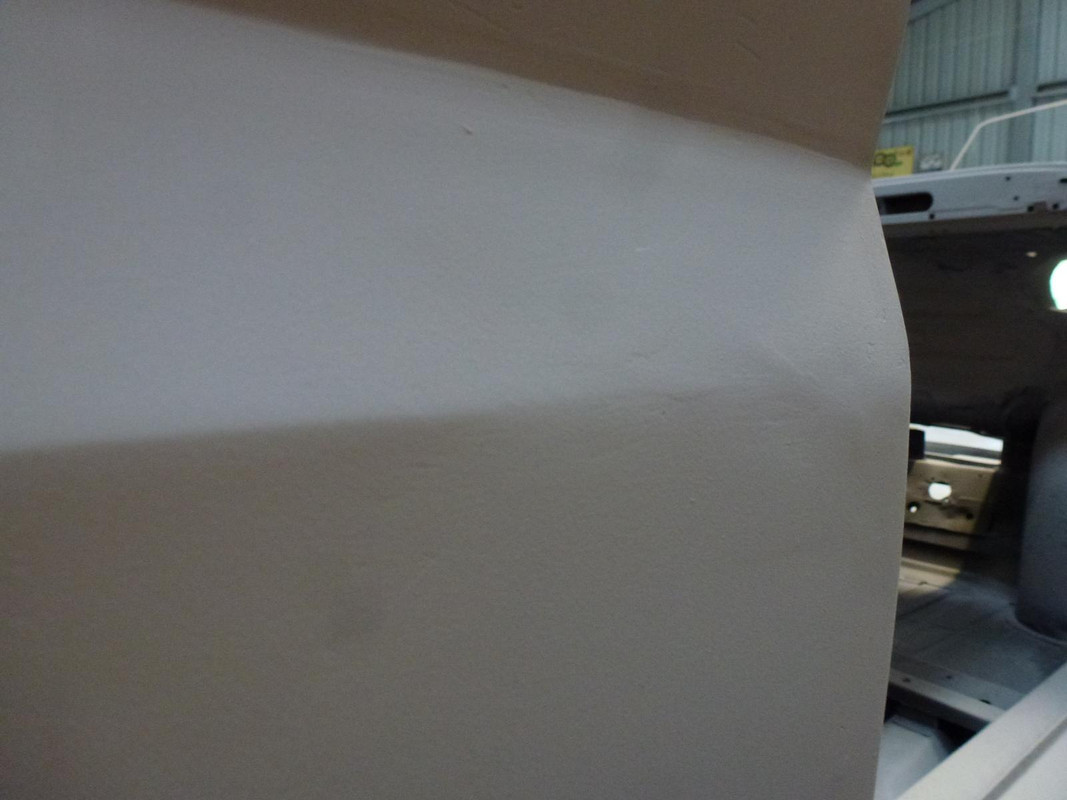
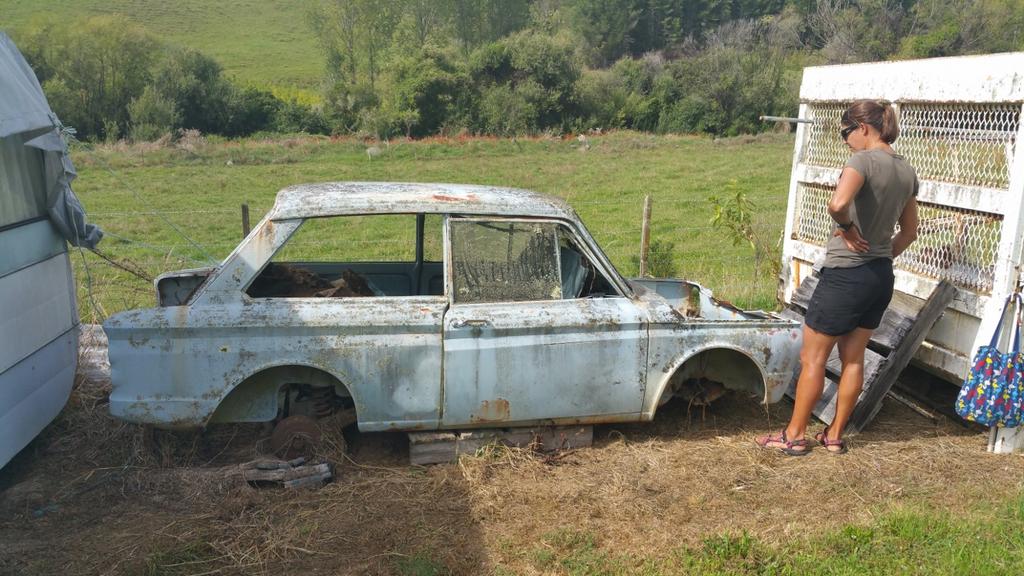
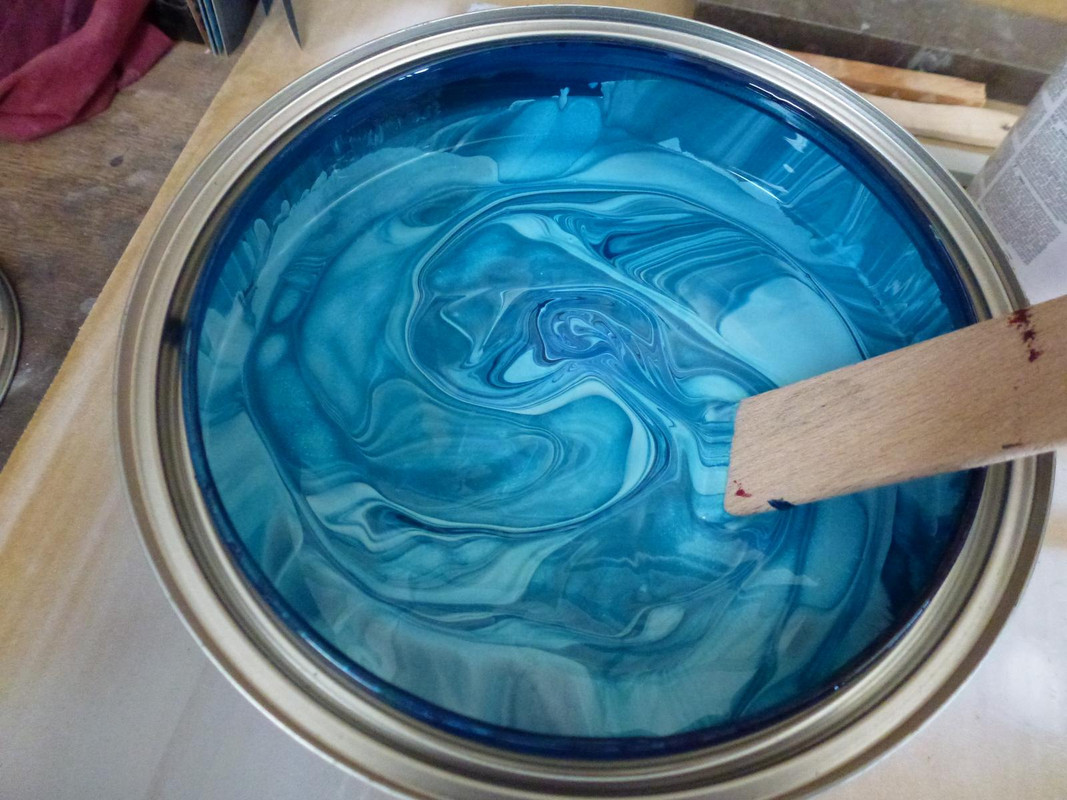

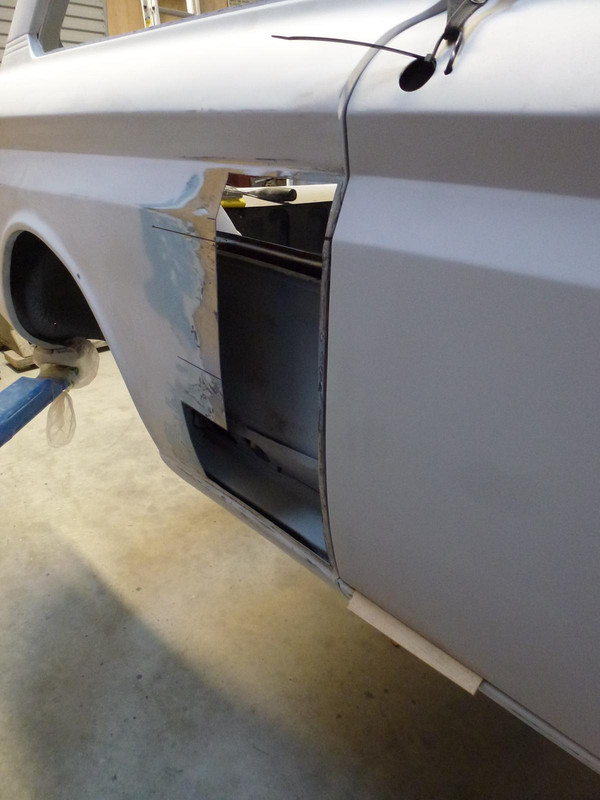

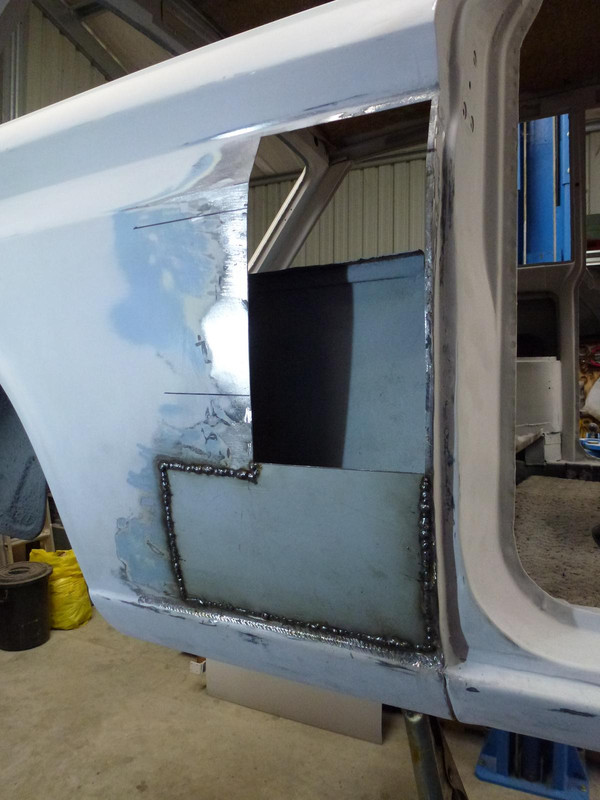
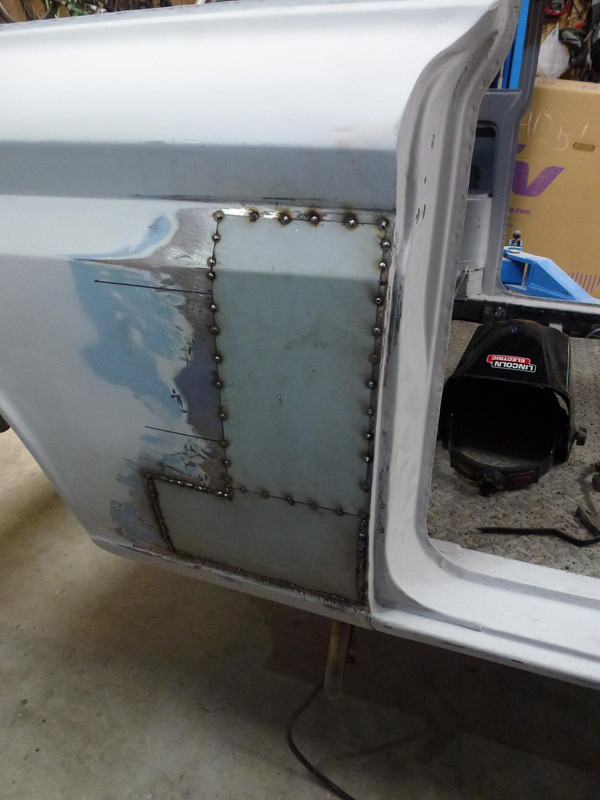
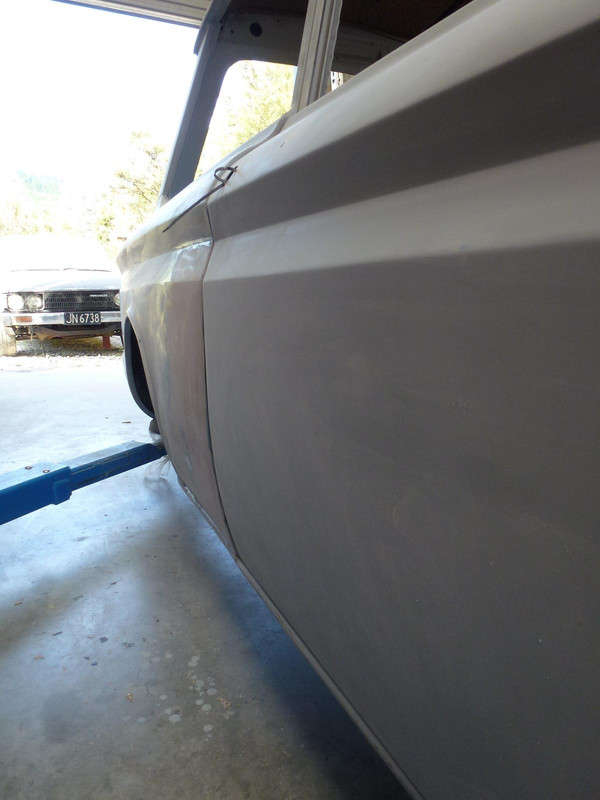
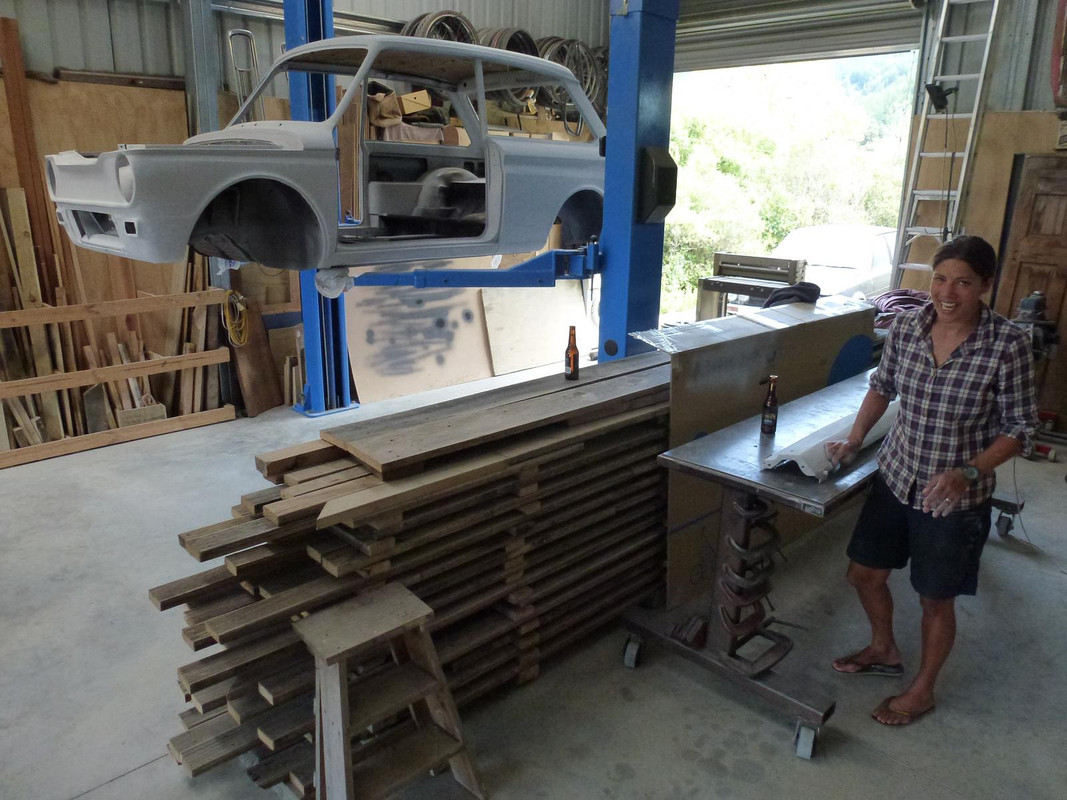
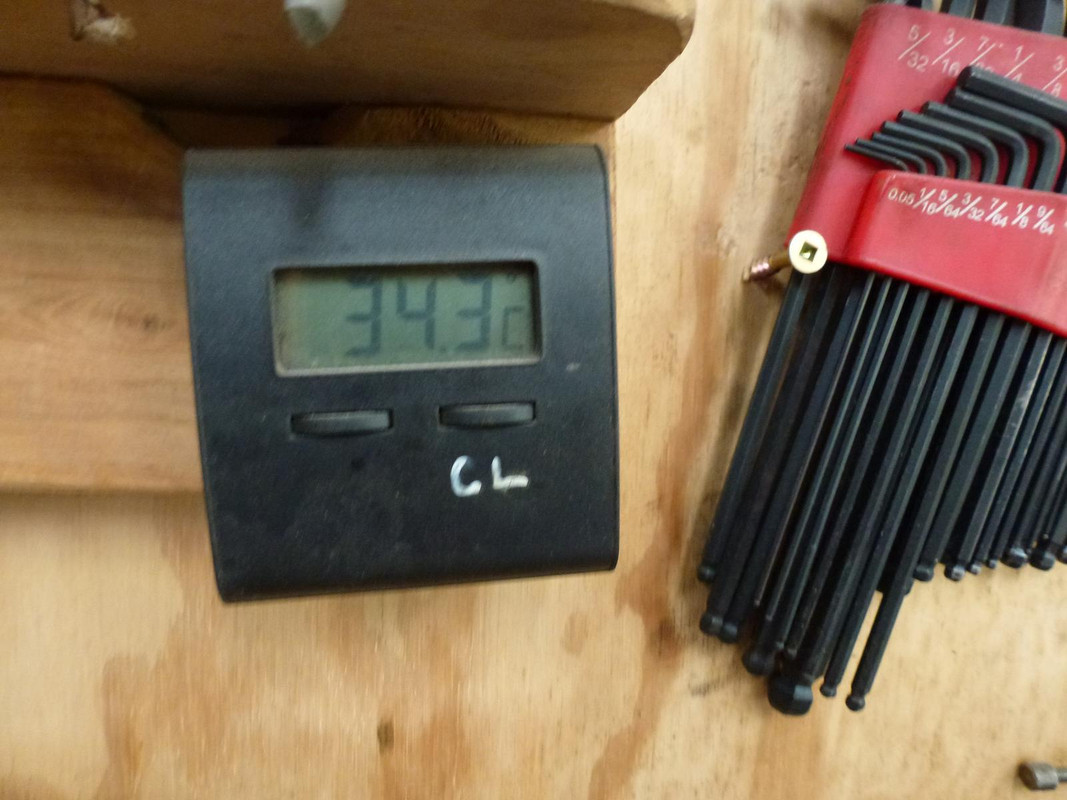
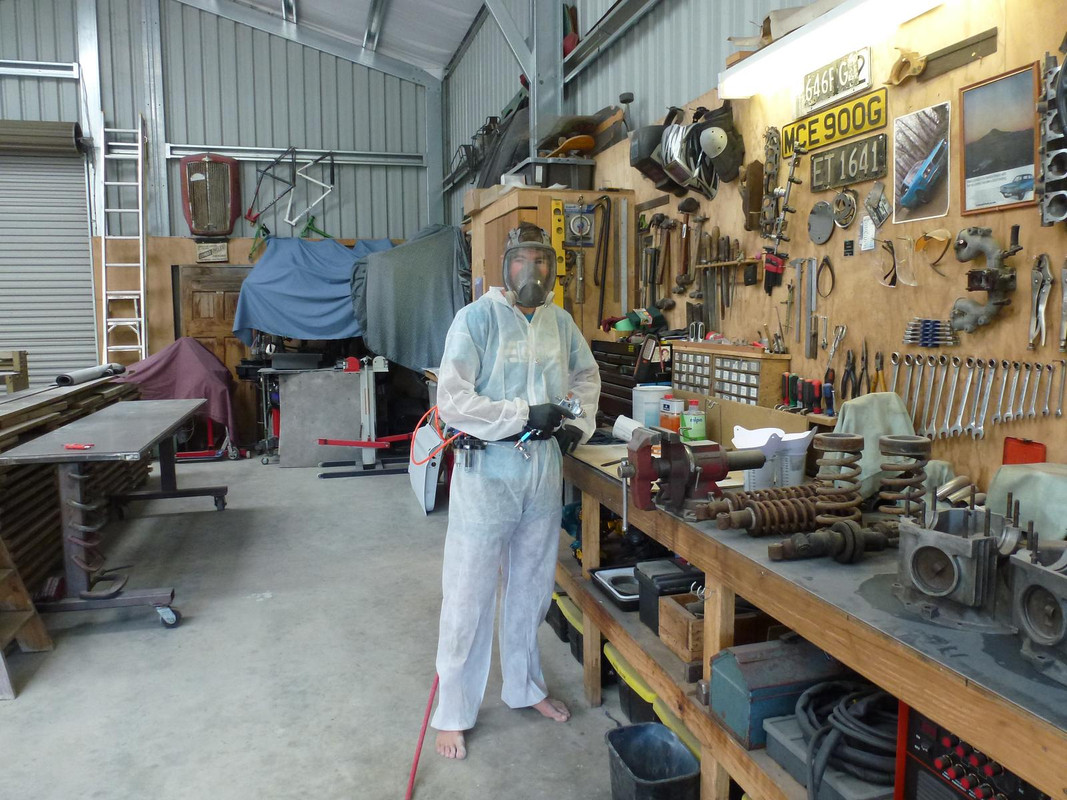
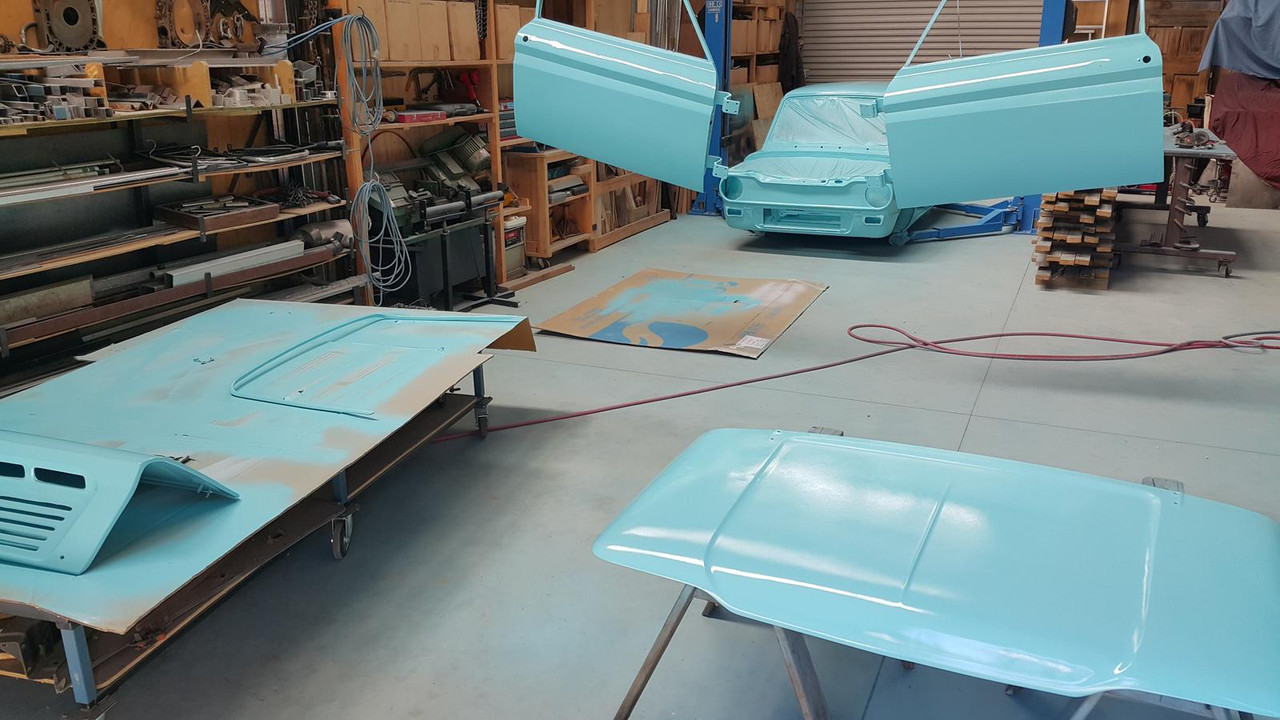
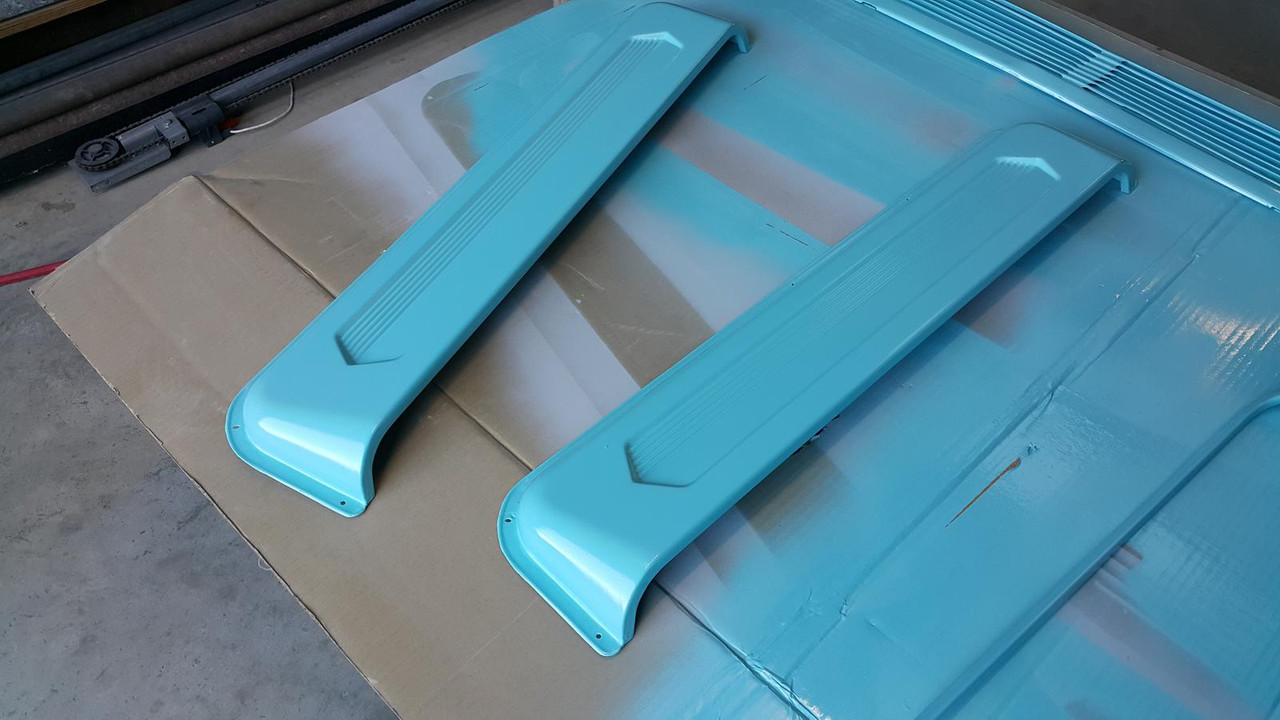
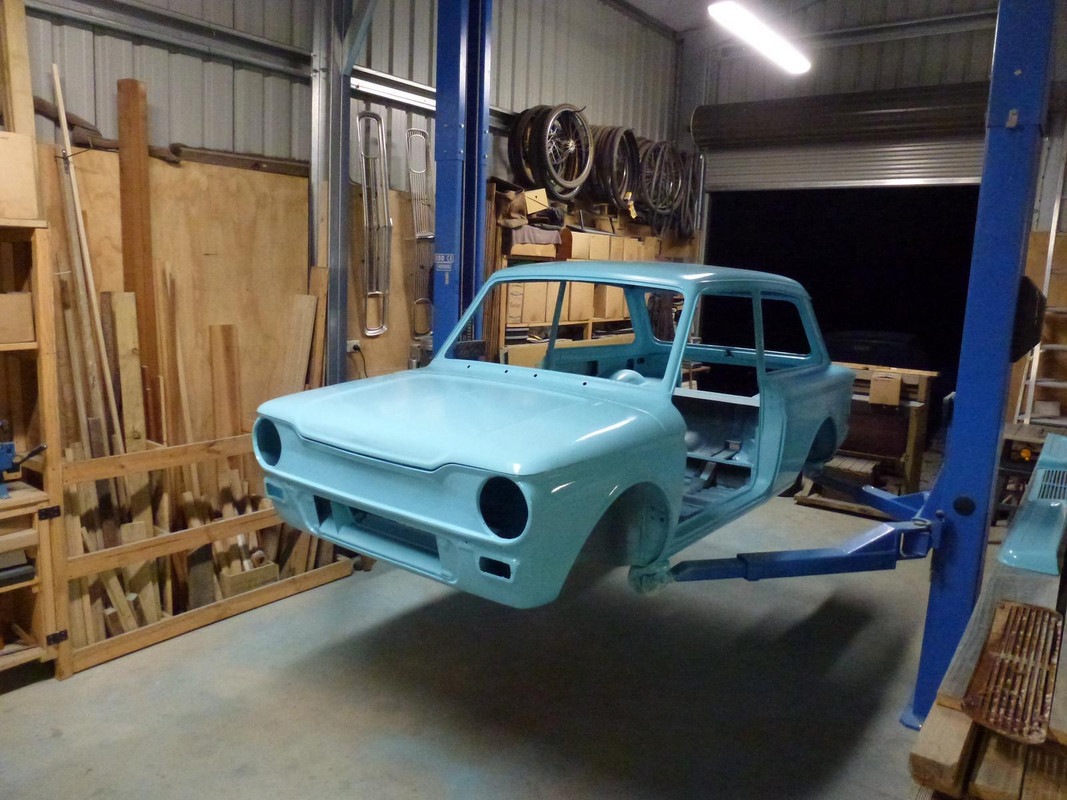


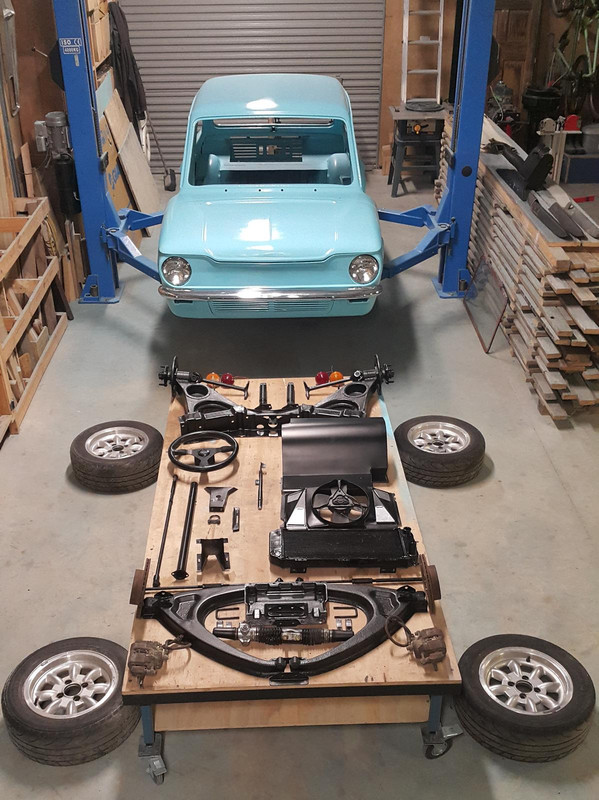
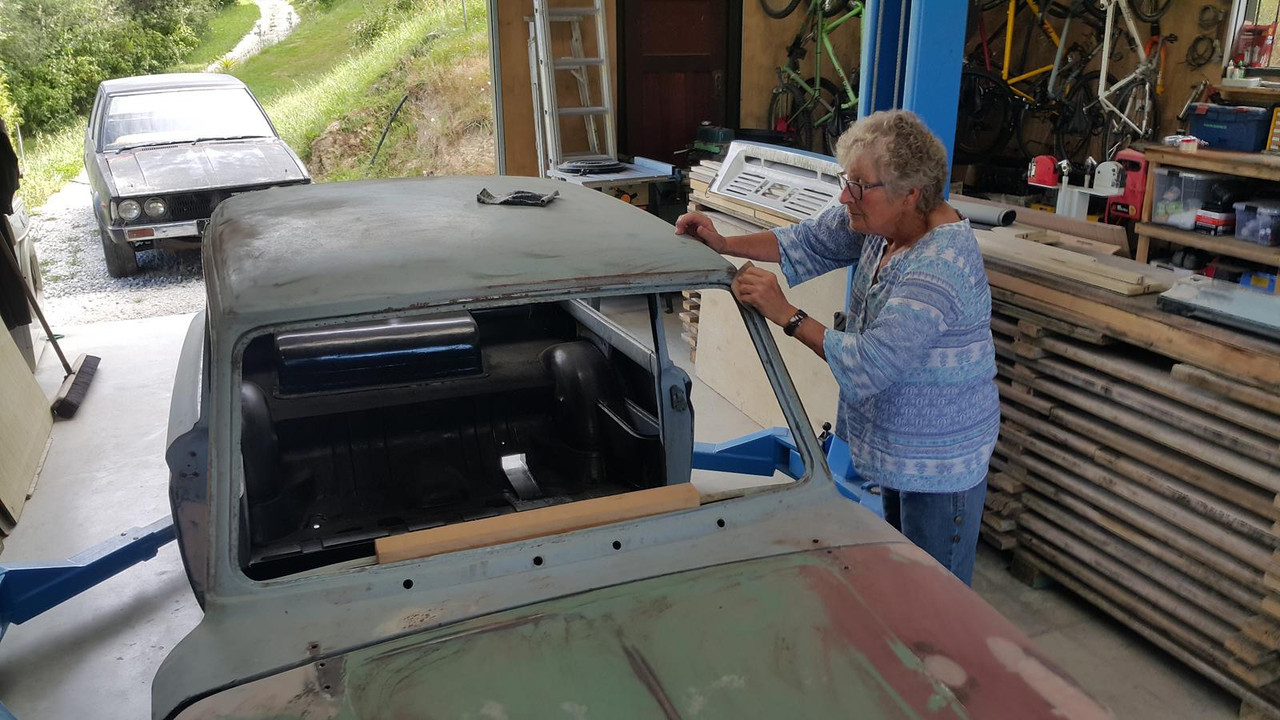
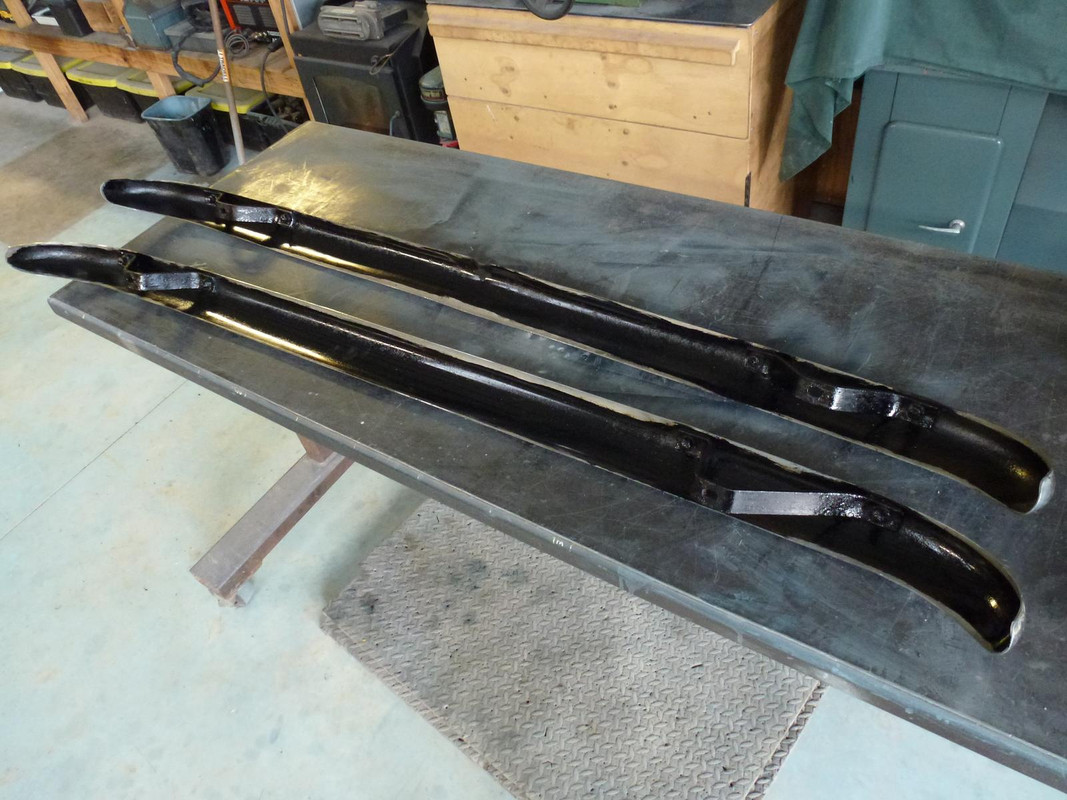
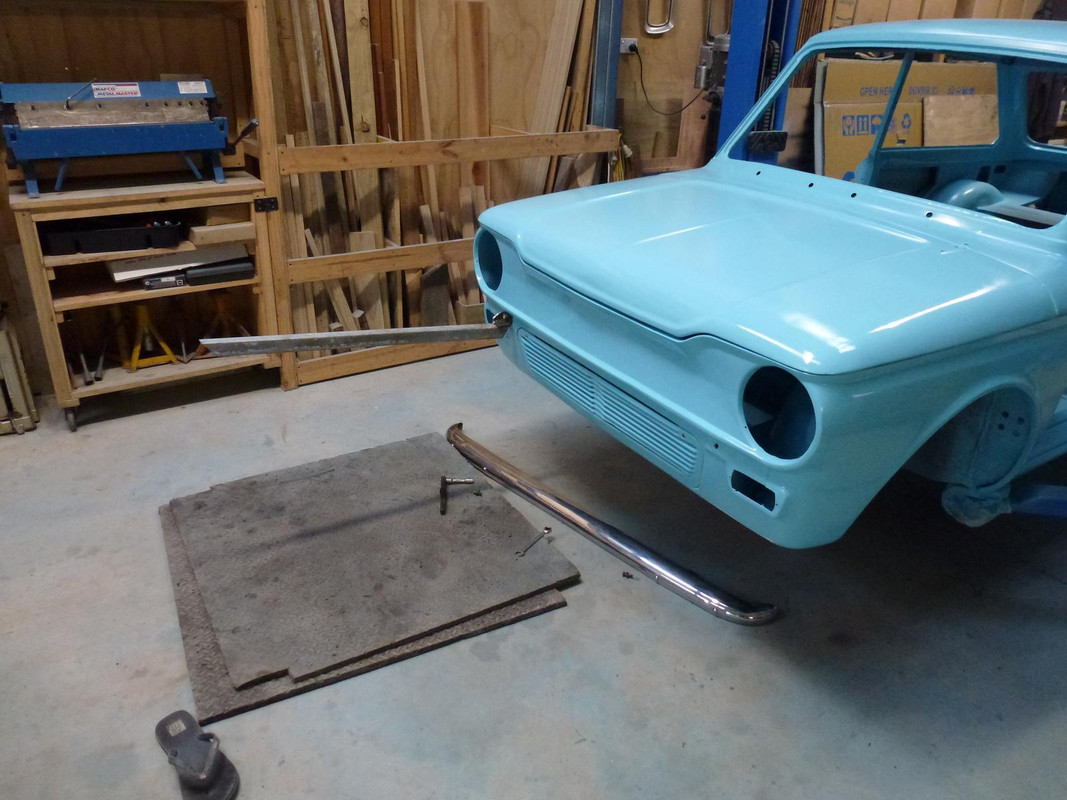
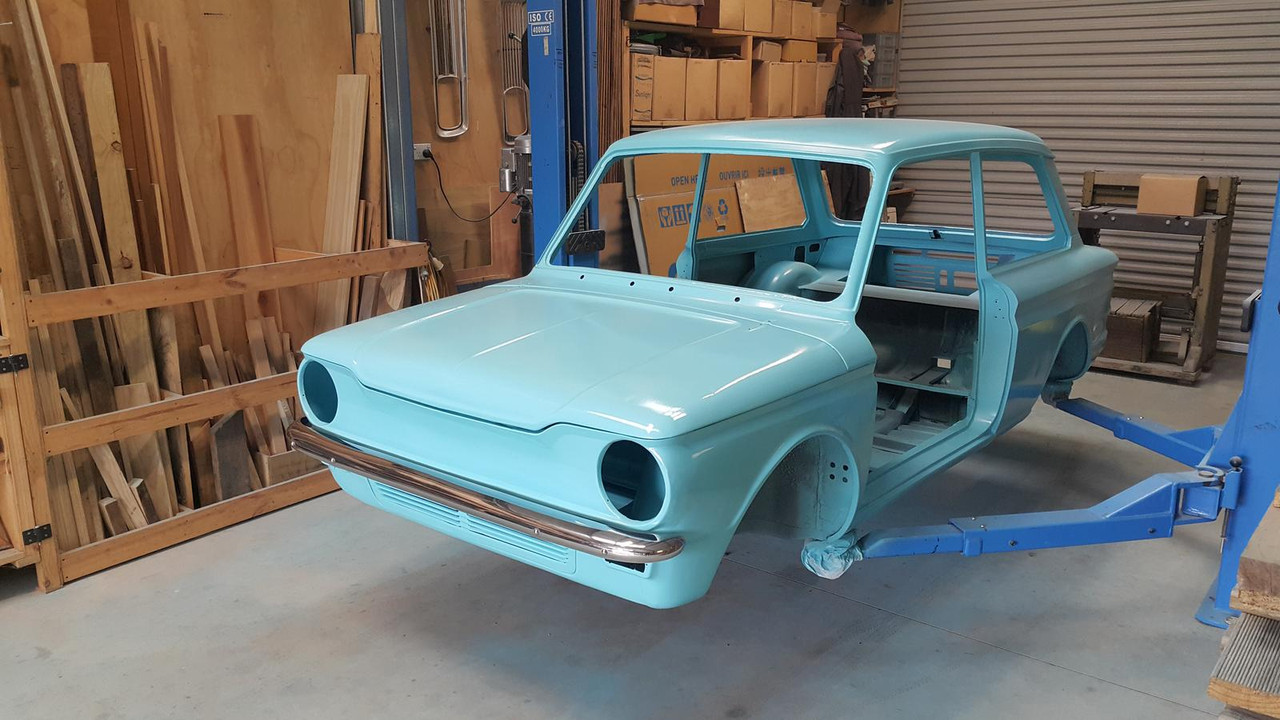
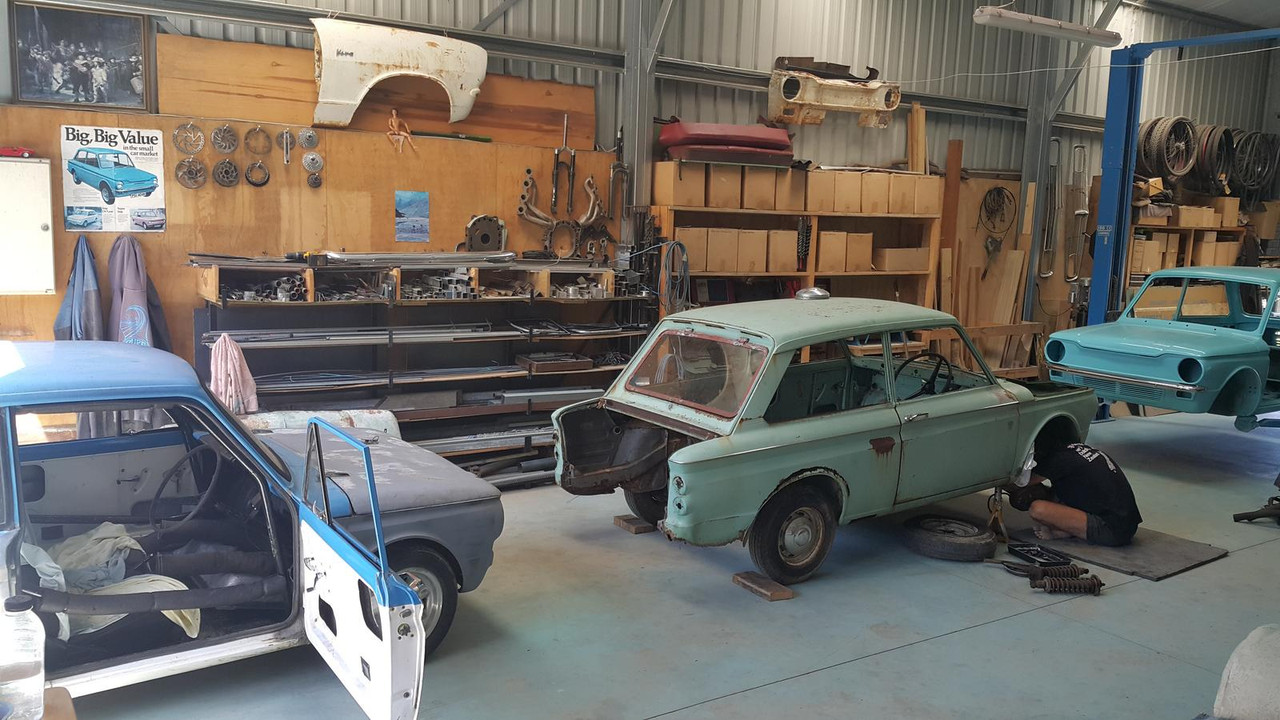
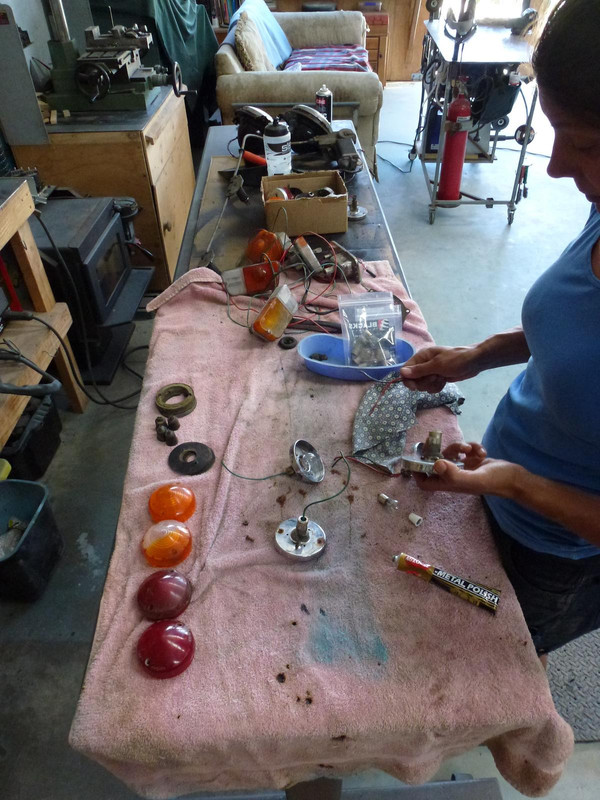
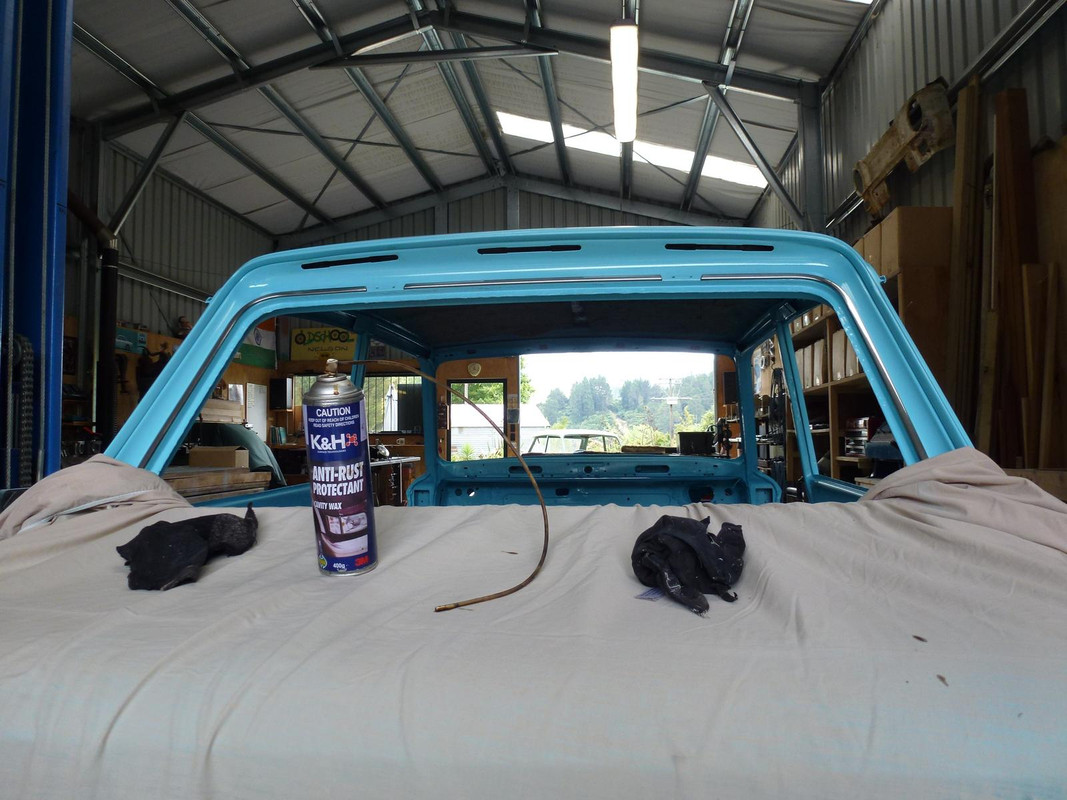
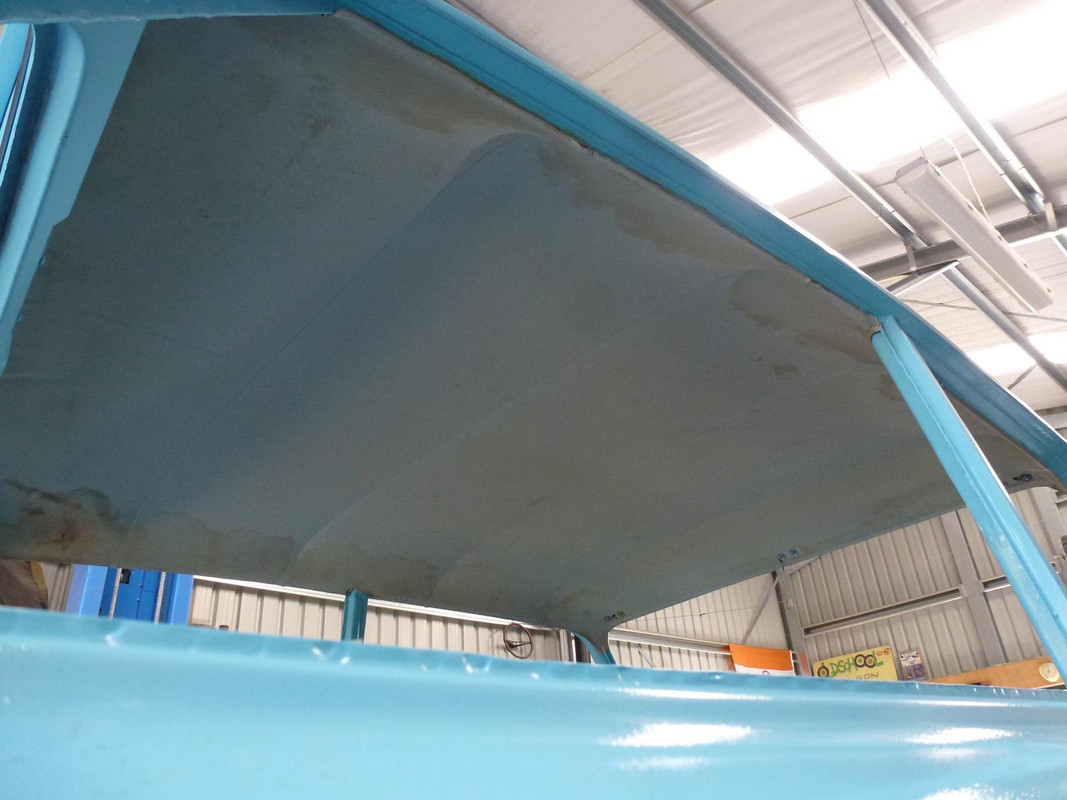
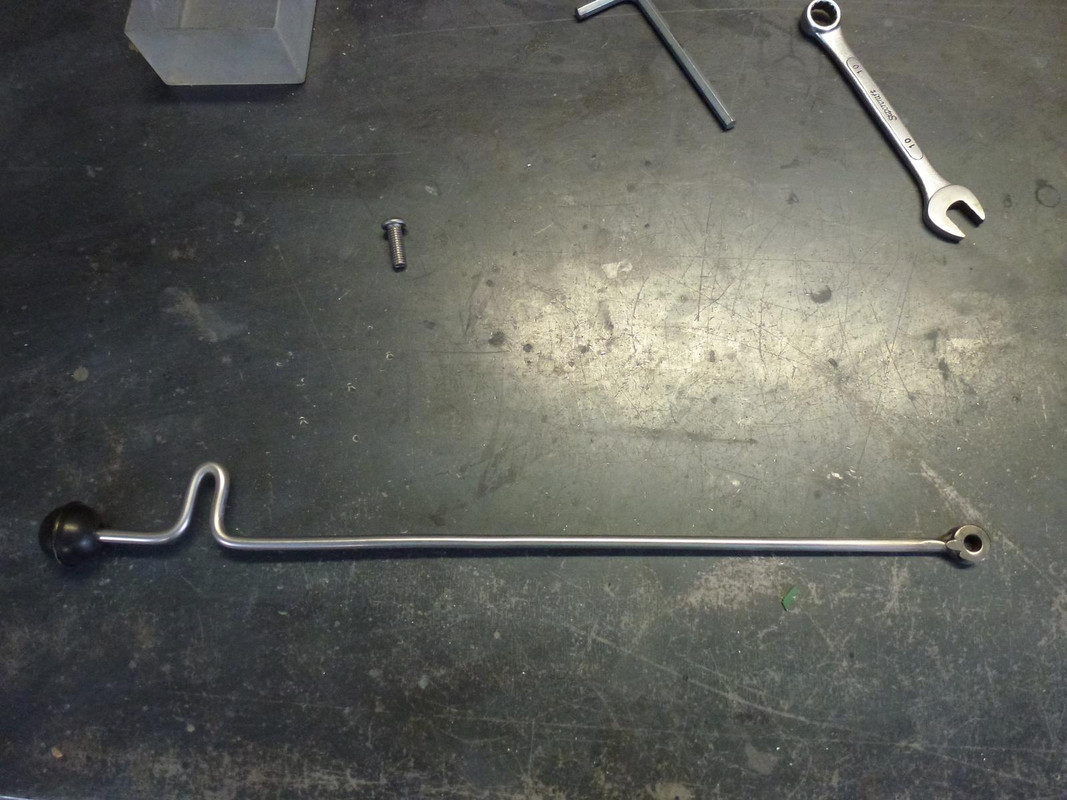
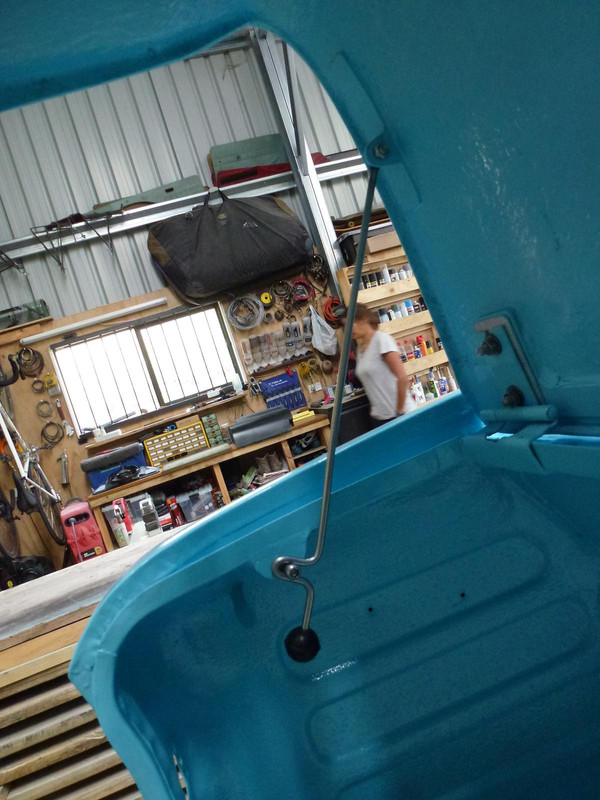
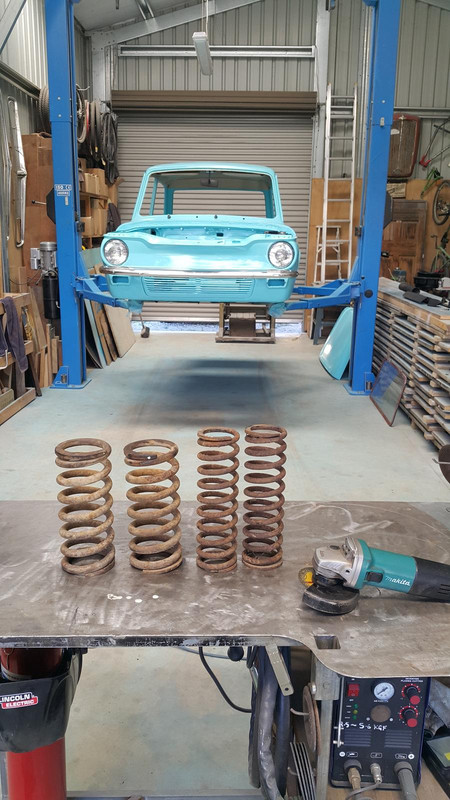
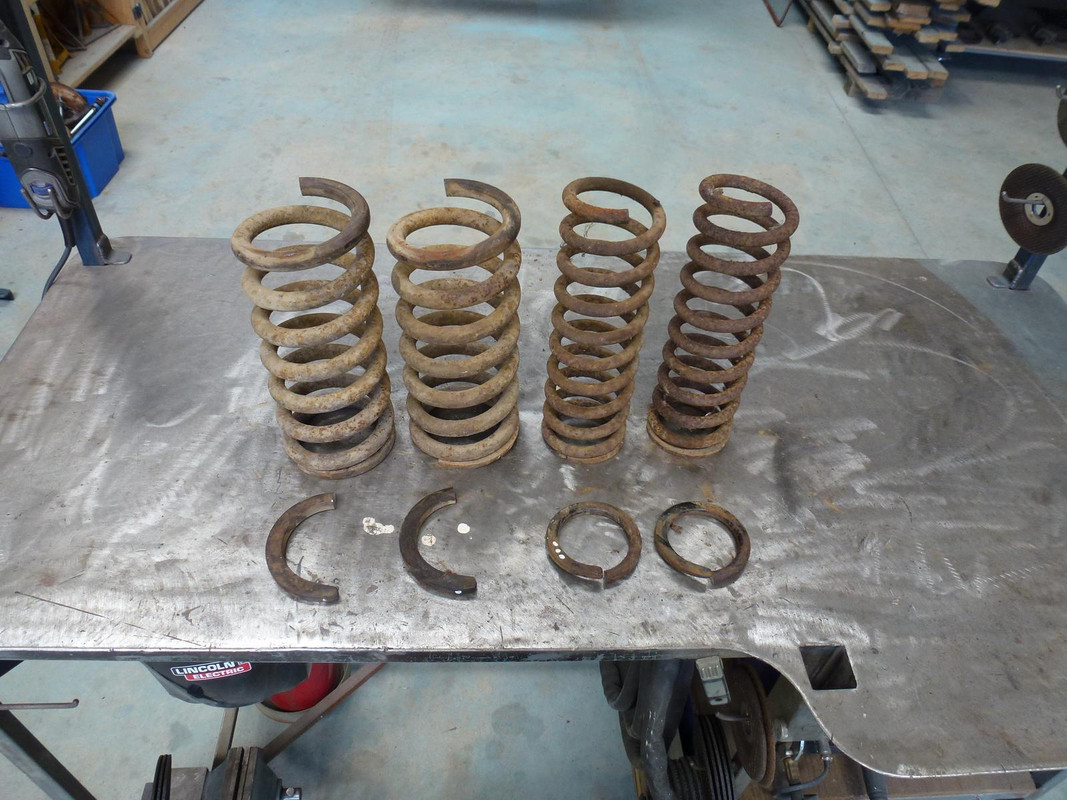
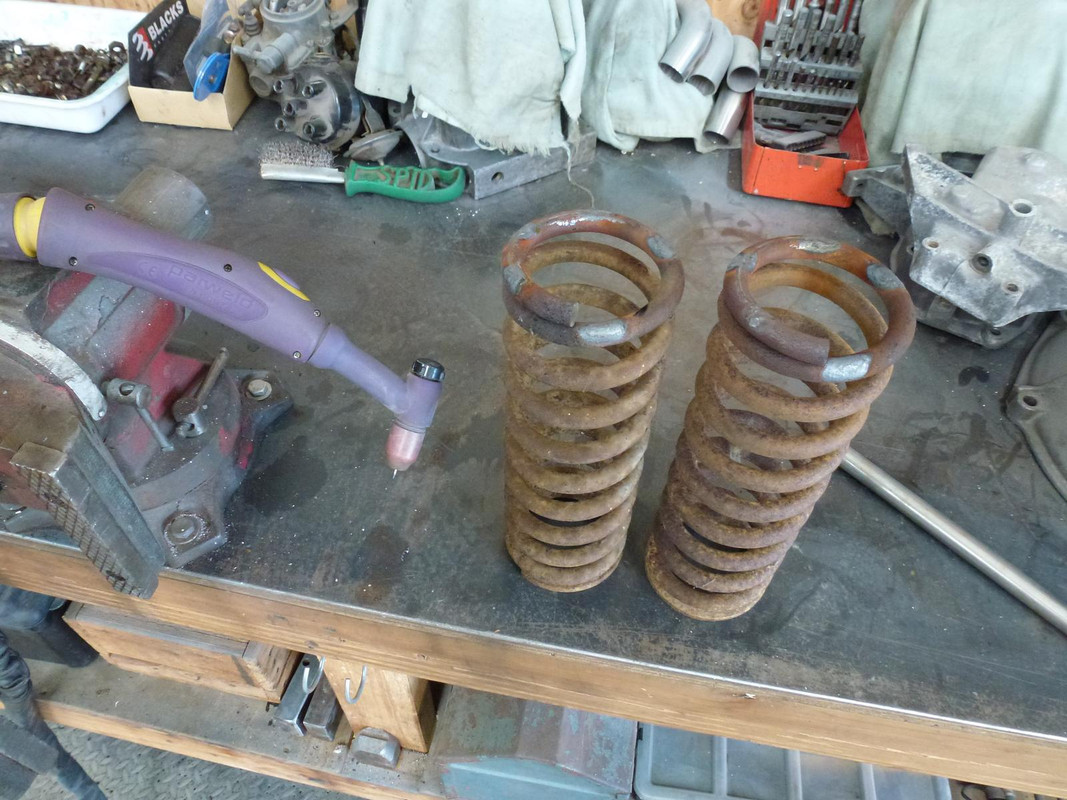
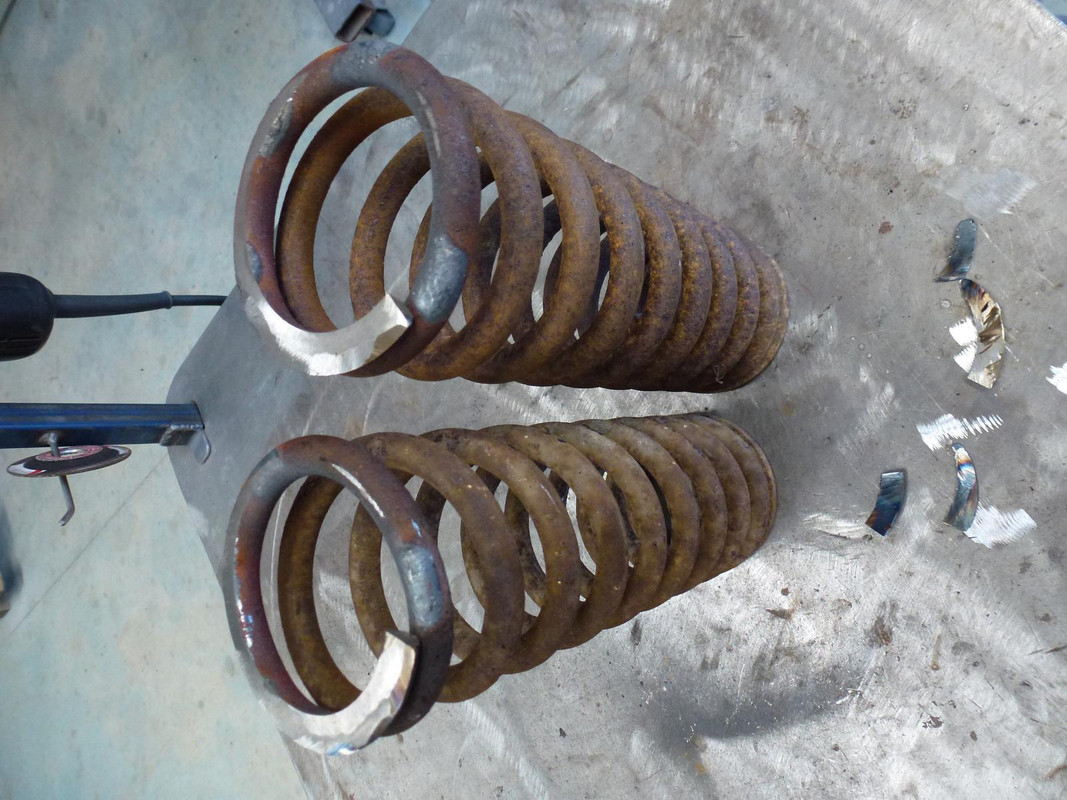
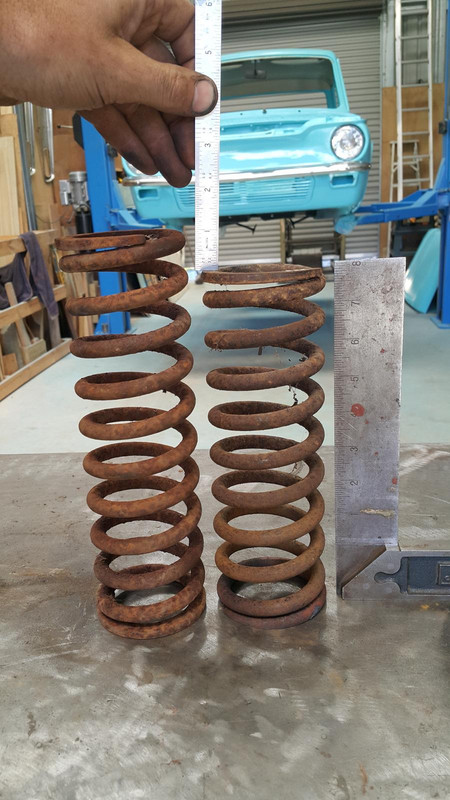


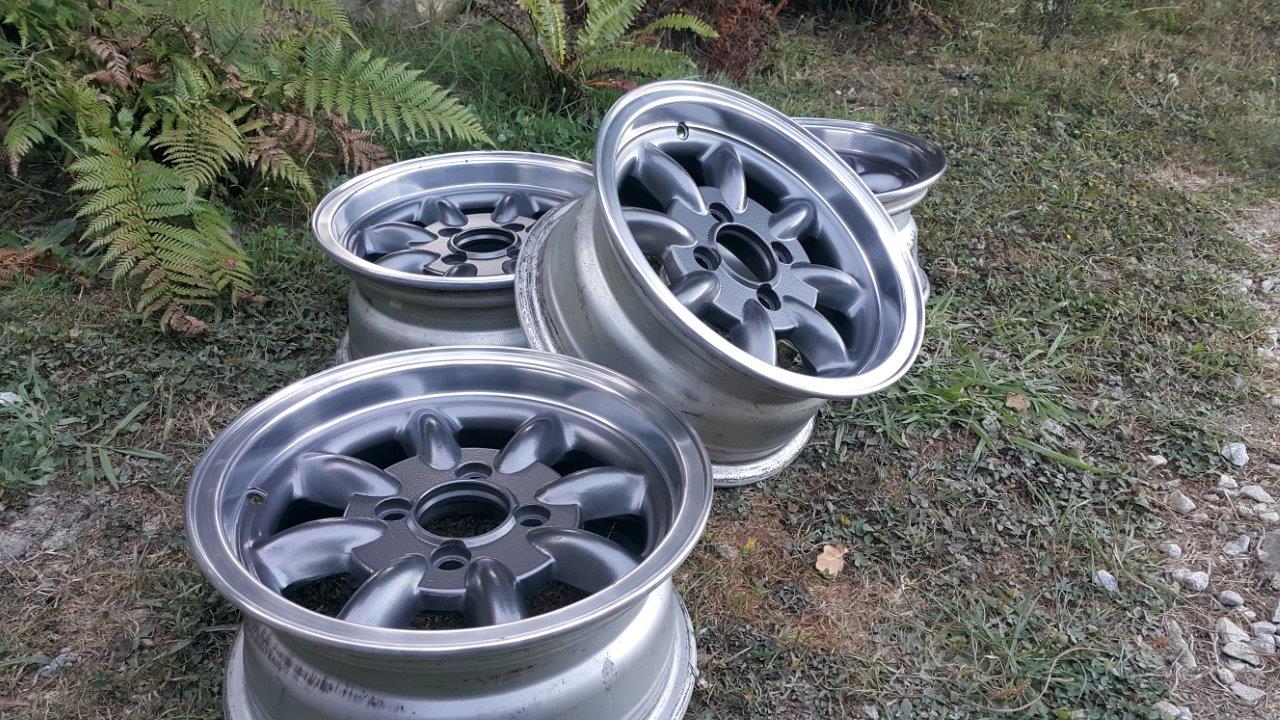
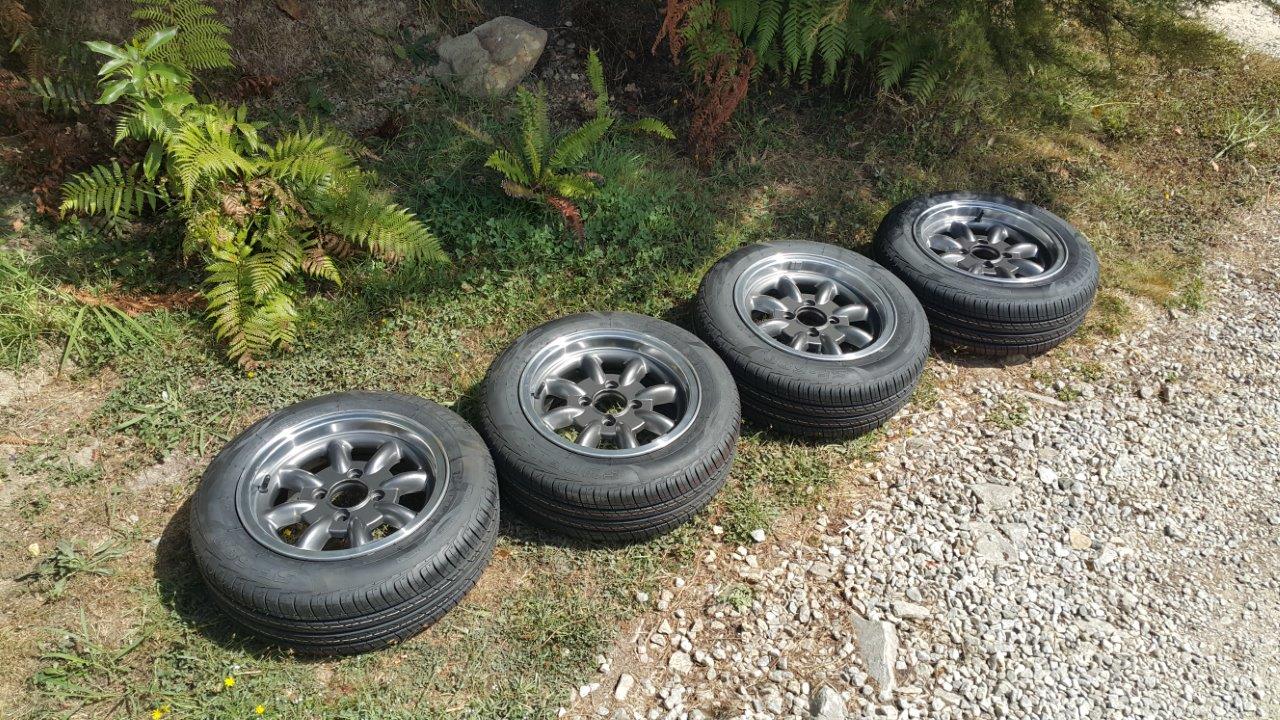
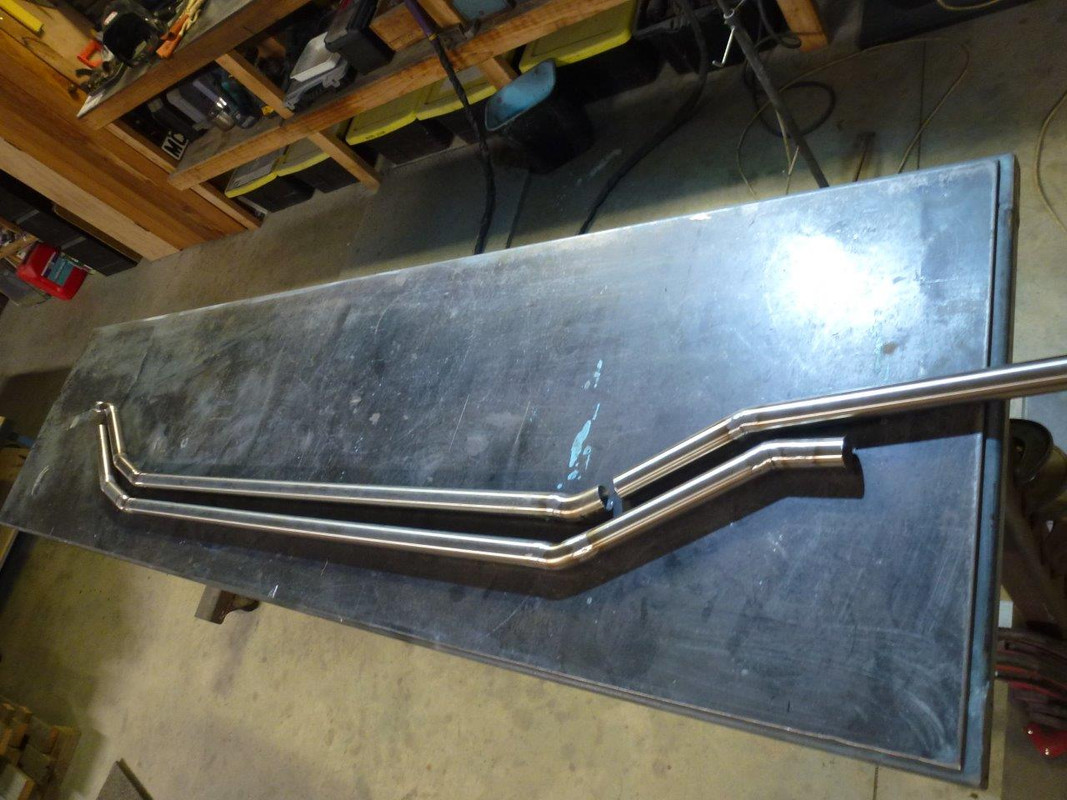
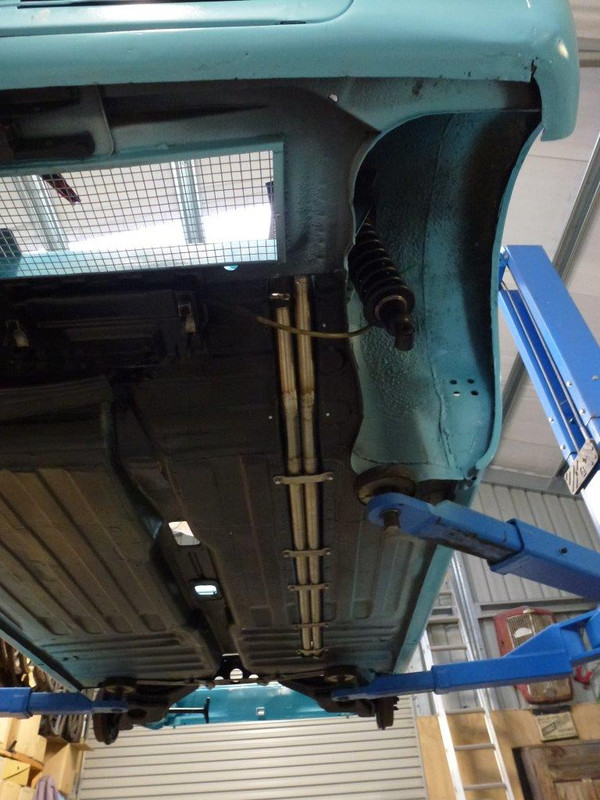
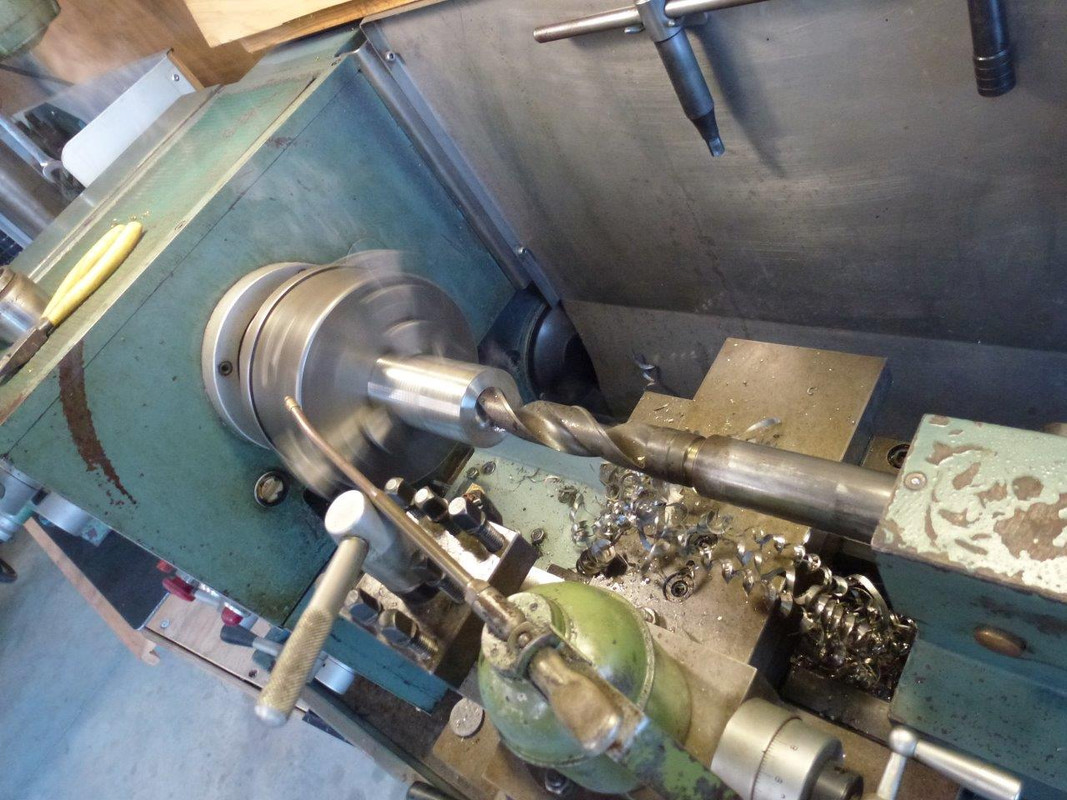
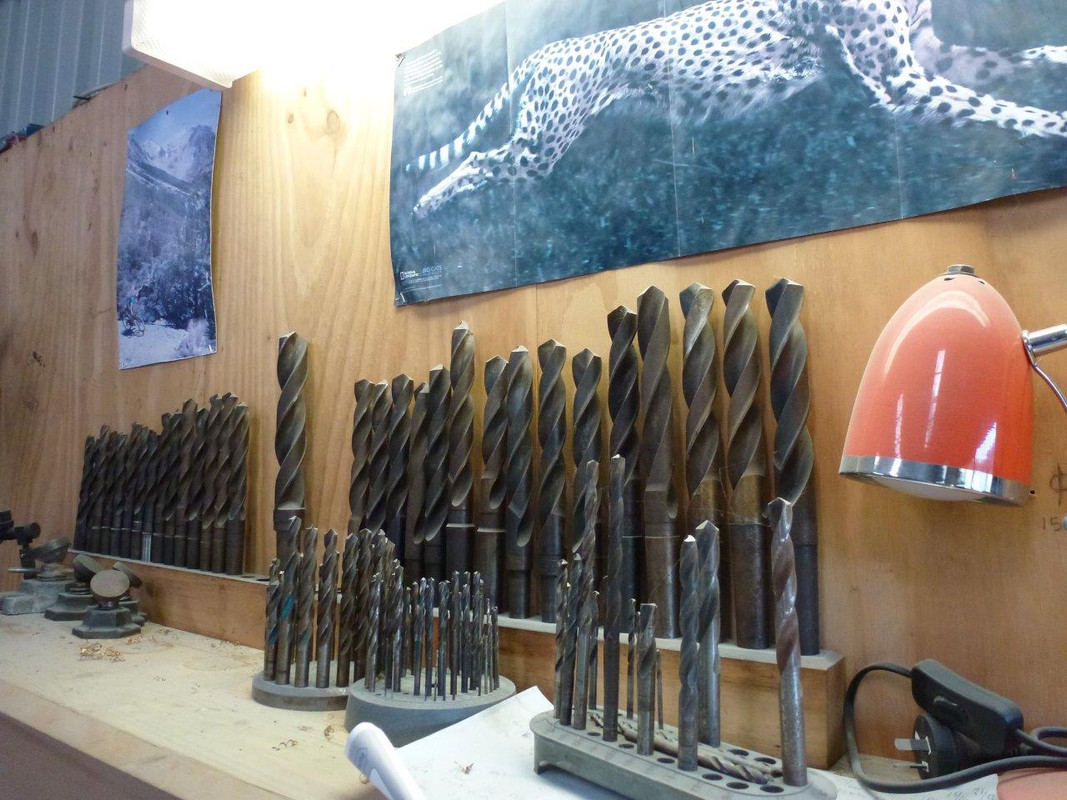
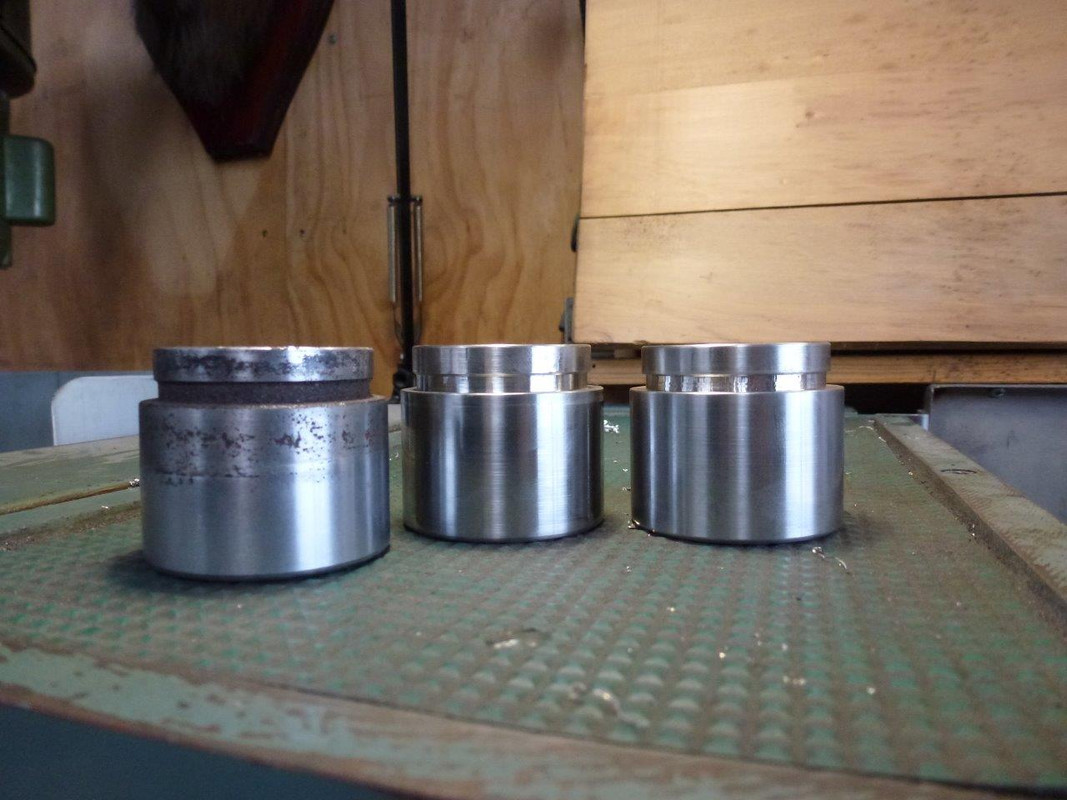

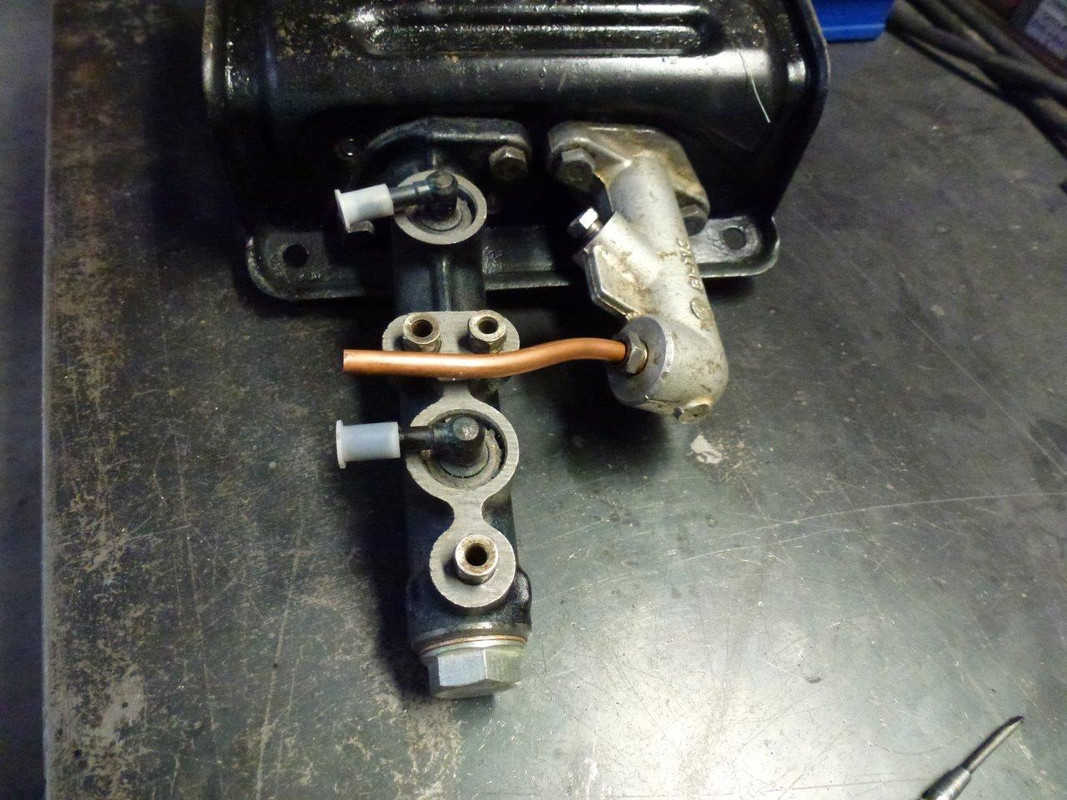

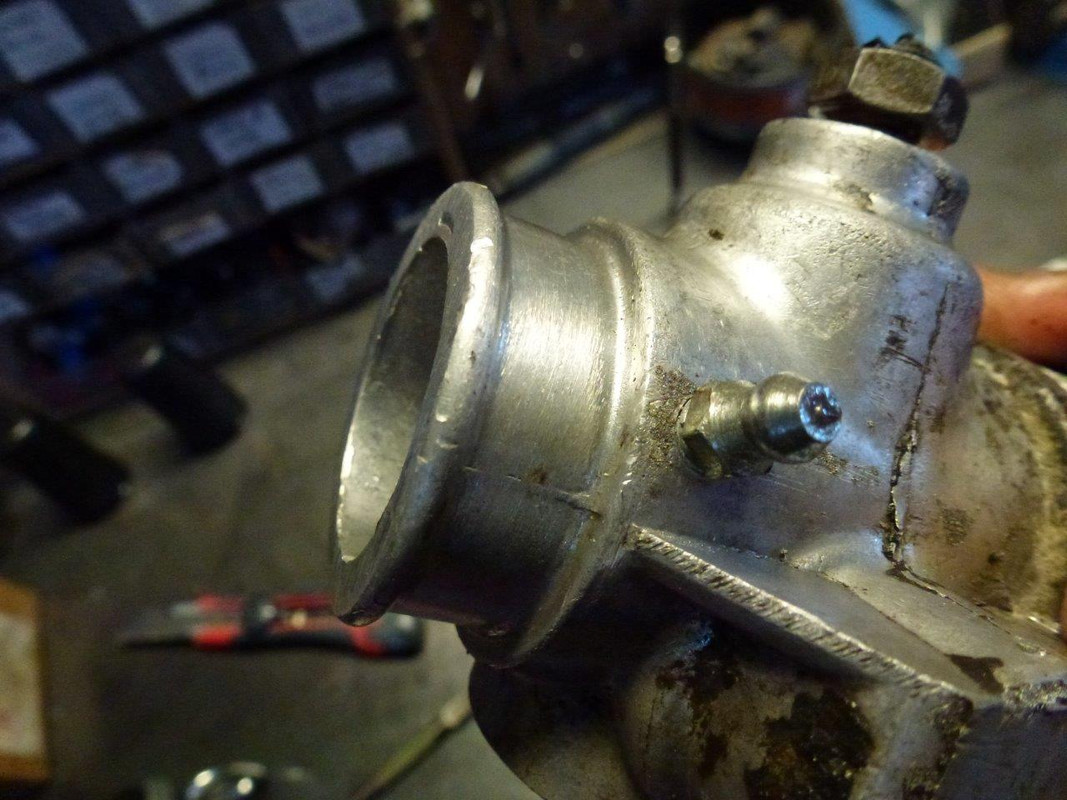
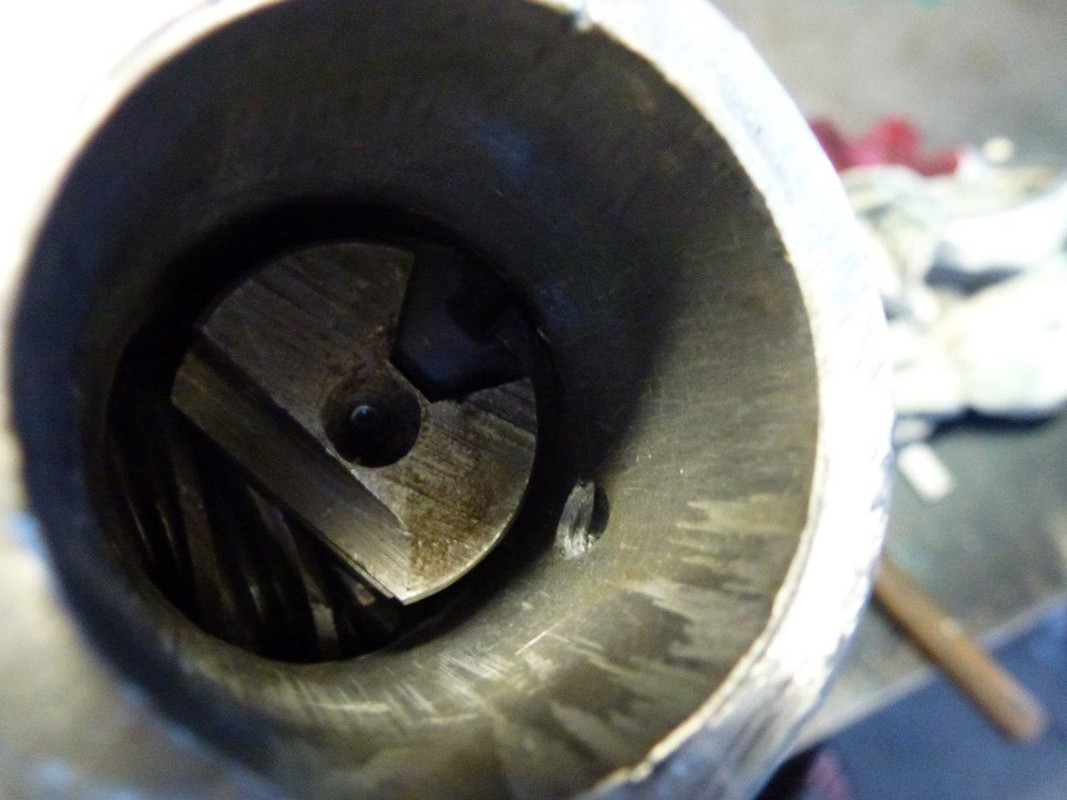
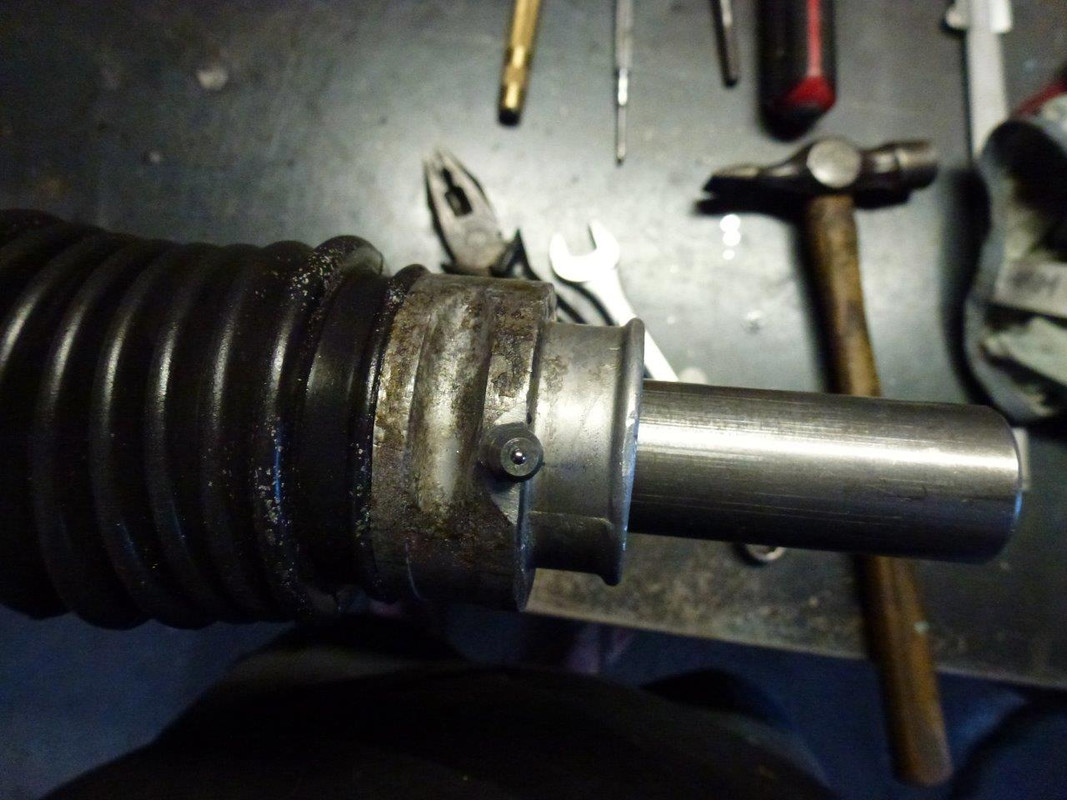


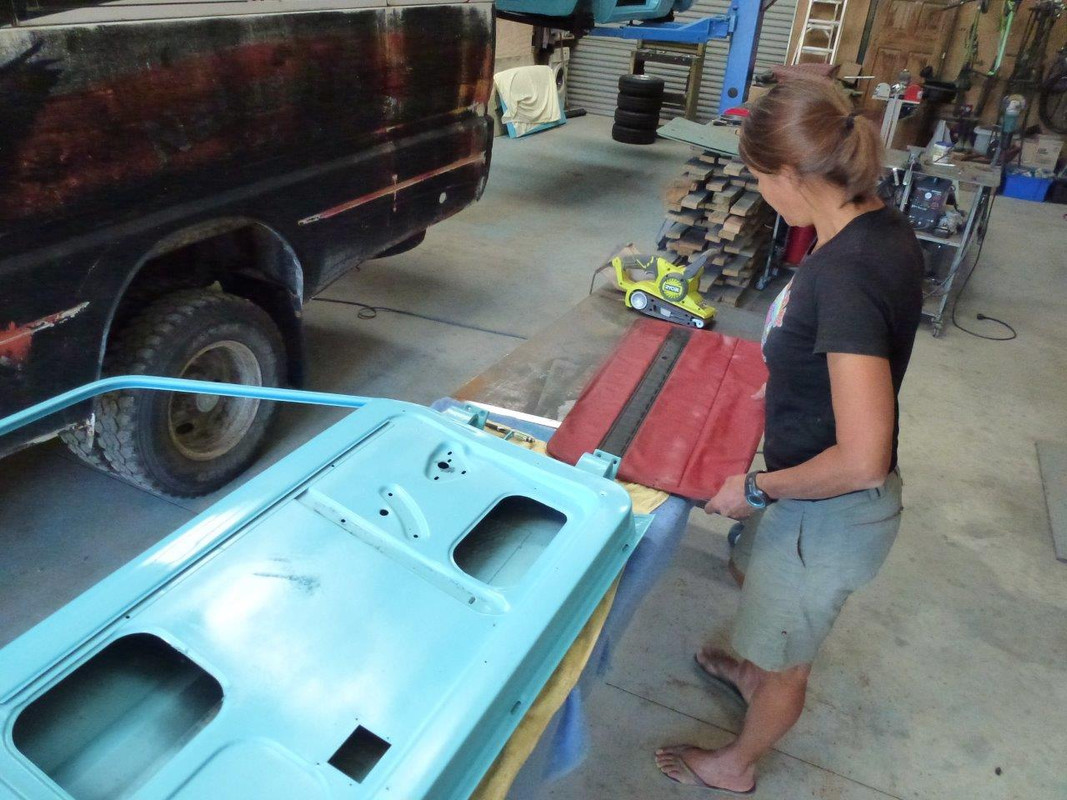
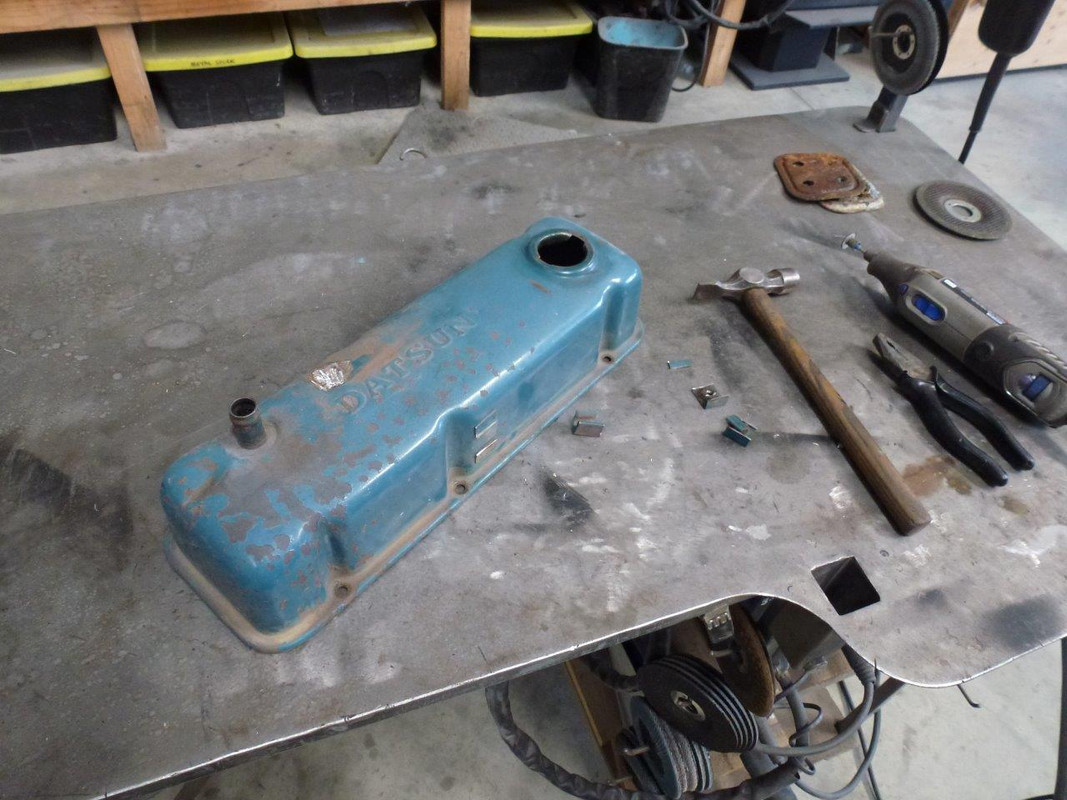

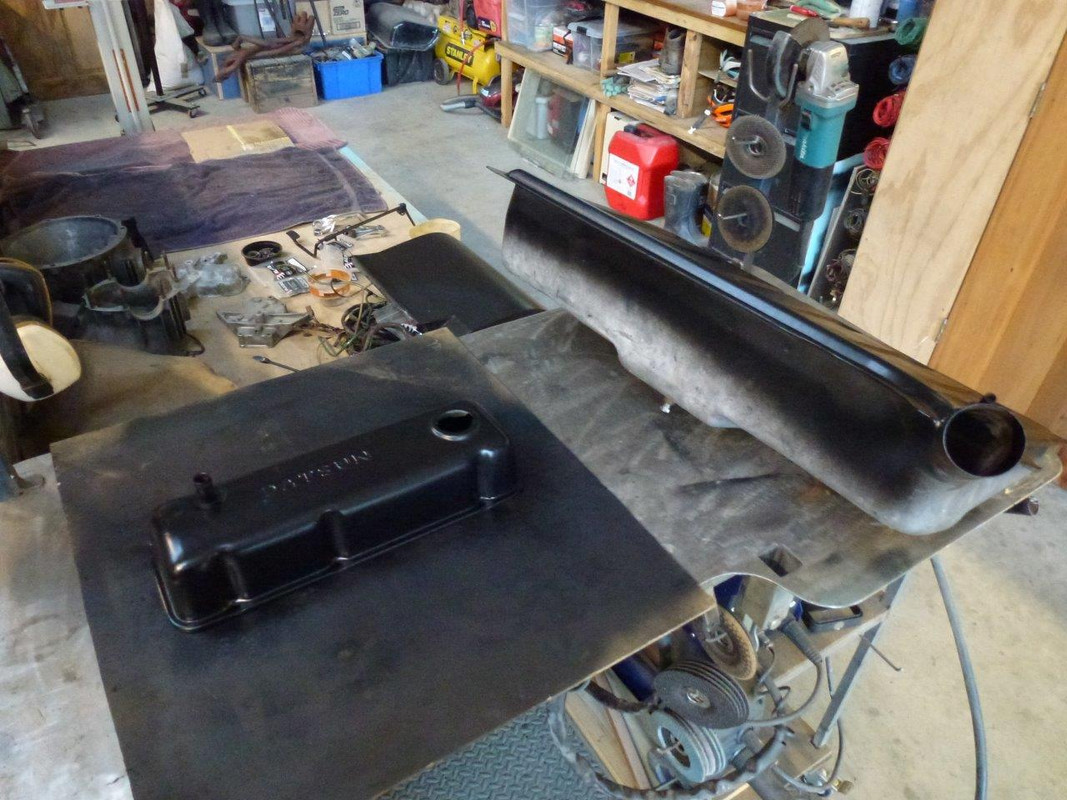
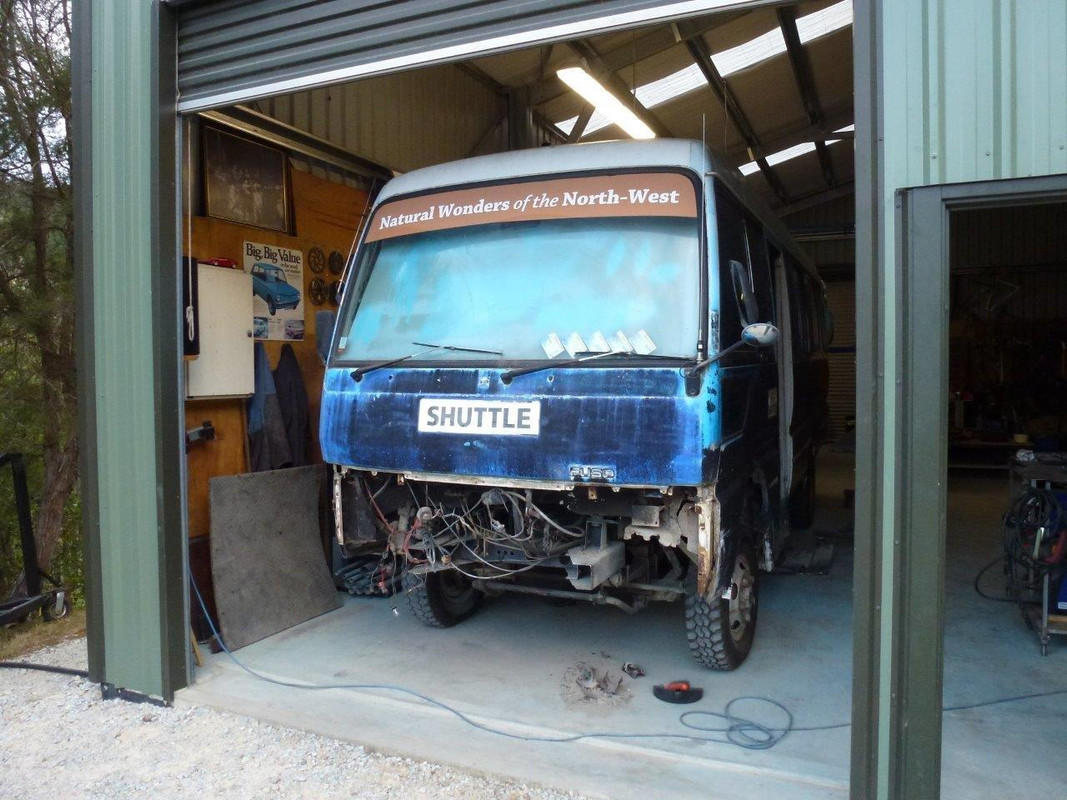
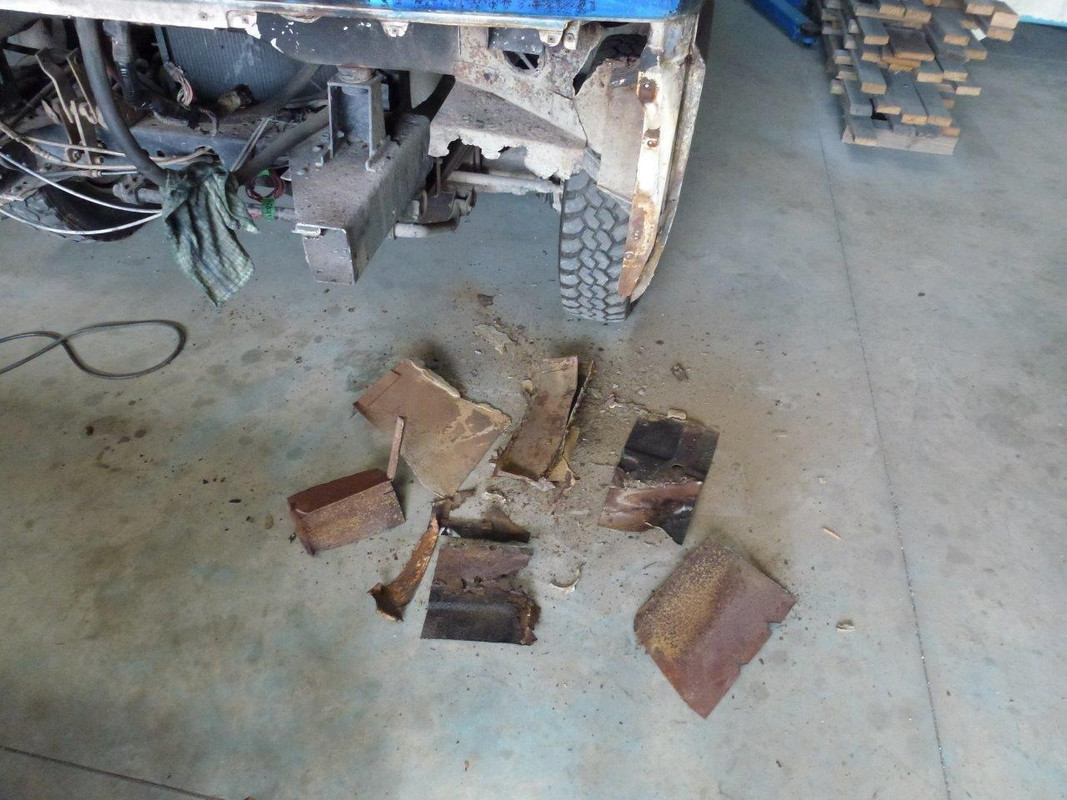
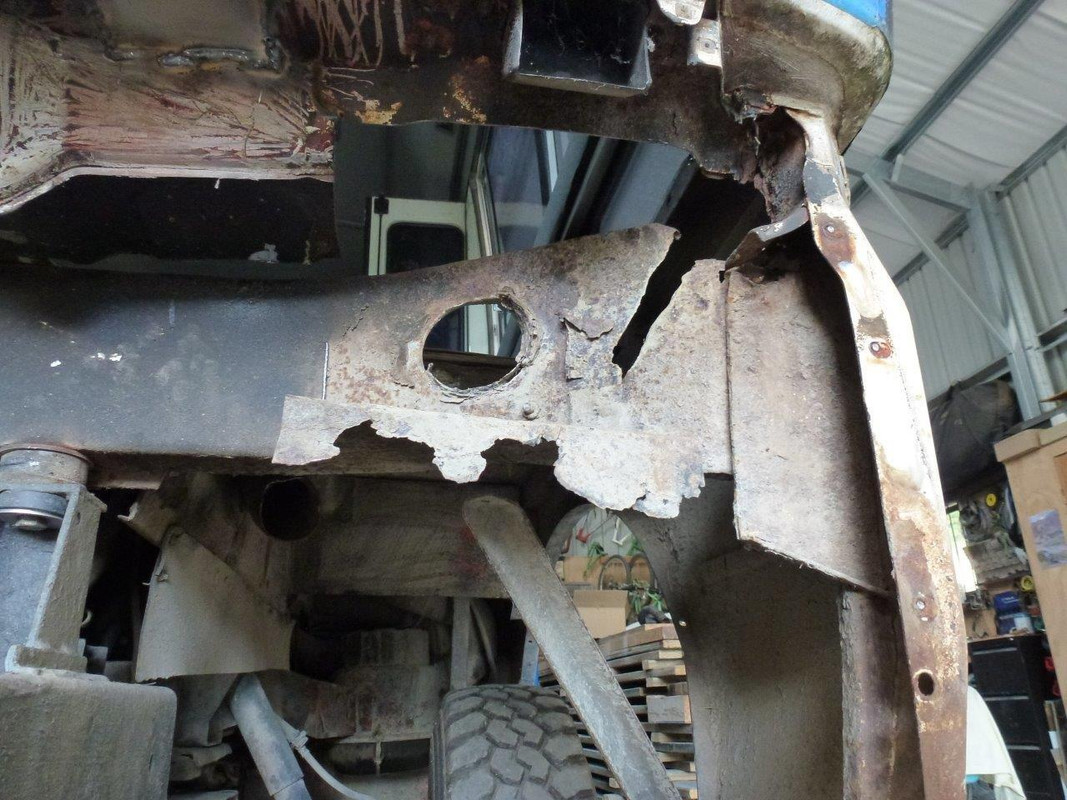

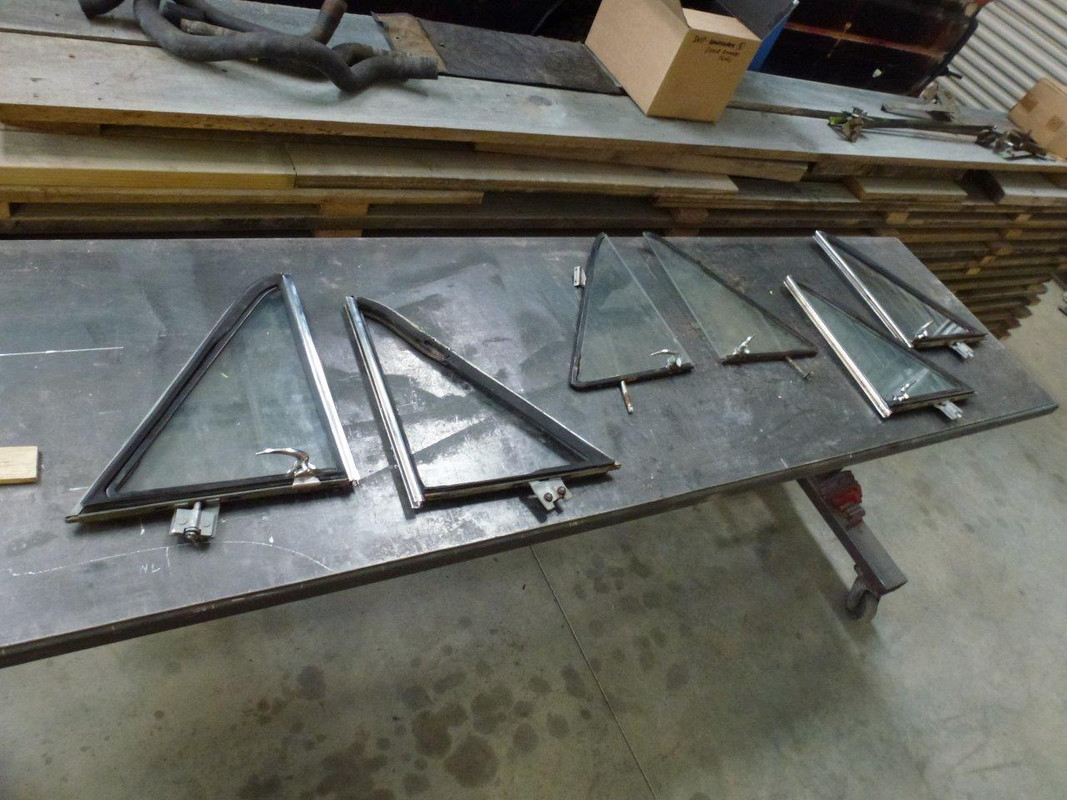
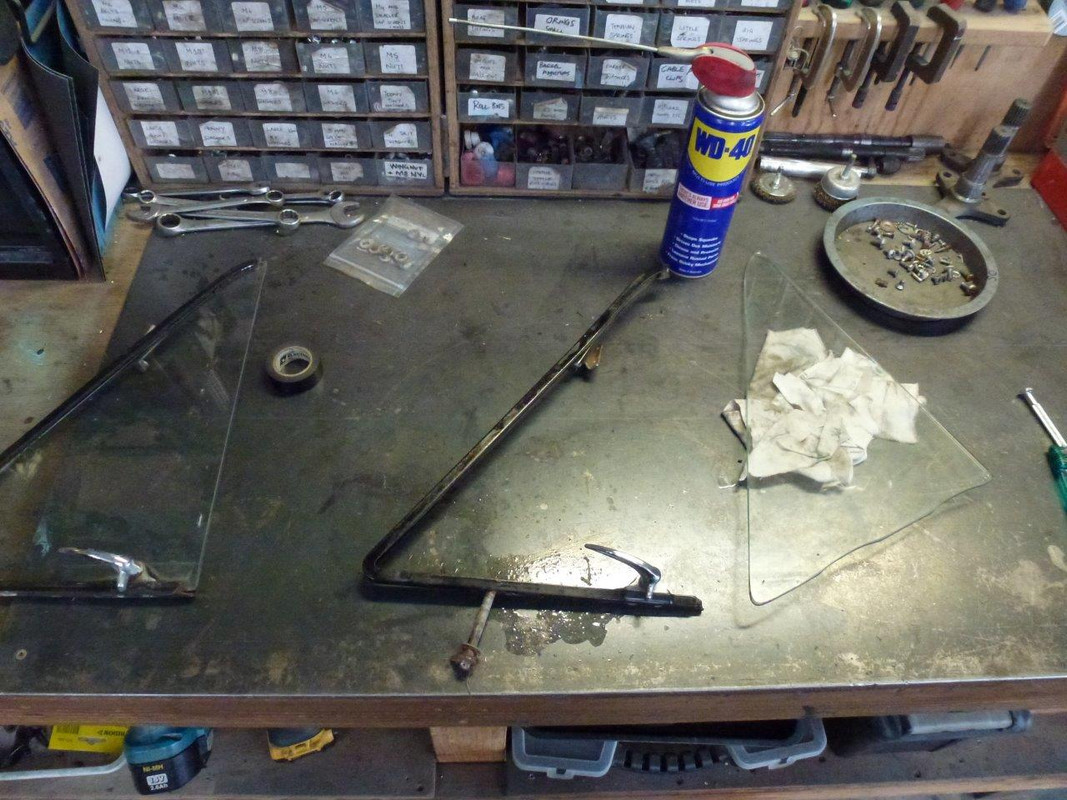
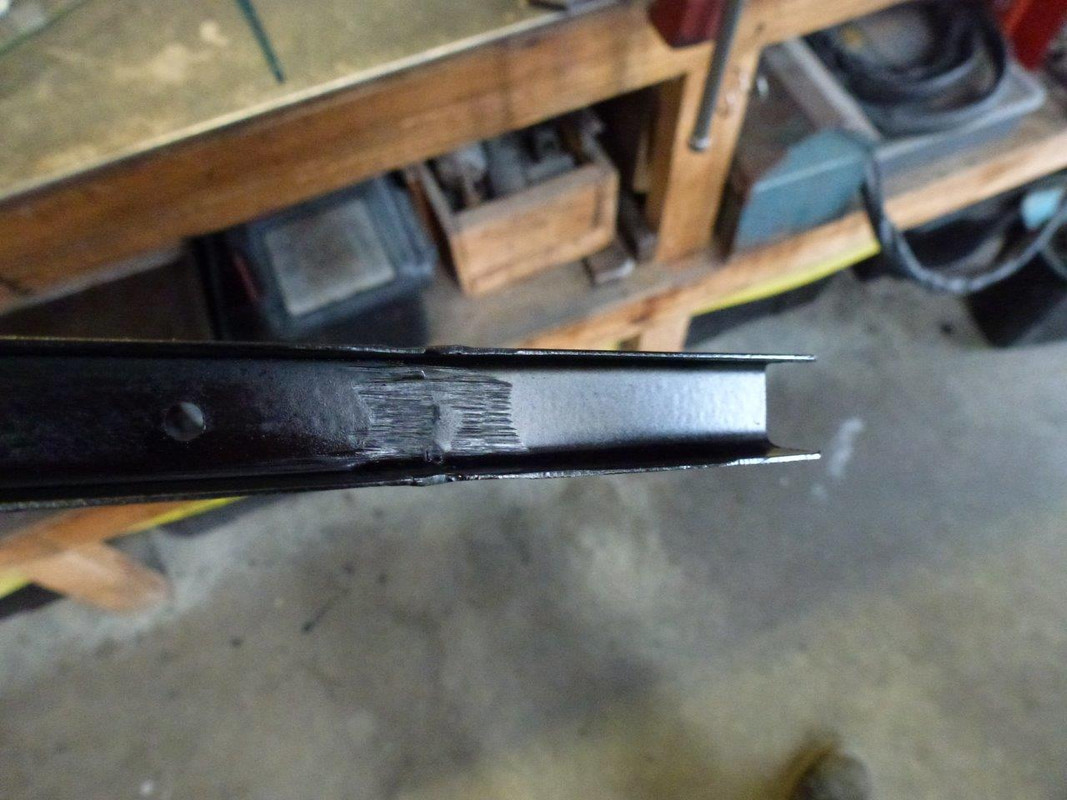
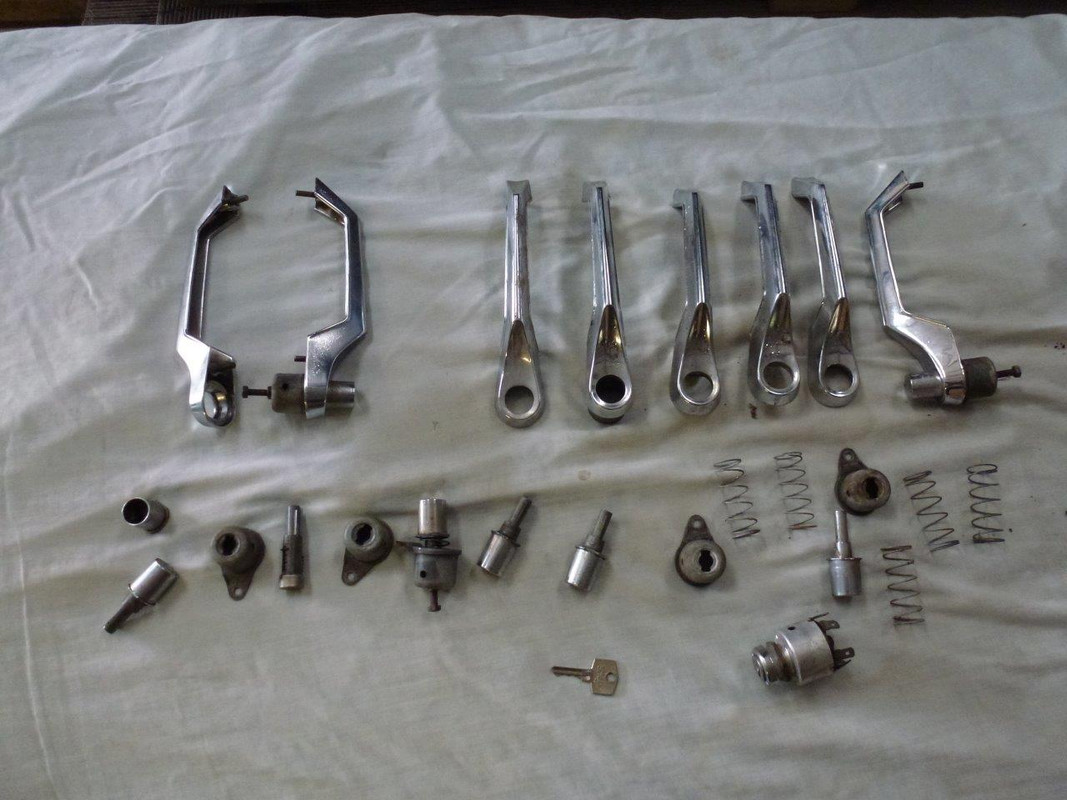
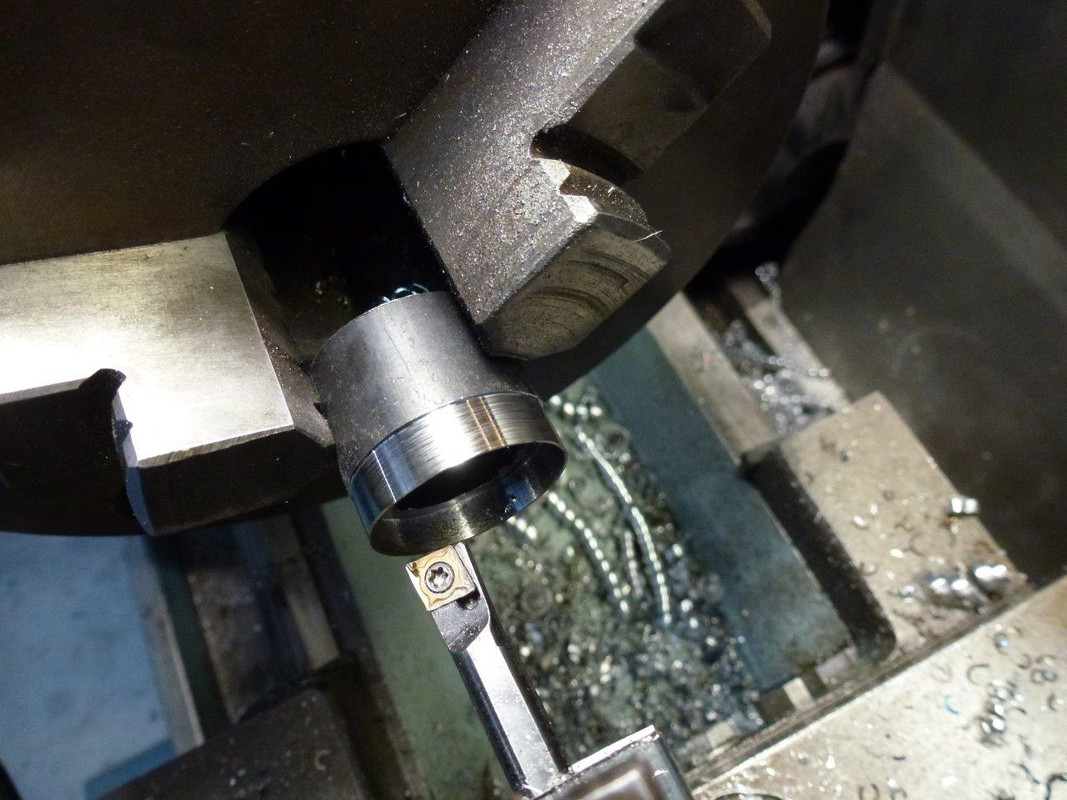
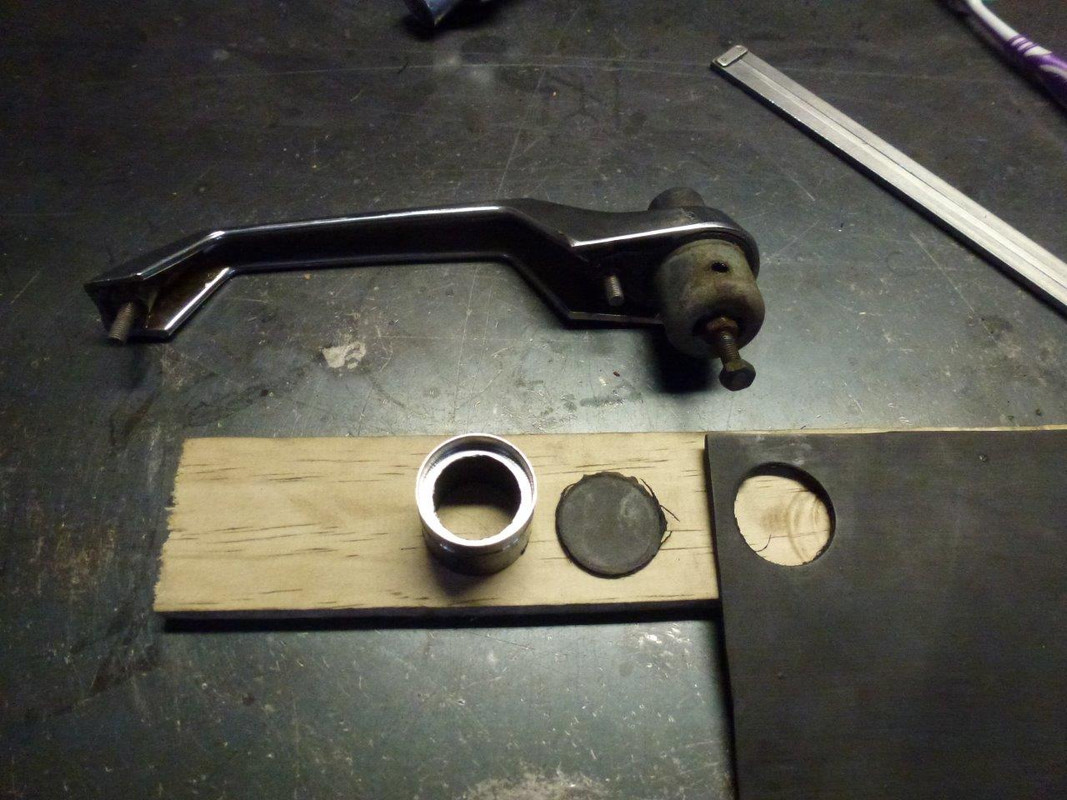
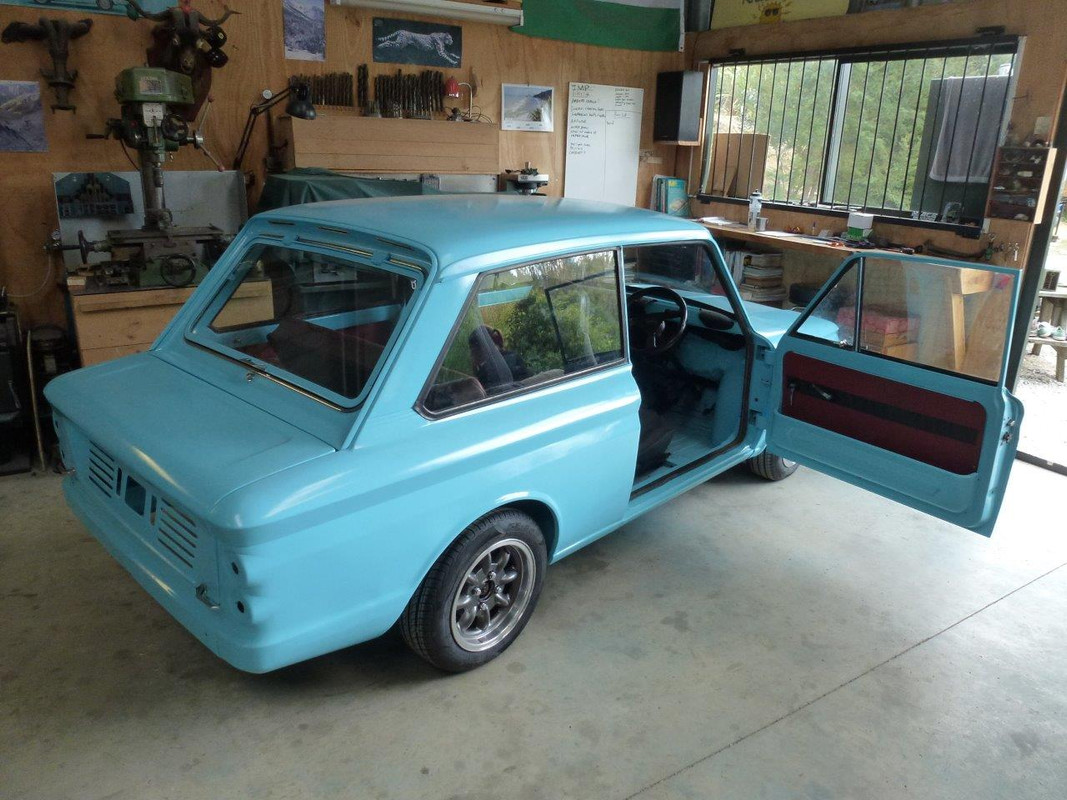
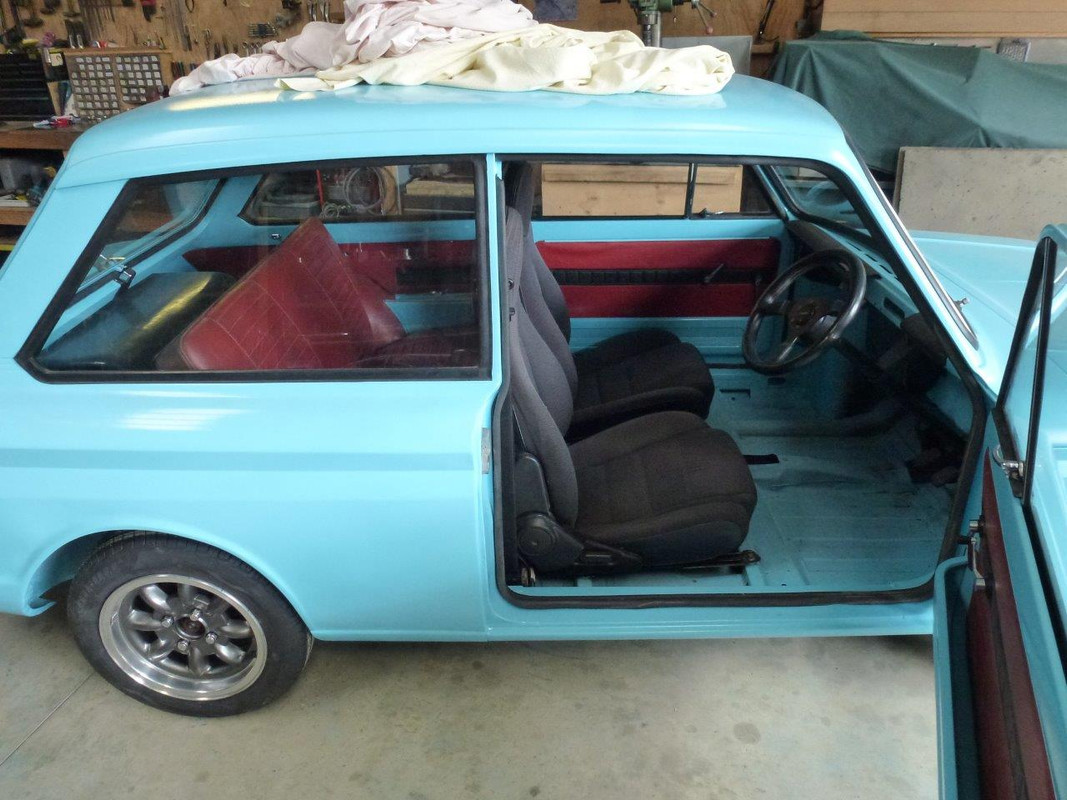
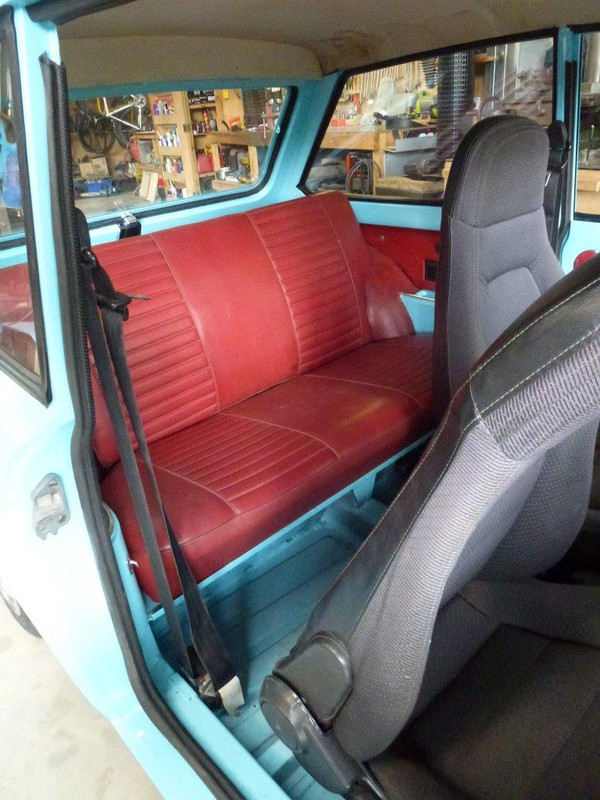

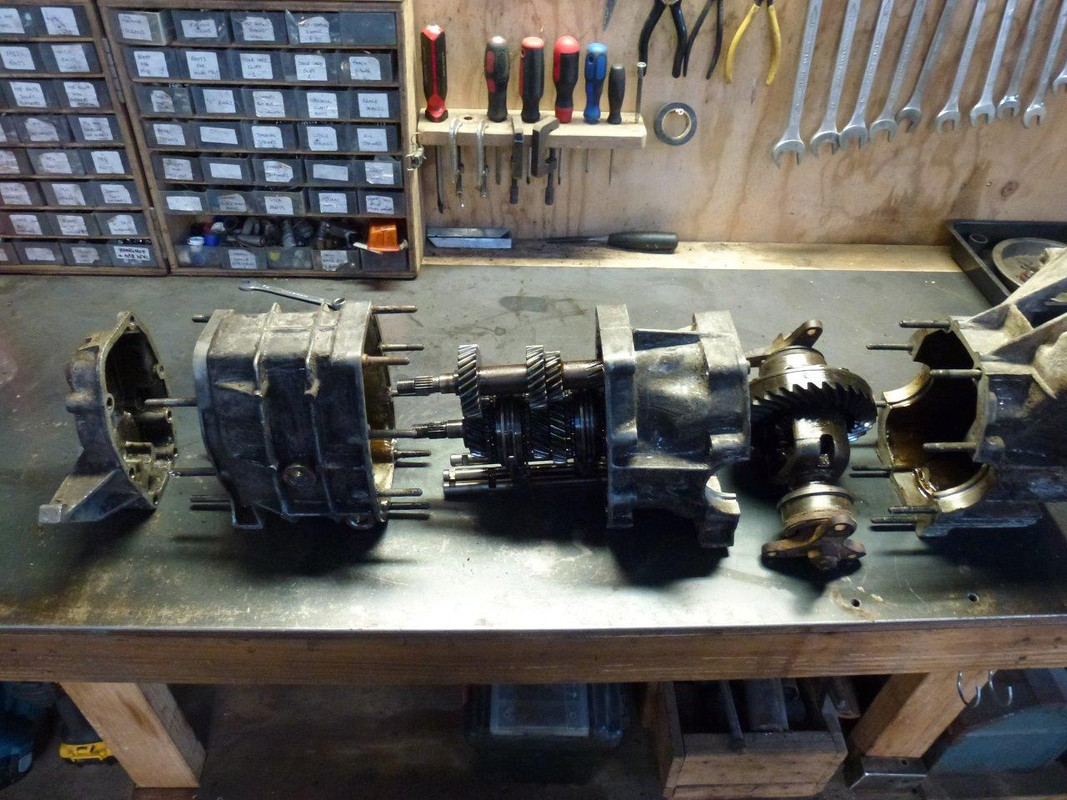
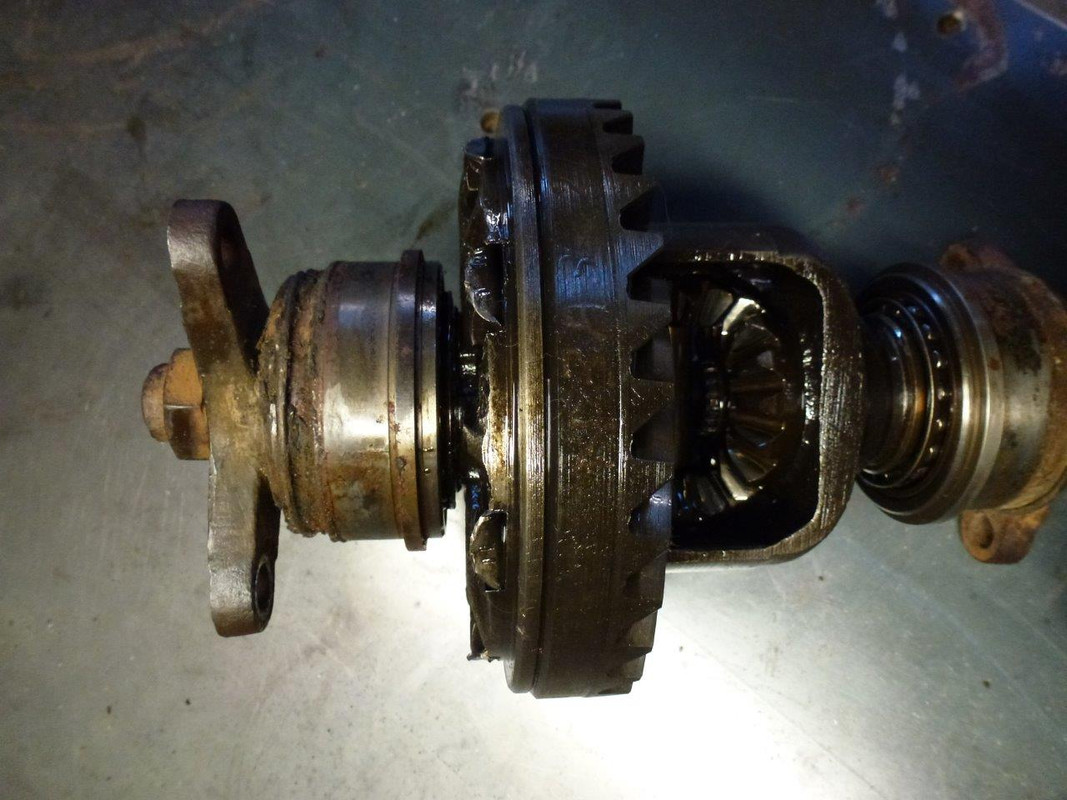
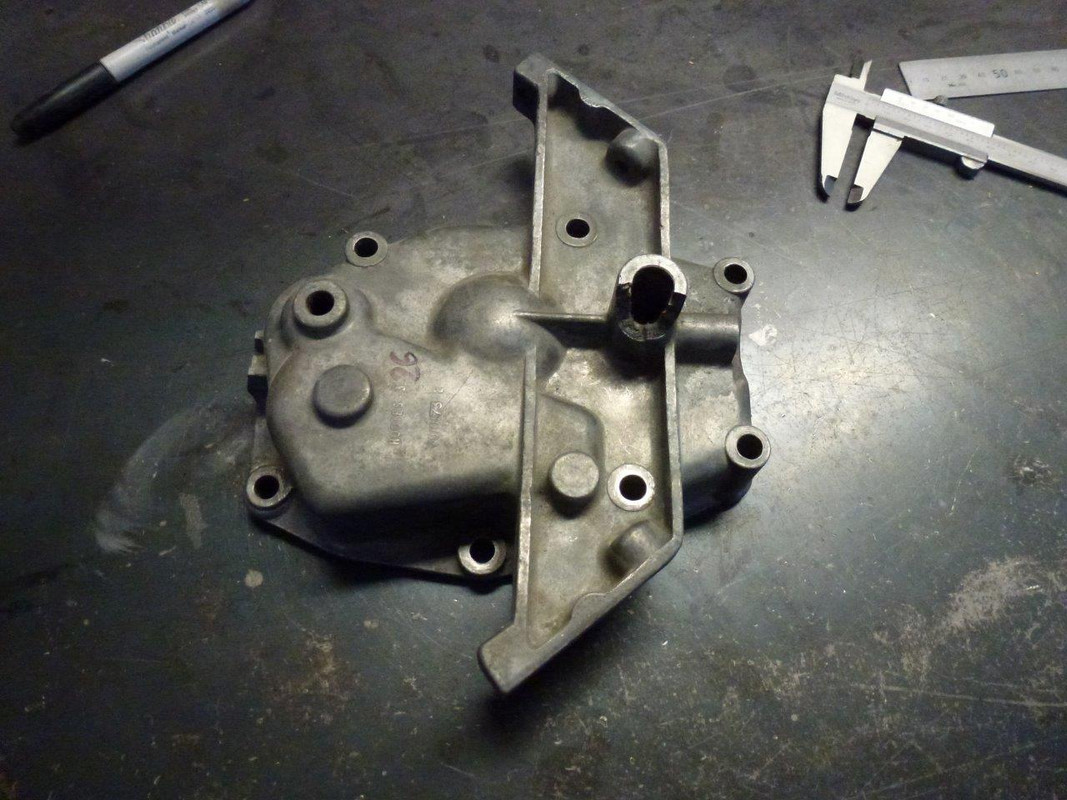
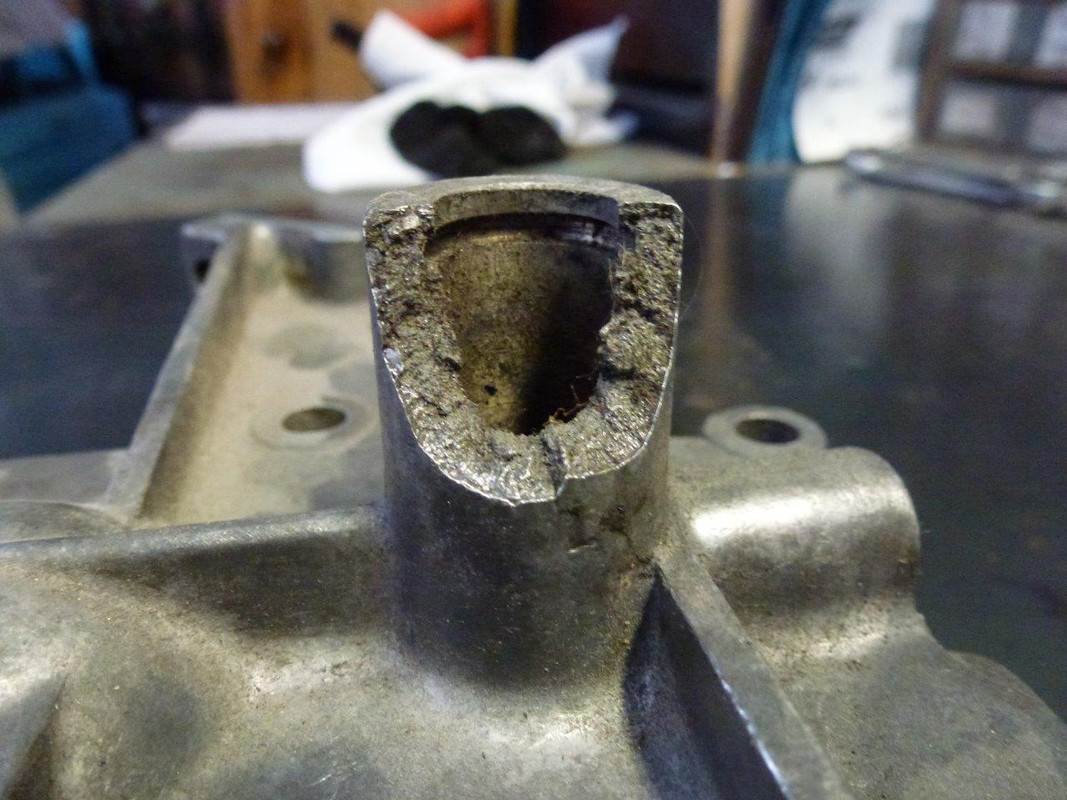

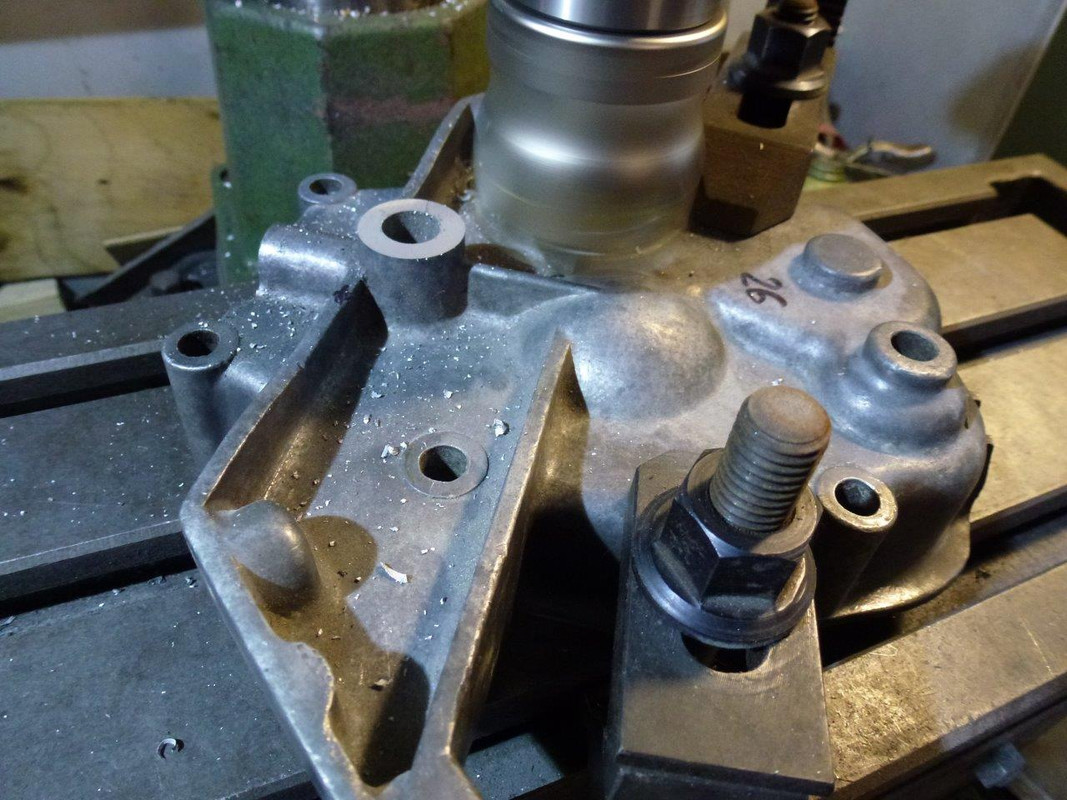
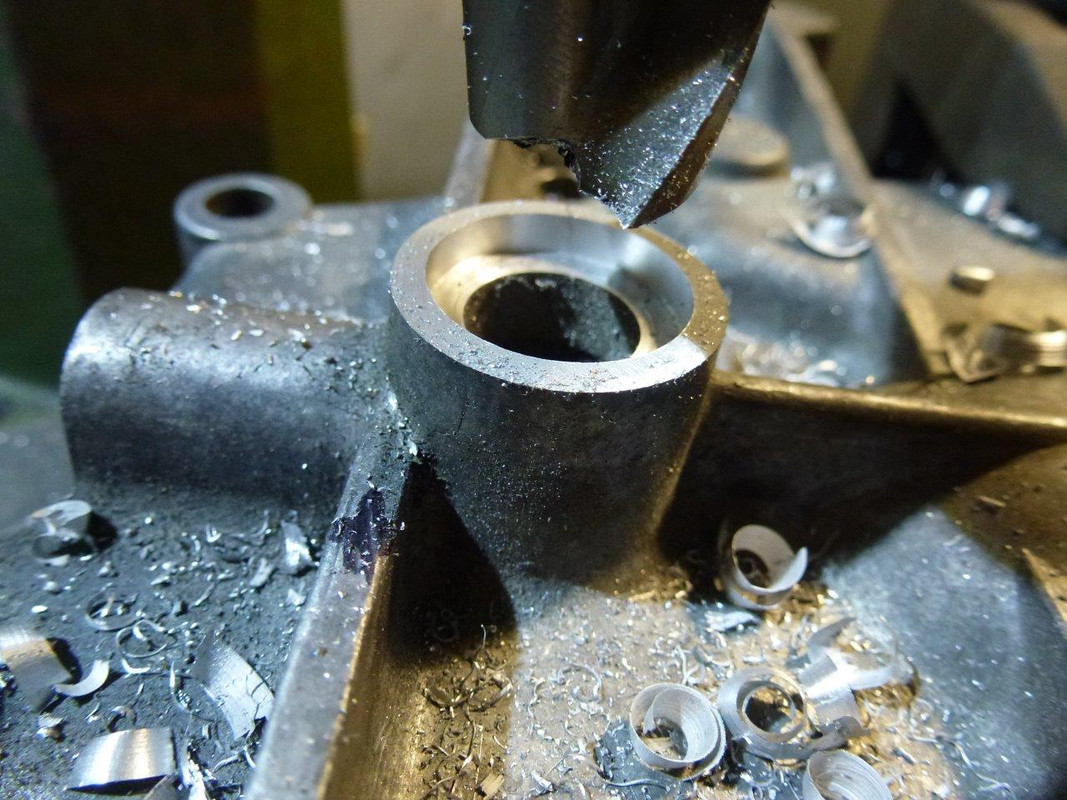
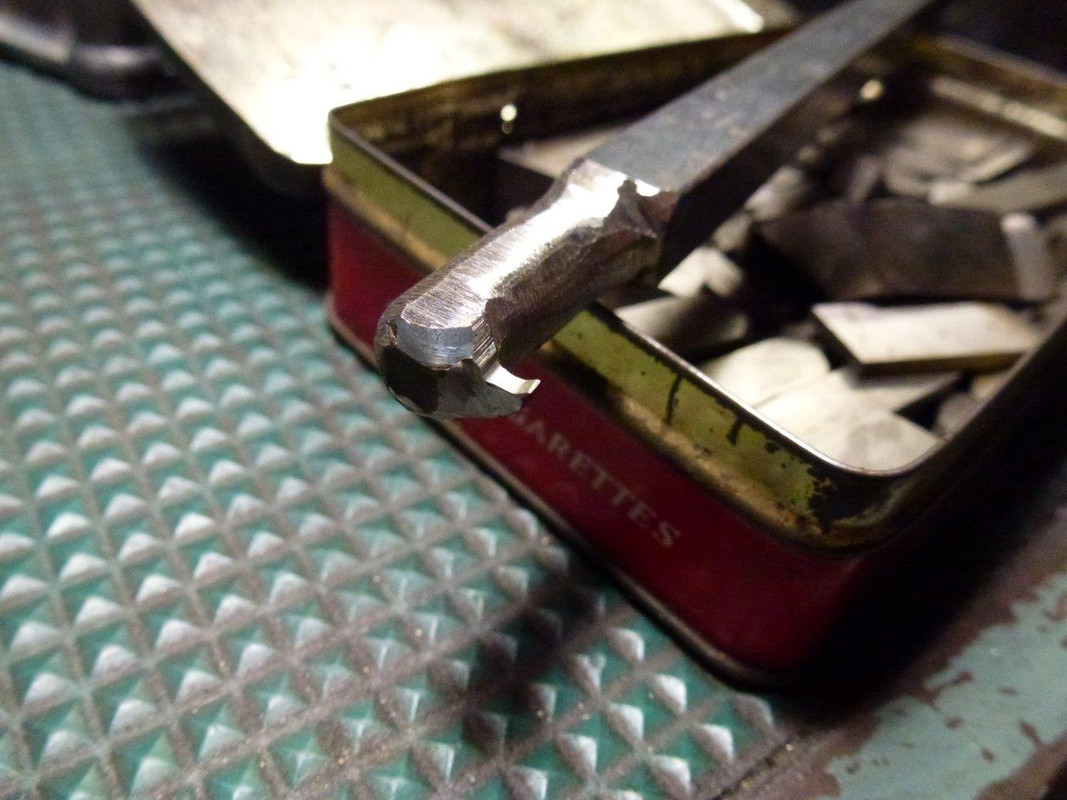
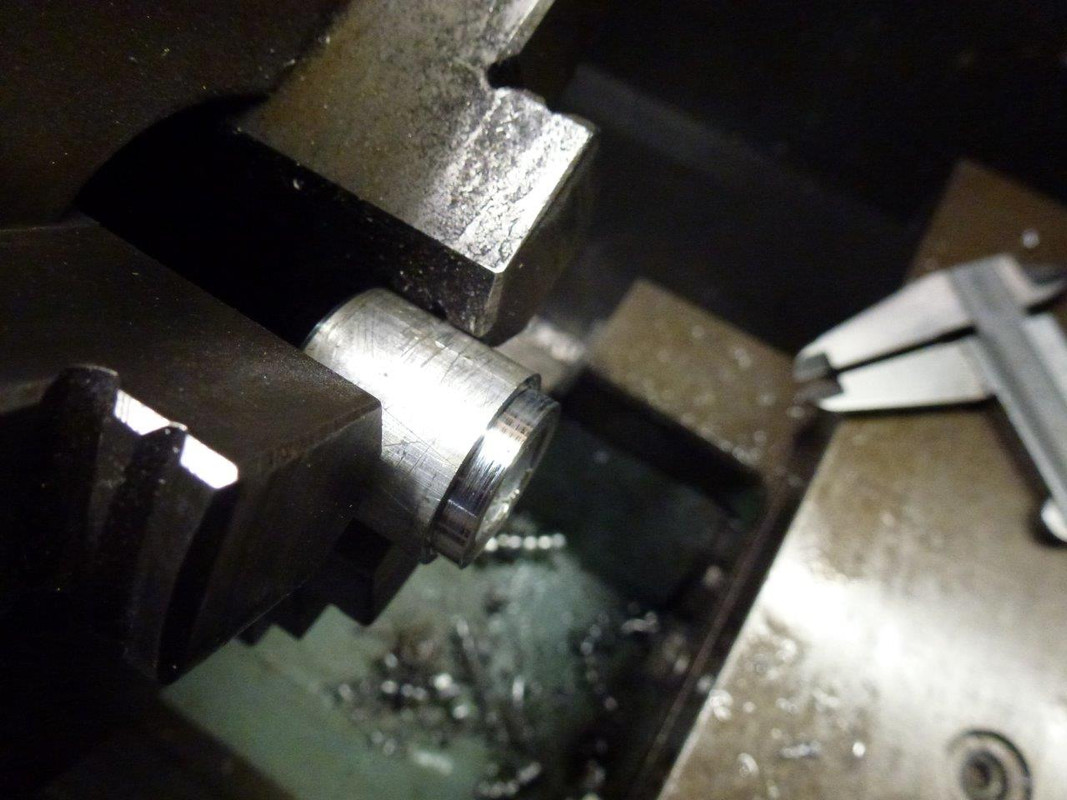
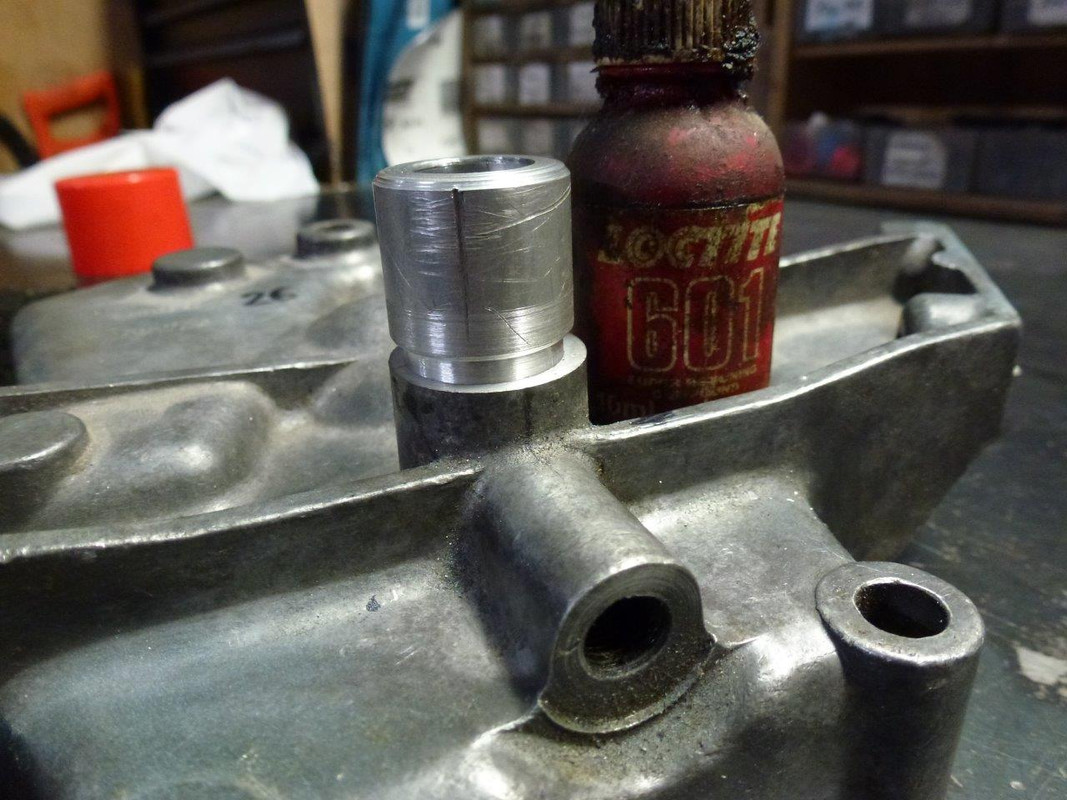
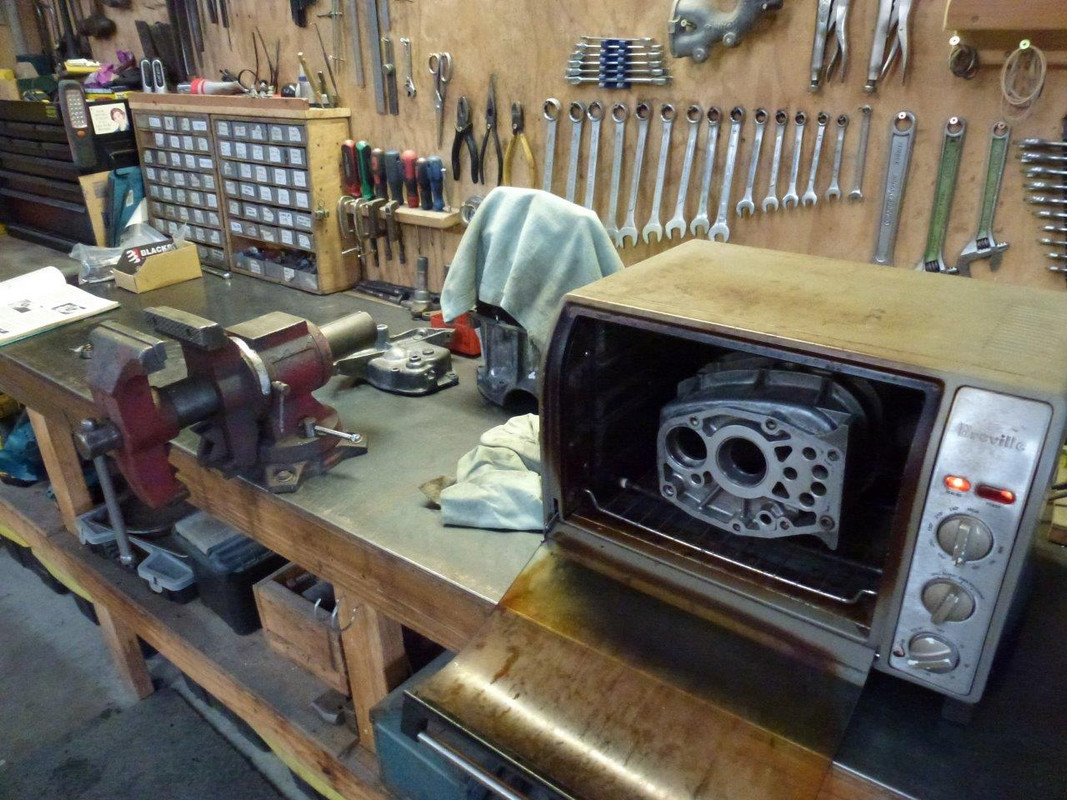
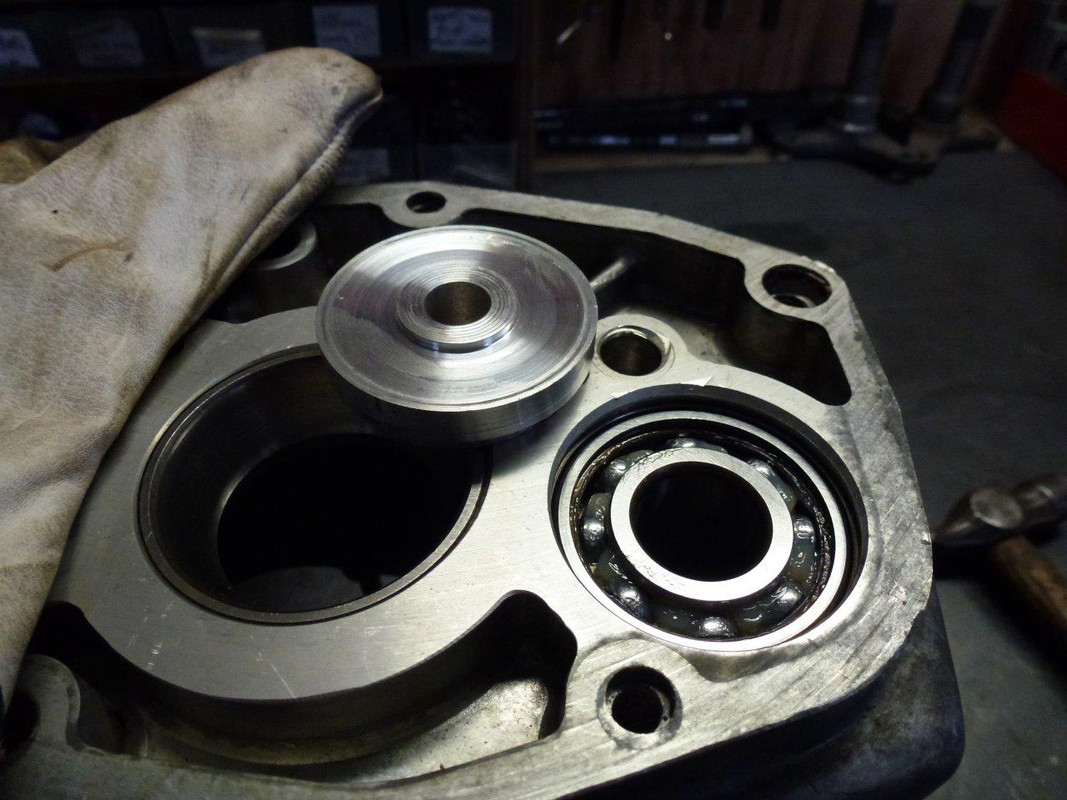
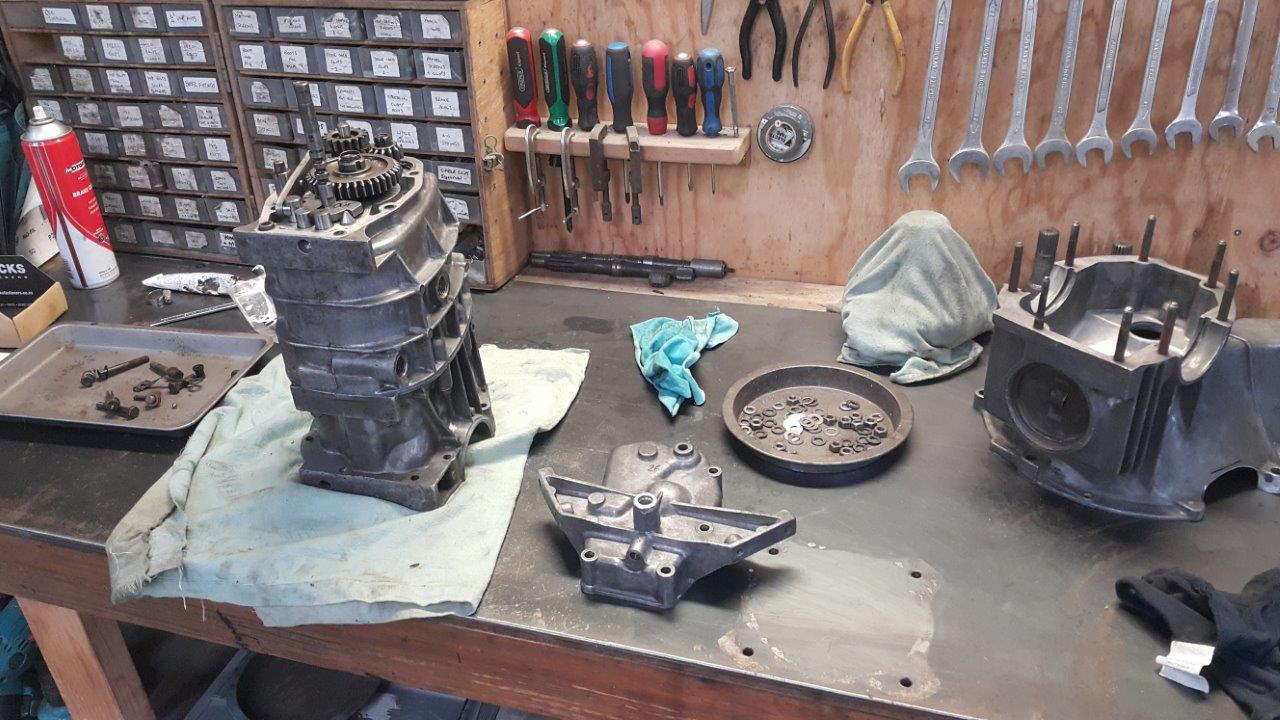
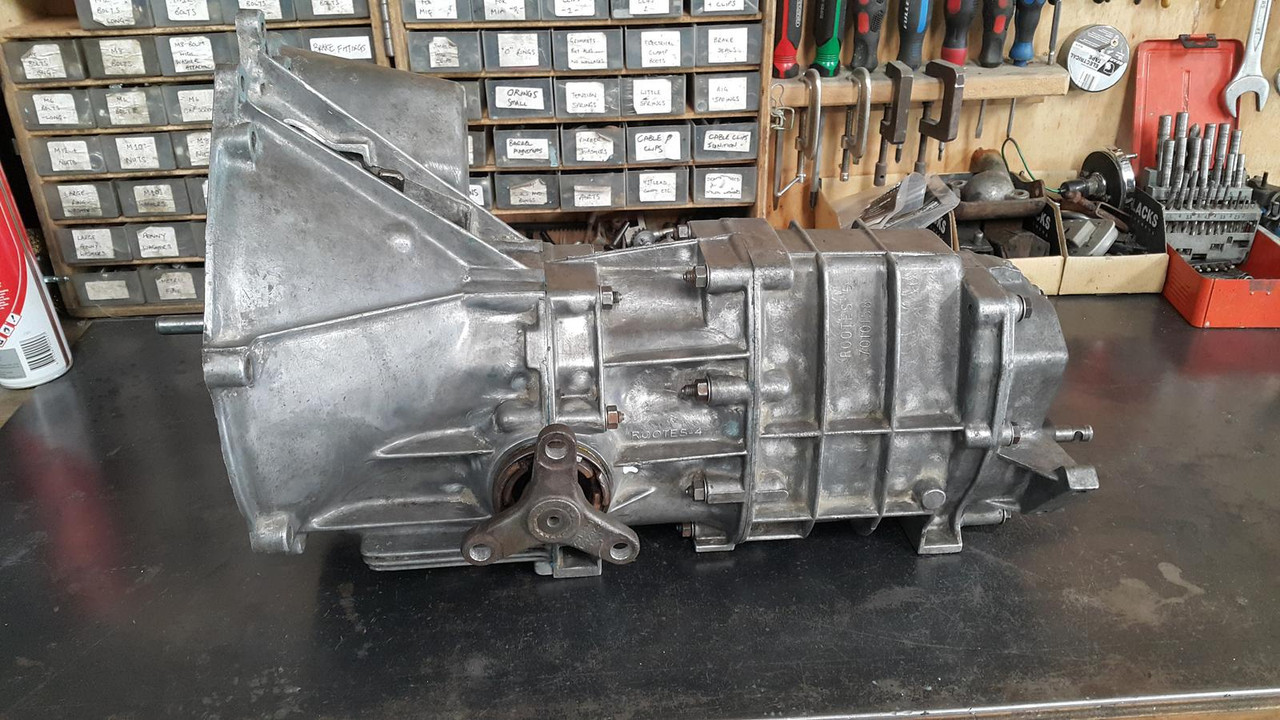
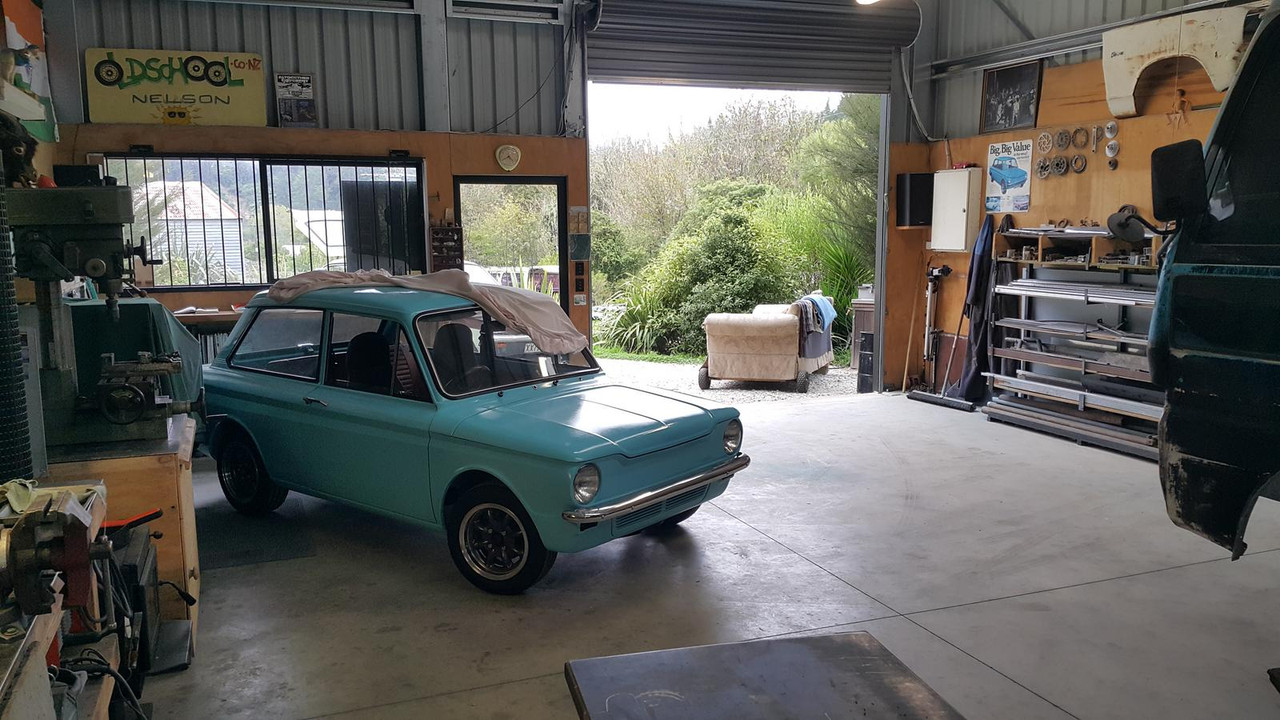
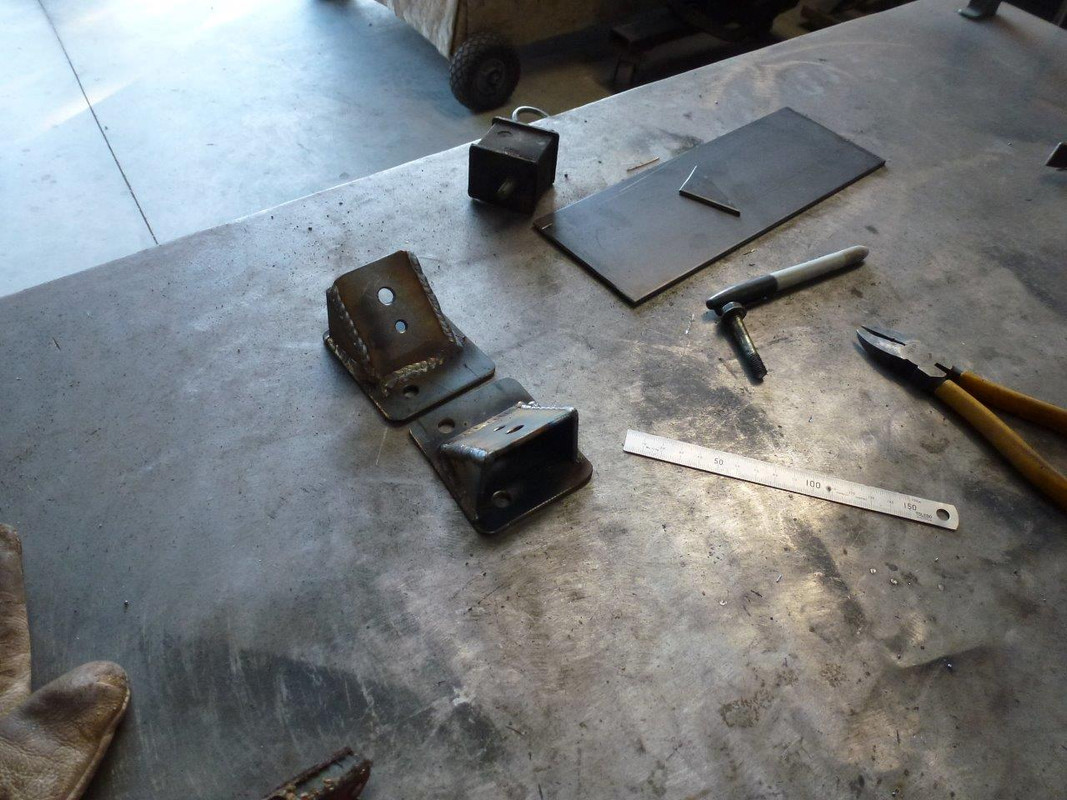
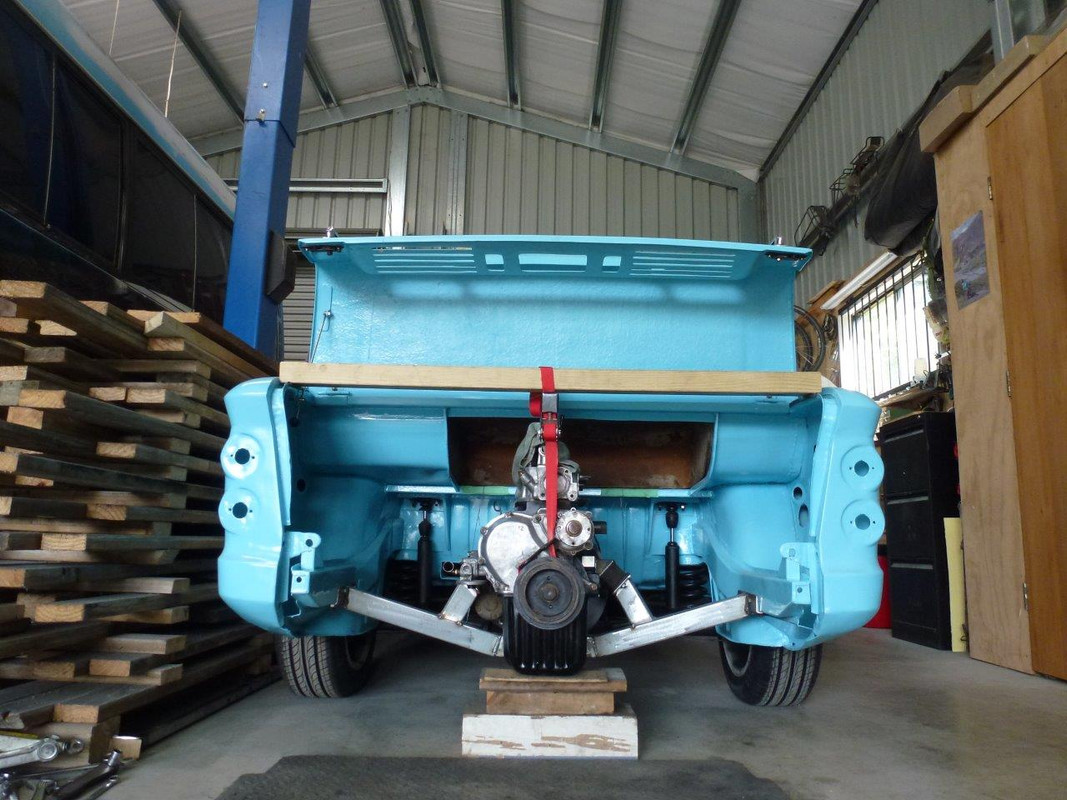
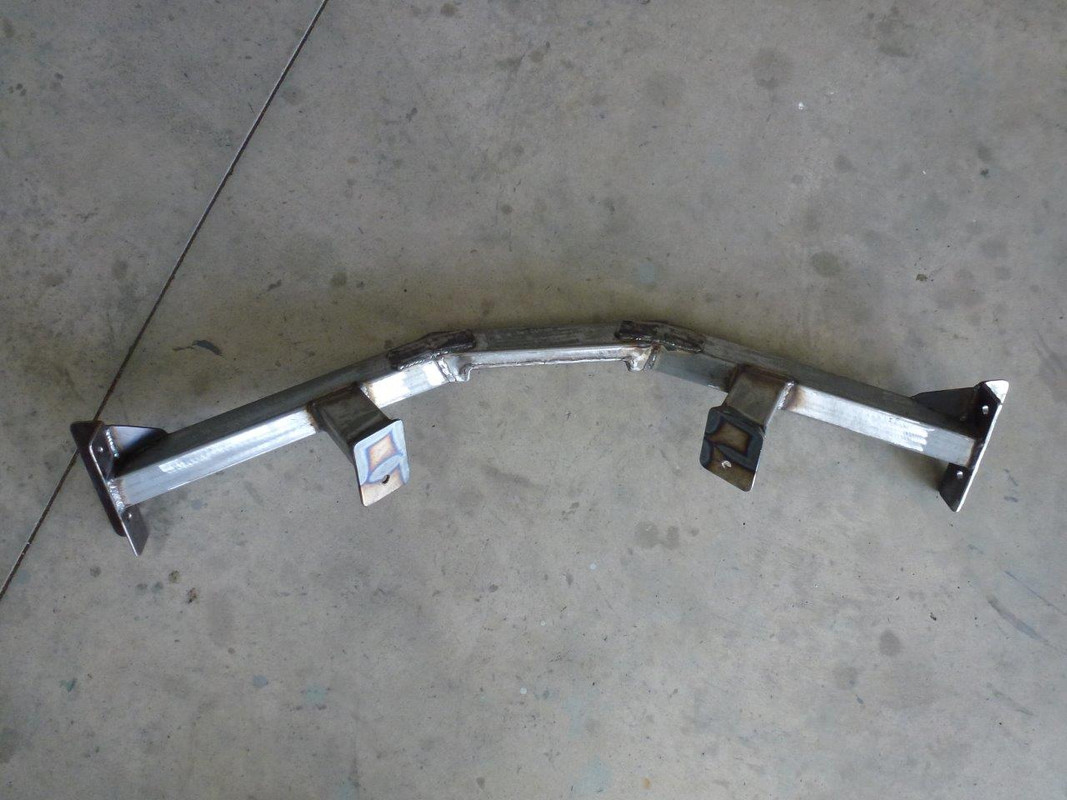
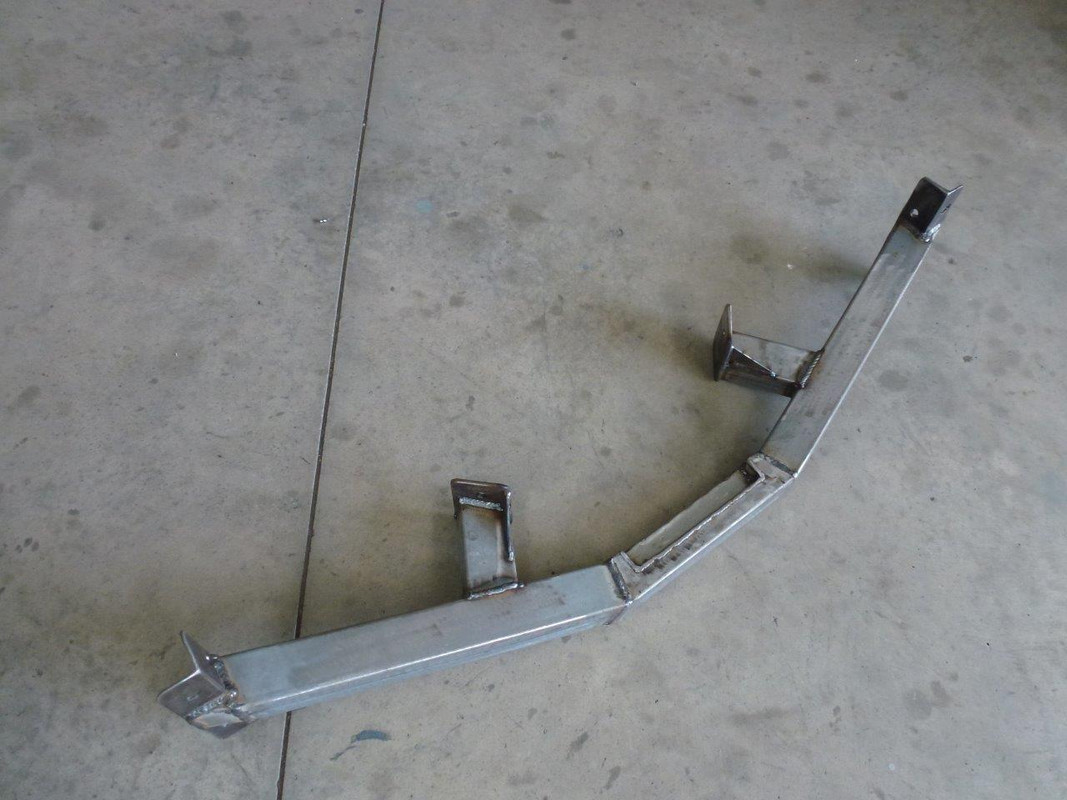
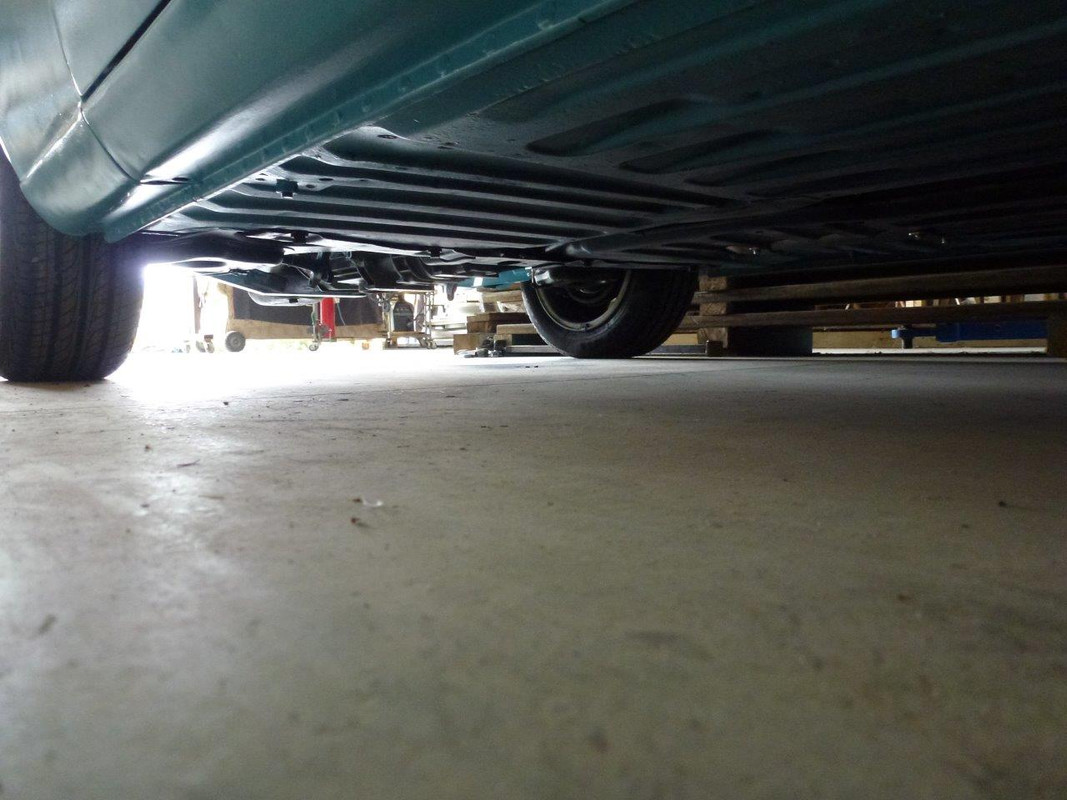

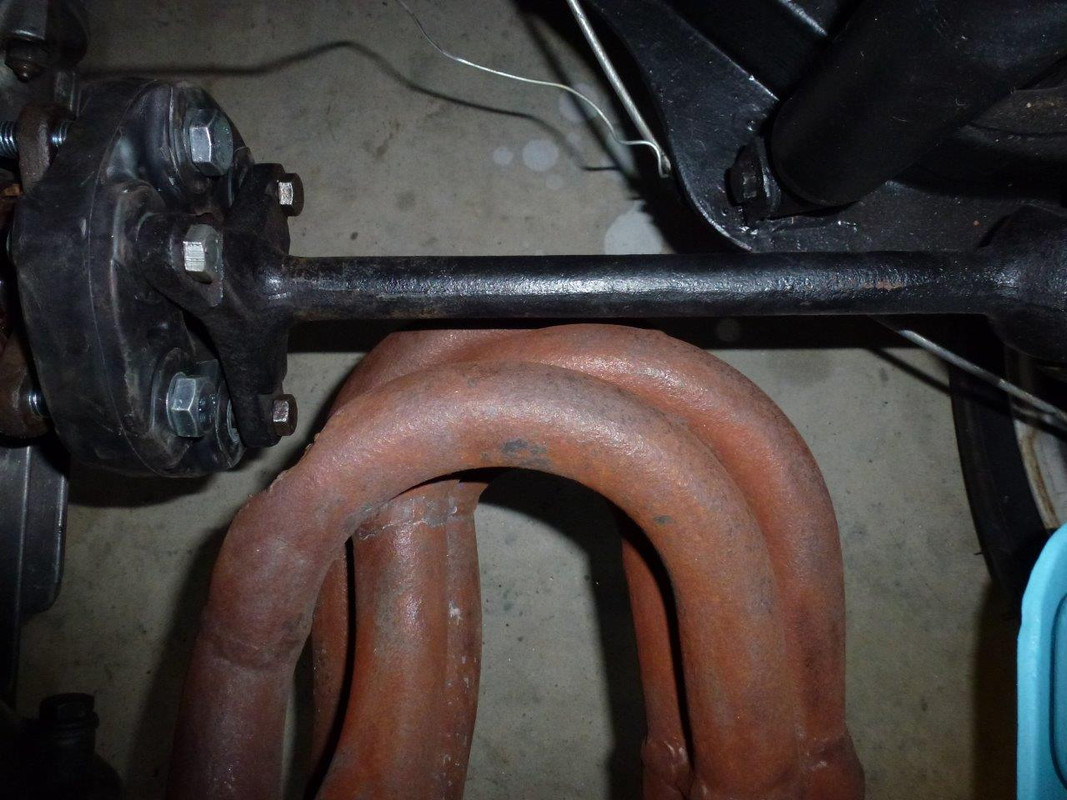
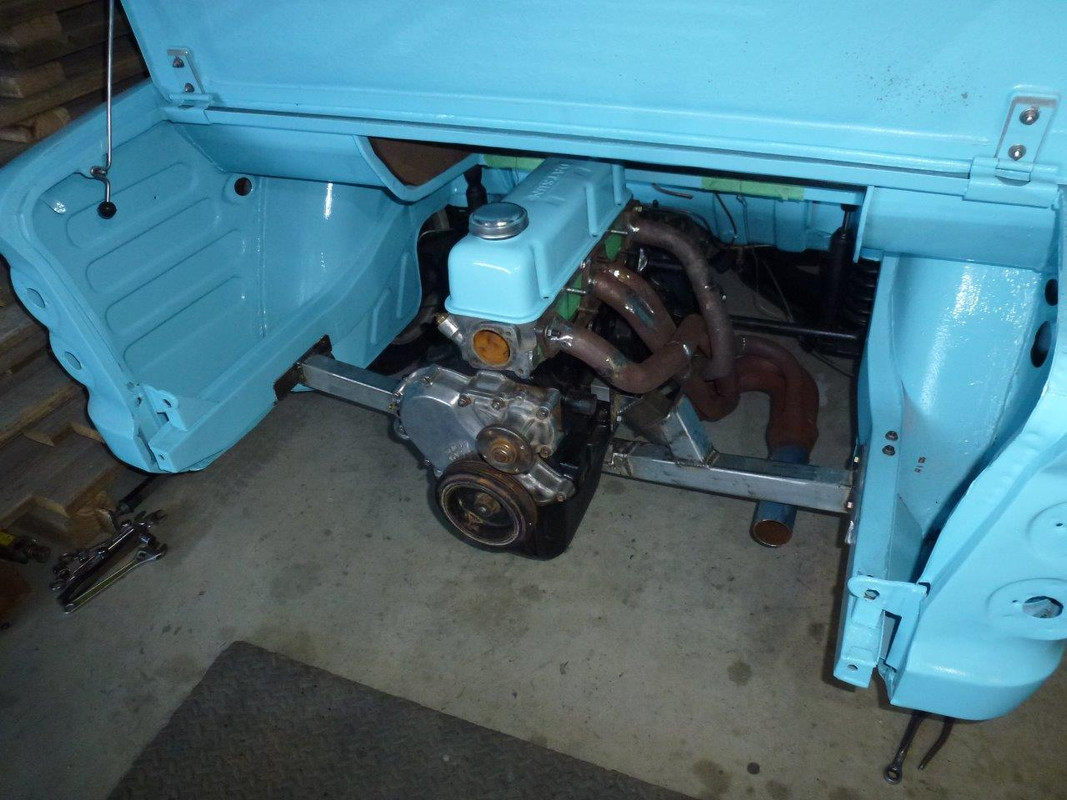
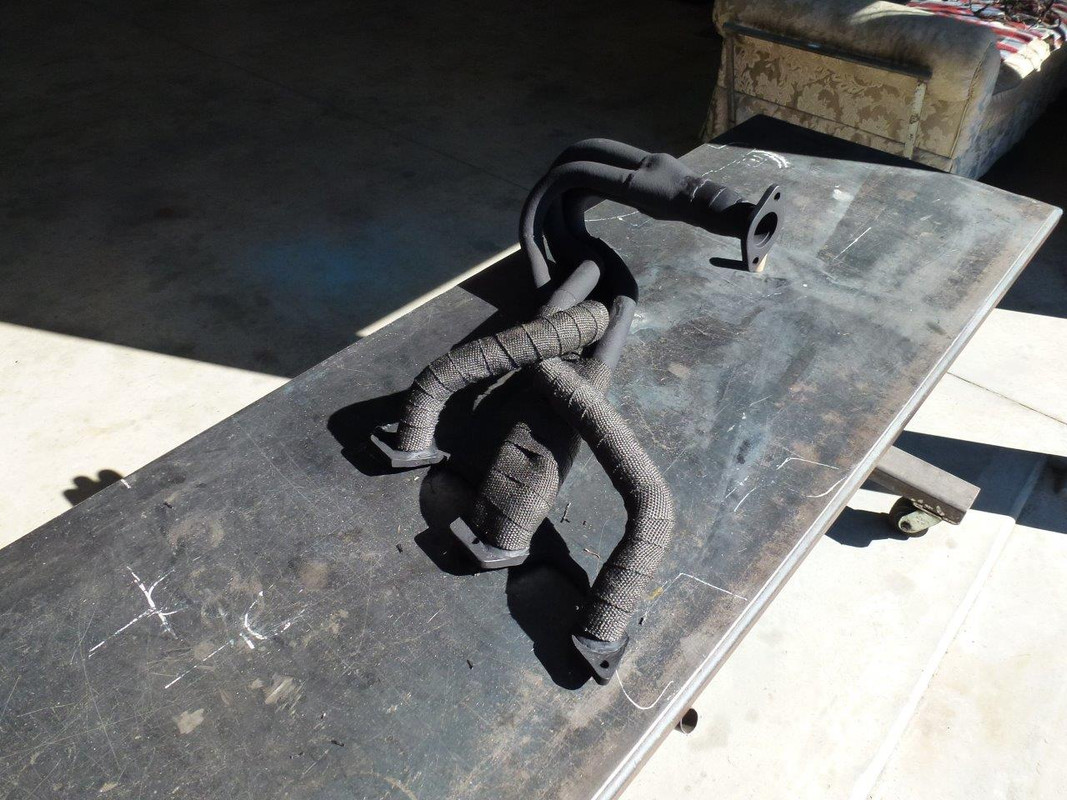
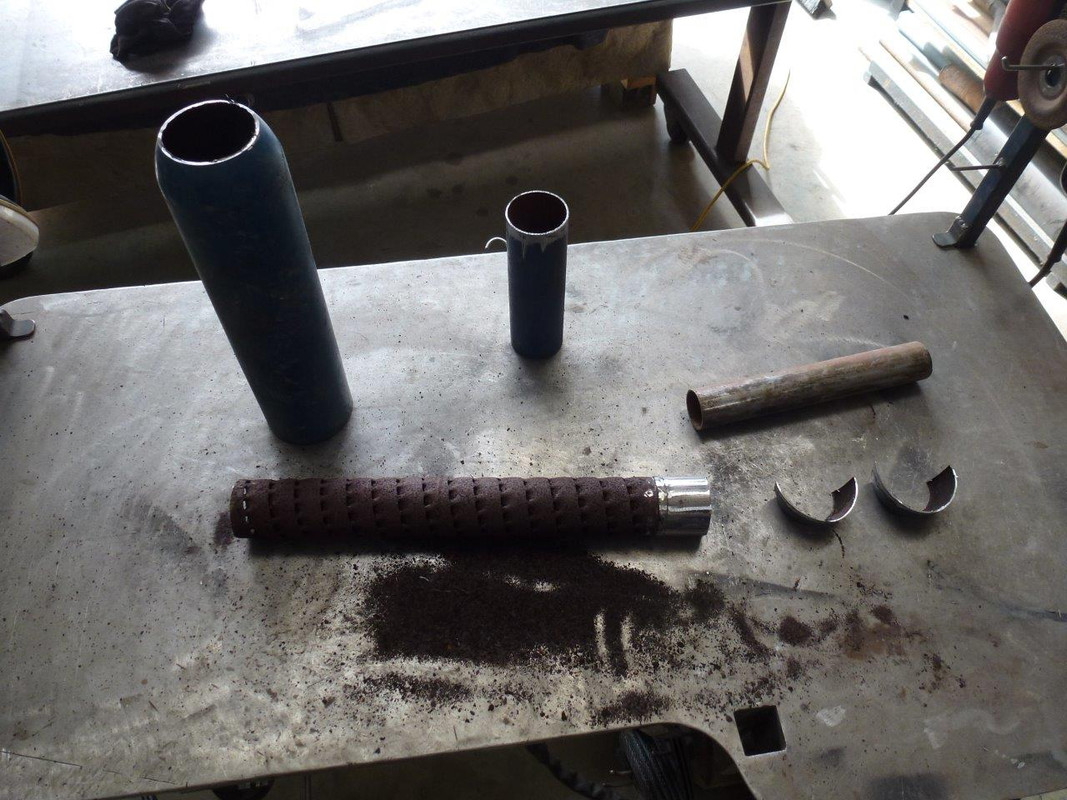
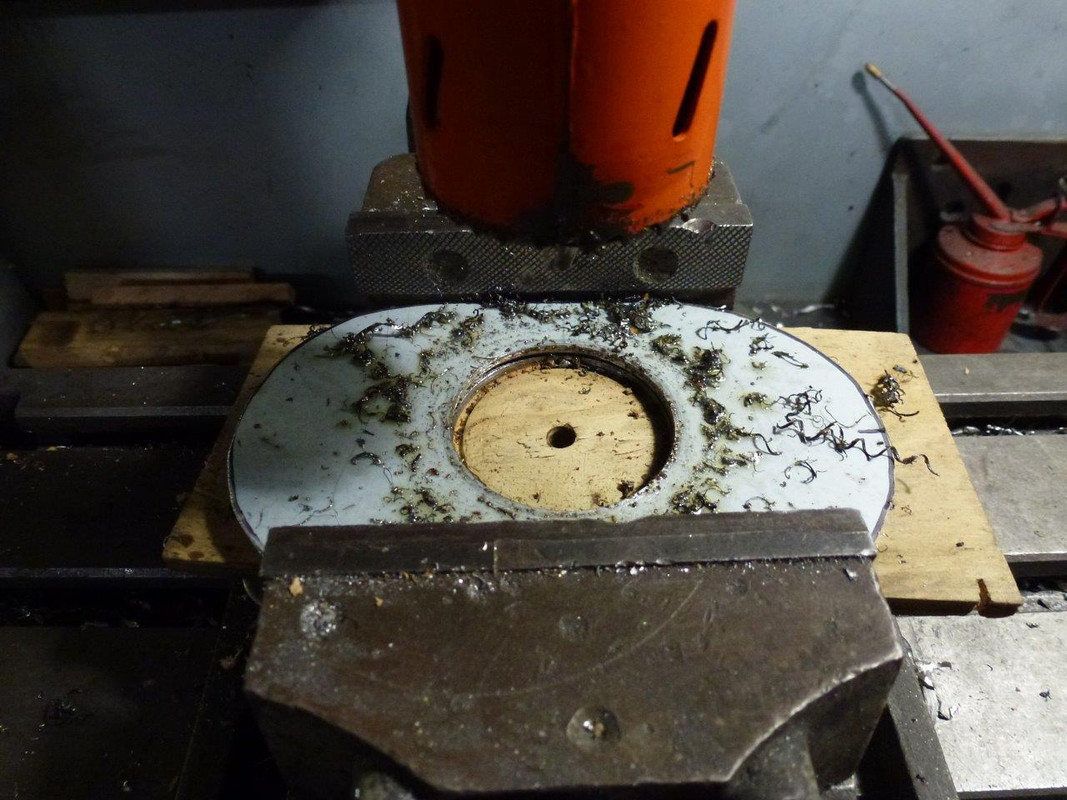
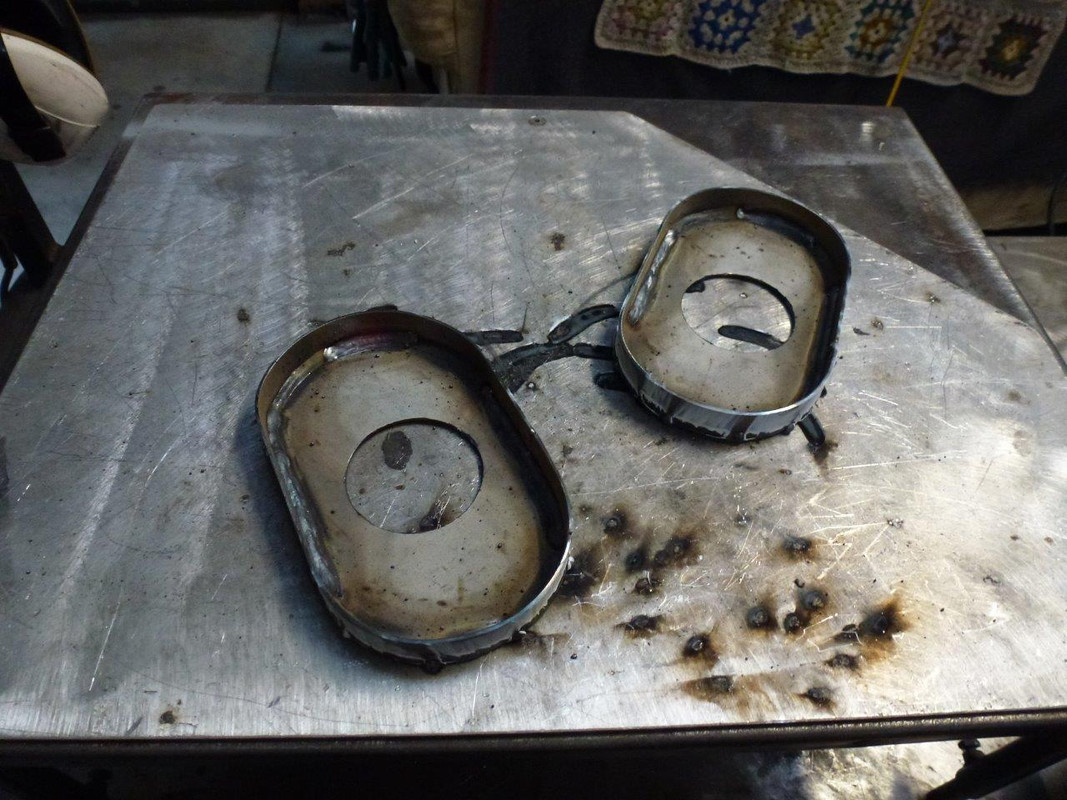
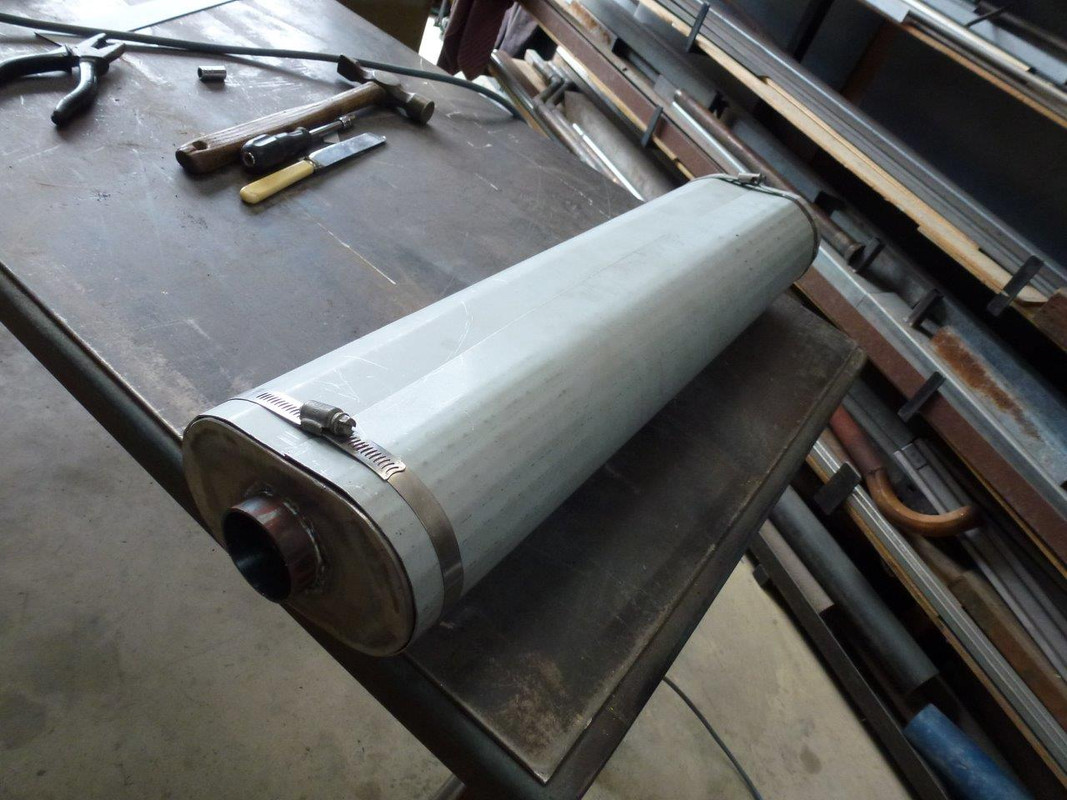
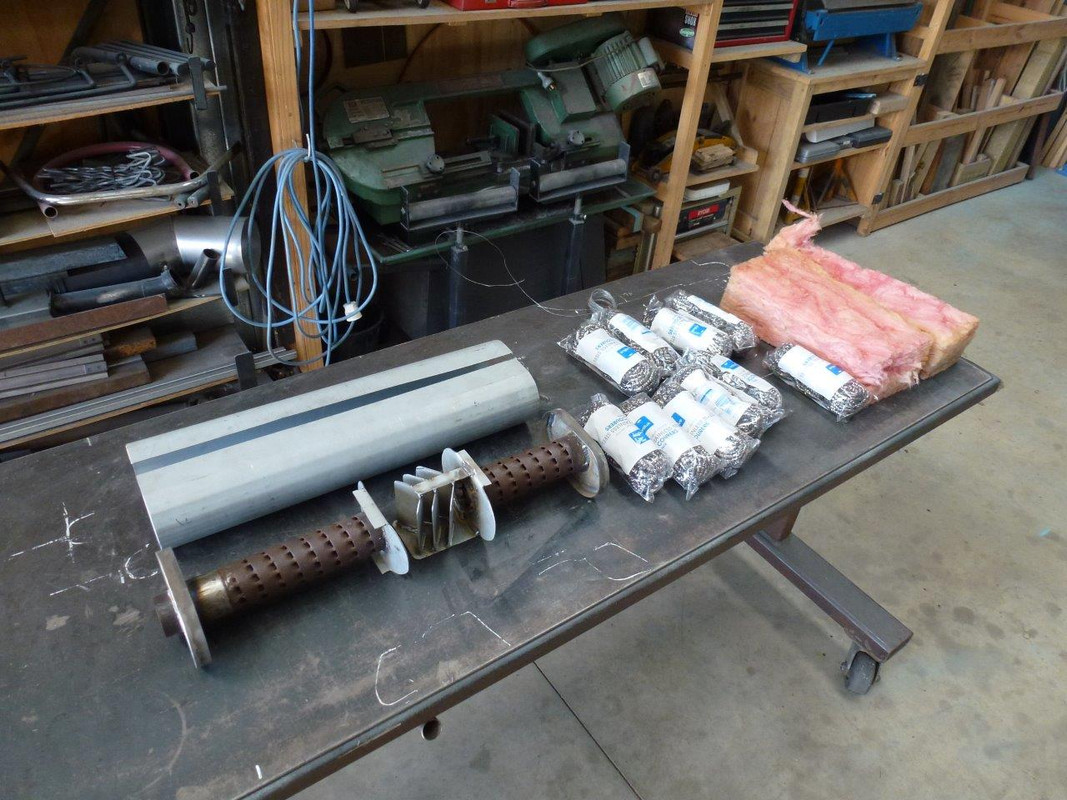
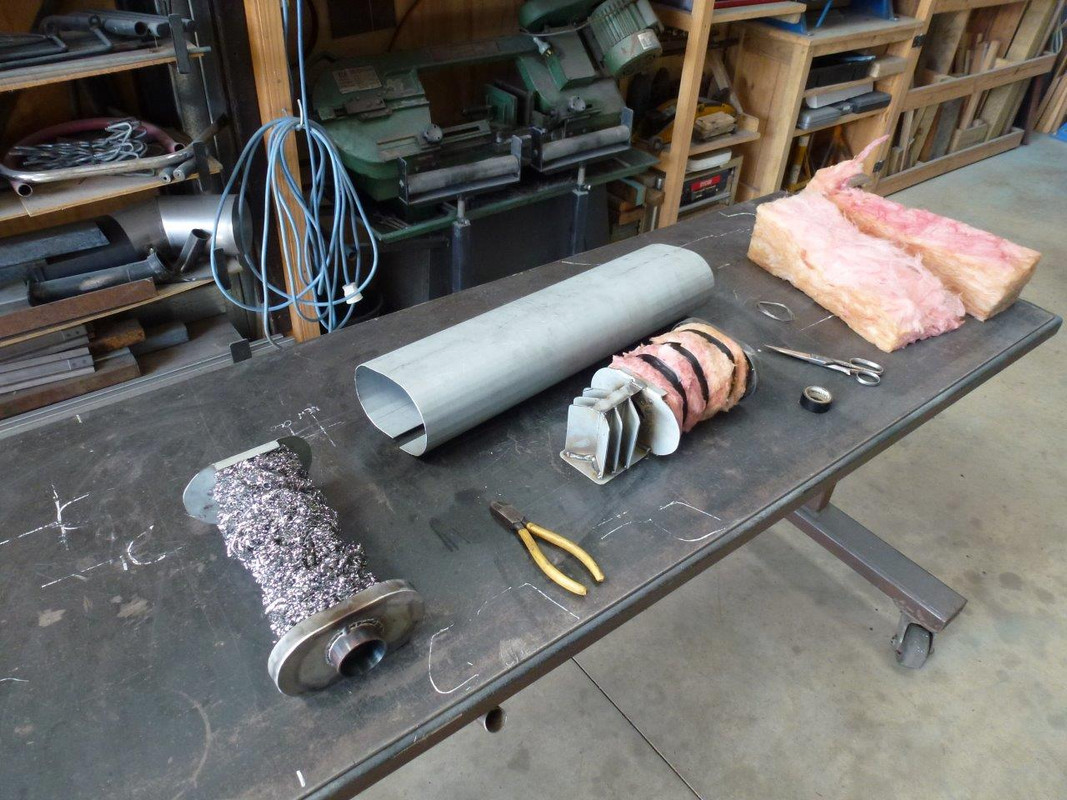
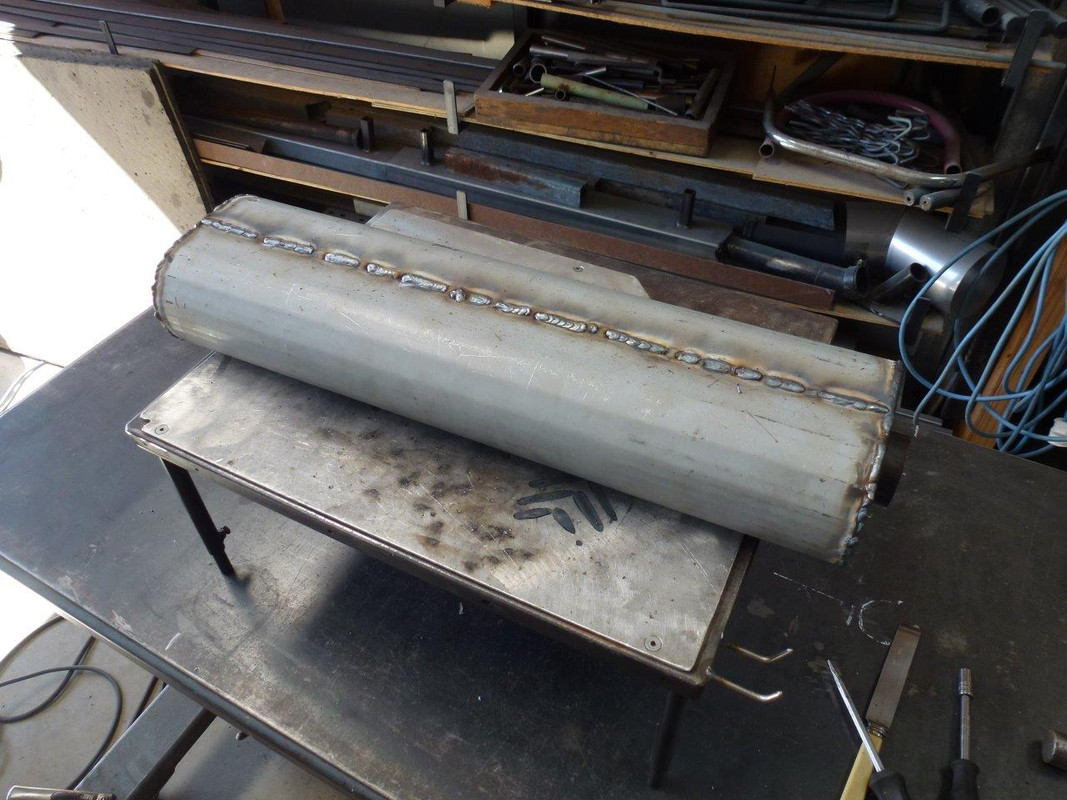
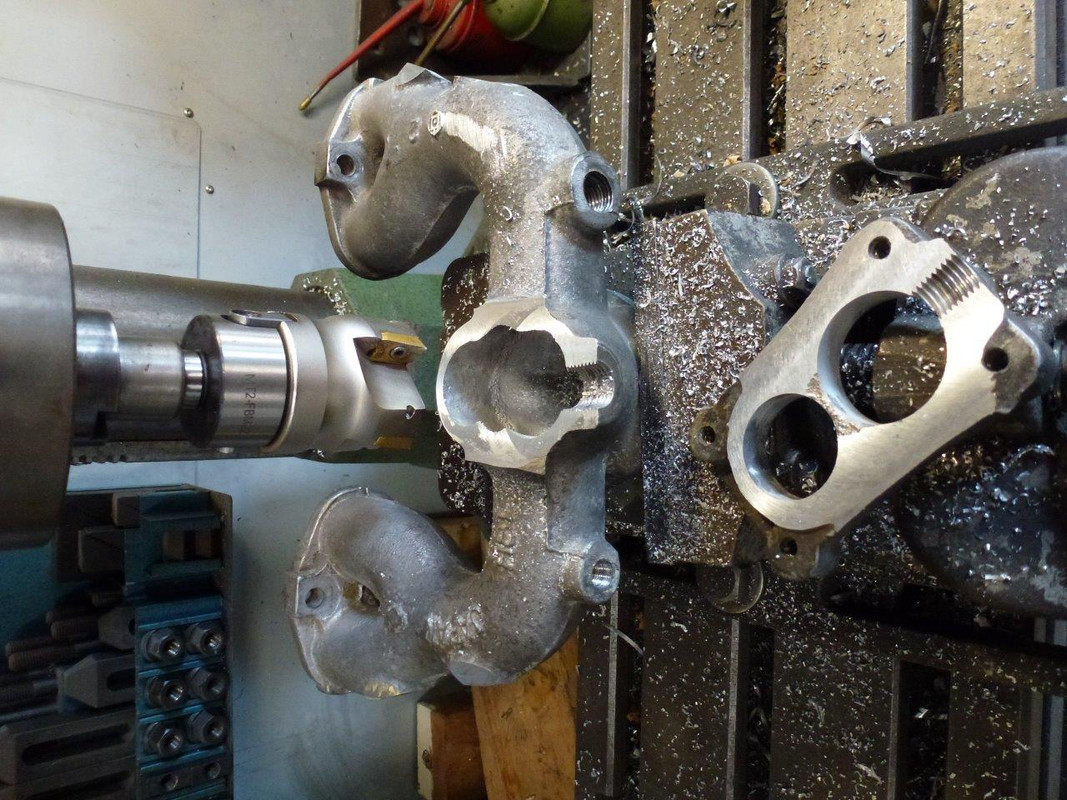

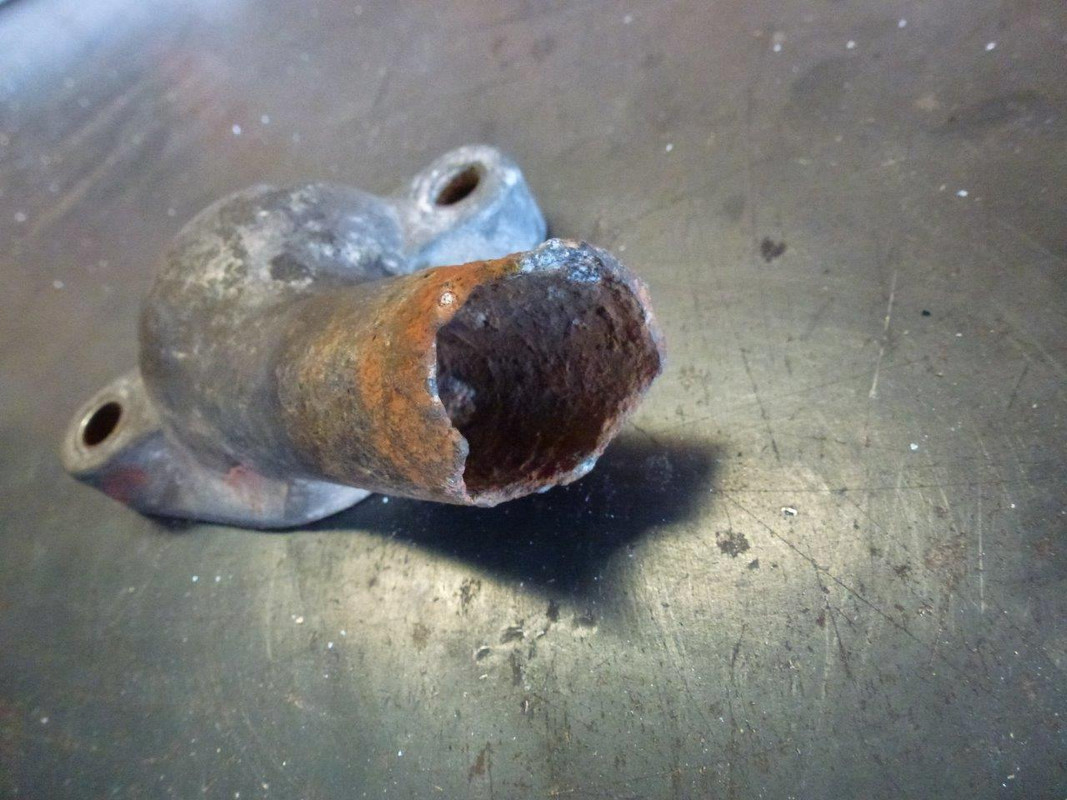
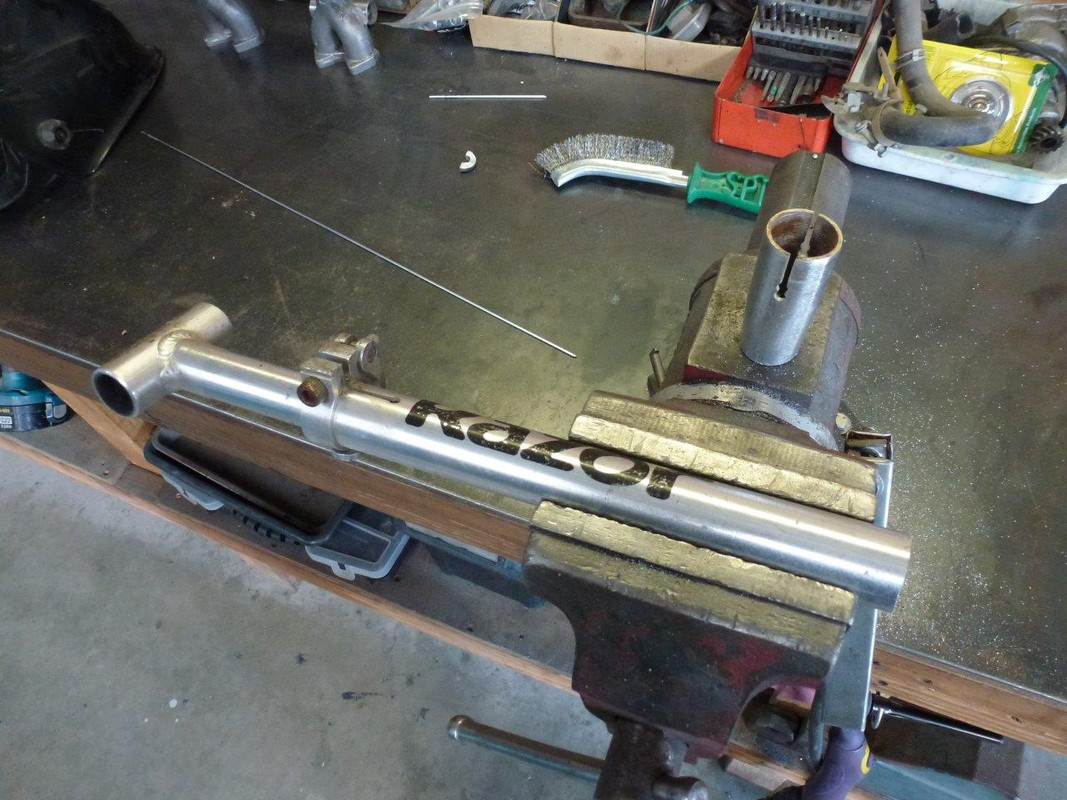
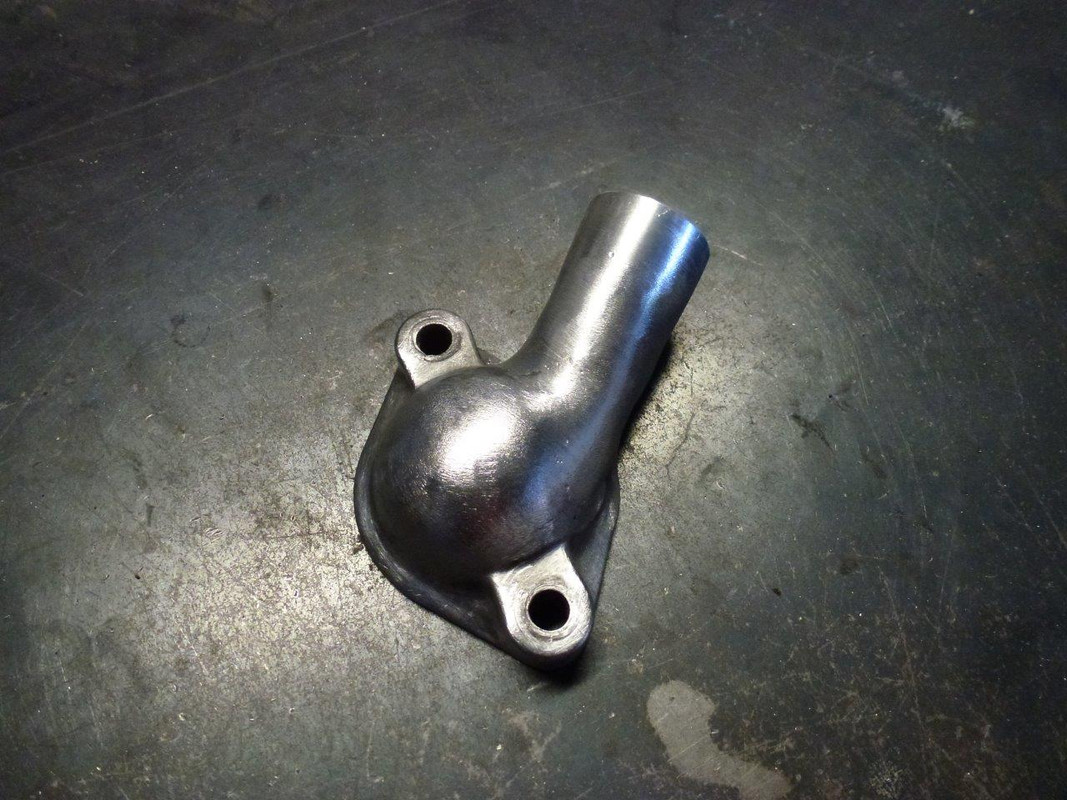
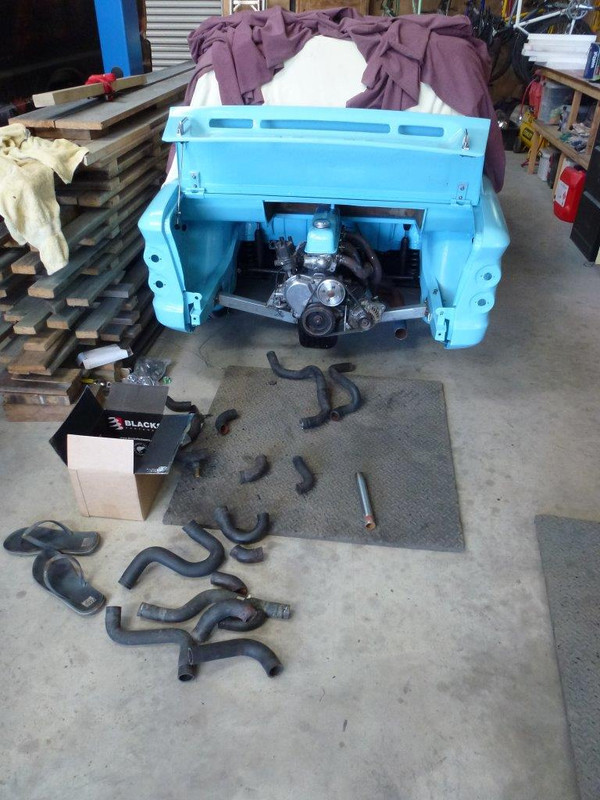
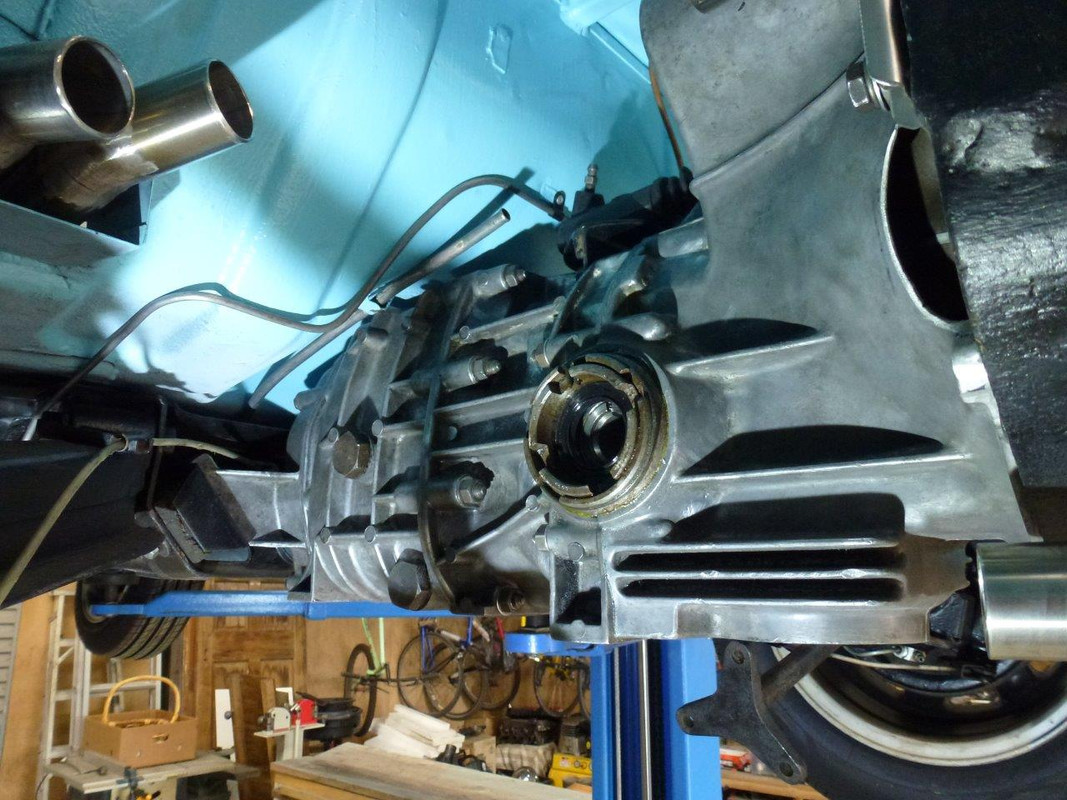
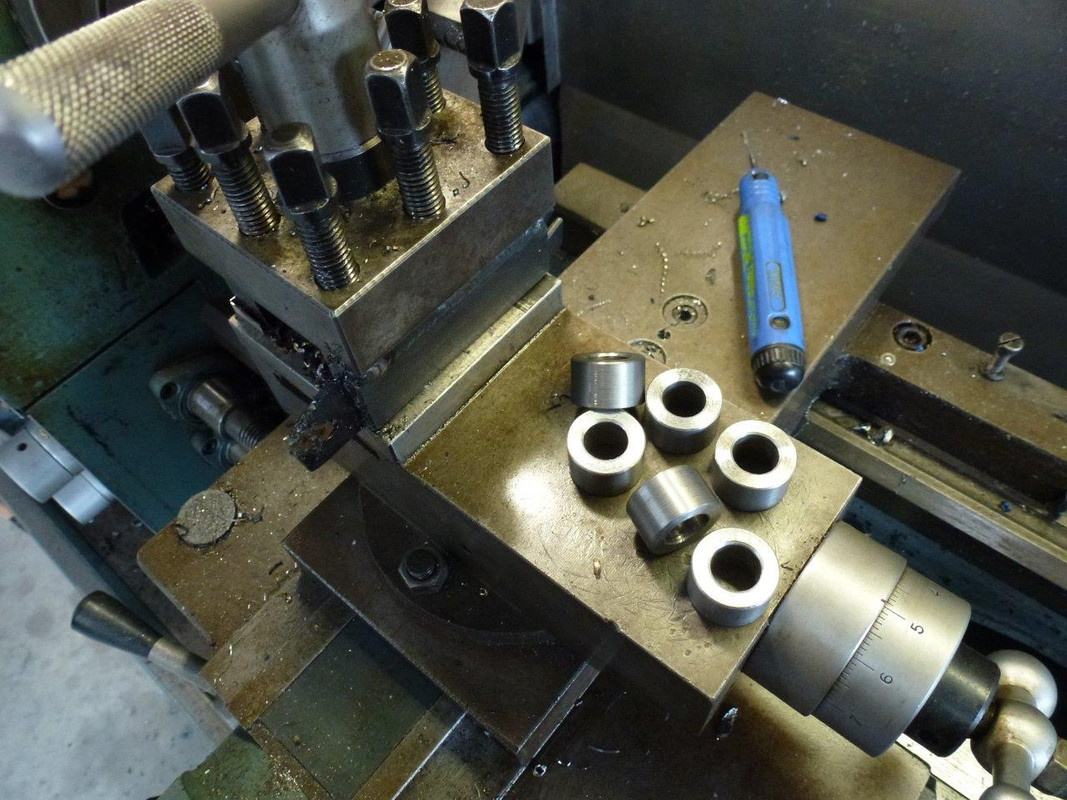
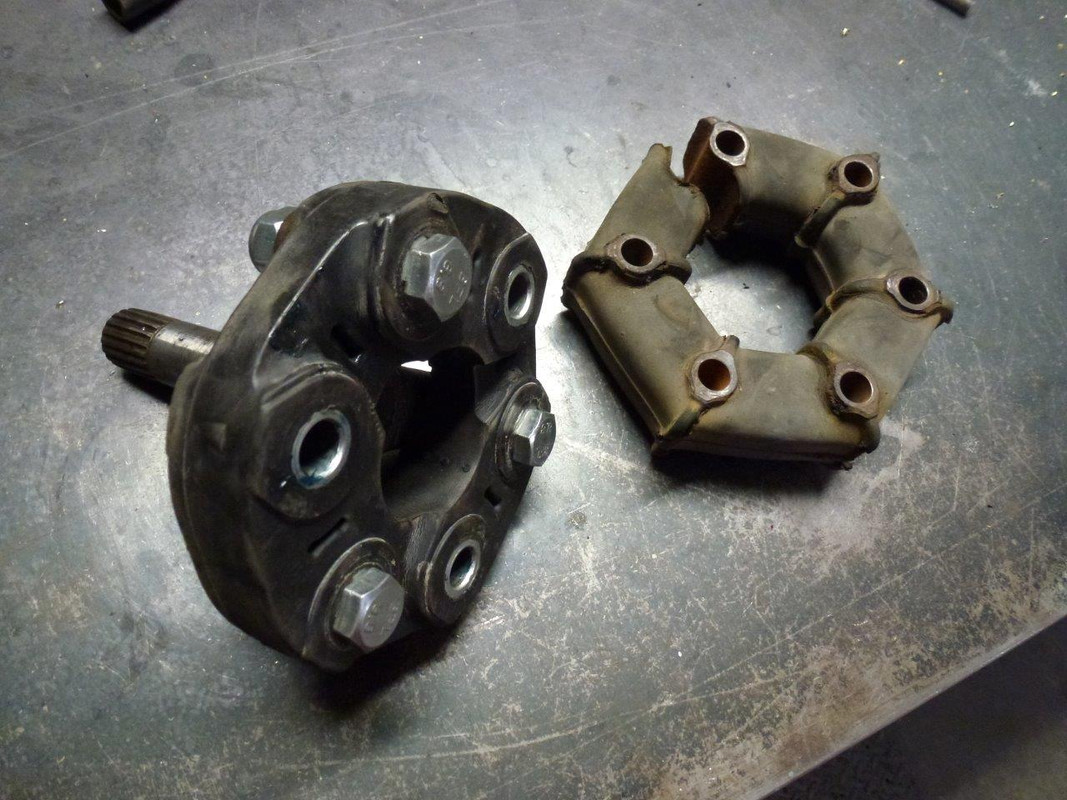
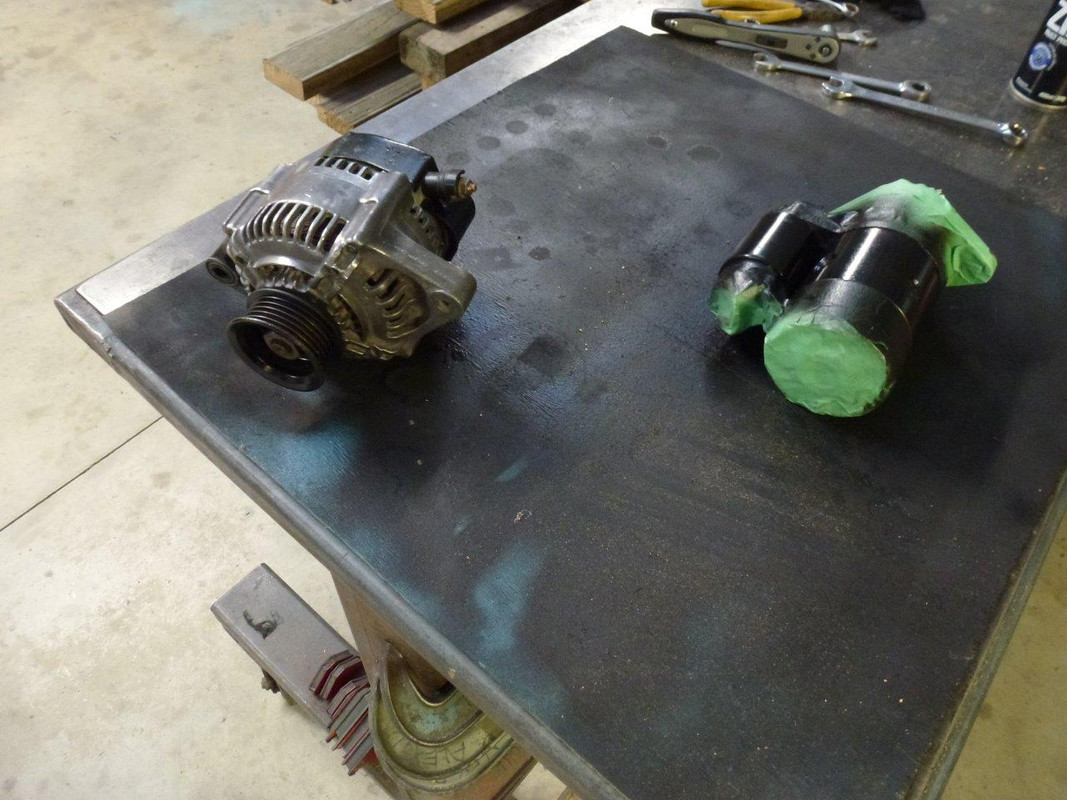
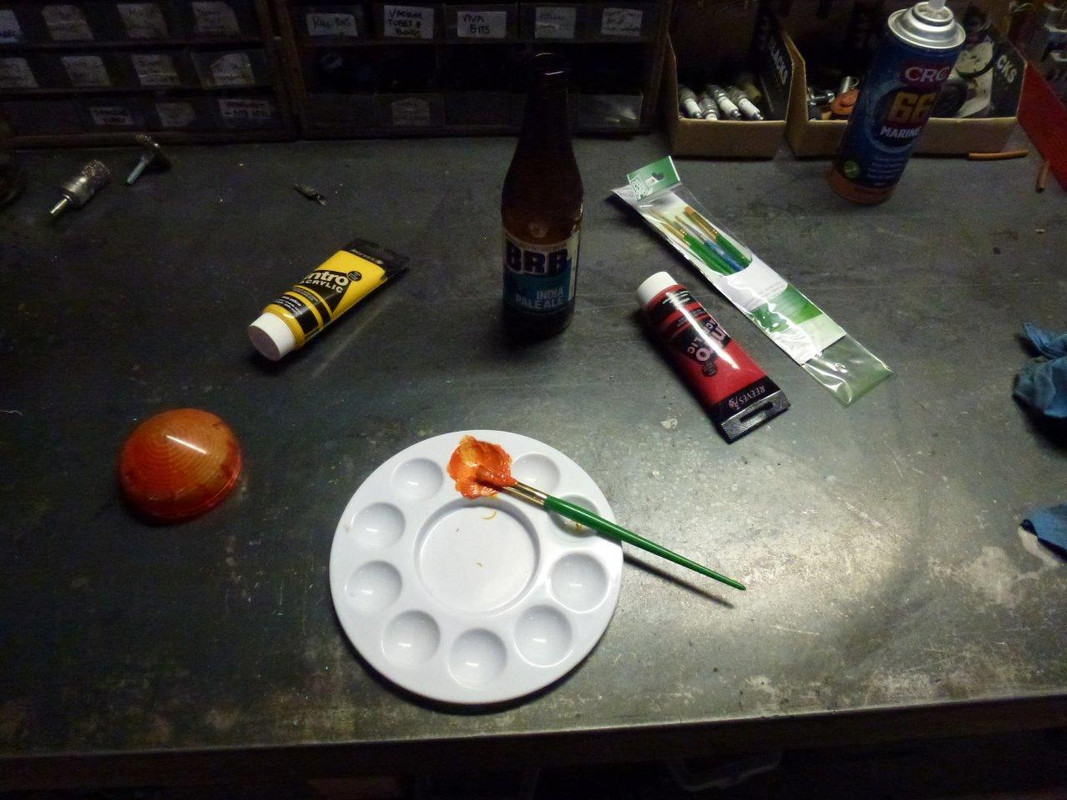
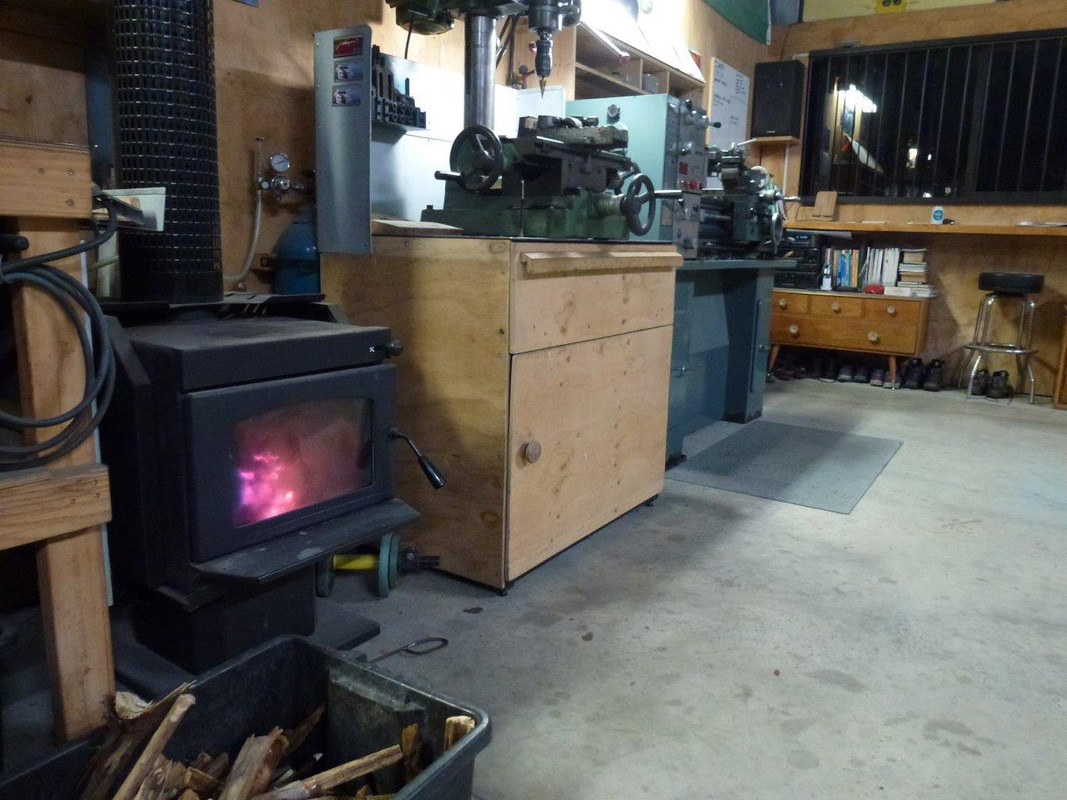
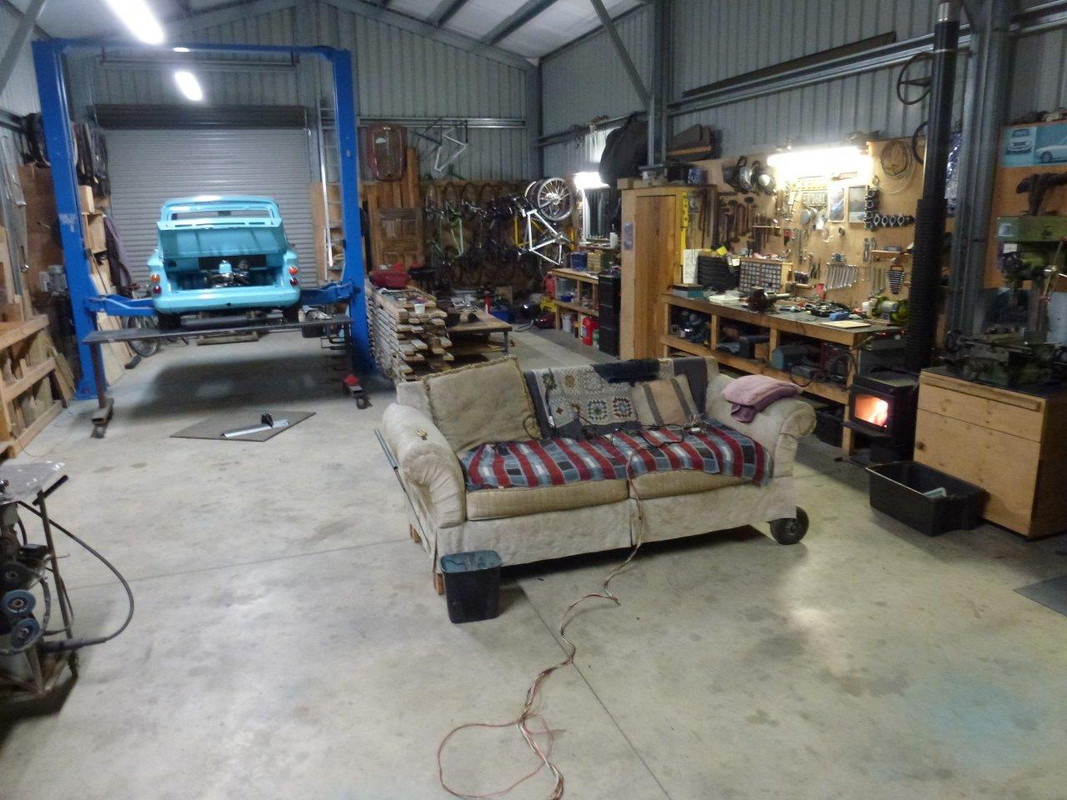
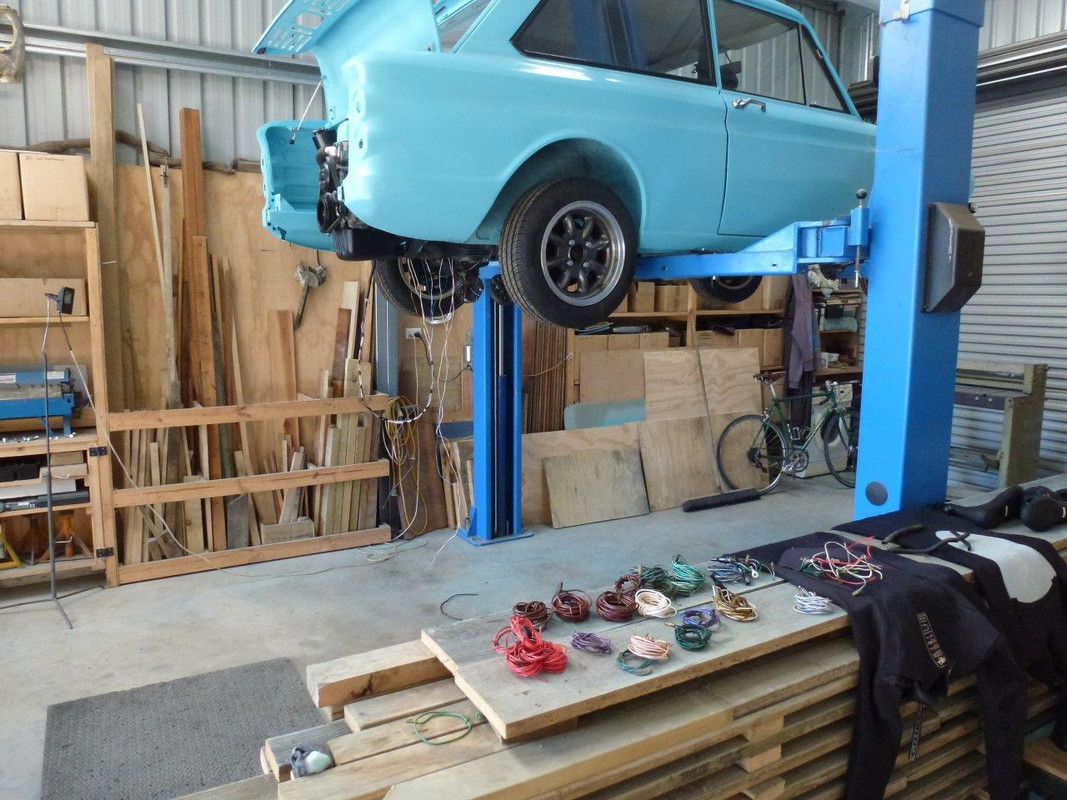
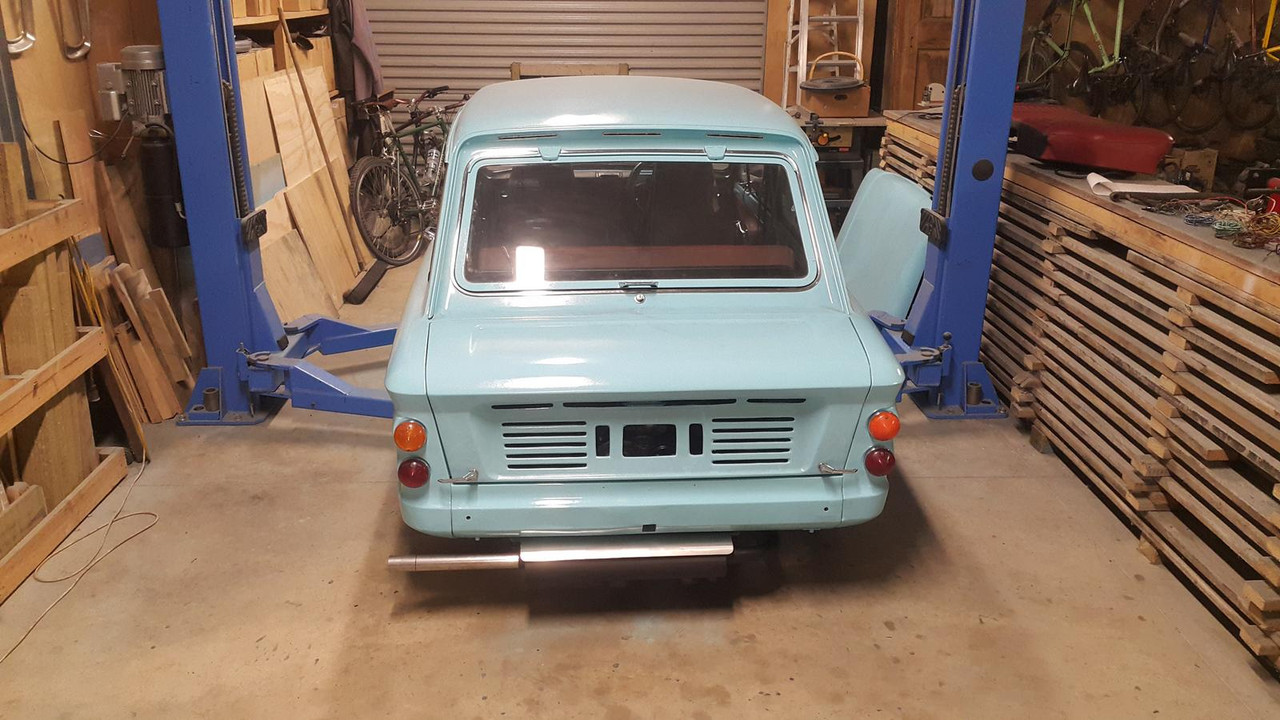


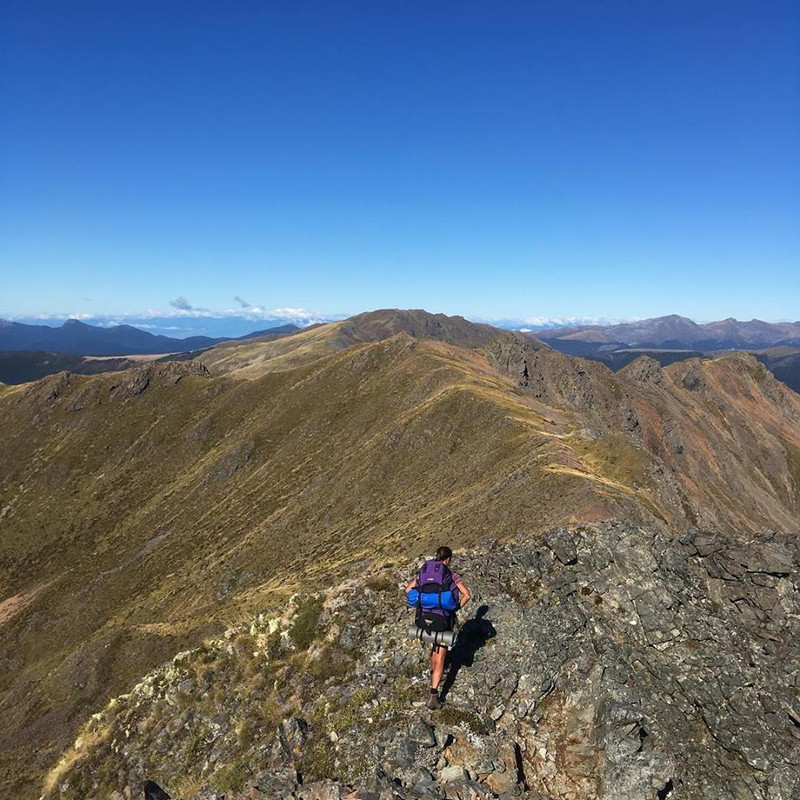
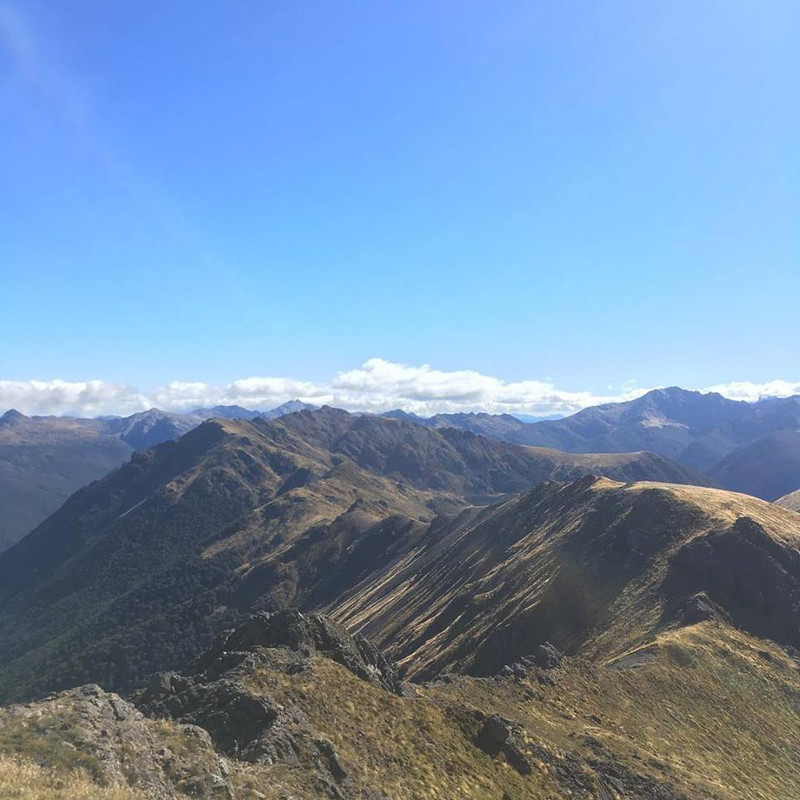
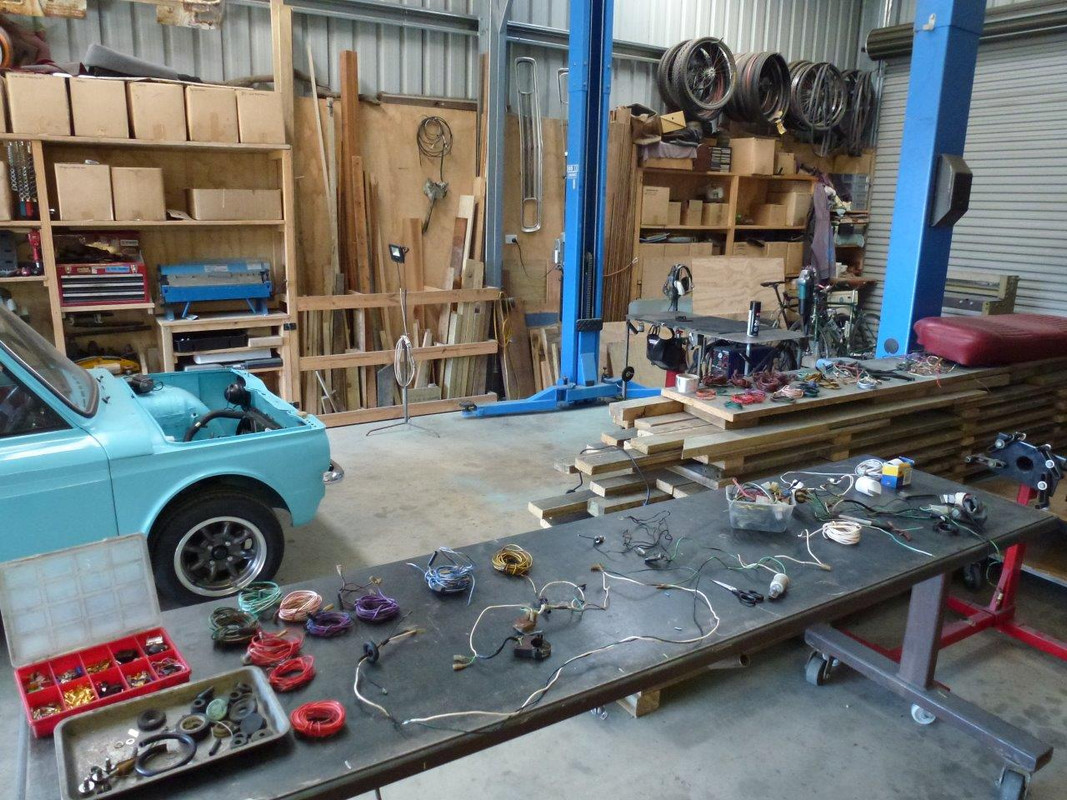
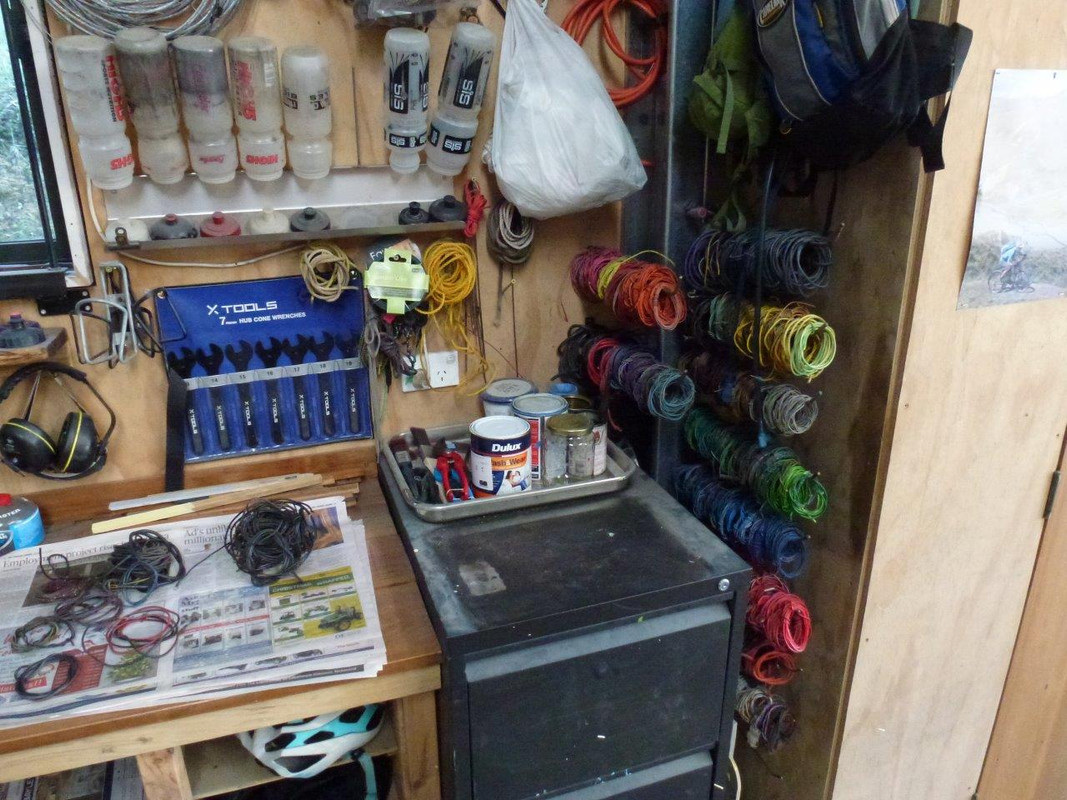
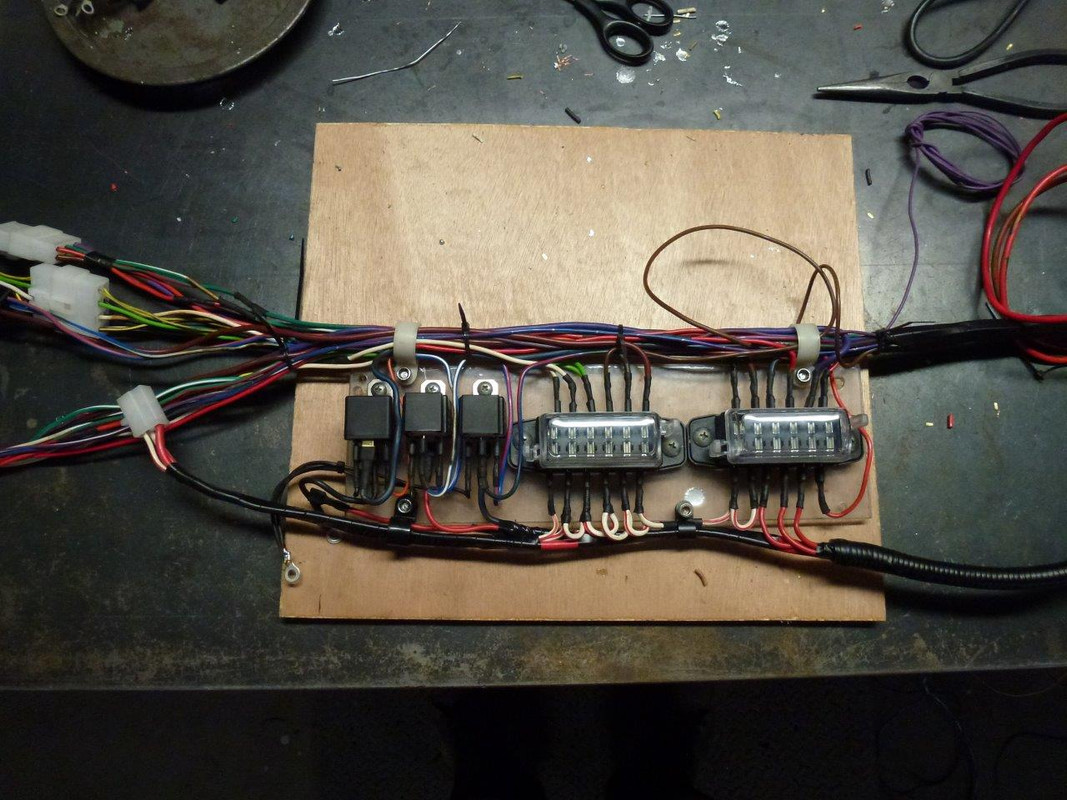
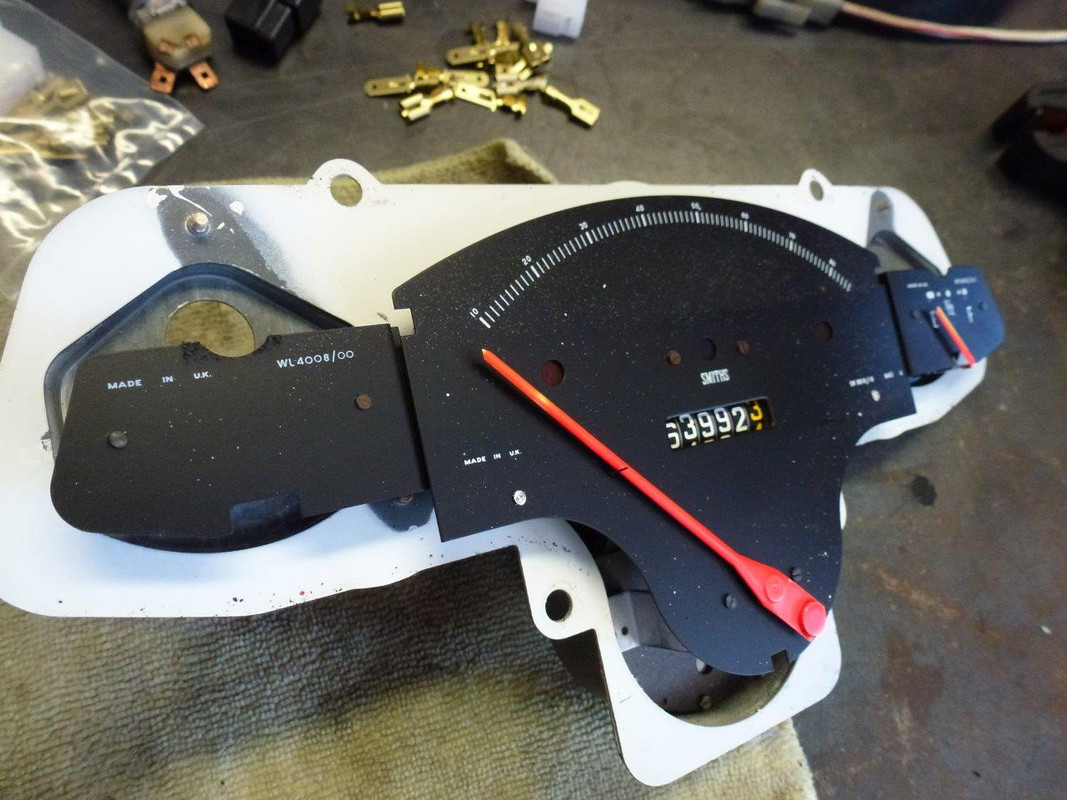
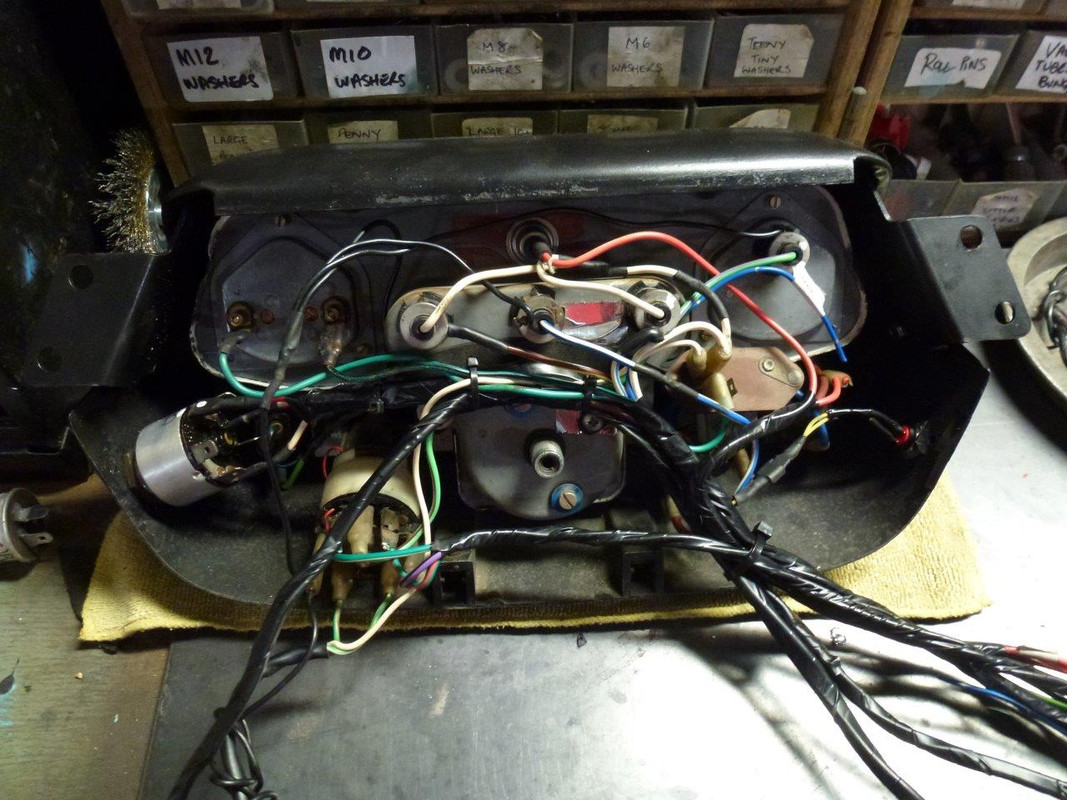
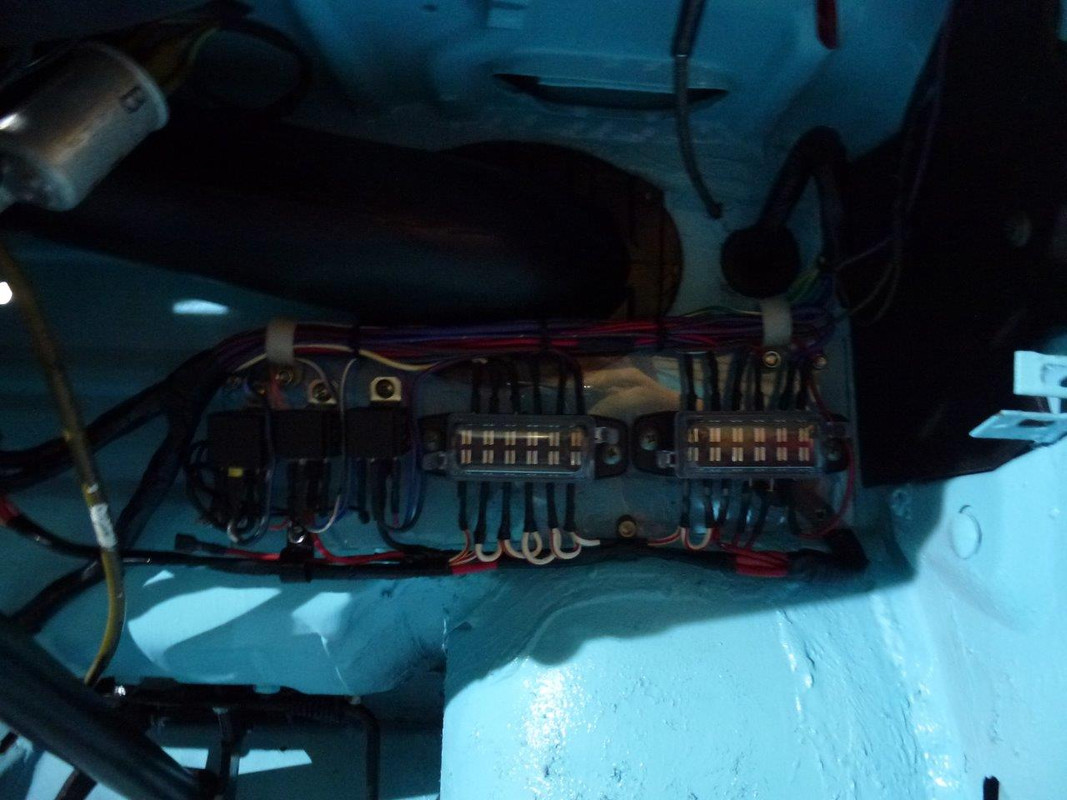
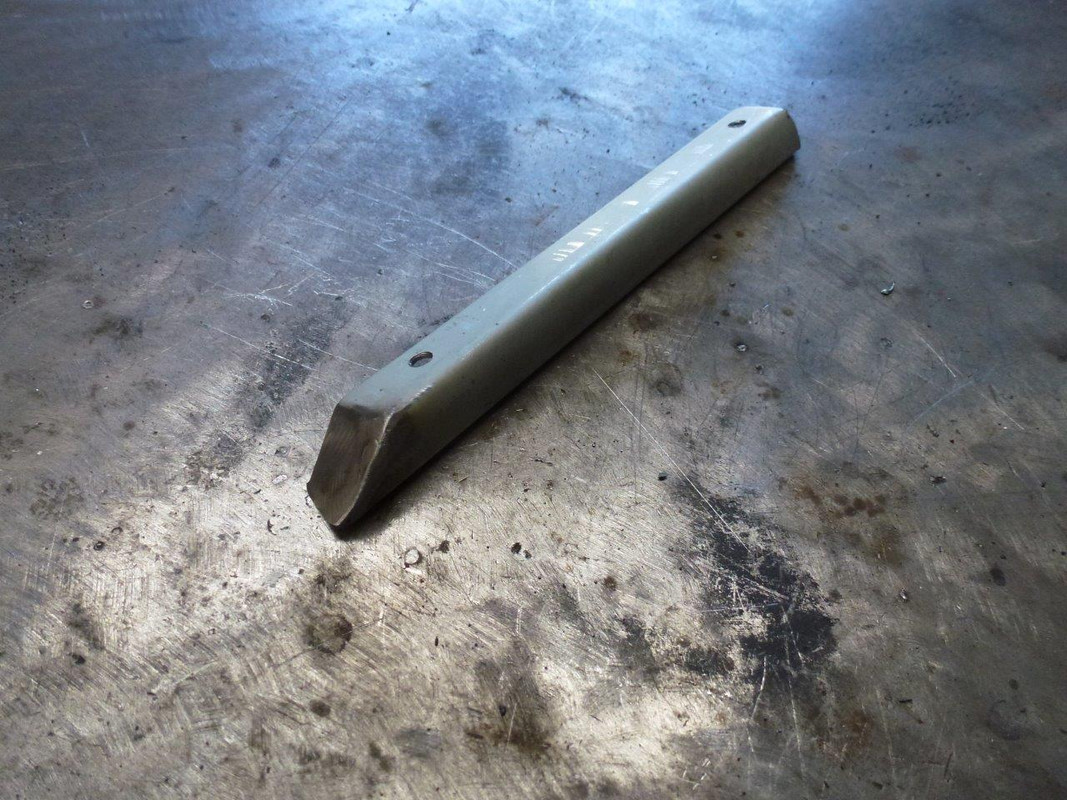

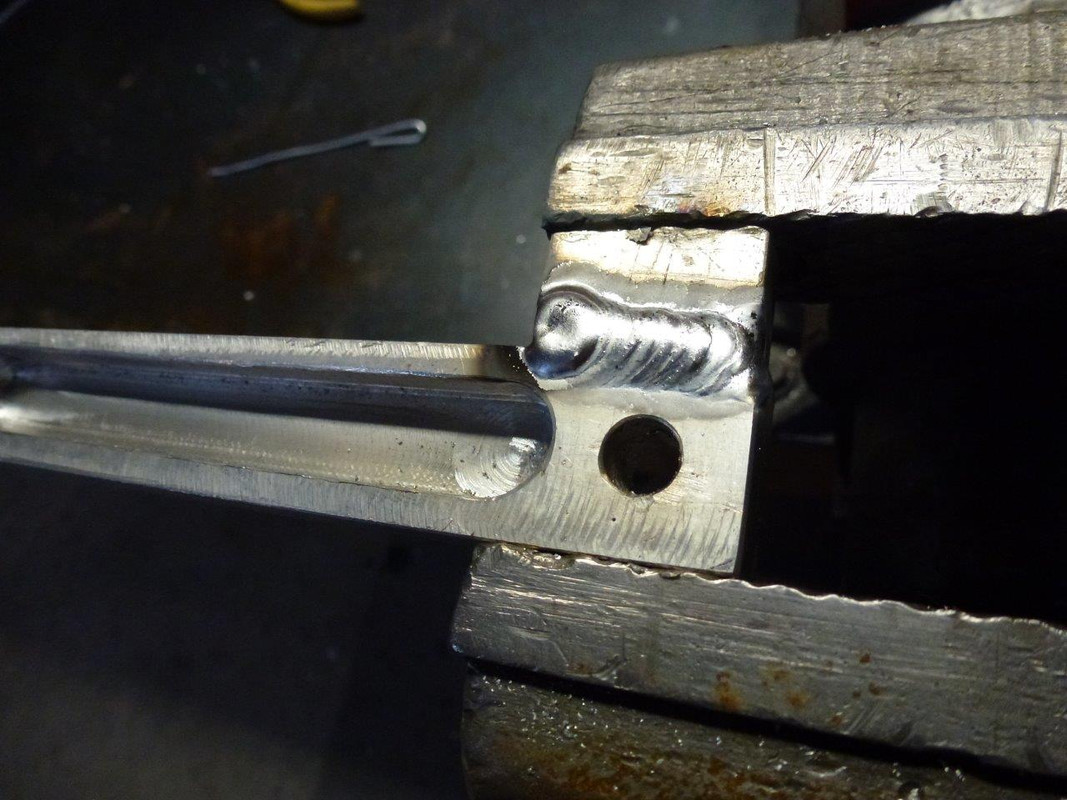
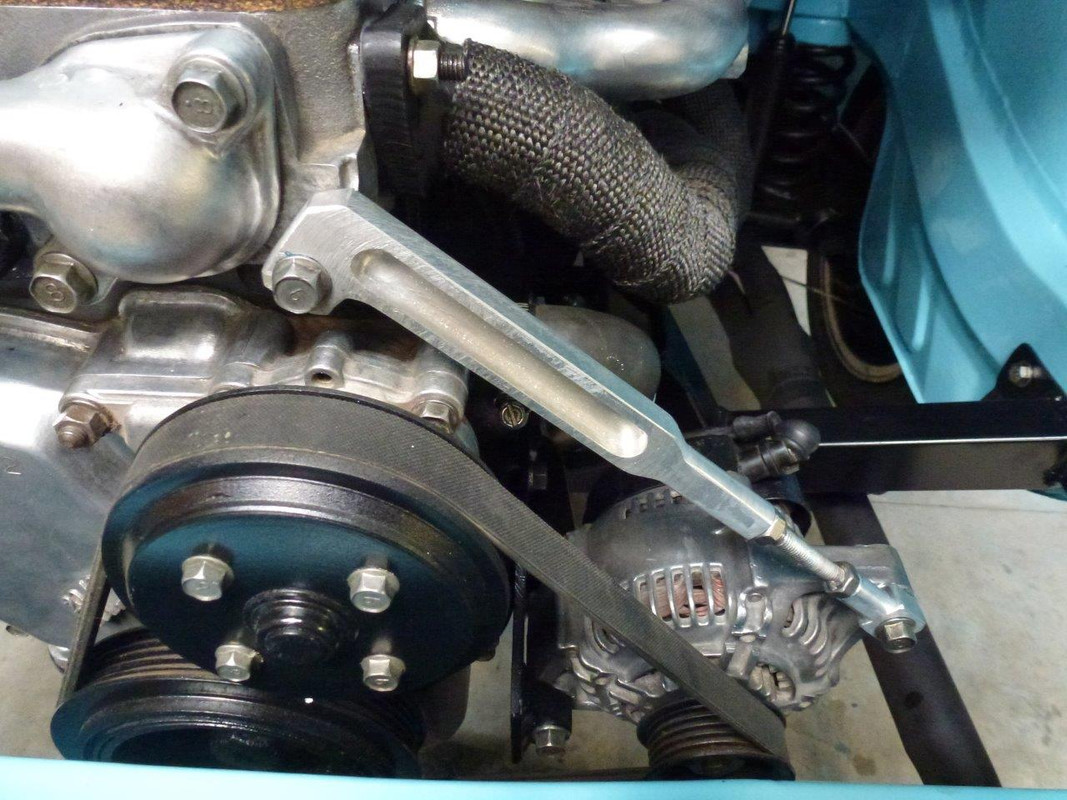
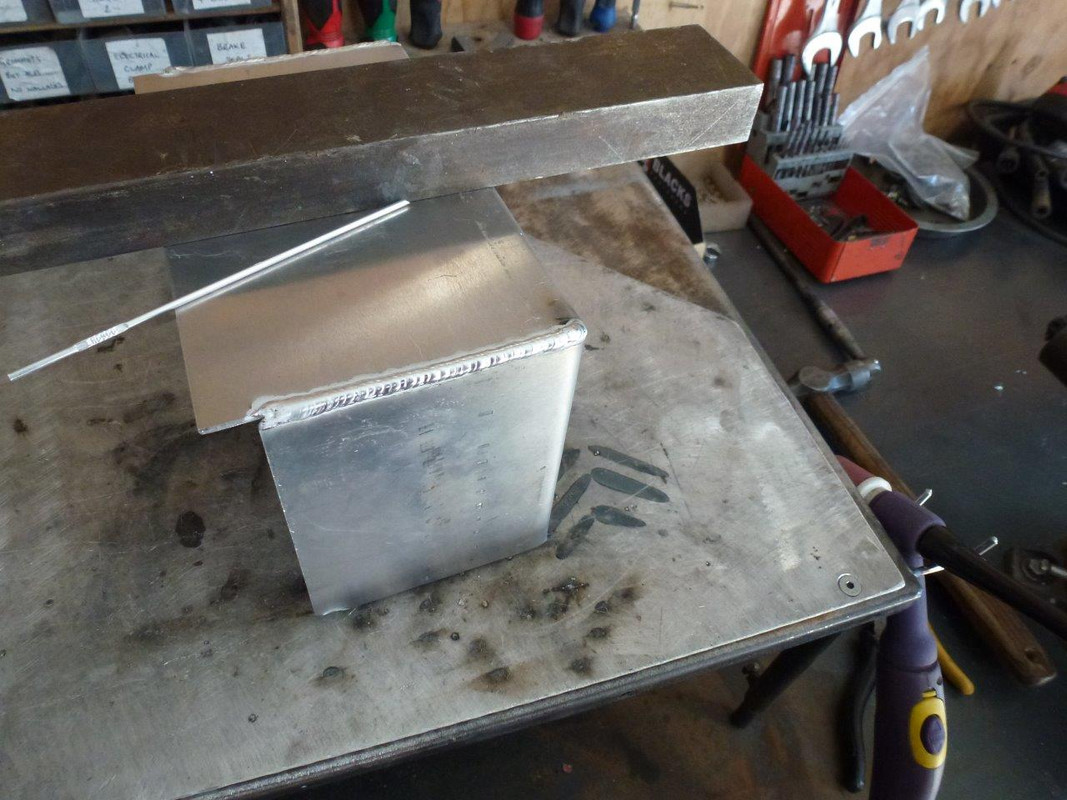
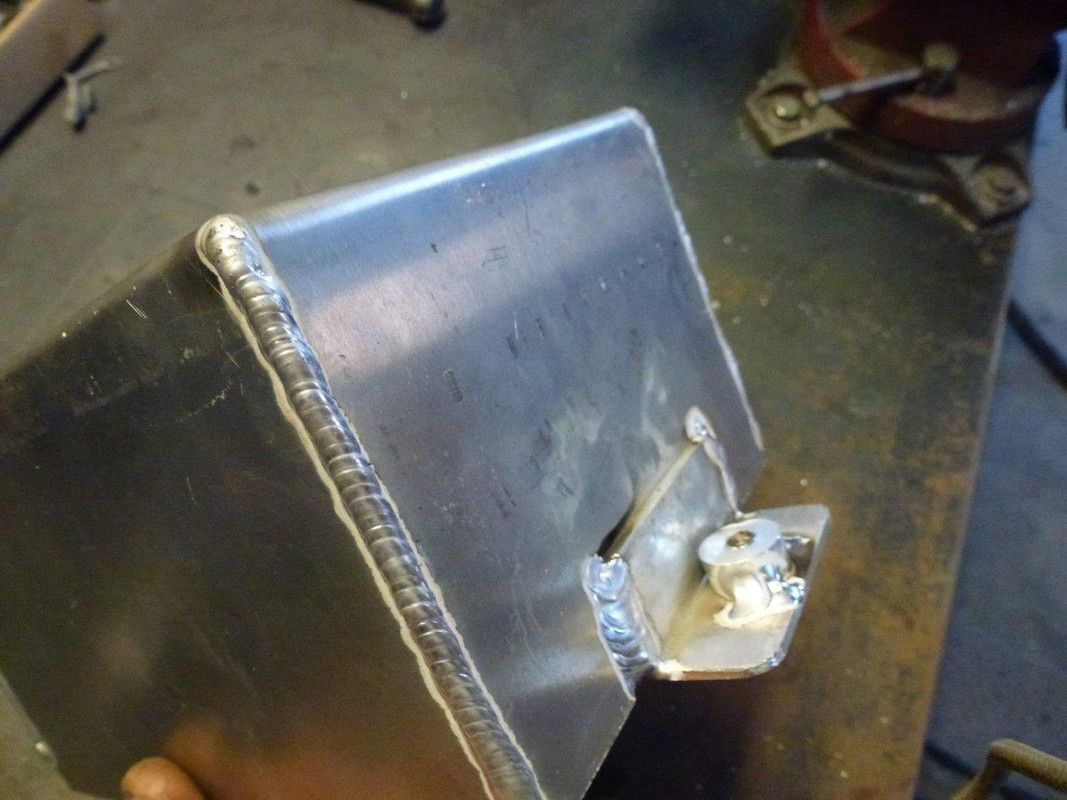
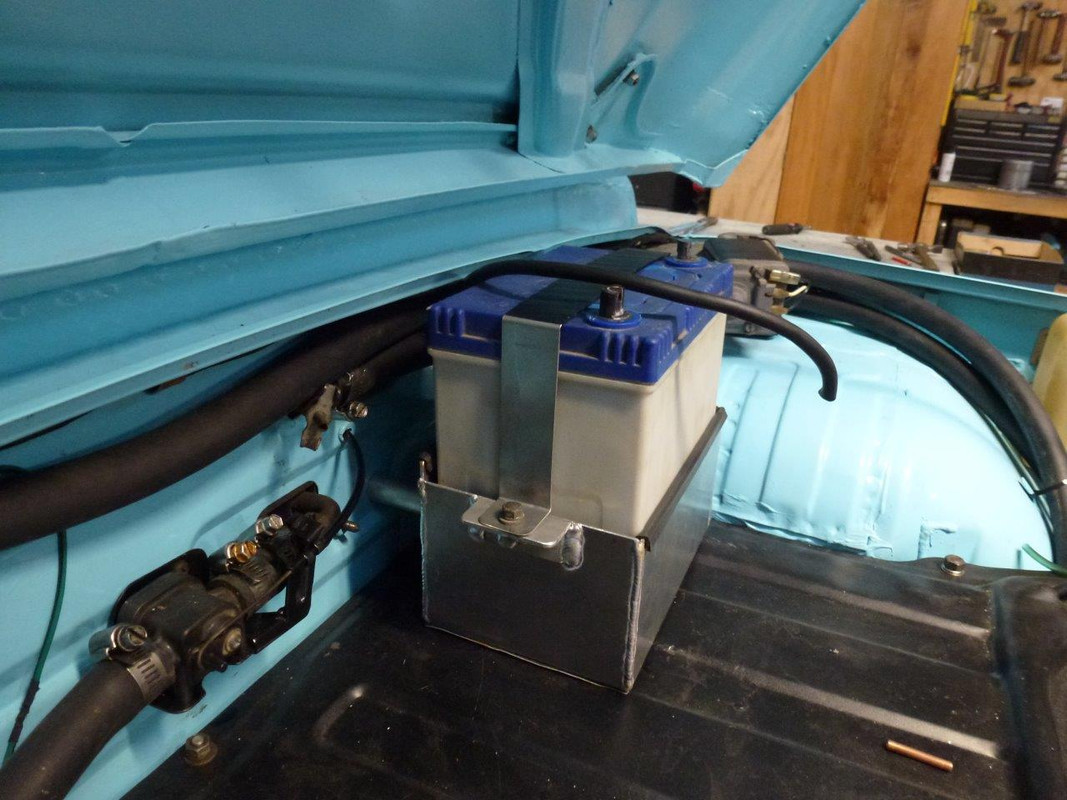
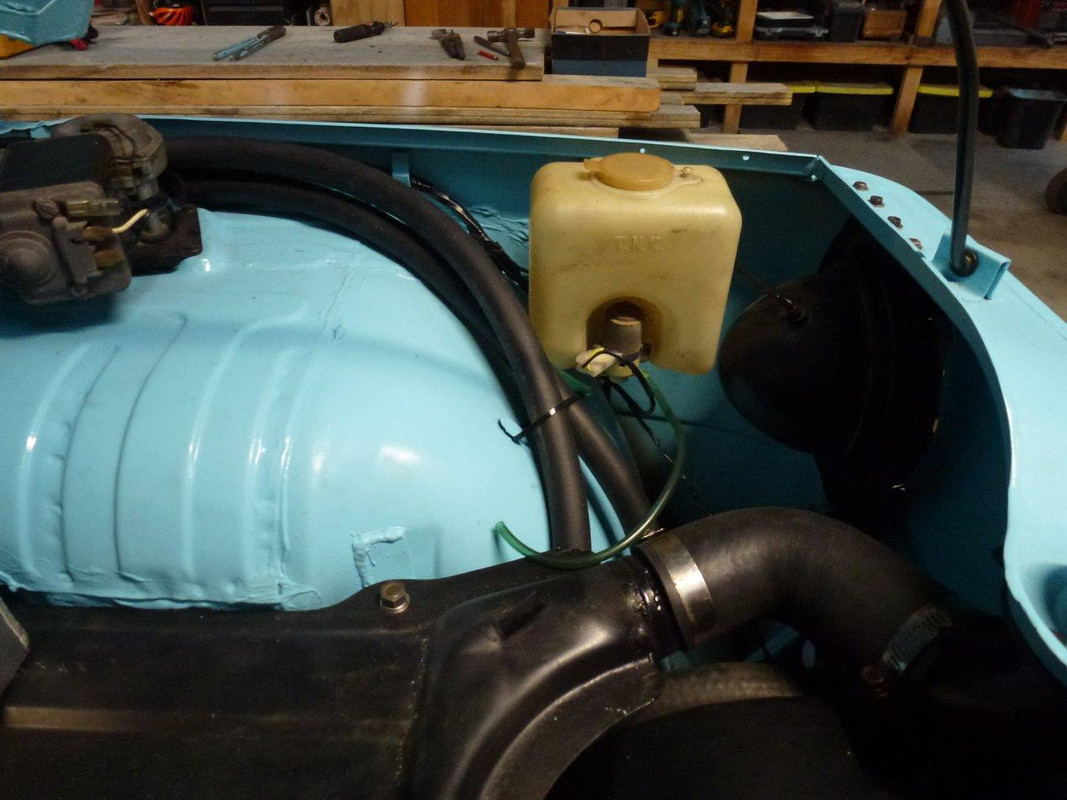
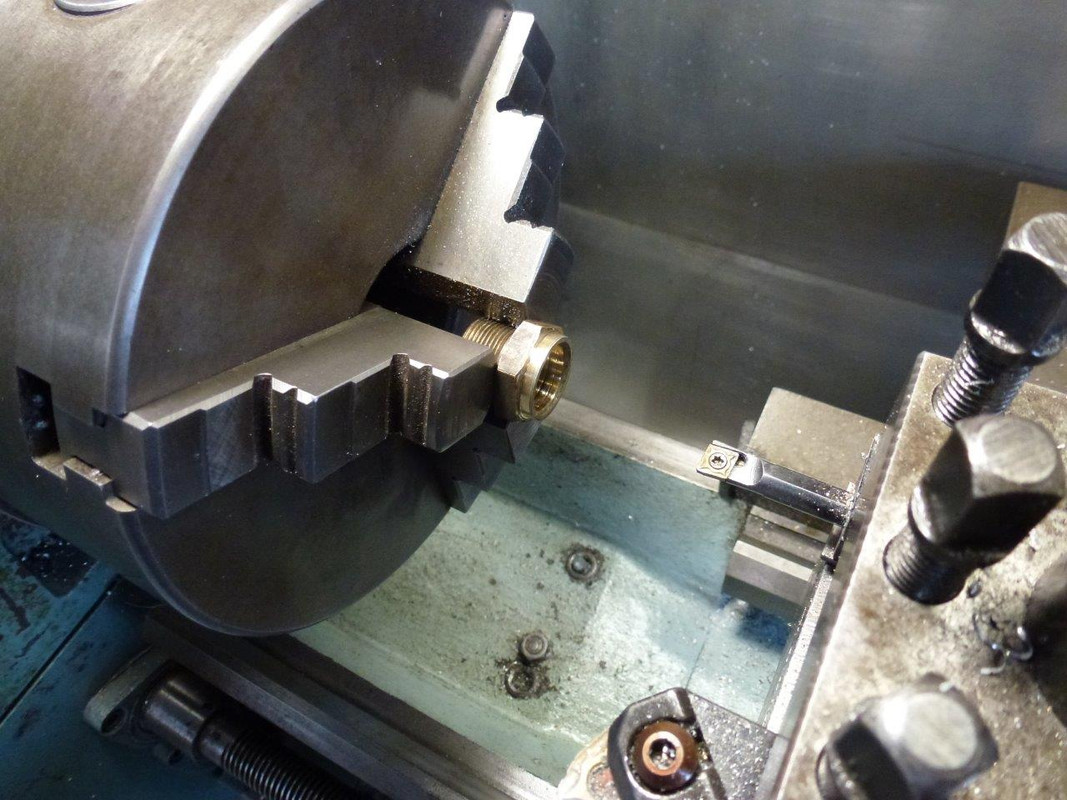
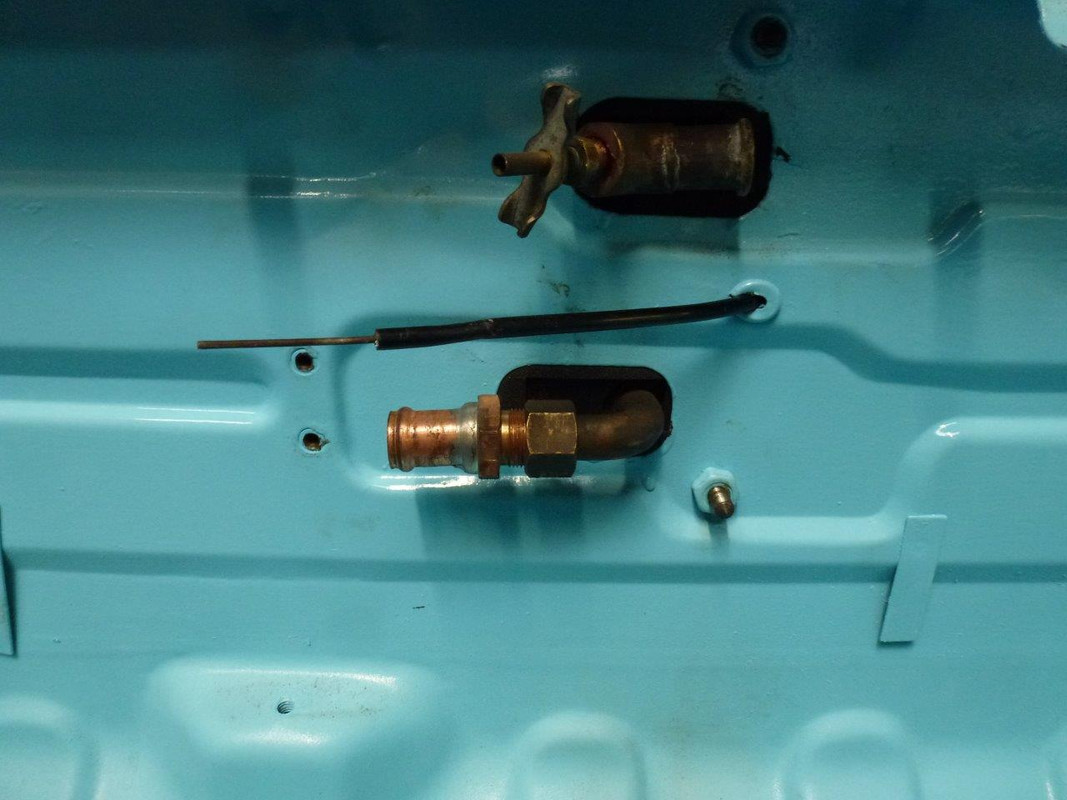
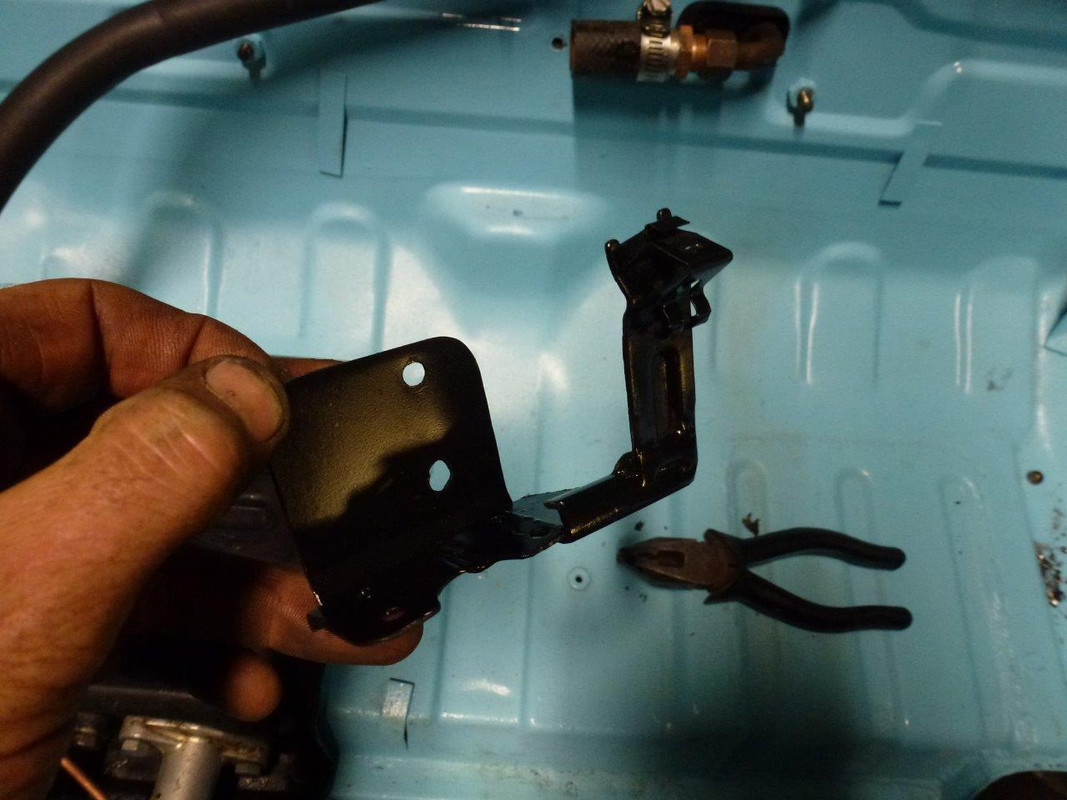
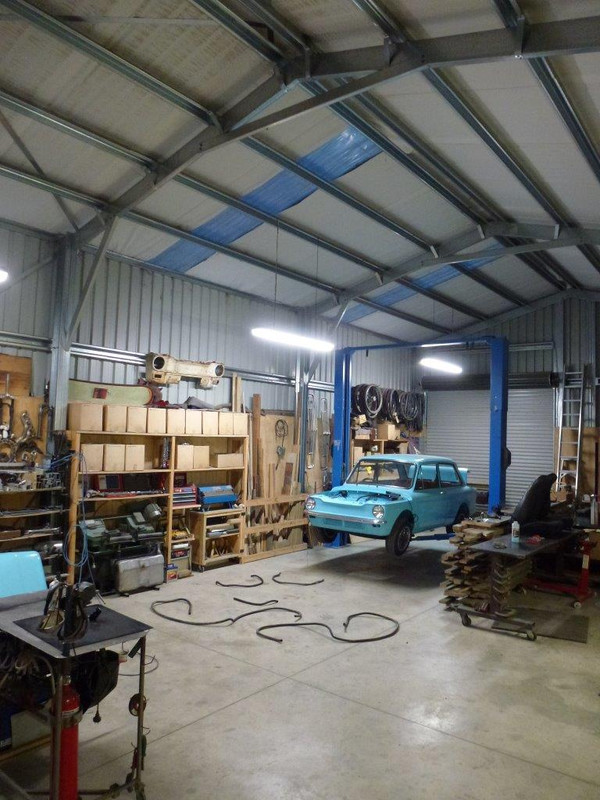


 Stan
Stan